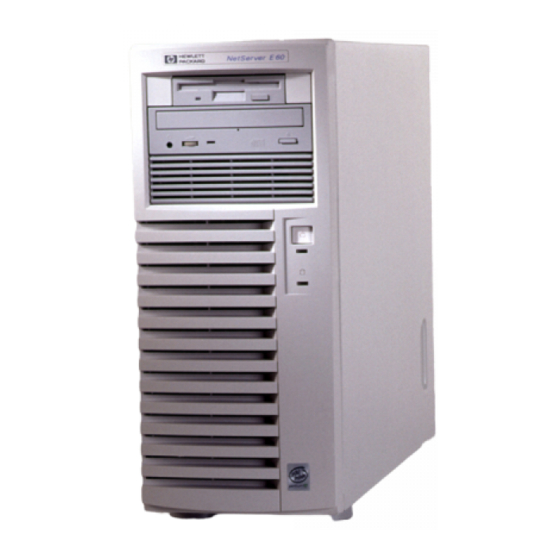
HP NetServer E 60 Installation Manual
Hide thumbs
Also See for NetServer E 60:
- Administrator's manual (34 pages) ,
- Installation road map (6 pages) ,
- Installation manual (65 pages)
Table of Contents
Advertisement
Quick Links
Advertisement
Table of Contents
Troubleshooting

Related Manuals for HP NetServer E 60


Summary of Contents for HP NetServer E 60
- Page 1 HP NetServer E 60 Installation Guide Online Version: B Updated May 1999...
- Page 2 Notice The information contained in this document is subject to change without notice. Hewlett-Packard makes no warranty of any kind with regard to this material, including, but not limited to, the implied warranties of merchantability and fitness for a particular purpose. Hewlett-Packard shall not be liable for errors contained herein or for incidental or consequential damages in connection with the furnishing, performance, or use of this material.
-
Page 3: Table Of Contents
Embedded SCSI Controller Configuration ..........21 Tools Required.....................21 Installing Hard Disk Drives ................21 Installing the Optional HP NetServer E 60 Duplexing Cable Kit ....26 Installing the Optional HP NetServer E 60 External SCSI Cable Kit .....26 5 Installing Additional Memory ..............29 Introduction ....................29 Tools Required.....................29 Installation Basics ..................29... - Page 4 Reinstalling the NOS..................44 Removing a Processor Module..............45 8 Connecting the Monitor, Keyboard, Mouse, and UPS ......47 9 Configuring the Server Using the HP NetServer Navigator CD-ROM..49 Contents of the HP NetServer Navigator CD-ROM ........49 Obtaining NetServer Product History............49 Readme File ....................50 Viewing the Readme File .................50...
- Page 5 Using Information Assistant................59 Getting Help.....................59 Finding Information ..................60 Copying and Printing Information .............61 Installing HP Information Assistant Software ..........61 Installing from the CD-ROM ..............61 11 Using the BIOS Setup and SCSI Select Utilities ........63 Using the BIOS Setup Utility ................63 User Preferences ..................63...
- Page 6 Regulatory Notices - Product Safety.............93 CD-ROM Electrical Safety Statement............93 Laser Safety Statements ................93 Batteries....................95 Noise Declaration and Ergonomics............96 C Service and Support ..................97 D Warranty and Software License ..............99 Warranty ......................99 HP Software Product License Agreement.............99 Non-Nuclear Usage ..................101 Index ......................103...
-
Page 7: Setting Up The Hp Netserver E 60
This is especially important if you plan to ship the HP NetServer E 60 elsewhere for final installation. Find System HP NetServer Navigator CD-ROM Configuration CD This CD-ROM is used to configure and troubleshoot the HP NetServer E 60. It is shipped with each E 60. -
Page 8: Installation Options
The following upgrades (PCI cards, memory DIMMs, hard disk drives, and processor modules) require removing the cover from the HP NetServer E 60. BE SURE to disconnect power from the unit before opening it. BE SURE to observe appropriate ESD precautions when handling electronic... - Page 9 Chapter 1 Setting Up the HP NetServer E 60 If Installing See Chapter 3, "Removing and Replacing the System Accessories, Cover." remove Cover Add Hard Disk For details see Chapter 4, "Installing Mass Storage Drives Devices." An optional external SCSI port cable kit is available to extend one of the system's embedded SCSI ports to the rear of the system.
- Page 10 Chapter 1 Setting Up the HP NetServer E 60 Add PCI Boards Note that slot assignments of disk drive controller cards affects boot order. For details see Chapter 6, "Installing Additional Boards." Add a Processor The HP NetServer E 60 supports either Pentium II or Pentium III processors.
-
Page 11: Configuring The System
UPS, see Chapter 8. 2) Boot the HP Turn on the monitor. Press the power-on button on NetServer Navigator the HP NetServer, and press the eject button on the CD-ROM CD-ROM drive. Place the HP NetServer Navigator CD-ROM in the drive, and close the drive. - Page 12 Windows NT Server, or if you replace HP components. (For example, if you disable the embedded 10/100TX LAN adapter and replace it with an HP network interface card or a third party card, install the NOS manually.) 7) Read Configuration Configuration Advisor will appear.
- Page 13 Chapter 1 Setting Up the HP NetServer E 60 10) Run DiagTools To verify that the HP NetServer hardware is fully (Optional) functional, create a DiagTools diskette to run DiagTools from after configuration. Select NetServer Utilities from the HP Navigator main menu, and then select DiagTools from the NetServer utilities menu.
-
Page 15: Controls, Indicators, And Ports
2 Controls, Indicators, and Ports Front Panel Before installation, familiarize yourself with the HP NetServer E 60's switches and LED (Light Emitting Diode) indicators. The connections, switches, indicators, ports and the user-serviceable internal components of the NetServer E 60 are shown in Figure 2-1. - Page 16 Chapter 2 Controls, Indicators, and Ports Table 2-1 shows the Control panel switches and the associated indicator definitions. Table 2-1. Control Panel Switch and Indicators Control / Indicator Description The power button acts as both a button for transitioning Power On/Off/Sleep the system between the on and sleep states, and for Switch transitioning the system between the off and on states.
-
Page 17: Rear View
The Power Connector accepts a standard power cable to connect the HP NetServer E 60 with the site power supply. • To install an external SCSI port you need the optional HP NetServer E 60 External SCSI Port Cable Kit (P/N D8214A). - Page 18 Chapter 2 Controls, Indicators, and Ports Power Key Lock Keyboard Mouse Serial Port A Parallel Port Serial Port B External SCSI LAN RJ45 Port Knock-out Video SVGA Figure 2-2. Rear Panel and Ports...
-
Page 19: Power-Up And Power-Down Procedures
Chapter 2 Controls, Indicators, and Ports Table 2-2 shows the LAN LED indicators. Table 2-2. LAN Port (RJ45) LED Indicator Definitions Indicator Definition This green LED is the activity/link indicator. When Link LED steady on, this LED indicates a valid LAN link. This LED will also flash when there is LAN activity. - Page 20 Chapter 2 Controls, Indicators, and Ports 2. Press the power switch on the HP NetServer's control panel when prompted by the operating system. Normally this is the complete procedure. NOTE The power supply will continue to provide standby current to the NetServer until the power cable is disconnected from the rear panel.
-
Page 21: Removing And Replacing The System Cover
These steps do not include the removal of the front bezel of the system. You do not need to remove the front bezel of the HP NetServer E 60 to install internal accessories, such as memory or mass storage. 1. Turn off the NetServer and disconnect the power cord and any phone line. - Page 22 Chapter 3 Removing and Replacing the System Cover Key Lock Screws Screws Figure 3-1. Screws and Lock Holding on Cover 4. Remove the NetServer cover. Place your hands near the bottom front of the cover, one along each side. Pull the cover slightly back to release it and then lift up and off the chassis (see Figure 3-2).
-
Page 23: Replacing The Cover
Chapter 3 Removing and Replacing the System Cover Replacing the Cover To replace the cover, follow these steps: 1. If necessary, return the air duct to its closed position. 2. Place one hand on either side of the cover and press inward lightly while lowering the cover onto the chassis. -
Page 24: Adjusting The System Feet
Chapter 3 Removing and Replacing the System Cover Adjusting the System Feet When adding internal accessories to the system, turn the feet inward so that the system will lay flat on its side on the floor. Figure 3-4. Turn Feet Inward before Laying the NetServer on Its Side... -
Page 25: Installing Mass Storage Devices
4 Installing Mass Storage Devices Introduction The HP NetServer E 60 comes standard with an IDE CD-ROM and a floppy disk drive (some models also include a SCSI hard disk drive and a tape backup drive). The internal mass storage cage can hold, and cabling is provided for, up to four Ultra Wide SCSI hard disk drive devices. -
Page 26: Installing Mass Storage Devices
The boot order can be changed using the system's BIOS Setup utility (press [F2] during the boot process). Installing Mass Storage Devices The following table shows how mass storage devices may be added to the HP NetServer E 60: Interface... -
Page 27: Embedded Scsi Controller Configuration
Chapter 4 Installing Mass Storage Devices Embedded SCSI Controller Configuration Typically, no configuration of the embedded SCSI controller is required. You do have the option of reassigning the designation of channel A and B. In order to verify or modify SCSI host adapter settings, or to low-level format SCSI disks or verify SCSI media, run the SCSI Select Utility. - Page 28 Chapter 4 Installing Mass Storage Devices 4. Lay the server on its side (components showing). Unsnap the air duct and move it out of the way (see Figure 4-1). Figure 4-1. Moving the Air Duct 5. Loosen three captive screws on the mass storage cage (see Figure 4-2). 6.
- Page 29 NOTE If the hard disk drive you are planning to install already has a mounting tray attached, you must remove it before you can install the drive in your HP NetServer E 60.
- Page 30 Chapter 4 Installing Mass Storage Devices Figure 4-3. Adding a Hard Disk Drive 9. Install the screws that secure the drive (or the shelf or the brackets) to the mass storage cage. First, attach one of the screws through the round screw hole at the rear of the cage, then through the elongated hole at the front of the cage.
- Page 31 Chapter 4 Installing Mass Storage Devices HDD 1 HDD 2 Tabs HDD 3 HDD 4 Figure 4-4. Hard Disk Drive Cage Screw Holes 10. Reinstall the mass storage cage. Make sure the tabs at the front on the cage slide into the slots provided for them (see Figure 4-3). 11.
-
Page 32: Installing The Optional Hp Netserver E 60 Duplexing Cable Kit
It requires you have at least two hard disk drives be installed in the hard disk drive cage, and a second SCSI cable (HP NetServer E 60 SCSI Duplex Cable Kit P/N D8212A). - Page 33 Chapter 4 Installing Mass Storage Devices 1. To install the external cable, connect one end to the free SCSI connector on the System board (refer to the Technical Reference Card on the chassis for location). 2. Using a flat blade screwdriver, pop out the external SCSI knock-out at the rear of the system (see Figure 4-7 for location).
- Page 34 Chapter 4 Installing Mass Storage Devices 4. Install the external connector end of the cable to the rear where the knockout was removed and insert the two threaded studs from the outside (see Figure 4-7). Figure 4-7. Connecting the Cable to the Rear of the System...
-
Page 35: Installing Additional Memory
DIMMs may be installed in any combination in any socket. However, HP recommends starting at socket 0 and filling the sockets in order: 1, 2, and 3. Use only HP DIMMs. For availability of DIMM upgrade kits for the NetServer E 60, check the web site at: http://www.hp.com/netserver/products/accessories/... - Page 36 Use an anti-static wrist strap and a grounding mat. Before you remove a memory module from the anti-static container, touch a grounded, unpainted metal surface on the HP NetServer E 60 to discharge static electricity. 6. Locate the DIMM sockets (see Figure 5-1). DIMM Slots 0 1 2 3 Figure 5-1.
- Page 37 Choose a socket into which you want to install a DIMM. DIMMs may be installed in any combination, in any socket. CAUTION Use only HP DIMMs. c. Spread the two retaining clips on the socket outward. d. Align the notches on the DIMM with the keys on the socket (see Figure 5-2).
-
Page 38: Removing Dimms
Chapter 5 Installing Additional Memory Figure 5-3. DIMM Insertion 8. Repeat to install all of the DIMMs for your memory configuration. NOTE Most DIMMs are dimensionally identical, so, if you have three or more DIMMs installed, you may check that they are all seated by sliding a straight edge (a pen, for example) across their top edges and checking that it remains in continuous contact with all of the DIMMs. - Page 39 Chapter 5 Installing Additional Memory 3. Remove the top cover from the NetServer. See Chapter 3 for details. 4. Open the retaining clips. 5. Lift the DIMM completely away from the socket. 6. Place the DIMM in its anti-static container. 7.
-
Page 41: Installing Additional Boards
6 Installing Additional Boards Introduction The HP NetServer E 60 includes six PCI slots and one ISA slot that is shared with PCI slot 6. PCI slots 3-6 have a slot guide for full-sized boards (as shown in Figure 6-1). -
Page 42: Using The Primary Or Secondary Pci Bus
SCSI controller, use the other PCI slots before using slot 3. IRQs are shared in the HP NetServer E 60 system as shown below. If you are installing a PCI board that does not support interrupt sharing (refer to the accessory board documentation), make sure that the shared slot is empty or has no embedded device assigned to it. -
Page 43: Pci Slot Initialization Order
If you plan on adding a disk array controller board to the HP NetServer E 60, HP recommends the HP NetRAID 3Si PCI board be installed in slot 5. When installing a disk array controller board, you may alter the server's boot order to allow the system to boot off one of the array's drives. - Page 44 5. Read the documentation that is included with the accessory card. Note any special instructions. NOTE Adding a PCI-to-PCI bridge card to the HP NetServer may alter the server's boot order. This boot order can be changed using the SETUP utility (press [F2] during the boot process).
- Page 45 Chapter 6 Installing Additional Boards 7. Use the T15 driver or flat blade screw driver to remove the PCI slot cover for each slot to be used, and store it for future use (see Figure 6-2). Figure 6-2. Removing the Accessory Slot Cover 8.
-
Page 46: Removing Accessory Boards
Chapter 6 Installing Additional Boards Figure 6-3. Inserting an Accessory Board 9. Secure the accessory board using the screw you previously removed with the slot cover. Use the T15 driver or flat blade screw driver. Once the accessory board is installed, you may need to install software drivers. The drivers for the new board are either part of your existing system software or included on a floppy diskette that accompanies the accessory. -
Page 47: Installing A Second Processor
The NetServer E 60 supports up to two processor modules. Processor modules are available at different clock speeds. The HP NetServer E 60 supports either Pentium II or Pentium III processors. Do not mix Pentium II and Pentium III processors in the system. Do not mix processors with different clock speeds in the system (example: 400MHz and 450MHz processors). -
Page 48: Determine Where To Place The Processor Module
(instead relying on settings internal to the CPU). These processors will still perform at their normal rated speed in the NetServer E 60 regardless of the system switch settings. 400MHz... - Page 49 Before you remove a processor module from the anti-static container, touch a grounded, unpainted metal surface on the HP NetServer E 60 to discharge static electricity. 1. Remove the terminating resistor module from the secondary processor slot as shown in the following illustration. First, unclip the two plastic securing clips that hold down the resistor module.
-
Page 50: Upgrading The Firmware
Upgrading the Firmware If your processor included a new HP NetServer Navigator CD-ROM, insert the CD into the HP NetServer E 60 CD-ROM drive and power on the system. Follow instructions to ensure that the BIOS is up-to-date. Reinstalling the NOS You may have to reinstall your Network Operating System in order to use the additional processor. -
Page 51: Removing A Processor Module
Chapter 7 Installing a Second Processor Removing a Processor Module Use the same procedure as above, and simply remove rather than add the processor module. BE SURE to replace the terminating resistor module. -
Page 53: Connecting The Monitor, Keyboard, Mouse, And Ups
If you have an uninterruptible power supply (UPS), refer to the instructions supplied with it. Install and turn on the UPS. The HP NetServer E 60 performs a diagnostic test when it is connected to an external power source, and then performs another test when the power switch is turned on. -
Page 55: Configuring The Server Using The Hp Netserver Navigator Cd-Rom
CD-ROM to configure your NetServer. Contents of the HP NetServer Navigator CD-ROM The Main Menu of HP Navigator directs you to modules where you can perform configuration tasks or access online system documentation. The menu buttons for these modules are as follows and are described in this chapter: •... -
Page 56: Readme File
If the system fails to boot, follow the diagnostic instructions on the screen. 2. Go to the HP Navigator Main Menu. If the language needs to be changed, select User Preferences and the language you want. You can also change the language of the BIOS when prompted. -
Page 57: Run Configuration Assistant And Installation Assistant
10 seconds, and turn the power on again. If the system fails to start, follow the instructions on the screen. 1. When HP NetServer Navigator starts, you may need to set the language, time, and date. Follow the onscreen instructions. You can also change the language of the BIOS when prompted. - Page 58 I/O port ranges, DMA channels, and interrupt (IRQ) levels. • Configure Disk Array: If you have an HP disk array, you must configure it with the disk array utility. Select Execute on the Configure Disk Array screen to start the Disk Array utility.
-
Page 59: Custom Configuration
Configuration screen displays the following menu: • Essential Steps: ◊ Configure Disk Array: If you have an HP disk array, you must configure it with the disk array utility. Select Execute on the Configure Disk Array screen to start the Disk Array utility. - Page 60 ◊ Install Utility Partition: This step creates a 32 MB utility partition on the server hard disk where HP Navigator will copy DiagTools, the BIOS update utility, the disk array utility, the NIC configuration utility, the Remote Console feature, troubleshooting utilities, and other utilities.
-
Page 61: Replicate Configuration
If you are unfamiliar with these products or concepts, • Go to the Management Web site on the HP Web Site at http://www.hp.com/go/netserver_mgmt to view information on HP TopTools and all server management options for your NetServer. - Page 62 Servers, included on the HP NetServer Navigator CD-ROM can provide all the tools you need to manage your small business environment. Local TopTools for Servers provides the same information as HP TopTools but is run directly at the server. Local TopTools for Servers is automatically installed on your server when using the HP NetServer Navigator CD to install your Network Operating System.
-
Page 63: Pcanywhere32
It must first be copied to diskette and then executed from the diskette. User Preferences User Preferences lets you change the language and the system date and time. You can also change the system language displayed by the HP NetServer E 60 BIOS. -
Page 65: 10 Information Assistant
Restart from the HP NetServer Online Documentation CD-ROM on the NetServer and run Information Assistant, or install Information Assistant as an application program on a Windows client machine (see the section "Installing HP Information Assistant Software" in this chapter). Getting Help Help button. -
Page 66: Finding Information
Chapter 10 Information Assistant Finding Information Information Assistant provides many ways to navigate through its topics and locate information. For example: Map button. Displays a window with an outline of every module and topic in Information Assistant for the selected product. The Map enables you to view the contents of the Information Assistant in outline format, and then select a topic to view. -
Page 67: Copying And Printing Information
Installing HP Information Assistant Software HP Information Assistant runs on a PC running Windows 3.1 and above, Windows 95/98, or Windows NT. Install it from the HP NetServer Online Documentation CD-ROM onto the client system that will manage the NetServer. - Page 68 Chapter 10 Information Assistant In Program Manager or the Programs group, the Setup utility creates a new program group called NetServer Information Assistant, with an icon for running the application.
-
Page 69: Using The Bios Setup And Scsi Select Utilities
11 Using the BIOS Setup and SCSI Select Utilities The HP NetServer E 60 BIOS Setup utility is used to configure the following system options: • User Preferences • Security • Configuration Using the BIOS Setup Utility Turn on the monitor and the NetServer, and start the Setup utility by pressing the [F2] key when Press <F2>... -
Page 70: Configuration
Chapter 11 Using the BIOS Setup and SCSI Select Utilities Configuration Use this menu option to configure I/O ports, I/O addressing, interrupts, PCI slot masters, IRQ interrupt locking, boot device ordering, embedded NIC enable/disable and Wake-on-LAN. • Integrated I/O Port. Configure ports for serial and parallel, assign base addresses and interrupts, pointing devices (mouse), and console redirection for remote control. -
Page 71: Reserving Resources For Isa Non-Plug-And-Play Boards
Chapter 11 Using the BIOS Setup and SCSI Select Utilities Reserving Resources for ISA Non-Plug-and-Play Boards If you have installed an ISA non-Plug-and Play accessory board, you must reserve system resources for it. Turn on the monitor and the NetServer, and start the Setup utility by pressing the [F2] key when Press <F2>... - Page 72 Chapter 11 Using the BIOS Setup and SCSI Select Utilities 6. Use the up and down arrow keys to highlight ISA non-Plug-and-Play Devices, and press Enter to select that submenu. 7. Use the up and down arrow keys to highlight Memory Resources, and press Enter to select that submenu.
-
Page 73: Enabling The Remote Console Feature
Use HP's BIOS level remote access to diagnose and remedy problems associated with a NetServer's hardware operations or configuration. To enable the Remote Console feature of the HP NetServer E 60, enter the BIOS Setup utility as described above, then do the following: 1. -
Page 74: About The Remote Console Feature
Update the system BIOS. This feature is particularly useful since it allows you to update a NetServer's BIOS remotely. • Run the HP LAN configuration utility to configure and test embedded 10/100TX LAN Adapter (NIC). • Run the SCSI Configuration Utility. This utility allows you to configure the server's SCSI host adapter settings, format a disk, or verify disk media. -
Page 75: Using The Scsi Select Utility
• Set or reset system date, time, and keyboard language. In addition, your HP NetServer E 60 includes pcANYWHERE32 communications software (by Symantec Inc.) that may also be installed on both the server and remote console to graphically redirect your Windows NT server console to a remote location. -
Page 76: Scsi Disk Utilities
Chapter 11 Using the BIOS Setup and SCSI Select Utilities • Advanced Configuration Options Reset SCSI, display <Ctrl><A> message, enables or disables SCSI BIOS and features. SCSI Disk Utilities Use this menu option to format and verify media. • Select device Select a device for low-level formatting or media verification. -
Page 77: 12 Troubleshooting
12 Troubleshooting Troubleshooting Tools If you are having problems installing your HP NetServer, there are a number of different tools available for troubleshooting: • HP NetServer Information Assistant contains the following tools: ◊ Troubleshooting Information ◊ Parts Information ◊ List of Error Messages and Beep Error Messages •... -
Page 78: If The System Will Not Power On
Chapter 12 Troubleshooting If the System Will Not Power On Follow these steps if the power/activity light does not light green after you press the power-on button: 1. Remove the AC power cord, wait 15 seconds, reconnect the power cord, and try again. -
Page 79: Error Messages
2. Simplify the HP NetServer configuration to the minimum required: a monitor, one flexible disk drive, one CD-ROM drive, one hard disk drive, keyboard, mouse, and NIC. - Page 80 Chapter 12 Troubleshooting After Installing an Accessory 1. Turn off the monitor, the computer, and any external devices. 2. Unplug all cables from the power outlet. 3. Remove the cover. 4. Check the following: ◊ If you have installed an accessory board, check that the board is firmly seated in its slot and that any switches or jumpers on the accessory board are properly set.
-
Page 81: Clearing The Cmos Configuration
Chapter 12 Troubleshooting Clearing the CMOS Configuration You may need to clear the CMOS configuration if the configuration has been corrupted by a program, or if incorrect settings made in the Setup program have made the display unreadable. To clear the configuration: 1. - Page 82 SCSI cable is securely plugged into the SCSI controller board. Check that the boot device is enabled in the Start-up center under the Security menu of the Setup program. If the problem persists, contact your HP support organization. Verify that the boot device has an operating system installed.
-
Page 83: Hardware Problems
Chapter 12 Troubleshooting If a NetServer configuration error is reported during the startup routine, clear the CMOS memory as described under "Clearing the CMOS Configuration," and restart the NetServer. Hardware Problems This section describes what to do if you have problems with your monitor, mass storage devices, printer, accessory boards, keyboard, or mouse. -
Page 84: The Keyboard Or Mouse Does Not Work
Chapter 12 Troubleshooting 4. If the screen goes blank after the NOS has booted, contact your HP support organization. The Keyboard or Mouse Does Not Work 1. Check that the keyboard and mouse are connected to the correct connectors. Refer to the I/O panel label on the rear panel of the NetServer. -
Page 85: Password Problems
Chapter 12 Troubleshooting Password Problems This section describes some common password problems. Resetting Lost Passwords If you have forgotten the User or Administrator password, you can reset them. The User password can be reset if you know the Administrator password; the Administrator password can only be reset by a switch on the system board. -
Page 86: Battery Problems
11. Choose the Exit option and save the changes to save the new password(s). Battery Problems If your HP NetServer repeatedly loses its configuration or the CPU clock stops, you should replace the battery or install an external battery (an external battery with a 5-year life span is available from HP, order 1420-0513 from your authorized reseller.) -
Page 87: Problems Running The Setup Program
Chapter 12 Troubleshooting Battery Figure 12-1. Battery on System Board 4. Insert the new battery with the positive sign (+) facing out, and ensure that it is seated completely. Make sure that the retaining clip is in place, and holds the battery firmly. 5. -
Page 89: A Specifications
A Specifications The specifications listed below can vary if you install a mass storage device in your server that has more stringent environmental limits. Make sure that the operating environment for your server is suitable for all the mass storage devices that you are using. -
Page 90: Video Display Modes
32-bit, 33MHz speed. PCI rev; 2.1 compliant. Two Serial ports; One bi-directional parallel port with ECP/EPP high speed support; PS/2 style mouse and keyboard connectors. CD-ROM Bundled HP D4384A CD-ROM drive; IDE interface; 32x speed. Video Display Modes Max. Refresh Max. Refresh Max. -
Page 91: Weight And Dimensions
Appendix A Specifications Weight and Dimensions Weight Approx. 30 lbs (14 kg.), depending on configuration – excludes keyboard and monitor. Height 17.09 inches (434 mm) Width 7.1 inches (180mm) 11.67 inches (296.5mm) Feet opened Depth 19.57 inches (497mm) Power Supply Specifications Type Auto-ranging Input –... -
Page 92: System Board Layout
Serial A Parallel Serial B IDE 1 IDE 2 LAN (RJ45) SCSI (B) SCSI (A) System switches Status connector Snap ISA slot Full-sized System board screw not visible when Processor installed System board screw Figure A-1. NetServer E 60 System Board... -
Page 93: B Regulatory Information
B Regulatory Information Regulatory Notices - Electromagnetic Compliance Electromagnetic Compatibility (EMC) requirements have been established in many countries to regulate the radio frequency energy generated by Information Technology Equipment (ITE). This energy is generated during the normal and intended use of this equipment and so it is limited by country regulations to levels intended to minimize potential interference to other electrical equipment, including public safety services. -
Page 94: Notice For Canada (Industry Canada)
Consult the dealer or an experienced radio/television technician for help. Hewlett-Packard's system certification tests were conducted with HP-supported peripheral devices and HP shielded cables, such as those you receive with your computer. Changes or modifications not expressly approved by Hewlett-Packard could void the user's authority to operate the equipment. -
Page 95: Notice For Japan
Appendix B Regulatory Information Notice for Japan The configuration of the server you have purchased may be in either the class A or class B category. For products labeled as Class B: This equipment is in the Class B category information technology equipment based on the rules of Voluntary Control Council For Interference by Information Technology Equipment (VCCI). -
Page 96: Notice For Korea
Appendix B Regulatory Information Notice for Korea The configuration of the server you have purchased may be in either the class A or class B category. Class A Equipment : Please note that this equipment has been approved for business purposes with regards to electromagnetic interference, if purchased in error for use in residential area, you may wish to exchange the equipment where you purchased Class B Equipment :... -
Page 97: Notice For Taiwan: Class A Warning Statement
Notice for the United Kingdom: General Approval This HP NetServer E 60 Product is approved under approval number NS/G/ 1234/J/100003 for indirect connection to Public Telecommunication Systems in the UK. -
Page 98: Declaration Of Conformity (Us, Eu, Australia)
Cupertino, CA 95014-5040 USA declares, that the product Product Name: Network Server Model Number(s): HP NetServer E 60 Product Options: conforms to the following Product Specifications: Safety: IEC 950: 1991+A1, A2, A3, A4 / EN 60950: 1992+A1, A2, A3, A4... -
Page 99: Regulatory Notices - Product Safety
Appendix B Regulatory Information Regulatory Notices - Product Safety The following information applies only to servers with factory-installed drives. CD-ROM Electrical Safety Statement WARNING To prevent fire or shock hazard, do not expose the unit to rain or moisture. To avoid electrical shock, do not open the cabinet. Refer servicing to qualified personnel only. - Page 100 LASER Safety - Finland LASERTURVALLISUUS LUOKAN 1 LASERLAITE KLASS 1 LASER APPARAT HP NetServer E 60 - verkkopalvelimeen voidaan asentaa lisävarusteena laitteensisainen CD-ROM-lukulaite, joka on laserlaite. Kyseinen CD-ROM-lukulaite on käyttäjän kannalta turvallinen luokan 1 laserlaite. Normaalissa käytössä lukulaitteen suojakotelo estää laseräteen pääsyn laiteen ulkopuolelle.
-
Page 101: Batteries
Appendix B Regulatory Information CLASS 1 This CD-ROM Drive Unit is classified as a CLASS 1 LASER PRODUCT. LASER PRODUCT LASSER The CLASS 1 LASER PRODUCT label is located KLASSE 1 on the top of the drive. PRODUKT Bei diesem CD-ROM-Laufwerk CDU56S handelt es sich um ein Laser-Produkt der Klasse 1. -
Page 102: Noise Declaration And Ergonomics
Appendix B Regulatory Information Noise Declaration and Ergonomics Germany Sound Pressure: LpA < 50 dB (A) am Arbeitsplatz, Beobachter Position (workplace, bystander position) normaler Betrieb (normal operation) nach DIN 45635 T. 19 (per ISO 7779) This product has not been evaluated for compliance with the ZH1/618 ergonomic requirements. -
Page 103: C Service And Support
C Service and Support For all service and support information, see the HP NetServer Warranty and Service/Support Booklet included with your product. -
Page 105: D Warranty And Software License
The following License Terms govern your use of the accompanying Software unless you have a separate signed agreement with HP. License Grant. HP grants you a license to Use one copy of the Software. "Use" means storing, loading, installing, executing or displaying the Software. You may not modify the Software or disable any licensing or control features of the Software. - Page 106 Support Utility software may be used only for restoring the hard disk of the HP computer system with which the Recovery CD originally was provided, and (ii) if separate EULA(s) are included with your Computer for any other MS products which are included on the Recovery CD, those MS products are subject to the terms of their respective EULA(s).
-
Page 107: Non-Nuclear Usage
Customer is solely liable if Products or Support purchased by Customer are used for these applications. Customer releases HP and will hold HP harmless from all loss, damage, expense, or liability in connection with such use. -
Page 109: Index
Advanced mode, 64 clearing, 75 AGP video display modes, 84 configuration AGP video interrupt jumper, 36 custom, 53 express, 51 HP Management solutions, 55 battery, 80 ISA non-Plug-and-Play boards, 64, BIOS setup, 63 boot device ordering, 64 NetServer utilities, 57 Configuration, 64... - Page 110 97 host adaptor settings, 69 mass storage, installing, 19 Hot-swap drives mass storage, internal installation, 21 boot device priority, 19 HP Management Solutions, 55 media verification, 70 HP Navigator, 50 memory HP NetServer installing, 29 ports, 11...
- Page 111 Index Monitor, connecting, 47 installation, 43 mouse Product Safety, 93 troubleshooting, 78 Readme file, 50 Navigator rear panel ports, 47 Configuration Assistant, 50 Regulatory Notices - Electromagnetic Installation Assistant, 50 Compliance, 87 Readme file, 50 Regulatory Notices - Product Safety, 93 NetServer utilities configuration, 57 remote console, 67 removing the cover, 15...
- Page 112 Index Setup steps, 1 troubleshooting Setup utility, 50, 65 basics, 71 reserving resources for ISA boards, error messages, 73 finding the problem, 72 Setup utility, Advanced mode, 64 tools, 71 site preparation Troubleshooting environmental considerations, 83 service and support, 97 sleep mode, defined, 10 turning feet, 18 software...