Table of Contents
Advertisement
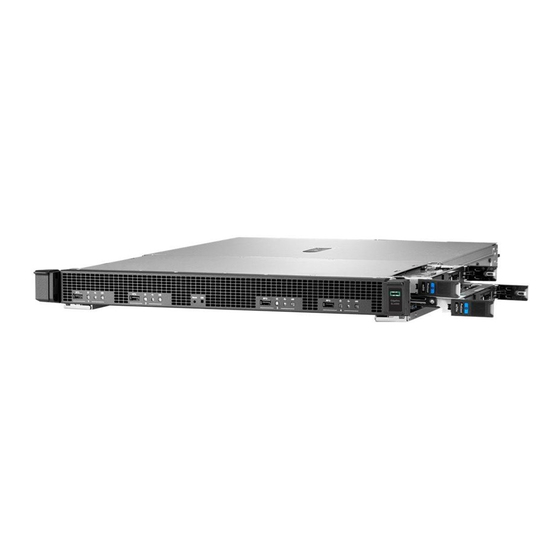
HPE Edgeline EL4000 System
Maintenance and Service Guide
Abstract
This guide describes identification and maintenance procedures, diagnostic tools,
specifications, and requirements for hardware components and software. This guide is for an
experienced service technician. Hewlett Packard Enterprise assumes you are qualified in the
servicing of computer equipment, trained in recognizing hazards in products, and are familiar
with weight and stability precautions.
Part Number: 868754-002
Published: May 2017
Edition: 2
Advertisement
Table of Contents

Related Manuals for HP Edgeline EL4000


Summary of Contents for HP Edgeline EL4000
- Page 1 HPE Edgeline EL4000 System Maintenance and Service Guide Abstract This guide describes identification and maintenance procedures, diagnostic tools, specifications, and requirements for hardware components and software. This guide is for an experienced service technician. Hewlett Packard Enterprise assumes you are qualified in the servicing of computer equipment, trained in recognizing hazards in products, and are familiar with weight and stability precautions.
- Page 2 © 2017 Hewlett Packard Enterprise Development LP Notices The information contained herein is subject to change without notice. The only warranties for Hewlett Packard Enterprise products and services are set forth in the express warranty statements accompanying such products and services. Nothing herein should be construed as constituting an additional warranty. Hewlett Packard Enterprise shall not be liable for technical or editorial errors or omissions contained herein.
-
Page 3: Table Of Contents
Contents Illustrated parts catalog................6 System components for PCIe configuration..................6 Cartridge spare parts......................6 Cartridge rail card spare parts....................7 Fan spare part........................7 Baseboard PCA spare parts....................7 QSFP+ riser card spare part....................7 SFP+ riser card spare parts....................7 PCIe riser card spare parts....................7 Power supply spare parts....................8 Front panel board spare parts....................8 Cable kit spare parts...................... - Page 4 Removing and replacing the cartridge..................32 Cartridge components......................32 Removing and replacing the front panel board................32 Remove and replace the front panel board for the PCIe configuration......32 Remove and replace the front panel board for the PXIe configuration......34 Removing and replacing the cartridge rail cards.................35 Remove and replace the cartridge rail cards in a PCIe system........
- Page 5 Websites....................61 Support and other resources...............62 Accessing Hewlett Packard Enterprise Support................. 62 Information to collect......................62 Accessing updates........................62 Customer self repair........................63 Remote support.......................... 63 Acronyms and abbreviations...............64 Documentation feedback..............66 Contents...
-
Page 6: Illustrated Parts Catalog
Illustrated parts catalog System components for PCIe configuration Hewlett Packard Enterprise continually improves and changes product parts. For complete and current supported parts information, see the Hewlett Packard Enterprise PartSurfer website (http:// www.hpe.com/info/partssurfer). Item Description Cartridge spare parts on page 6 Cartridge rail card spare parts on page 7 Fan spare part on page 7 Baseboard PCA spare parts on page 7... -
Page 7: Cartridge Rail Card Spare Parts
867520-001 HPE EL4000 Switch baseboard PCA 867524-001 QSFP+ riser card spare part Customer self repair: Optional The QSFP+ riser card is supported only on the HPE Edgeline EL4000 PassThru System. Description Spare part number QSFP+ riser card V2 867531-001 SFP+ riser card spare parts Customer self repair: Optional The SFP+ riser card is supported only on the HPE Edgeline EL4000 Switch System. -
Page 8: Power Supply Spare Parts
Power supply spare parts Customer self repair: Mandatory Description Spare part number 800W Flex Slot -48VDC Hot Plug Power Supply 754382-001 800W Flex Slot Platinum Plus Hot Plug Power 754381-001 Supply Front panel board spare parts Customer self repair: Optional Description Spare part number Front panel board... -
Page 9: Cartridge Spare Parts
Item Description Cartridge spare parts on page 6 Cartridge rail card spare parts on page 9 Fan spare part on page 7 PXIe riser board spare parts on page 10 Baseboard PCA spare part on page 10 Power supply spare parts on page 8 Front panel board spare part on page 10 Cable kit spare parts on page 10 Not shown... -
Page 10: Fan Spare Part
Fan spare part Customer self repair: Mandatory Description Spare part number Fan module 867532-001 PXIe riser board spare parts Customer self repair: Mandatory Description Spare part number PXIe riser board assembly 867529-001 Baseboard PCA spare part Customer self repair: Optional Description Spare part number HPE EL4000 Instrumentation baseboard PCA... - Page 11 Description Spare part number EL4000 Instrumentation cable kit. 869163-001 Includes the following: • Front I/O to system board SAS cable (x8, 12G) assembly • UID to main baseboard cable assembly • Cable front I/O USB assembly • Rail board to system board, right SAS cable (x8, 12G) assembly •...
-
Page 12: Customer Self Repair
Customer self repair Hewlett Packard Enterprise products are designed with many Customer Self Repair (CSR) parts to minimize repair time and allow for greater flexibility in performing defective parts replacement. If during the diagnosis period Hewlett Packard Enterprise (or Hewlett Packard Enterprise service providers or service partners) identifies that the repair can be accomplished by the use of a CSR part, Hewlett Packard Enterprise will ship that part directly to you for replacement. - Page 13 demandez à Hewlett Packard Enterprise de remplacer ces pièces, l'intervention peut ou non vous être facturée, selon le type de garantie applicable à votre produit. REMARQUE: Certaines pièces Hewlett Packard Enterprise ne sont pas conçues pour permettre au client d'effectuer lui-même la réparation. Pour que la garantie puisse s'appliquer, Hewlett Packard Enterprise exige que le remplacement de la pièce soit effectué...
- Page 14 Hewlett Packard Enterprise entro un determinato periodo di tempo, generalmente cinque (5) giorni lavorativi. Il componente difettoso deve essere restituito con la documentazione associata nell'imballo di spedizione fornito. La mancata restituzione del componente può comportare la fatturazione del ricambio da parte di Hewlett Packard Enterprise. Nel caso di riparazione da parte del cliente, Hewlett Packard Enterprise sostiene tutte le spese di spedizione e resa e sceglie il corriere/vettore da utilizzare.
- Page 15 Parts-only Warranty Service (Garantieservice ausschließlich für Teile) Ihre Hewlett Packard Enterprise Garantie umfasst möglicherweise einen Parts-only Warranty Service (Garantieservice ausschließlich für Teile). Gemäß den Bestimmungen des Parts-only Warranty Service stellt Hewlett Packard Enterprise Ersatzteile kostenlos zur Verfügung. Für den Parts-only Warranty Service ist das CSR-Verfahren zwingend vorgegeben. Wenn Sie den Austausch dieser Teile von Hewlett Packard Enterprise vornehmen lassen, werden Ihnen die Anfahrt- und Arbeitskosten für diesen Service berechnet.
- Page 16 Customer Self Repair Veel onderdelen in Hewlett Packard Enterprise producten zijn door de klant zelf te repareren, waardoor de reparatieduur tot een minimum beperkt kan blijven en de flexibiliteit in het vervangen van defecte onderdelen groter is. Deze onderdelen worden CSR-onderdelen (Customer Self Repair) genoemd. Als Hewlett Packard Enterprise (of een Hewlett Packard Enterprise Service Partner) bij de diagnose vaststelt dat de reparatie kan worden uitgevoerd met een CSR-onderdeel, verzendt Hewlett Packard Enterprise dat onderdeel rechtstreeks naar u, zodat u het defecte onderdeel daarmee kunt vervangen.
- Page 17 • Obrigatória—Peças cujo reparo feito pelo cliente é obrigatório. Se desejar que a Hewlett Packard Enterprise substitua essas peças, serão cobradas as despesas de transporte e mão-de-obra do serviço. • Opcional—Peças cujo reparo feito pelo cliente é opcional. Essas peças também são projetadas para o reparo feito pelo cliente.
- Page 18 Customer self repair...
- Page 19 Customer self repair...
- Page 20 Customer self repair...
-
Page 21: Removal And Replacement Procedures
Removal and replacement procedures Required tools You need the following items for some procedures: • T-10 Torx screwdriver • T-15 Torx screwdriver • Phillips screwdriver Safety considerations Before performing service procedures, review all the safety information. Preventing electrostatic discharge About this task To prevent damaging the system, be aware of the precautions you must follow when setting up the system or handling parts. -
Page 22: System Warnings And Cautions
This symbol indicates the presence of a hot surface or hot component. If this surface is contacted, the potential for injury exists. WARNING: To reduce the risk of injury from a hot component, allow the surface to cool before touching. This symbol indicates that the component exceeds the recommended weight for one individual to handle safely. -
Page 23: Power Down The System
If you must dismount the system or remove a non-hot-plug component, then you must power down the system. 2. Dismounting the system If the environment, cabling configuration, or the system location creates unstable conditions, then dismount the system and place it on a stable surface. 3. -
Page 24: Removing The Pxie Access Panel
Removing the PXIe access panel Procedure 1. Press the latch button and open the latch. 2. Slide the panel to the rear of the chassis. 3. Lift and remove the access panel. Remove the fixed top cover Depending on the configuration of your system, perform one or more of the following procedures: •... -
Page 25: Removing The Fixed Top Cover Of The Pcie System
Removing the fixed top cover of the PCIe system Procedure 1. Using a Torx screwdriver, remove the nine T-10 Torx screws securing the fixed top cover to the system. Removing the fixed front top cover of the PXIe system Procedure 1. -
Page 26: Remove The Pcie Riser Assembly
Remove the PCIe riser assembly • Removing the left PCIe riser assembly on page 26 • Removing the right PCIe riser assembly on page 27 Removing the left PCIe riser assembly Procedure 1. Power down the system (Power down the system on page 23). 2. -
Page 27: Removing The Right Pcie Riser Assembly
Removing the right PCIe riser assembly Procedure 1. Power down the system (Power down the system on page 23). 2. Dismount the system (Dismount the system on page 23). 3. Remove the access panel (Removing the PCIe access panel on page 23). 4. -
Page 28: Removing And Replacing An Ac Power Supply
Removing and replacing an AC power supply Procedure 1. Power down the system (Power down the system on page 23). This action is required only if you have a single power supply in the system. 2. Dismount the system (Dismount the system on page 23). This action is required only if you have a single power supply in the system. - Page 29 4. Remove the ground cable from the top of the power supply. 5. Remove the connector from the rear of the power supply. To replace the component, reverse the removal procedure. Removal and replacement procedures...
-
Page 30: Removing And Replacing A Power Supply Blank
Removing and replacing a power supply blank Procedure 1. Remove the component as indicated. To replace the component, reverse the removal procedure. Removing and replacing a system battery About this task If the system no longer automatically displays the correct date and time, then replace the battery that provides power to the real-time clock. -
Page 31: Removing And Replacing A Fan
IMPORTANT: Replacing the system board battery resets the system ROM to its default configuration. After replacing the battery, reconfigure the system through UEFI System Utilities. To replace the component, reverse the removal procedure. For more information about battery replacement or proper disposal, contact an authorized reseller or an authorized service provider. -
Page 32: Removing And Replacing The Cartridge
To replace the component, reverse the removal procedure. Removing and replacing the cartridge Procedure 1. Power down the system (Power down the system on page 23). 2. Dismount the system (Dismount the system on page 23), if necessary. 3. Push latch on cover. 4. - Page 33 5. Disconnect the cables from the rail board assembly. 6. Using a Torx screwdriver, remove six T-15 Torx screws and remove the front panel board. Removal and replacement procedures...
-
Page 34: Remove And Replace The Front Panel Board For The Pxie Configuration
To replace the component, reverse the removal procedure. Remove and replace the front panel board for the PXIe configuration Procedure 1. Power down the system (Power down the system on page 23). 2. Dismount the system (Dismount the system on page 23). 3. -
Page 35: Removing And Replacing The Cartridge Rail Cards
8. Using a Torx screwdriver, remove the six T-15 Torx screws and remove the front panel board. To replace the component, reverse the removal procedure. Removing and replacing the cartridge rail cards Perform one of the following procedures depending on the configuration of your system: •... - Page 36 5. Remove the fixed top cover (Removing the fixed top cover of the PCIe system on page 25). 6. Disconnect all cables from the rail cards. 7. Using a Torx screwdriver, remove the two T-15 screws from both the left and right rail card retention brackets and remove the brackets.
-
Page 37: Remove And Replace The Cartridge Rail Cards In A Pxie System
To replace the component, reverse the removal procedure. Remove and replace the cartridge rail cards in a PXIe system Procedure 1. Power down the system (Power down the system on page 23). 2. Dismount the system (Dismount the system on page 23). 3. -
Page 38: Removing And Replacing The Pcie Riser Cards
To replace the component, reverse the removal procedure. Removing and replacing the PCIe riser cards Perform one of the following procedures depending on the configuration of your system: • Remove and replace the left PCIe riser card on page 38 •... -
Page 39: Remove And Replace The Right Pcie Riser Card
To replace the component, reverse the removal procedure. Removing and replacing the PCIe QSFP+ riser card About this task The QSFP+ riser card is supported only on the HPE Edgeline EL4000 PassThru System. Procedure 1. Power down the system (Power down the system on page 23). -
Page 40: Removing And Replacing The Pcie Sfp+ Riser Card
To replace the component, reverse the removal procedure. Removing and replacing the PCIe SFP+ riser card About this task The SFP+ riser card is supported only on the HPE Edgeline EL4000 Switch System. Procedure 1. Power down the system (Power down the system on page 23). -
Page 41: Removing And Replacing The Pxie Riser Assembly
To replace the component, reverse the removal procedure. Removing and replacing the PXIe riser assembly Procedure 1. Power down the system (Power down the system on page 23). 2. Dismount the system (Dismount the system on page 23). 3. Remove the access panel (Removing the PXIe access panel on page 24). 4. -
Page 42: Removing And Replacing The Baseboard
8. Using a Torx screwdriver, remove the six T-15 screws, and then remove PXIe riser board from the PXIe riser assembly. Removing and replacing the baseboard The following procedures are for both the passthru and switch baseboards. Perform one of the following procedures depending on the configuration of your system: •... -
Page 43: Remove And Replace The Baseboard In A Pxie Configuration
• Remove the SFP+ riser card (Removing and replacing the PCIe SFP+ riser card on page 40). • Remove the QSFP+ riser card (Removing and replacing the PCIe QSFP+ riser card on page 39). Disconnect all cables from the baseboard. 10. - Page 44 To replace the component, reverse the removal procedure. Removal and replacement procedures...
-
Page 45: Troubleshooting
Troubleshooting HPE Edgeline Troubleshooting Guide The HPE Edgeline System Troubleshooting Guide provides procedures for resolving common problems and comprehensive courses of action for fault isolation and identification, issue resolution, and software maintenance on the Edgeline System. The document is available in the Hewlett Packard Enterprise Information Library. -
Page 46: Component Identification
Component identification Base configurations The HPE Edgeline EL4000 System comes in the following configurations: • HPE Edgeline EL4000 4x10GbE 2xQSFP+ PassThru System Supports 1 to 4 full-height, half-length PCIe cards. The core network is pass-through. A separate 1G RJ-45 network port is provided for access to the iLO management network. -
Page 47: Front Panel Leds And Buttons
Front panel LEDs and buttons Item Description Status USB 2.0 port Connects a USB 2.0 device to the cartridge Cartridge power LED/ Green = Normal operation button Amber = Standby operation Off = No power or no cartridge installed Cartridge health LED Green = Normal operation Flashing Amber = Degraded condition Flashing Red = Critical condition... -
Page 48: Rear Panel Components
Rear panel components Item Description Power supply PCIe slot #4 (bottom) PCIe slot #3 (top) iLO port Chassis UID LED PCIe slot #1 (top) PCIe slot #2 (bottom) Power supply QSFP+ Uplink B or SFP+ Uplink B QSFP+ Uplink A or SFP+ Uplink A Rear components include either QSFP+ or SFP+ ports, depending on configuration. -
Page 49: Cartridge Slot Identification
Item Description System battery System board Cartridge slot identification Item Description Left side, top—Cartridge 1 Left side, bottom—Cartridge 2 Right side, top—Cartridge 3 Right side, bottom—Cartridge 4 PXIe configuration Front panel components Item Description Cartridge 1 Cartridge 2 10 MHz REF OUT clock SFP+ Uplink A connector SFP+ Uplink B connector 10 MHz REF IN clock... -
Page 50: Front Panel Leds And Buttons
Item Description Cartridge 3 Cartridge 4 Front panel LEDs and buttons Item Description Status USB 2.0 port Connects a USB 2.0 device to the cartridge Cartridge power LED/ Green = Normal operation button Amber = Standby operation Off = No power or no cartridge installed Cartridge health LED Green = Normal operation Flashing Amber = Degraded condition... -
Page 51: Rear Panel Components
Rear panel components Item Description Power supply 1 PXIe slot 4 PXIe slot 5 PXIe slot 3 PXIe slot 2 Power supply 2 Rear panel LEDs and buttons Item Description Power supply 1 LED Chassis UID LED Power supply 2 LED Rear panel components... -
Page 52: System Board Components (Pxie)
System board components (PXIe) Item Description System board DIP Switch System battery DIP switch Position Default Function • Off = Fan normal mode • On = Fan high mode Cartridge slot identification Item Description Left side, top—Cartridge 1 Left side, bottom—Cartridge 2 Table Continued System board components (PXIe) - Page 53 Item Description Right side, top—Cartridge 3 Right side, bottom—Cartridge 4 Component identification...
-
Page 54: Specifications
Specifications Product QuickSpecs For more information about product features, specifications, options, configurations, and compatibility, see the product QuickSpecs on the Hewlett Packard Enterprise website. Environmental specifications Table 1: Standard specifications Specification Value Temperature range — Operating 10°C to 35°C (50°F to 95°F) Nonoperating -30°C to 60°C (-22°F to 140°F) Relative humidity (noncondensing) -
Page 55: Environmental Specifications-System Components Support Matrix
Table 3: ASHRAE Class A4 specifications Specification Value Temperature range — Operating 5°C to 45°C (41°F to 113°F) Nonoperating -30°C to 60°C (-22°F to 140°F) — Relative humidity (noncondensing) Operating 8% to 90% at 28°C (82.4°F) maximum wet bulb temperature Non-Operating 5% to 95% at 38.7°C (101.7°F) maximum wet bulb temperature... -
Page 56: Mechanical Specifications
Environmental Support status specification Base Fans SATA M.2 NVME M.2 PCIe PXIe system drives drives cards modules Extended Ambient Yes (with 45°C Operating redundancy) Support (ASHRAE Class A4 Compliant) Extended Edgeline Yes (with 0°C to 55°C redundancy) Operating Support Maximum altitude is 2,000 m (800 mbar) (at 25 °C ambient temperature) Upon fan failure, the servers in the system might have reduced performance M.2 drive might exceed its spec by 2°C to 3°C and have slight throttling. -
Page 57: Hpe 800W Flex -48Vdc Hot Plug Power Supply
Nominal input current (A rms) Maximum rated input wattage rating (Watts) Maximum rated VA (Volt-Amp) Efficiency (%) 88.3 89.8 91.1 91.9 92.0 92.1 92.2 92.1 Power factor 0.99 0.99 0.99 0.99 0.99 0.99 0.99 0.99 Leakage current 0.32 0.38 0.40 0.63 0.65 0.69... -
Page 58: Pxi/Pxie Specifications
PXI/PXIe specifications NOTE: Specifications are subject to change without notice. Electrical load regulation specifications Voltage (V) Load regulation (%) +3.3 <5 <5 Chassis cooling specifications Specification Value Module cooling system Forced air circulation (positive pressurization) through seven fans with High/Auto speed selector. Airflow From front to rear Pollution specifications... -
Page 59: System Synchronization Clock Specifications
Table 6: Base configuration 2 (m710x) Component Quantity Specification Cartridge m710x DIMMs/cartridge SATA M.2/cartridge 64 GB NVME M.2/cartridge PXI 6341 800 W AC The LWAd and LpAm when the system is operating in a 23°C ambient environment are provided in the following tables. - Page 60 NOTE: For other specifications, see 'PXI-1 Hardware Specification' at the PXI Systems Alliance website (http://www.pxisa.org/userfiles/files/Specifications/PXIHWSPEC22.pdf). 100 MHz system reference clock: PXIe_CLK100 and PXIe_SYNC100 Specification Value Maximum slot-to-slot skew 200 ps Accuracy ±25 ppm max (guaranteed over the operating temperature range) Maximum jitter 5 ps RMS phase jitter (10 Hz to 12 kHz range);...
-
Page 61: Websites
Websites General websites Hewlett Packard Enterprise Information Library www.hpe.com/info/EIL Single Point of Connectivity Knowledge (SPOCK) Storage compatibility matrix www.hpe.com/storage/spock Storage white papers and analyst reports www.hpe.com/storage/whitepapers For additional websites, see Support and other resources. Websites... -
Page 62: Support And Other Resources
Support and other resources Accessing Hewlett Packard Enterprise Support • For live assistance, go to the Contact Hewlett Packard Enterprise Worldwide website: http://www.hpe.com/assistance • To access documentation and support services, go to the Hewlett Packard Enterprise Support Center website: http://www.hpe.com/support/hpesc Information to collect •... -
Page 63: Customer Self Repair
www.hpe.com/support/AccessToSupportMaterials IMPORTANT: Access to some updates might require product entitlement when accessed through the Hewlett Packard Enterprise Support Center. You must have an HPE Passport set up with relevant entitlements. Customer self repair Hewlett Packard Enterprise customer self repair (CSR) programs allow you to repair your product. If a CSR part needs to be replaced, it will be shipped directly to you so that you can install it at your convenience. -
Page 64: Acronyms And Abbreviations
Acronyms and abbreviations chassis management Electromagnetic compatibility Integrated Lights-Out LpAm declared average bystander position A-Weighted sound pressure levels long-term evolution LWAd declared A-Weighted sound power levels peripheral component interconnect PCIe Peripheral Component Interconnect Express preboot execution environment PCI eXtensions for instrumentation PXIe PCI eXtensions for instrumentation express QSFP+... - Page 65 wireless wide area network Acronyms and abbreviations...
-
Page 66: Documentation Feedback
Documentation feedback Hewlett Packard Enterprise is committed to providing documentation that meets your needs. To help us improve the documentation, send any errors, suggestions, or comments to Documentation Feedback (docsfeedback@hpe.com). When submitting your feedback, include the document title, part number, edition, and publication date located on the front cover of the document.