Table of Contents
Advertisement
Quick Links
Advertisement
Table of Contents

Related Manuals for Brune HP25


Summary of Contents for Brune HP25
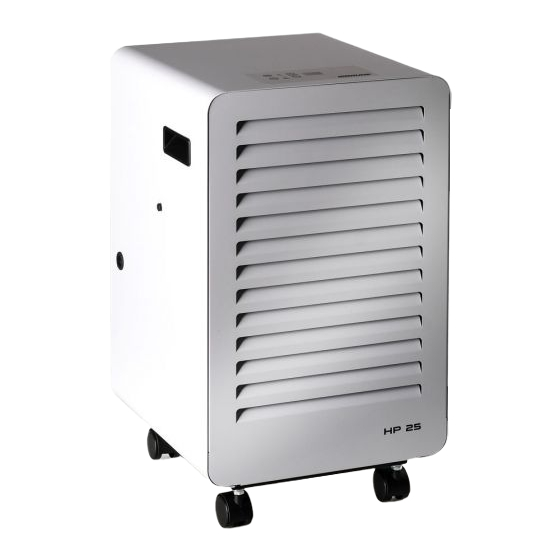
- Page 1 INSTRUCTIONS MANUAL [EN] HP25...
-
Page 2: Table Of Contents
CONTENTS PAGE 1. GENERAL SAFETY INFORMATION ..........................1 2. APPLIANCE RELEVANT SAFETY INFORMATION ......................13 3. GENERAL ADVICE ..............................15 4. DEHUMIDIFIER PRINCIPLES ............................15 5. INSTALLATION AND TRANSPORTATION ........................15 6. OPERATING INSTRUCTIONS ............................16 7. ELECTRONIC CONTROL ............................. 17 8. -
Page 3: General Safety Information
1. GENERAL SAFETY INFORMATION The operator must provide the user with the operating instructions and ensure that the user understands the contents. - The appliance contains a flammable refrigerant. - This is a natural refrigerant. - Read the supplied instructions/warnings. - Read the service manual. - Page 4 WARNING Risk of fire/flammable materials WARNINGS - Do not use means to accelerate the defrosting process or to clean, other than those recommended by the manufacturer. - The appliance shall be stored in a room without continuously operating ignition sources (for example: open flames, an operating gas appliance or an operating electric heater).
- Page 5 - Any person who is involved with working on or breaking into a refrigerant circuit should hold a current valid certificate from an industry-accredited assessment authority, which authorizes their competence to handle refrigerants safely in accordance with industry’s recognized assessment specification. - Servicing shall only be performed as recommended by the equipment manufacturer.
- Page 6 4. Checking for presence of refrigerant The area shall be checked with an appropriate refrigerant detector prior to and during work, to ensure the technician is aware of potentially flammable atmospheres. Ensure that the leak detection equipment being used is suitable for use with flammable refrigerants, i.e.
- Page 7 released refrigerant and preferably expel it externally into the atmosphere. 8. Checks to the refrigeration equipment Where electrical components are being changed, they shall be fit for the purpose and to the correct specification. At all times the manufacturer's maintenance and service guidelines shall be followed.
- Page 8 dealt with. If the fault cannot be corrected immediately but it is necessary to continue operation, an adequate temporary solution shall be used. This shall be reported to the owner of the equipment so all parties are advised. Initial safety checks shall include: - That capacitors are discharged: this shall be done in a safe manner to avoid possibility of sparking;...
- Page 9 flammable atmospheres. Replacement parts shall be in accordance with the manufacturer's specifications. NOTE: The use of silicon sealant may inhibit the effectiveness of some types of leak detection equipment. Intrinsically safe components do not have to be isolated prior to working on them. Repair to intrinsically safe components Do not apply any permanent inductive or capacitance loads to the circuit without ensuring that this will not exceed the permissible...
- Page 10 Leak detection methods The following leak detection methods are deemed acceptable for systems containing flammable refrigerants. Electronic leak detectors shall be used to detect flammable refrigerants, but the sensitivity may not be adequate, or may need re-calibration. (Detection equipment shall be calibrated in a refrigerant-free area.) Ensure that the detector is not a potential source of ignition and is suitable for the refrigerant used.
- Page 11 Remove refrigerant; Purge the circuit with inert gas; Evacuate; Purge again with inert gas; Open the circuit by cutting or brazing. The refrigerant charge shall be recovered into the correct recovery cylinders. The system shall be flushed with OFN to render the unit safe.
- Page 12 Extreme care shall be taken not to overfill the refrigeration system. Prior to recharging the system it shall be pressure tested with OFN. The system shall be leak tested on completion of charging but prior to commissioning. A follow up leak test shall be carried out prior to leaving the site.
- Page 13 f) Make sure that cylinder is situated on the scales before recovery takes place. g) Start the recovery machine and operate in accordance with manufacturer's instructions. h) Do not overfill cylinders. (No more than 80 % volume liquid charge). i) Do not exceed the maximum working pressure of the cylinder, even temporarily.
- Page 14 complete with pressure relief valve and associated shut-off valves in good working order. Empty recovery cylinders are evacuated and, if possible, cooled before recovery occurs. The recovery equipment shall be in good working order with a set of instructions concerning the equipment that is at hand and shall be suitable for the recovery of flammable refrigerants.
-
Page 15: Appliance Relevant Safety Information
2. APPLIANCE RELEVANT SAFETY INFORMATION ATTENTION This dehumidifier must not be used in rooms under the following conditions: - Potentially explosive atmosphere - Aggressive atmospheres - Featuring a high concentration of solvents - An extremely high ratio of dust Keep Unit Grounded: Always operate the unit with a grounding plug and a grounded electrical outlet. - Page 16 Keep Out of Water: Never operate the unit in pooled or standing water, as this may create a risk of injury from electrical shock. Do not store or operate outdoors. If electrical wiring or components become wet, thoroughly dry them before using the unit. If in doubt do not use the dehumidifier and consult a qualified technician or a vendors approved engineer.
-
Page 17: General Advice
3. GENERAL ADVICE Before putting your dehumidifier into operation for the first time, the instructions manual should be studied carefully. After receiving the unit, you should check your dehumidifier for any transport damage. In case of damage, you should inform the sender immediately. Transport damages should be stated after unpacking the equipment. -
Page 18: Operating Instructions
6. OPERATING INSTRUCTIONS ATTENTION - Operate the dehumidifier only in the upright position. - Plug in to a standard outlet with the correct voltage and amperage for the unit. - Allow five minutes before restarting after the unit shuts off for any reason. This will avoid damaging the compressor. - Check dehumidifier daily for correct operation. -
Page 19: Electronic Control
7. ELECTRONIC CONTROL This unit is equipped with an electronic control system. The individual LEDs and corresponding symbols have the following meaning: 1 - ON/OFF key (standby key) to switch the 4 - +/- key for setting the target humidity value dehumidifier on and off 2 - Operation indicator - LED lights up when the 5 - TANK indicator LED lights up ->... - Page 20 Empty the tank and make sure that it is correctly inserted in the machine. After a short delay, the unit will resume operation. If the tank is removed during operation, a beep is heard and the unit stops operating. 6) Display The display shows the current ACTUAL humidity as standard.
- Page 21 Coupling the radio humidity transmitter with the dehumidifier Menu Ad: Here you can couple the radio humidity transmitter to the unit. You can choose between 256 address codes. On the radio humidity transmitter, the setting is made with the 8-digit coding switch. You can find the corresponding address code in the unit in the enclosed list.
-
Page 22: Working With Direct Drainage
8. WORKING WITH DIRECT DRAINAGE This dehumidifier is supplied with a water tank fitted ex works with a threaded plug to drain the condensate. In addition, a hose connection for a 14 mm hose (9/16") is included in the scope of delivery, which allows the user to directly drain the water from the container into a water drain without pressure. -
Page 23: Working Mode With Condensate Pump (Option)
9. WORKING MODE WITH CONDENSATE PUMP (OPTION) Switch off the unit and disconnect the mains plug of the unit from the mains supply; Remove the water tank from the dehumidifier and empty it; Loosen the screw cap of the drain connection on the condensate pump. Place an 8 mm hose (inner diameter) of the desired length on the drain connection of the condensate pump, fix it by turning the screw cap and run it through the recess provided for this purpose on the side of the housing. -
Page 24: Electrical Connections
10. ELECTRICAL CONNECTIONS This dehumidifier was designed to operate in a 220-240 V~50Hz electrical installation. Make sure that the electric sockets are connected to earth and that all safety precautions are taken. 11. OPERATING CONDITIONS This dehumidifier can be operated within an ambient temperature range from +5 to +32°C and with a relative humidity from 35% to 90%. -
Page 25: Troubleshooting
13. TROUBLESHOOTING Trouble Cause Solution No power to the unit Plug in the unit; check power at outlet Unit does not operate Water tank must be emptied and Completely filled water tank installed again Under this condition the dehumidifier becomes Ambient temperature is lower than inefficient. -
Page 26: Electric Diagrams
15. ELECTRIC DIAGRAMS DEHUMIDIFIER ELECTRIC WIRING PUMP CONNECTION WIRING (OPTION) If a condensate pump is used, it must be connected to the socket under the water pan of the dehumidifier. Only then it is possible to turn it back on. The water pump is supplied via lines F and N. -
Page 27: Disposal
16. DISPOSAL In the European Union electronic equipment must not be treated as domestic waste. It must be disposed of professionally, in accordance with Directive 2019/19/EU of the European Parliament and Council of 4th July 2019 concerning old electrical and electronic equipment. - Page 28 Luftbefeuchtung Proklima GmbH Schwarzacher Straße 13 D-74858 Aglasterhausen Tel.: 06262/5454 Fax: 06262/3255 E-Mail: mail@brune.info Web: www.brune.info...