Table of Contents
Advertisement
Quick Links
OPERATING INSTRUCTIONS
MANUAL DE INSTRUCCIONES
MODE D'EMPLOI
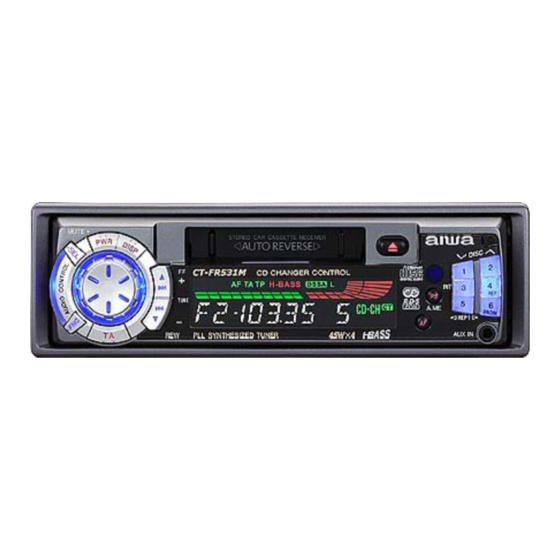
CT-FX531M
STEREO CAR CASSETTE RECEIVER
RADIO-CASSETTE ESTEREOFONICO PARA AUTOMOVIL
OWNER'S RECORD
For your convenience, record the model number and
serial number (you will find them on the bottom side of
your set) in the space provided below. Please refer to
them when you contact your AIWA dealer in case of
difficulty.
Model No. CT-FX531M
Serial No.
YU
ENGLISH
ESPAÑOL
FRANÇAIS
8B-KT9-901-01
001006ATM-OX
Advertisement
Table of Contents

Summary of Contents for Aiwa CT-FX531M
- Page 1 For your convenience, record the model number and serial number (you will find them on the bottom side of your set) in the space provided below. Please refer to them when you contact your AIWA dealer in case of difficulty. Model No. CT-FX531M Serial No.
-
Page 2: Installation And Connections
For some car types you may need to make adjustments or modifications to install the unit. If your car is of such type, consult your nearest AIWA car audio dealer. Mounting-angle adjustment The mounting angle should be 30 degrees or less from horizontal. - Page 3 Si su coche es de este tipo, consulte con su concesionario de audio para coches de AIWA más cercano. Ajuste del ángulo de montaje El ángulo de montaje debe ser de 30 grados o menos de la horizontal.
- Page 4 C To the input jack of the optional power puissance en option (pour le canal avant) amplifier (for the front channel) D Du changeur de disque compact AIWA en option D From the optional AIWA compact disc changer E Vers le câblage du véhicule...
- Page 5 À entrada do amplificador de potência opcional de AIWA E Al cableado del vehículo opcional (para o canal frontal) D Do CD changer opcional AIWA ADC-EX106, Colores de los cables 1 Negro (cable a tierra a conectar a la carrocería del ADC-M100 vehículo [metal].)
-
Page 6: Table Of Contents
PRECAUTIONS • Use only in a 12-volt DC negative-ground electrical system. • Disconnect the vehicle’s negative battery terminal while mounting and connecting the unit. • When replacing the fuse, be sure to use one with an identical amperage rating. Using a fuse with a higher amperage rating may cause serious damage to the unit. -
Page 7: Theft Protection
THEFT PROTECTION Take the front panel with you when leaving the car, and keep it in the supplied carrying case. Detaching the front panel Before detaching the front panel, remove the cassette to prevent possible damage to the unit. Press z to remove the cassette. Press and hold PWR/MUTE until the unit turns off. -
Page 8: Radio Operation
Adjusting sound You can select the following modes for adjusting sound depending on the music you listen to: BASS (low frequencies), TRE (high frequencies), BAL (left/right), FAD (front/rear), H-BASS (high bass)*, and DSSA (Drivers Sound Stage Adjustment)** * You can reinforce the bass sound. ** You can adjust sound stage and tone balance to best serve a particular seat in the car. - Page 9 Press FNC repeatedly to select the desired band (F1, F2, F3, A1 or A2). Press TUNEi (to move to higher frequencies) or TUNEk (to move to lower frequencies) to tune in to a station. “ST” appears in the display when an FM station is broadcasting in stereo, and receiving conditions are good.
-
Page 10: Tape Playback
Using the timer (My Information) You can schedule the radio to activate for daily radio programs. The unit automatically turns on and off in Radio mode at the scheduled times. Smart Jog MY INFO indicator Turn off the unit. Press and hold INFO until “PROGRAM” flashes in the display. -
Page 11: Auxiliary Equipment
Press the following buttons to operate tape transport. Eject a cassette* Change the playback side Stop fast-forwarding or rewinding and resume playback Fast-forward either side of the tape To resume playback, press the same button again Rewind either side of the tape To resume playback, press the same button again * When you eject the cassette, the unit switches to the... -
Page 12: Steering Wheel Remote Control
ENGLISH CD CHANGER OPERATION Playing a CD You can play CDs from a connected AIWA CD Changer. For detailed information on installing a CD Changer, refer to the Installation and Connection manual supplied with the CD Changer. CD Changer indicator CD number Press FNC repeatedly to display “CD-CH.”... -
Page 13: Troubleshooting
Printed in Indonesia...
