Grandstream Networks GDS3710 Configuration Manual
Hide thumbs
Also See for GDS3710:
- User manual (133 pages) ,
- Quick installation manual (47 pages) ,
- Connection manual (22 pages)
Table of Contents
Advertisement
Quick Links
Advertisement
Table of Contents

Related Manuals for Grandstream Networks GDS3710


Summary of Contents for Grandstream Networks GDS3710
- Page 1 Grandstream Networks, Inc. Connecting GDS3710 with WP820 Configuration Guide...
-
Page 2: Table Of Contents
Figure 3: Enable Direct IP Call ........................6 Figure 4: WP820 General Settings ....................... 6 Figure 5: WP820 SIP Settings ........................7 Figure 6: WP820 Connected to GDS3710 through UCM6XXX ..............8 Figure 7: SIP Basic Settings ......................... 9 Figure 8: Door System Settings ........................9 Figure 9: White List ............................. -
Page 3: Introduction
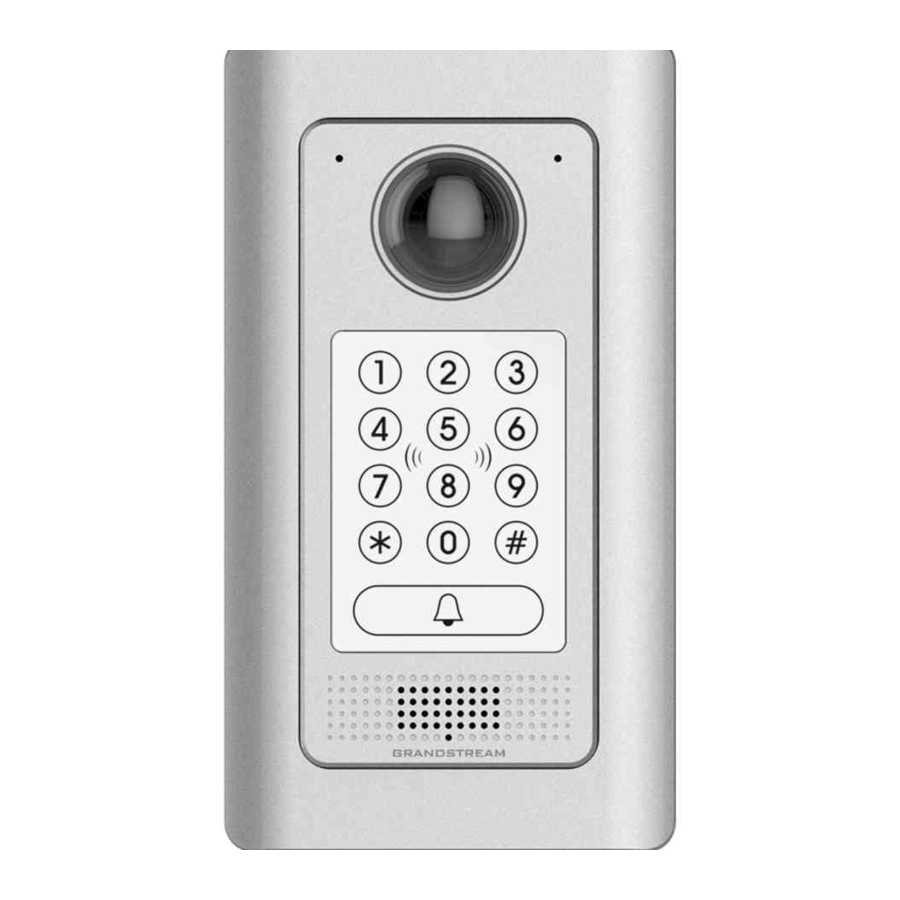
INTRODUCTION GDS3710 HD IP Video Door System is a hemispheric IP video door phone and a high-definition IP surveillance. GDS3710 is ideal for monitoring from wall to wall without blind spots. Powered by an advanced Image Sensor Processor (ISP) and state of the art image algorithms, it delivers exceptional performance in all lighting conditions. -
Page 4: Peering Scenario
PEERING SCENARIO We assume that the GDS3710 is installed on a small warehouse at front door and WP820 is connected to the same network via Wi-Fi using an access point (GWN7610 for instance). Employees can swipe the RFID card to get in, while visitors need to press the Door Bell to initial video call and the related person at the WP820 side need to type the key PIN to open the door remotely to allow the visitors to get in as shown in the figure below. -
Page 5: Figure 2: Door System Settings
GDS3710. 5. Click in order to apply changes. Make sure that the Direct IP Call feature is active from the GDS3710 WebGUI under “SIP Settings SIP Advanced Settings” then click on “Enable Direct IP Call”. P a g e... -
Page 6: Settings Configuration On The Wp820 Side
The WP820 related Account need to be set as “Active”, and correct “Local SIP Port” need to be configured at the GDS3710 side. These are the basic settings to make the peering scenario work. 1. On the WP820 Web GUI navigate under “Account General Settings” and set “Account Active”... -
Page 7: Figure 5: Wp820 Sip Settings
Figure 5: WP820 SIP Settings P a g e Connecting GDS3710 with WP820 Configuration Guide... -
Page 8: Connection Using Sip Server
CONNECTION USING SIP SERVER In case of multiple GDS3710 and WP820 are available, a SIP server needs to be set in order to communicate between different devices. Note: We recommend using Stateless SIP server in this type of installations, Stateful SIP servers may not work. -
Page 9: Figure 7: Sip Basic Settings
3. Number Called When Door Bell Pressed (assuming 1001 is the WP820 number). 4. Remote PIN to Open the Door. The following figure shows an example of the configuration done. Figure 8: Door System Settings P a g e Connecting GDS3710 with WP820 Configuration Guide... -
Page 10: White List Settings
White List Settings Any number calling the GDS3710 extension will have its call auto answered. To restrict allowed numbers to call the GDS3710, user needs to navigate under “SIP Settings White List”. 1. Check Enable White Number List. 2. Click on Add to add numbers allowed to dial the GDS3710. -
Page 11: Figure 11: Gds Settings On Wp820 Web Gui
GDS3710 stream will be played on the WP820 phone with the “Open” button that appears in the bottom of the screen. If users press the “open” button, a SIP message will be sent to the GDS3710 in order to open the door as shown below. -
Page 12: Figure 12: Open Door From Wp820
“0” to “9”). Then you need to click on “Confirm” to view the selected section and to go back to the call screen. Figure 13: Zoom options from WP820 P a g e Connecting GDS3710 with WP820 Configuration Guide...