
Related Manuals for Agilent Technologies HP E5574A


Summary of Contents for Agilent Technologies HP E5574A
- Page 1 sales@artisantg.com artisantg.com (217) 352-9330 | Click HERE Find the Keysight / Agilent E5574A at our website:...
- Page 2 This manual may contain references to HP or Hewlett-Packard. Please note that Hewlett- Packard's former test and measurement, semiconductor products and chemical analysis businesses are now part of Agilent Technologies. We have made no changes to this manual copy. The HP XXXX referred to in this document is now the Agilent XXXX.
- Page 3 HP E5574A Optical Loss Analyzer User’s Guide Artisan Technology Group - Quality Instrumentation ... Guaranteed | (888) 88-SOURCE | www.artisantg.com...
- Page 4 Notices Printing History software or interfacing, unau- Certification thorized modification or misuse, New editions are complete revi- Hewlett-Packard Company certi- This document contains proprie- operation outside of the environ- sions of the guide reflecting fies that this product met its pub- tary information that is protected mental specifications for the alterations in the functionality of...
- Page 5 HP E5574A Optical Loss Analyzer User’s Guide Artisan Technology Group - Quality Instrumentation ... Guaranteed | (888) 88-SOURCE | www.artisantg.com...
- Page 6 Safety Summary The following general safety precautions must be observed during all phases of operation, service, and repair of this instrument. Failure to comply with these precautions or with specific warnings elsewhere in this manual violates safety standards of design, manufacture, and intended use of the instrument.
- Page 7 Safety Summary • Do not operate the instrument in the presence of flammable gases or fumes. Operation of any electrical instrument in such an environment constitutes a definite safety hazard. • Do not install substitute parts or perform any unauthorized modification to the instrument.
- Page 8 Safety Summary Initial Safety Information for Laser Source The specifications for the laser source are as follows: E5574A Laser Type FP-Laser InGaAsP Laser Class According to IEC 825 (Europe) According to 21 CFR 1040.10 (Canada, Japan, USA) less than 500 µW Output Power (CW) 9 µm Beam Waist Diameter...
- Page 9 Safety Summary A sheet of laser safety warning labels is included with the laser module. You must stick the labels in the local language onto the outside of the instrument, in a position where they are clearly visible to anyone using the instrument. NOT E The Max.
- Page 10 Safety Summary instrument’s front panel. The laser is enabled by pressing S . The laser is enabled OURCE when the green LED on the front panel of the laser module is lit. WARNI NG Under no circumstances look into the end of an optical cable attached to the optical output when the device is operational.
- Page 11 Artisan Technology Group - Quality Instrumentation ... Guaranteed | (888) 88-SOURCE | www.artisantg.com...
- Page 12 In This Book The Structure of this Manual This manual is divided into four parts: • General information and guidelines in chapter 1. • The operating guide, describing how to use the instrument from the front panel, in chapters 2 to 7. •...
-
Page 13: Table Of Contents
Contents 1 Introducing the HP E5574A Optical Loss Analyzer 1.1 The Components of the OLA 23 1.2 What You Can Do With the OLA 24 Operational Modes 24 The OLA Applications 25 1.3 The OLA Front Panel Keys 26 The Softkeys 27... - Page 14 Contents Starting the Measurement 42 Checking the Measurement Conditions 43 Checking the Stability of the Setup 43 Repeating the PDL Measurement 43 Measuring PDL and Insertion Loss Simultaneously 44 Explanation of the Results 44 2.2 Measuring the Polarization Dependent Characteristics of Couplers 46 PD Coupler Test Measurement Setup 46 Starting the Measurement 47...
- Page 15 Contents Explanation of the Result 64 4 Testing Optical Couplers 4.1 Measuring Optical Coupler Characteristics 67 Coupler Test Measurement Setup 67 Starting the Measurement 68 Checking the Measurement Conditions 69 Checking the Stability of the Setup 69 Continuing the Coupler Test 70 Measuring the Directivity 71 Explanation of the Results 72 5 Measuring Power...
- Page 16 Contents Sweeping Through all States of Polarization 85 Setting a Reproducible State of Polarization 87 7 Instrument Settings and Software Status 7.1 Checking the General Instrument Settings 91 7.2 Checking the System Configuration 91 7.3 Checking the Software Status 92 8 HP-IB Programming 8.1 Introduction to Programming the OLA 95 The HP Interface Bus 95...
- Page 17 Contents 8.6 Programming Examples 159 Example 1 - Checking the Communication 159 Example 2 - Reading Power and Storing the Reference 160 A Installation and Maintenance Safety Considerations 165 Initial Inspection 165 AC Line Power Supply Requirements 166 Line Power Cable 166 Replacing the Fuse 168 Replacing the Battery 169 Environmental Specifications 170...
- Page 18 Contents Definitions of Terms 185 Technical Data, Product Specifications and Characteris- tics 188 D Performance Test Required Test Equipment 195 General 196 Setup and Performing the Performance Test 196 Setting the Wavelength 197 Test I. Center Wavelength 198 Test II. Output Power 199 Test III.
- Page 19 Contents Cleaning Procedures 228 Cleaning Cable Connectors 228 Cleaning Connector Adapters 230 Cleaning Connector Interfaces 231 Cleaning Bare Fiber Adapters 232 Cleaning Bare Fiber Ends 233 Cleaning Lenses 233 Cleaning Large Area Lenses and Mirrors 234 Cleaning Fixed Connector Interfaces 235 Cleaning Optical Glass Plates 236 Cleaning Physical Contact Interfaces 236 Cleaning Recessed Lens Interfaces 237...
- Page 20 Figures 1-1 The OLA Components 23 1-2 The OLA Front Panel 26 1-3 Select Application Display 27 1-4 Example of an Application Display 29 1-5 Preset Display 32 1-6 Setup for Measuring the Reference Power 35 2-1 Setup for PDL Measurements 41 2-2 Polarization Dependent Loss Display 42 2-3 Polarization Dependent Loss / Insertion Loss Display 44 2-4 Setup for PD Coupler Test 46...
- Page 21 Figures A-3 Releasing the Fuse Holder 168 A-4 The Fuse Holder 169 A-5 Correct Positioning of the HP E5574A 171 A-6 The HP-IB Connector 172 D-1 Center Wavelength Test Setup 198 D-2 Output Power Test Setup 199 D-3 CW-Stability Short Term Test Setup 200...
- Page 22 Tables 8-1 HP-IB Capabilities 96 8-2 EEE Common Commands 101 8-3 SCPI Standard STATUS Commands 102 8-4 Application Independent Commands 103 8-5 PDCT Specific Commands 103 8-6 IL Specific Commands 104 8-7 PDL/IL Specific Commands 104 8-8 Coupler Test Specific Commands 104 8-9 Return Loss Specific Commands 105 8-10 Powermeter Specific Commands 106 8-11 Min/Max Application Specific Commands 107...
-
Page 23: Introducing The Hp E5574A Optical Loss Analyzer
Introducing the HP E5574A Optical Loss Analyzer Artisan Technology Group - Quality Instrumentation ... Guaranteed | (888) 88-SOURCE | www.artisantg.com... - Page 24 Introducing the HP E5574A Optical Loss Analyzer In this chapter you will find basic information about the HP E5574A Optical Loss Analyzer (OLA). After reading this chapter you will know • how the instrument works, • which applications it supports, •...
-
Page 25: The Components Of The Ola
Introducing the HP E5574A Optical Loss Analyzer The Components of the OLA The Components of the OLA The HP E5574A Optical Loss Analyzer is a complete solution for the loss/gain characterization of active and passive optical components. The instrument has been optimized to measure the loss of optical fibers and components caused by different states of... -
Page 26: What You Can Do With The Ola
Introducing the HP E5574A Optical Loss Analyzer What You Can Do With the OLA The OLA consists of • one or two built-in Fabry-Perot laser sources, • a 3-dB optical coupler for the connection of an external source and for Return Loss measurements, •... -
Page 27: The Ola Applications
Introducing the HP E5574A Optical Loss Analyzer What You Can Do With the OLA • You can measure the optical power of any active optical device connected to one of the optical heads. • You can measure two optical powers simultaneously (which is mandatory for comparing active or passive optical devices and for measuring optical couplers). -
Page 28: The Ola Front Panel Keys
Introducing the HP E5574A Optical Loss Analyzer The OLA Front Panel Keys Return Loss (RL) You measure the fraction of power which is scattered back to the source by a component. Powermeter You measure the absolute or relative power of one or two light sources in dBm or Watts. -
Page 29: The Softkeys
Introducing the HP E5574A Optical Loss Analyzer The OLA Front Panel Keys The Softkeys The four keys below the display are softkeys (software controlled keys). Their meaning changes according to the instrument application you use. The current function of each softkey is indicated in the corresponding box on the display. -
Page 30: The Cursor Control Keys
Introducing the HP E5574A Optical Loss Analyzer The OLA Front Panel Keys With the softkeys, the cursor control keys, or the rotary knob you can choose any application. To start the highlighted application press or E or A once more. -
Page 31: The Rotary Knob
Introducing the HP E5574A Optical Loss Analyzer Operating the OLA When changing a numerical parameter, you can use these keys to move the cursor. The Rotary Knob The rotary knob performs like ↑ / ↓. It is especially useful if you want to increment or decrement a highlighted parameter value quickly and conveniently. -
Page 32: Help Is Available
Introducing the HP E5574A Optical Loss Analyzer Help is Available Please note: • The application may provide more options than are displayed. Press M to view any additional softkeys available. • The > in the upper right-hand corner of the window frame indicates, that a second page exists. -
Page 33: Getting Started
Introducing the HP E5574A Optical Loss Analyzer Getting Started Getting Started This section is intended to give you general advice. Details can be found in chapters 2 to 7, depending on the application chosen. Please follow these steps in the given order:... -
Page 34: General Instrument Settings
Introducing the HP E5574A Optical Loss Analyzer Getting Started General Instrument Settings The general instrument settings for display and sensitivity affect all subsequent measurements. How to Check the General Instrument Settings 1 Press P to check or change the general instrument settings. -
Page 35: Zeroing The Heads
Introducing the HP E5574A Optical Loss Analyzer Getting Started In refresh mode, this value can change as the measuring window is a sliding window which is updated continuously. However, the accuracy of the PDL value will not improve over time. -
Page 36: Storing The Reference Power
Introducing the HP E5574A Optical Loss Analyzer Getting Started How to Zero the Heads 1 Shield the optical head(s) from light. Do one of the following: • Screw the protection caps onto the heads. • Interrupt the signal path (e. g. by turning the source off). -
Page 37: Setup For Measuring The Reference Power
Introducing the HP E5574A Optical Loss Analyzer Getting Started How to Measure the Reference Power Coupler Internal Source(s) Pol. Ctrl. Signal Processing and Display 3 dB Head Input A Head Input A Head Input B Head Input B Optical Input... -
Page 38: Checking The Stability
Introducing the HP E5574A Optical Loss Analyzer Getting Started 3 Press A and activate “Powermeter”. 4 Check the “Head” parameter on the display. 5 Press B, respectively, to activate the head to which you have connected the optical output. 6 Check the power output value on the display. For the internal source it should be around –7.5 dBm. -
Page 39: How To Obtain Exact Results
Selection of the Optical Heads See the HP E5574A Technical Data sheet for information on the optical heads. Optical head HP 81521B opt. 001 is recommended for all polarization dependent measurements. -
Page 40: The Influence Of The Output Connector
Introducing the HP E5574A Optical Loss Analyzer How to Obtain Exact Results a specified polarization sensitivity of 0.003 dBpp for the measurement of polarization dependent power variations. If you are using the optical heads HP 81524A or HP 81525A, respectively, please note that these heads are not suitable for polarization dependent measurements. - Page 41 Taking Polarization Dependent Measurements Artisan Technology Group - Quality Instrumentation ... Guaranteed | (888) 88-SOURCE | www.artisantg.com...
-
Page 42: Taking Polarization Dependent Measurements
Taking Polarization Dependent Measurements This chapter provides information on how to measure the loss of an optical component or the changes of the characteristics of an optical coupler caused by different states of polarization. When you start one of the applications •... -
Page 43: Measuring Polarization Dependent Loss
Taking Polarization Dependent Measurements Measuring Polarization Dependent Loss Measuring Polarization Dependent Loss This section covers the use of the applications “Pol. Depend. Loss” and “PDL / Insert. Loss”. You can measure how the optical loss of passive components is affected by different states of polarization. PDL Measurement Setup Coupler Internal... -
Page 44: Starting The Measurement
Taking Polarization Dependent Measurements Measuring Polarization Dependent Loss 3 Activate the optical output. If you use the internal light source, press S OURCE turn the source on. The source indicator lamp must be lit. If you have connected an external light source to the optical input, press S to turn the internal source off. -
Page 45: Checking The Measurement Conditions
Taking Polarization Dependent Measurements Measuring Polarization Dependent Loss Checking the Measurement Conditions 1 If not already done, check the general instrument settings by pressing P RESET For highest resolution, the “Number of Digits” should read 0.1234 and “Low PDL” should be set. The “Mode” will affect the measuring method (see section 1.6 “Getting Started”... -
Page 46: Measuring Pdl And Insertion Loss Simultaneously
Taking Polarization Dependent Measurements Measuring Polarization Dependent Loss Measuring PDL and Insertion Loss Simultaneously ATTEN TI O N Before you measure Insertion Loss, you must at least measure and store the reference power P ref. If you have not yet stored the reference power, refer to page 31 in section 1.6 “Getting Started”. - Page 47 Taking Polarization Dependent Measurements Measuring Polarization Dependent Loss Averaged Insertion Loss The Insertion Loss is defined as ⋅ (dB) – ------------- - P ref You will notice a difference in readings for the insertion loss values measured with the applications “Insertion Loss” or “PDL / Ins. Loss”...
-
Page 48: Measuring The Polarization Dependent Characteristics Of Couplers
Taking Polarization Dependent Measurements Measuring the Polarization Dependent Characteristics of Couplers Measuring the Polarization Dependent Characteristics of Couplers This section covers the use of the application “PD Coupler Test”. You can measure how the Coupling Ratio, the Splitting Ratio and other parameters change with polarization. -
Page 49: Starting The Measurement
Taking Polarization Dependent Measurements Measuring the Polarization Dependent Characteristics of Couplers The same setup can be 1 Connect the optical output to input no. 1 of the device under test used for the standard (DUT). coupler test. 2 Connect optical head A to output no. 1 of the DUT. 3 Connect optical head B to output no. -
Page 50: Checking The Measurement Conditions
Taking Polarization Dependent Measurements Measuring the Polarization Dependent Characteristics of Couplers The display shows the measured values for the Polarization Dependent Coupling Ratio (PDCR) and the Polarization Dependent Splitting Ratio (PDSR). Checking the Measurement Conditions 1 If not already done, check the general instrument settings by pressing P RESET For highest resolution, the “No. -
Page 51: Continuing The Measurement
Taking Polarization Dependent Measurements Measuring the Polarization Dependent Characteristics of Couplers Continuing the Measurement 1 Press to display the measured values in percent. 2 Press to change the measuring unit to dB. 3 Press → to view the second page of the application. Page two shows the measured values for Polarization Dependent Loss (PDL) and Polarization Dependent Excess Loss (PDEL). -
Page 52: Explanation Of The Results
Taking Polarization Dependent Measurements Measuring the Polarization Dependent Characteristics of Couplers Explanation of the Results (P ref) (Head A) (Head B) Figure 2-7 Connection Scheme for Optical Couplers If this is your setup, you have measured the following parameters: Polarization Dependent Coupling Ratio PDCR = CR max –... - Page 53 Taking Polarization Dependent Measurements Measuring the Polarization Dependent Characteristics of Couplers Polarization Dependent Splitting Ratio PDSR = SR max – SR max = Out max / Out min = Out min / Out PDSR (%) = SR max (%) – SR min (%) PDSR (dB) = –...
- Page 54 Taking Polarization Dependent Measurements Measuring the Polarization Dependent Characteristics of Couplers Artisan Technology Group - Quality Instrumentation ... Guaranteed | (888) 88-SOURCE | www.artisantg.com...
- Page 55 Taking Standard Loss Measurements Artisan Technology Group - Quality Instrumentation ... Guaranteed | (888) 88-SOURCE | www.artisantg.com...
-
Page 56: Taking Standard Loss Measurements
Taking Standard Loss Measurements This chapter provides information on how to measure the Insertion Loss and the Return Loss of passive optical components. This chapter is divided into two sections: • Measuring the Insertion Loss • Measuring the Return Loss Artisan Technology Group - Quality Instrumentation ... -
Page 57: Measuring The Insertion Loss
Taking Standard Loss Measurements Measuring the Insertion Loss Measuring the Insertion Loss This section covers the use of the application “Insertion Loss” to measure the ratio of the optical power emerging from a device to the power launched into that device. Note: The attenuation of polarized light usually differs from the attenuation of unpolarized light. -
Page 58: Insertion Loss Measurement Setup
Taking Standard Loss Measurements Measuring the Insertion Loss Insertion Loss Measurement Setup Coupler Internal Source(s) Pol. Ctrl. Signal Processing and Display 3 dB Head Input A Head Input A Head Input B Head Input B Optical Input Optical Input Optical Output Optical Output Device under... -
Page 59: Starting The Measurement
Taking Standard Loss Measurements Measuring the Insertion Loss Starting the Measurement 1 Press A to activate the “Select Applications” menu. 2 Choose “Insertion Loss”. The OLA displays the Insertion Loss value almost immediately. Figure 3-2 Insertion Loss Display The value is updated automatically. Checking the Measurement Conditions 1 If not already done, check the general instrument settings by pressing P... -
Page 60: Checking The Stability Of The Setup
Taking Standard Loss Measurements Measuring the Return Loss Checking the Stability of the Setup 1 Press M 2 Press TABILITY 3 Check the stability value. Refer to page 31 in section 1.6 “Getting Started” for information on the stability value. 4 Press to return to the previous page and read the PDL. -
Page 61: Return Loss Calibration Setup
Taking Standard Loss Measurements Measuring the Return Loss Return Loss Calibration Setup Figure 3-3 Setup for Return Loss Calibration 1 Connect the optical head A to the optical input of the OLA. For best performance, the connector adaptors HP 81000AI and HP 81000AA together with the patchcord HP 81102AC are recommended. -
Page 62: Calibrating For Rl Measurements
Taking Standard Loss Measurements Measuring the Return Loss Calibrating for RL Measurements Instead of measuring the To calibrate the instrument for Return Loss measurements you have power transmitted to the DUT, you can use the • enter the assumed backreflection and assumed backreflection of a glass-to-air transition as •... -
Page 63: Return Loss Calibration Display
Taking Standard Loss Measurements Measuring the Return Loss 8 Press ALIBRATE Figure 3-5 Return Loss Calibration Display 9 Press –>P . The power reflected from the open end of the optical output and received by the optical head is stored as the reference power. -
Page 64: Return Loss Measurement Setup
Taking Standard Loss Measurements Measuring the Return Loss Return Loss Measurement Setup Coupler Internal Source(s) Pol. Ctrl. Signal Processing and Display 3 dB Head Input A Head Input A Head Input B Head Input B Optical Input Optical Input Optical Output Optical Output Device under... -
Page 65: Starting The Measurement
Taking Standard Loss Measurements Measuring the Return Loss Starting the Measurement The OLA measures the Return Loss automatically and continuously. Figure 3-7 Return Loss Display Before you record the value of the Return Loss on your test protocol, it is good practice to check the stability of your setup. Checking the Stability of the Setup 1 Press M 2 Press... -
Page 66: Explanation Of The Result
Taking Standard Loss Measurements Measuring the Return Loss Explanation of the Result The Return Loss is calculated according to the following formula: Return Loss (dB) = – 10 log [(P – P par) / (P ref – P par)] + RL ref Artisan Technology Group - Quality Instrumentation ... -
Page 67: Testing Optical Couplers
Testing Optical Couplers Artisan Technology Group - Quality Instrumentation ... Guaranteed | (888) 88-SOURCE | www.artisantg.com... - Page 68 Testing Optical Couplers This chapter provides information on how to measure the properties of optical couplers. It covers the application “Coupler Test”. You can measure the following parameters: • Coupling Ratio, which means the ratio of the power at one output to the total power of both outputs.
-
Page 69: Measuring Optical Coupler Characteristics
Testing Optical Couplers Measuring Optical Coupler Characteristics Measuring Optical Coupler Characteristics Coupler Test Measurement Setup The same setup can be Two optical heads are required to measure the properties of optical used for the polarization couplers. dependent coupler test. Coupler Internal Source(s) Pol. -
Page 70: Starting The Measurement
Testing Optical Couplers Measuring Optical Coupler Characteristics 1 Connect the optical output to input no. 1 of the device under test (DUT). 2 Connect optical head A to output no. 1 of the DUT. 3 Connect optical head B to output no. 2 of the DUT. 4 Activate the optical output. -
Page 71: Checking The Measurement Conditions
Testing Optical Couplers Measuring Optical Coupler Characteristics Checking the Measurement Conditions 1 If not already done, check the general instrument settings by pressing P (see section 1.6 “Getting Started” on page 31). RESET Press to return to the Coupler Test. REVIOUS 2 Check the “Head”... -
Page 72: Continuing The Coupler Test
Testing Optical Couplers Measuring Optical Coupler Characteristics Continuing the Coupler Test 1 Press to display the measured values in percent. 2 Press to change the measuring unit to dB. 3 Press → to view the second page of the application. Figure 4-3 Coupler Test Display, Page 2 Page two shows the measured values for Insertion Loss (IL) and... -
Page 73: Measuring The Directivity
Testing Optical Couplers Measuring Optical Coupler Characteristics Measuring the Directivity The Directivity is a measure of the isolation between the two input ports of the coupler. 1 Connect one of the heads to the secondary input of the coupler. 2 Check the “Head” parameter on the display. If it does not show the head to which you have connected the secondary input, press respectively. -
Page 74: Explanation Of The Results
Testing Optical Couplers Measuring Optical Coupler Characteristics Explanation of the Results (P ref) (Head A) (Head B) Figure 4-5 Connection Scheme for Optical Couplers If this is your setup, you have measured the following parameters: Coupling Ratio (%) = Out / (Out + Out (dB) = –... - Page 75 Measuring Power Artisan Technology Group - Quality Instrumentation ... Guaranteed | (888) 88-SOURCE | www.artisantg.com...
-
Page 76: Measuring Power
Measuring Power This chapter provides information on how to measure optical power, usually the power radiated by active optical devices. It covers the application “Powermeter”. If you activate the built-in Using one optical head you can measure: polarization controller, • The average power of a light source in dBm or W. you can also measure the power at different states of •... -
Page 77: Measuring Absolute And Relative Power
Measuring Power Measuring Absolute and Relative Power Measuring Absolute and Relative Power Powermeter Measurement Setup Coupler Internal Source(s) Pol. Ctrl. Signal Processing and Display 3 dB Head Input A Head Input A Head Input B Head Input B Optical Input Optical Input Optical Output Optical Output... -
Page 78: Starting The Measurement
Measuring Power Measuring Absolute and Relative Power Starting the Measurement 1 Press A to activate the “Select Applications” menu. 2 Choose “Powermeter”. The OLA begins to measure the optical power received by the optical head(s). Figure 5-2 Powermeter Display Checking the Measurement Conditions 1 If not already done, check the general instrument settings by pressing P (see section 1.6 “Getting Started”... -
Page 79: Storing A Reference Value
Measuring Power Measuring Absolute and Relative Power Wavelength The parameter λ shows the wavelength setting for best performance of the optical head(s). It will change if you turn the internal laser on or if you activate the secondary internal laser source by pressing 1550 or 1310, respectively. -
Page 80: Setting The Measurement Mode
Measuring Power Measuring Absolute and Relative Power Setting the Measurement Mode The “Mode” parameter explains the measured values on the screen. It shows two settings: • Left: The measurement mode of head A (the meaning of the A- value) • Right: The measurement mode of head B (the meaning of the B- value) The standard settings are: The A-value is the power measured at head A, the B-value is the power measured at head B. -
Page 81: Measuring The Fluctuation Of Optical Power
Measuring Power Measuring Absolute and Relative Power Measuring the Fluctuation of Optical Power You can measure the fluctuation of the optical power even if it is rather small compared to the average power radiated. You can specify the method of measurement and display and the number of samples to be taken into account. -
Page 82: Explanation Of The Results
Measuring Power Measuring Absolute and Relative Power maximal and minimal value is displayed. The next sample replaces the oldest value stored and the difference is calculated anew. The display is thus updated from sample to sample. By repeatedly pressing you can set the measurement and display mode to •... - Page 83 Using the OLA as a Laser Source and Polarization Controller Artisan Technology Group - Quality Instrumentation ... Guaranteed | (888) 88-SOURCE | www.artisantg.com...
-
Page 84: Using The Ola As A Laser Source And Polarization Controller
Using the OLA as a Laser Source and Polarization Controller This chapter provides information on how to use the OLA as a laser light source or as a controller to sweep or set the polarization of an external laser source. The chapter is divided into two sections: 1 How to use the OLA as a light source, and 2 How to use the OLA as a polarization controller. -
Page 85: Using The Ola As A Laser Source
Using the OLA as a Laser Source and Polarization Controller Using the OLA as a Laser Source Using the OLA as a Laser Source You can use the OLA to launch laser light into any optical fiber or device. Using the Internal Laser Depending on how the OLA was ordered, the instrument will comprise one or two built-in Fabry-Perot lasers, that deliver linear polarized laser light at the optical output with a power of about... -
Page 86: Using An External Source
Using the OLA as a Laser Source and Polarization Controller Using the OLA as a Polarization Controller Using an External Source You can perform all You can connect an external LED, laser, or white light source to the measurements with an optical input of the OLA. -
Page 87: Sweeping Through All States Of Polarization
Using the OLA as a Laser Source and Polarization Controller Using the OLA as a Polarization Controller Sweeping Through all States of Polarization When you start one of the applications • Pol. Depend. Loss, • PD Coupler Test, or • PDL / Insert. Loss, the built-in polarization controller begins to sweep automatically. -
Page 88: Polarization Controller Rate Settings Display
Using the OLA as a Laser Source and Polarization Controller Using the OLA as a Polarization Controller How to Change the Scan Rate If the automatic sweep of the polarization controller is on, the “Pol. Controller” screen displays the current scan rate. Figure 6-1 Polarization Controller Rate Settings Display You can change the scan rate within a range of 2 to 6 sweeps per... -
Page 89: Setting A Reproducible State Of Polarization
Using the OLA as a Laser Source and Polarization Controller Using the OLA as a Polarization Controller Setting a Reproducible State of Polarization If you have called the When the automatic sweep is off, the four paddles return to zero “Pol. - Page 90 Using the OLA as a Laser Source and Polarization Controller Using the OLA as a Polarization Controller Artisan Technology Group - Quality Instrumentation ... Guaranteed | (888) 88-SOURCE | www.artisantg.com...
- Page 91 Instrument Settings and Software Status Artisan Technology Group - Quality Instrumentation ... Guaranteed | (888) 88-SOURCE | www.artisantg.com...
-
Page 92: Instrument Settings And Software Status
Instrument Settings and Software Status This chapter provides information on how to check or change the current system parameters and how to get information about the state of the software installed. It mainly covers the functions of the key and the A key. -
Page 93: Checking The General Instrument Settings
Instrument Settings and Software Status Checking the General Instrument Settings Checking the General Instrument Settings The general instrument settings affect all subsequent measurements. Press P to check or change the general instrument settings. RESET You can change the number of digits to be displayed, the measurement and display mode, and the sensitivity. -
Page 94: Checking The Software Status
Instrument Settings and Software Status Checking the Software Status How to change the HP-IB address 1 You can change the instrument’s HP-IB address by pressing HPIB. 2 Use the rotary knob or the keypad to set the new address. 3 Press or E to store the new value. - Page 95 HP-IB Programming Artisan Technology Group - Quality Instrumentation ... Guaranteed | (888) 88-SOURCE | www.artisantg.com...
-
Page 96: Hp-Ib Programming
HP-IB Programming This chapter deals with the commands used for remote control of the Optical Loss Analyzer via the HP Interface Bus. It is assumed that you are already familiar with programming the HP-IB. This chapter is divided into four main sections: •... -
Page 97: Introduction To Programming The Ola
HP-IB Programming Introduction to Programming the OLA Introduction to Programming the OLA The interface used for remote control of the OLA is the HP-IB, the Hewlett-Packard Interface Bus. The HP Interface Bus The Hewlett-Packard Interface Bus is the interface used for communication between a controller and an external device, such as the OLA. -
Page 98: Setting The Hp-Ib Address
HP-IB Programming Introduction to Programming the OLA • The SCPI Consortium: Standard Commands for Programmable Instruments, published periodically by various publishers. To obtain a copy of this manual, contact your Hewlett-Packard representative. The OLA interfaces to the HP-IB as defined by the IEEE Standards 488.1 and 488.2. -
Page 99: Ola Specific Features
HP-IB Programming Introduction to Programming the OLA Local Mode The instrument is operated using the front panel keys. Remote After reception of the first command or query via the HP- IB, the instrument is put into remote state. The softkeys are erased. The right-hand softkey is replaced by . -
Page 100: How The Ola Processes Hp-Ib Commands
HP-IB Programming Introduction to Programming the OLA How the OLA Processes HP-IB commands The OLA maintains three queues for the communication with the HP-IB controller: • the input queue, • the output queue, and • the error queue. The Input Queue Incoming data are stored in the input queue. -
Page 101: Some Notes About Programming And Syntax Conventions
HP-IB Programming Introduction to Programming the OLA The Error Queue If a command or query cannot be processed successfully, an error message is placed in the error queue. Error messages consist of the error code and the error text. The error queue is a FIFO queue (first in - first out). It can hold up to 30 error messages. - Page 102 HP-IB Programming Introduction to Programming the OLA Command Syntax Used in this Manual Please observe the following guidelines: <...> The characters between angled brackets show the kind of data which you send with a command or which you receive upon a query.
-
Page 103: Command Summary
HP-IB Programming Command Summary Command Summary IEEE Common Commands The following commands conform to the IEEE standard 488.2. Table 8-2 EEE Common Commands Parameter/ Response Command Format Min Max Function *CLS Clear Status Command *ESE <value> 255 Event Status Enable Command *ESE? <value>... -
Page 104: Scpi Standard Status Commands
HP-IB Programming Command Summary SCPI Standard STATUS Commands The following commands control and reflect the status registers as defined by the IEEE standard 488 and the Standard Commands for Programmable Instruments (SCPI). Table 8-3 SCPI Standard STATUS Commands STAT:OPER? Returns the OPERation EVENt register contents STAT:OPER:COND? Returns the OPERation CONDition register contents... -
Page 105: Ola Specific Commands
HP-IB Programming Command Summary OLA Specific Commands Note: Commands marked with a “+” character exist with comparable behavior for the HP 8153A Lightwave Multimeter. Table 8-4 Application Independent Commands SENS:POW:HEAD? Returns information on a head SENS:FUNC Starts an application SENS:FUNC? Returns the current application SENS:FUNC:STAT? Returns the status of an application... - Page 106 HP-IB Programming Command Summary Table 8-6 IL Specific Commands SENS:DATA? IL Returns the IL value + SENS:POW:REF:DISP Stores the reference power + SENS:POW:REF:DISP? Returns the stored reference power SENS:POW:REF:DISP:HEAD? Returns the origin of the reference + SENS:POW:ATIM Sets the average time + SENS:POW:ATIM? Returns the average time Table 8-7 PDL/IL Specific Commands...
- Page 107 HP-IB Programming Command Summary Table 8-9 Return Loss Specific Commands ABOR Stops the polarization controller INIT Starts the polarization controller SENS:DATA? RL Returns the Return Loss value SENS:POW:REF Sets RL ref SENS:POW:REF? Returns the RL ref setting SENS:POW:REF:DISP:PREF Stores P ref SENS:POW:REF:DISP:PREF? Returns P ref SENS:POW:REF:DISP:PPAR...
- Page 108 HP-IB Programming Command Summary Table 8-10 Powermeter Specific Commands ABOR Stops the polarization controller INIT Starts the polarization controller PADD:POS Sets a paddle position PADD:POS? Returns a paddle position SCAN:RAT Sets the sweep speed SCAN:RAT? Returns the sweep speed SENS:DATA? POW Returns the power value SENS:FUNC:MINM Starts the Min/Max application...
-
Page 109: Ieee Common Commands
HP-IB Programming IEEE Common Commands Table 8-11 Min/Max Application Specific Commands SENS:DATA? MINM Returns the Min/Max value SENS:POW:WIND:MOD Sets the measurement window mode SENS:POW:WIND:MOD? Returns the measurement window mode SENS:POW:WIND:SIZ Sets the measurement window size SENS:POW:WIND:SIZ? Returns the measurement window size SENS:POW:ATIM? Returns the average time SENS:FUNC POW... -
Page 110: General Remarks
HP-IB Programming IEEE Common Commands General Remarks Common Status Information There are four registers for status information: • Status Byte register (STB) • Service Request Enable register (SRE) • Event Status Register (ESR) • Event Status Enable register (ESE) Two of these are status-registers and two are enable-registers. These registers conform to the IEEE Standard 488.2-1987. -
Page 111: Command Descriptions
HP-IB Programming IEEE Common Commands ATTEN TIO N Unused bits in any of the registers return 0 when you read them. The Request Service Bit in the Status Byte A service request (SRQ) occurs when a bit in the Status Byte register goes from 0 to 1 AND the corresponding bit in the Service Request Enable Mask is set. -
Page 112: Command *Ese
HP-IB Programming IEEE Common Commands command *ESE syntax *ESE<wsp><value> description The Event Status Enable command *ESE sets bits in the Event Status Enable register that enable the corresponding bit in the Event Status Register ESR. The register is cleared at power-on. The *RST and *CLS commands do not affect the register. -
Page 113: Bit
HP-IB Programming IEEE Common Commands command *ESR? syntax *ESR? description The Event Status Register query *ESR? returns the contents of the Event Status Register. The register is cleared after being read. The bit value for the register: 0 ≤ value ≤ 255. response Mnemonic Decimal Value... -
Page 114: Related Commands *Ese
HP-IB Programming IEEE Common Commands command *OPC syntax *OPC description The OPeration Complete command *OPC parses and executes all commands and queries in the input queue. When the contents of the input queue have been processed, the Operation Complete bit in the Event Status Register ESR is set. -
Page 115: Enter 724;A
HP-IB Programming IEEE Common Commands related commands *OPC, *WAI example OUTPUT 724;"*CLS;*ESE 1;*SRE 32" OUTPUT 724;"*OPC?" ENTER 724;A$ command *OPT? syntax *OPT? description The OPTions query *OPT? returns a string with the options installed in the OLA. There are two fields, separated by commas. response The two fields are: <Laser>,<Connector>... - Page 116 HP-IB Programming IEEE Common Commands command *RST syntax *RST description The ReSeT command *RST sets the instrument to the default setting stored in ROM. Pending *OPC/*OPC? actions are cancelled. The ReSeT command acts as follows: • selects the default laser (1310 nm if installed, 1550 nm else) •...
- Page 117 HP-IB Programming IEEE Common Commands command *SAV syntax *SAV<wsp><location description With the SAVe command *SAV the instrument setting is stored in RAM. You can store settings at locations 1 - 9. The scope of the saved setting is identical to the standard setting (see *RST). The RAM location: 1 ≤...
- Page 118 HP-IB Programming IEEE Common Commands example OUTPUT 724;"*SRE 48" command *SRE? syntax *SRE? description The Service Request Enable query *SRE? returns the contents of the Service Request Enable register. The value stored in the register: 0 ≤ value ≤ 255. See *SRE for response information on the Service Request Enable register.
- Page 119 HP-IB Programming IEEE Common Commands command *TST? syntax *TST? description The TeST query *TST? initiates a self-test and returns a result value. The self-test • switches the laser off • stops the automatic sweep of the polarization controller • activates the “Select Application” menu •...
-
Page 120: Standard Status Commands
HP-IB Programming Standard STATUS Commands Standard STATUS Commands This section gives a list of the OLA-commands and queries used for determining the status of the instrument. General Remarks The OLA uses two “nodes” which describe the status of the instrument: •... - Page 121 HP-IB Programming Standard STATUS Commands If the corresponding bits in the ENABle registers are set, changes in the OPERation EVENt register will change bit 7 of the Status Byte, changes in the QUEStionable EVENt register will change bit 3 (see Figure 8-1 on page 108).
-
Page 122: Command Descriptions
HP-IB Programming Standard STATUS Commands Command Descriptions command :STATus:OPERation:CONDition? syntax :STATus:OPERation:CONDiton? description This query reads the contents of the OPERation:CONDition register. Only two bits of the condition register are used. Mnemonic Bit Value Zeroing A Zeroing B example OUTPUT 724;":STAT:OPER:COND?" ENTER 724;A$ command :STATus:OPERation[:EVENt]? - Page 123 HP-IB Programming Standard STATUS Commands example OUTPUT 724;":STAT:OPER:ENAB 768" command :STATus:OPERation:ENABle? syntax :STATus:OPERation:ENABle? description This query returns the current contents of the OPERation:ENABle register. example OUTPUT 724;":STAT:OPER:ENAB?" ENTER 724;E$ command :STATus:OPERation:NTRansition syntax :STATus:OPERation:NTRansition<wsp><value> description This command sets the bits in the NTRansition register. Setting a bit in this register enables a negative transition (1 →...
- Page 124 HP-IB Programming Standard STATUS Commands command :STATus:OPERation:PTRansition? syntax :STATus:OPERation:PTRansition? description This query returns the current contents of the OPERation:PTRansition register. example OUTPUT 724;":STAT:OPER:PTR?" ENTER 724;P$ command :STATus:PRESet syntax :STATus:PRESet description This command presets all the enable registers and transition filters for both the OPERation and QUEStionable nodes: •...
- Page 125 HP-IB Programming Standard STATUS Commands command :STATus:QUEStionable[:EVENt]? syntax :STATus:QUEStionable[:EVENt]? description This query reads the contents of the QUEStionable:EVENt register. Only one bit of the event register is used (whether this bit contains information depends on the transition register configuration):. Mnemonic Bit Value Safety bit example...
- Page 126 HP-IB Programming Standard STATUS Commands command :STATus:QUEStionable:NTRansition syntax :STATus:QUEStionable:NTRansition XXXXXXXXXXX description This query returns the current contents of the QUEStionable:NTransition register. example OUTPUT 724;":STAT:QUES:NTR 0" command :STATus:QUEStionable:NTRansition? syntax :STATus:QUEStionable:NTRansition? description This query returns the current contents of the QUEStionable:NTransition register. example OUTPUT 724;":STAT:QUES:NTR?"...
-
Page 127: Ola Specific Commands
HP-IB Programming OLA Specific Commands OLA Specific Commands This section describes the commands used to operate the OLA remotely via its HP-IB interface. The commands and queries appear in alphabetical order. command :ABORt syntax :ABORt description The abort command stops the automatic sweep of the polarization controller. - Page 128 HP-IB Programming OLA Specific Commands errors The message “Wrong application for this command” is returned, if the present application is not Powermeter, Powermeter Min/Max, or Return Loss. example OUTPUT 724;":INIT" command :PADDle:POSition syntax :PADDle[1|2|3|4]:POSition<wsp><value|MIN|MAX> description The paddle positioning command sets the specified paddle (coil) of the polarization controller to the desired angle position.
- Page 129 HP-IB Programming OLA Specific Commands command :PADDle:POSition? syntax PADDle[1|2|3|4]:POSition? description The paddle position query returns the present position of the specified paddle (coil) of the polarization controller. It is only applicable to the applications • Powermeter, • Powermeter Min/Max, and •...
- Page 130 HP-IB Programming OLA Specific Commands Note: This command is only executed when the automatic sweep is on (see “:INITiate”). Value The value for the speed: 2 ≤ value ≤ 5. The default scan rate parameter is 5, the slowest is 2. MIN|MAX Instead of a value you can enter the keyword MIN (= 2) or MAX (= 5) respectively.
- Page 131 HP-IB Programming OLA Specific Commands example OUTPUT 724;":SCAN:RAT?" ENTER 724;A$ command :SENSe:CORRection:COLLect:ZERo syntax :SENSe[1|2]:CORRection:COLLect:ZERo description This command zeroes both optical heads (if attached). It is applicable to all applications. Note: The laser has to be switched off. The polarization controller stops automatically.
- Page 132 HP-IB Programming OLA Specific Commands command :SENSe:DATA? CR syntax :SENSe[1|2]:DATA?<wsp>CR description This query returns either the Coupling Ratio CR or the Polarization Dependent Coupling Ratio PDCR, depending on the application currently active. It is only applicable to the applications • Coupler Test, and •...
- Page 133 HP-IB Programming OLA Specific Commands errors The message “Wrong application for this command” is returned, if the present application is not Directivity. The message “No head connected” is returned, if there is only one or no optical head attached to the instrument. The message “No valid result possible”...
- Page 134 HP-IB Programming OLA Specific Commands command :SENSe:DATA? IL syntax :SENSe[1|2]:DATA?<wsp>IL description This query returns the Insertion Loss value. It is only applicable to the applications • Insertion Loss, • PDL/Insertion Loss, and • Coupler Test. parameter Reads head A Reads head B Default is 1.
- Page 135 HP-IB Programming OLA Specific Commands response The measured value in dB. Note: The delay between sending the command and receiving a response depends on the Window Size, the Window Mode and the Average Time. Worst case: Window Mode “refresh” Window Size 1000 Average Time T avg In this case the measurement will take 1000 s or approximately 17...
- Page 136 HP-IB Programming OLA Specific Commands errors The message “Wrong application for this command” is returned, if the present application is not one of those listed above. The message “No head connected” is returned, if there is no optical head attached to the specified channel. The message “No valid result possible”...
- Page 137 HP-IB Programming OLA Specific Commands related commands :SENSe:POWer:MEASuring:MODe, :SENSe:POWer:UNIT example OUTPUT 724;":SENS1:DATA? POW" ENTER 724;A$ command :SENSe:DATA? RL syntax :SENSe[1|2]:DATA?<wsp>RL description This query returns the Return Loss value. It is only applicable to the Return Loss application. parameter Reads head A Reads head B Default is 1.
- Page 138 HP-IB Programming OLA Specific Commands parameter Reads head A Reads head B Default is 1. response The measured value in dB or percent, depending on the current setting of the measurement unit (see “:SENSe:POWer:UNIT”). errors The message “Wrong application for this command” is returned, if the present application is not Coupler Test or Polarization Dependent Coupler Test.
- Page 139 HP-IB Programming OLA Specific Commands example OUTPUT 724;":SENS:FUNC PDL" OUTPUT 724;":SENS:FUNC STAB" OUTPUT 724;":SENS2:DATA? STAB" ENTER 724;A$ OUTPUT 724;":SENS:FUNC PDL" command :SENSe:FUNCtion syntax :SENSe[1|2]:FUNCtion[:ON]<wsp><application|value> description This command starts the specified application. It corresponds to pressing the A key and choosing an application from the “Select Application”...
- Page 140 HP-IB Programming OLA Specific Commands Note: • The Stability application cannot be started from the “Select Application” menu application, from the Powermeter application, or from the Powermeter Min/Max application. • To return to the Powermeter application from the Min/Max application, you have to restart the Powermeter application by first sending the command :SENS:FUNC MAIN and then sending the command :SENS:FUNC POW.
- Page 141 HP-IB Programming OLA Specific Commands response A character string like “PDL”, “STAB” etc. For the meaning of the mnemonic see “:SENSe:FUNCtion”. Note: The response may also indicate “SYST” for System settings or “AUX” for Auxiliary Information, though these instrument functions cannot be activated or operated via the HP-IB. related commands :SENSe:FUNCtion, :SENSe:FUNCtion:STATe? example...
- Page 142 HP-IB Programming OLA Specific Commands response A boolean value: Application is inactive Application is active related commands :SENSe:FUNCtion, :SENSe:FUNCtion? example OUTPUT 724;":SENS:FUNC:STAT? 3" ENTER 724;A$ command :SENSe:POWer:ATIMe syntax :SENSe[1|2]:POWer:ATIMe<wsp><value>[unit] description This command sets the time interval used for averaging power measurements.
- Page 143 HP-IB Programming OLA Specific Commands command :SENSe:POWer:ATIMe? syntax :SENSe[1|2]:POWer:ATIMe? description This query returns the current setting of the time interval used for averaging power measurements. It can be used any time. parameter 1|2 The channel parameter 1 or 2 may be present, but is ignored. response The average time is returned as a number in exponential format: 2E-2, 2E-1, or 1.
- Page 144 HP-IB Programming OLA Specific Commands command :SENSe:POWer:CALC:MODe? syntax :SENSe[1|2]:POWer:CALC:MODe? description This query returns the current setting of the measurement and display mode for the polarization dependent applications. It can be used any time. parameter 1|2 The channel parameter 1 or 2 may be present, but is ignored. response A boolean value: Refresh...
- Page 145 HP-IB Programming OLA Specific Commands command :SENSe:POWer:MEASuring:MODe syntax :SENSe[1|2]:POWer:MEASuring:MODe<wsp><mode> description This command sets the power measurement mode for the specified channel. It is only applicable to the Powermeter application. Note: The command which returns a result is :SENS:DATA? POW. parameters 1 Sets head A 2 Sets head B Default is 1.
- Page 146 HP-IB Programming OLA Specific Commands command :SENSe:POWer:MEASuring:MODe? syntax :SENSe[1|2]:POWer:MEASuring:MODe? description This query returns the current measurement mode of the specified channel. It is only applicable to the Powermeter application. parameters Reads the mode of head A Reads the mode of head B Default is 1.
- Page 147 HP-IB Programming OLA Specific Commands command :SENSe:POWer:OPTimize? syntax :SENSe[1|2]:POWer:OPTimize? parameters 1|2 The channel parameter 1 or 2 may be present, but is ignored. description This query returns the current optimization status of the OLA. Note: The optimization affects only the temperature controlled heads of type HP 81521B opt.
- Page 148 HP-IB Programming OLA Specific Commands command :SENSe:POWer:REFerence:DISPlay syntax :SENSe[1|2]:POWer:REFerence:DISPlay description This command stores the value currently measured and displayed as the new reference value (usually the source power). It is only applicable to the applications • Insertion Loss, • PDL/Insertion Loss, •...
- Page 149 HP-IB Programming OLA Specific Commands command :SENSe:POWer:REFerence:DISPlay:HEAD? syntax :SENSe[1|2]:POWer:REFerence:DISPlay:HEAD? description This query informs you whether the reference value has been taken with the specified head. It is only applicable to the applications • Insertion Loss, • PDL/Insertion Loss, • Coupler Test, •...
- Page 150 HP-IB Programming OLA Specific Commands command SENSe:POWer:REFerence:DISPlay:PPAR syntax SENSe[1|2]:POWer:REFerence:DISPlay:PPAR description This command stores the value currently measured and displayed as the power of parasitic reflections. It is only applicable to the Return Loss application. parameter Reads head A Reads head B Default is 1.
- Page 151 HP-IB Programming OLA Specific Commands command :SENSe:POWer:REFerence:DISPlay:PREF syntax :SENSe[1|2]:POWer:REFerence:DISPlay:PREF description This command stores the value currently measured and displayed as the Return Loss reference power. It is only applicable to the Return Loss application. parameter Reads head A Reads head B Default is 1.
- Page 152 HP-IB Programming OLA Specific Commands command :SENSe:POWer:REFerence:DISPlay? syntax :SENSe[1|2]:POWer:REFerence:DISPlay? description This query returns the stored reference value of the specified channel. It is only applicable to the applications • Insertion Loss, • PDL/Insertion Loss, • Coupler Test, • Directivity, and •...
- Page 153 HP-IB Programming OLA Specific Commands related commands :SENSe:POWer:REFerence errors The message “Wrong application for this command” is returned, if the present application is not Return Loss. example OUTPUT 724;":SENS:POW:REF?" ENTER 724;A$ command :SENSe:POWer:UNIT syntax :SENSe[1|2]:POWer:UNIT<wsp><unit> description This command sets the specified measurement unit. The units dBm and Watt are only applicable to the Powermeter application.
- Page 154 HP-IB Programming OLA Specific Commands errors The message “Wrong application for this command” is returned, if you send DBM|W|0|1 and the current application is not Powermeter. The same message is returned, if you send PERCent|DB|2|3 and the current application is not Coupler Test or Polarization Dependent Coupler Test.
- Page 155 HP-IB Programming OLA Specific Commands When the Coupler Test or PD Coupler Test application is active: Measurement unit % for CR, PDCR, SR, and PDSR Measurement unit dB for CR, PDCR, SR, and PDSR related commands :SENSe:POWer:UNIT, :SENSe:DATA? POW, :SENSe:DATA? CR, :SENSe:DATA? SR example OUTPUT 724;":SENS1:POW:UNIT?"...
- Page 156 HP-IB Programming OLA Specific Commands command :SENSe:POWer:WAVelength? syntax :SENSe[1|2]:POWer:WAVelength? description This query returns the current wavelength setting. parameter 1|2 The channel parameter 1 or 2 may be present, but is ignored. The wavelength is valid for both channels. response The wavelength is returned as a floating point number in exponential format, e.g.
- Page 157 HP-IB Programming OLA Specific Commands example OUTPUT 724;":SENS:POW:WIND:MOD REFR" command :SENSe:POWer:WINDow:MODe? syntax :SENSe[1|2]:POWer:WINDow:MODe? description This query returns the current mode of the window used for collecting the samples for the Min/Max determination. It is only applicable to the Powermeter Min/Max application. parameter 1|2 The channel parameter 1 or 2 may be present, but is ignored.
- Page 158 HP-IB Programming OLA Specific Commands related commands :SENSe:POWer:WINDow:SIZe? errors The message “Wrong application for this command” is returned, if the present application is not Powermeter Min/Max. example OUTPUT 724;":SENS:POW:WIND:SIZ 500" command :SENSe:POWer:WINDow:SIZe? syntax :SENSe[1|2]:POWer:WINDow:SIZe? description This query returns the dimension of the window used for collecting the samples for the Min/Max determination.
- Page 159 HP-IB Programming OLA Specific Commands command :SOURce:POWer:STATe? syntax :SOURce:POWer:STATe? description This query returns the current state of the internal laser source. response A boolean value: The internal source is off. The internal source is on. related commands :SOURce:POWer:STATe example OUTPUT 724;":SOUR:POW:STAT?" ENTER 724;A$ command :SOURce:POWer:WAVelength...
- Page 160 HP-IB Programming OLA Specific Commands example OUTPUT 724;":SOUR:POW:WAV?" ENTER 724;A$ command :SYSTem:ERRor? syntax :SYSTem:ERRor? description This query returns the oldest error message in the error queue. The error message returned is erased from the queue. To clear the error queue, you have to issue the query repeatedly. response The response includes the error code number and the error text string, separated by a comma, e.g.
- Page 161 Example 1 - Checking the Communication Function This program sends two queries and displays the responses. Listing !--------------------------------------------------------------- ----- ! HP E5574A OLA Programming Example 1 ! A Simple Communications Check !--------------------------------------------------------------- ----- ! Definitions and Initializations OLA=724 ! The first 7 is to access the HP-IB card in the controller, ! the 24 is the HP-IB address of the OLA.
- Page 162 This program measures and displays the source power and stores it as the reference power. Listing !--------------------------------------------------------------- ----- ! HP E5574A OLA Programming Example 2 ! Measuring Power and Storing the Reference !--------------------------------------------------------------- ----- Artisan Technology Group - Quality Instrumentation ... Guaranteed | (888) 88-SOURCE | www.artisantg.com...
- Page 163 HP-IB Programming Programming Examples ! Definitions and Initializations OLA=724 ! The first 7 is to access the HP-IB card in the controller, ! the 24 is the HP-IB address of the OLA. REAL Diff,Value1,Value2 CLEAR SCREEN PRINT TABXY(5,10);"Programming Example 2, Measuring Power" PRINT TABXY(5,13);"Value: dBm"...
- Page 164 HP-IB Programming Programming Examples OUTPUT OLA;":SENS1:POW:REF:DISP" Artisan Technology Group - Quality Instrumentation ... Guaranteed | (888) 88-SOURCE | www.artisantg.com...
- Page 165 Installation and Maintenance Artisan Technology Group - Quality Instrumentation ... Guaranteed | (888) 88-SOURCE | www.artisantg.com...
- Page 166 Installation and Maintenance This appendix provides installation instructions for the E5574A. It also includes information about initial inspection and damage claims, preparation for use, packaging, storage, and shipment. Artisan Technology Group - Quality Instrumentation ... Guaranteed | (888) 88-SOURCE | www.artisantg.com...
- Page 167 Appendix A. Installation and Maintenance Safety Considerations Safety Considerations The E5574A is a Class 1 instrument (that is, an instrument with an exposed metal chassis directly connected to earth via the power supply cable). The shown symbol is used to indicate a protective earth terminal in the instrument.
- Page 168 AC Line Power Supply Requirements AC Line Power Supply Requirements The HP E5574A can operate from any single-phase AC power source that supplies between 100V and 240V at a frequency in the range from 50 to 60Hz. The maximum power consumption is 100VA with all options installed.
- Page 169 To avoid the possibility of injury or death, please note that the HP E5574A does not have a floating earth. The HP E5574A is not designed for outdoor use. To prevent potential fire or shock hazard, do not expose the instrument to rain or other excessive moisture.
-
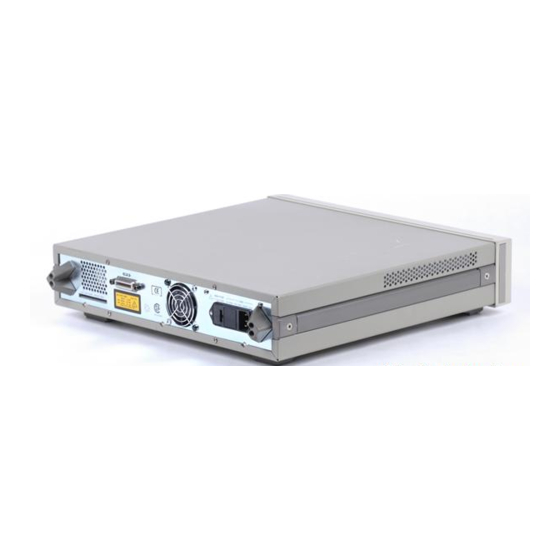
Page 170: Rear Panel Markings
Appendix A. Installation and Maintenance AC Line Power Supply Requirements The AC power requirements are summarized on the rear panel of the instrument. ISM GROUP 1 CLASS B Figure A-2 Rear Panel Markings Replacing the Fuse There is one fuse in this instrument. This is a T1.5A/250V (time- lag) (HP Part No. -
Page 171: The Fuse Holder
Appendix A. Installation and Maintenance AC Line Power Supply Requirements 2 Pull the fuse holder out of the instrument. Figure A-4 The Fuse Holder 3 Check and replace the fuse as necessary making sure that the fuse is always in the top position of the fuse holder, and the bridge is in the bottom. - Page 172 Appendix A. Installation and Maintenance Environmental Specifications Environmental Specifications The following summarizes the HP E5574A operating environment ranges. In order for the instrument to meet specifications, the operating environment must be within these limits. NOTE Protect the instrument from temperature extremes and changes in temperature that may cause condensation within it.
-
Page 173: Correct Positioning Of The Hp E5574A
Optical Output More Active Figure A-5 Correct Positioning of the HP E5574A Optical Output CAUTI ON Make sure that you only use the correct cables with your chosen output. Artisan Technology Group - Quality Instrumentation ... Guaranteed | (888) 88-SOURCE | www.artisantg.com... -
Page 174: The Hp-Ib Connector
Appendix A. Installation and Maintenance HP-IB Interface HP-IB Interface You can connect your HP-IB interface into a star network, a linear network, or a combination star and linear network. The limitations imposed on this network are as follows: • The total cable length cannot exceed 20 meters •... - Page 175 Appendix A. Installation and Maintenance HP-IB Interface CAUTI ON HP products delivered now are equipped with connectors having ISO metric-threaded lock screws and stud mounts (ISO M3.5 x 0.6) that are black in color. Earlier connectors may have lock screws and stud mounts with imperial-threaded lock screws and stud mounts (6-32 UNC) that have a shiny nickel finish.
- Page 176 Appendix A. Installation and Maintenance Claims and Repackaging Claims and Repackaging If physical damage is evident or if the instrument does not meet specification when received, notify the carrier and the nearest Hewlett-Packard Service Office. The Sales/Service Office will arrange for repair or replacement of the unit without waiting for settlement of the claim against the carrier.
- Page 177 Accessories Artisan Technology Group - Quality Instrumentation ... Guaranteed | (888) 88-SOURCE | www.artisantg.com...
- Page 178 Accessories The HP E5574A is a high performance optical loss analyzer for measurements on single-mode optical components. It is available in various configurations for the best possible match to the most common applications. This appendix provides information on the available options and accessories.
- Page 179 Appendix B. Accessories Instrument and Options Instrument and Options Model No. Description HP E5574A Optical Loss Analyzer including one HP 81521B #001 optical head Option 013 Fabry Perot Laser Source 1310 nm Option 015 Fabry Perot Laser Source 1550 nm...
- Page 180 Appendix B. Accessories HP-IB Cables and Adapters HP-IB Cables and Adapters The HP-IB connector is compatible with the connectors on the following cables and adapters. Model No. Description HP 10833A HP-IB Cable 1 m (3.3 ft.) HP 10833B HP-IB Cable 2 m (6.6 ft.) HP 10833C HP-IB Cable 4 m (13.2 ft.) HP 10833D...
- Page 181 Appendix B. Accessories Connector Interfaces and Other Accessories Connector Interfaces and Other Accessories The Optical Loss Analyzer is supplied with one of three output connector interface options: • Fiber Pigtail output with an FC/PC connector • Straight contact • Angled contact ATTEN TIO N The optical input always requires angled connectors.
- Page 182 Appendix B. Accessories Connector Interfaces and Other Accessories Model No. Description HP 81000GI HP 81000KI HP 81000SI DIN 47256 HP 81000VI HP 81000WI Biconic Angled Contact Connector If you want to use angled contact connectors to connect to the instrument, you must 1 attach your connector interface (see list of connector interfaces below) to the interface adapter, 2 then connect your cable.
- Page 183 Appendix B. Accessories Connector Interfaces and Other Accessories Model No. Description HP 81000GA NEC D4 HP 81000KA HP 81000SA DIN 47256/4108 HP 81000VA HP 81000WA Biconic Rack Mount Options Model No. Description P/N 5062-3988 Front Handle Kit P/N 5062-3974 Rack Mount Flange Kit Artisan Technology Group - Quality Instrumentation ...
- Page 184 Appendix B. Accessories Connector Interfaces and Other Accessories Artisan Technology Group - Quality Instrumentation ... Guaranteed | (888) 88-SOURCE | www.artisantg.com...
- Page 185 Specifications Artisan Technology Group - Quality Instrumentation ... Guaranteed | (888) 88-SOURCE | www.artisantg.com...
- Page 186 Specifications Artisan Technology Group - Quality Instrumentation ... Guaranteed | (888) 88-SOURCE | www.artisantg.com...
- Page 187 Appendix C. Specifications Definitions of Terms Definitions of Terms Output Power The output power at the specified wavelength, measured at the end of the pigtail (#020) or at the end of a jumper cable (#021 and #022), assuming specified HP connector interfaces and patchcords. Connectors and patchcords must be absolutely clean and undamaged.
- Page 188 Appendix C. Specifications Definitions of Terms where σ is the “RMS spectral width”, to be calculated with the help of the power and wavelength of each spectral component: σ Σ P × λ λ ⁄ – total Nonlinearity When changing the displayed power level from the reference level, , to an arbitrary displayed level, D , the nonlinearity, N, is the relative difference between the displayed power ratio, D...
- Page 189 Appendix C. Specifications Definitions of Terms Repeatability of PDL/PDG The uncertainty in reproducing a PDL/PDG measurement result with unchanged conditions (without moving the fibres or disconnecting the connectors). The repeatability is half the span between the maximum and minimum value of all differences. Absolute PDCR uncertainty The PDCR uncertainty includes all random and systematic uncertainties from the source, the polarization controller and the...
- Page 190 [4] For single-mode fiber with NA ≤ 0.1, straight fiber end, 1250 – 1570 nm. [5] with HP E5574A, setting optimized to DYNAMIC. [6] with HP E5574A, setting optimized to PDL and with HP 8153A. Artisan Technology Group - Quality Instrumentation ... Guaranteed | (888) 88-SOURCE | www.artisantg.com...
- Page 191 Appendix C. Specifications Technical Data, Product Specifications and Characteristics Absolute Power Measurement Specifications Optical Head 81521B #001 81521B 81524A 81525A Sensor element Ge, 5 mm InGaAs, 5 mm Wavelength range 900 – 1700 nm 800 – 1650 nm Power range +3 to –80 dBm +3 to –80 dBm +3 to –90 dBm...
- Page 192 Appendix C. Specifications Technical Data, Product Specifications and Characteristics Insertion Loss/Gain and Coupling Ratio Measurement Specifications Laser Source Option 013 Option 015 Option 135 Type Fabry Perot Laser with built-in isolator 1310 ±20 nm 1550 ±20 nm 1310/1550 ±20 nm Central wavelength single-mode, 9/125 µm Fiber type...
- Page 193 Appendix C. Specifications Technical Data, Product Specifications and Characteristics Polarization Dependent Loss (PDL), Gain (PDG) and Coupling Ratio (PDCR) Measurement Specifications Specifications are measured with internal source and optical head HP 81521B #001. 1310 ±20 nm and/or 1550 ±2 0nm Central wavelength (with internal source) Wavelength range...
- Page 194 Appendix C. Specifications Technical Data, Product Specifications and Characteristics Supplementary Performance Characteristics Return Loss Can be measured with internal source up to typically ± 55 dB with 1 dB accuracy. General Recalibration period: 2 years. Warm-up time to meet accuracy specifications: 60 min. for instrument, 5 min with laser on. HP-IB Capability All modes and parameters can be programmed, SCPI command set, HP 8153A lightwave multimeter compliant command set where applicable.
- Page 195 Performance Test Artisan Technology Group - Quality Instrumentation ... Guaranteed | (888) 88-SOURCE | www.artisantg.com...
- Page 196 Performance Test Use the Performance Test to verify the instruments warranted performance. Artisan Technology Group - Quality Instrumentation ... Guaranteed | (888) 88-SOURCE | www.artisantg.com...
- Page 197 Appendix D. Performance Test Required Test Equipment Required Test Equipment Instrument or Recommended Model Required Characteristic Quantity Accessories #20 #21 #22 Optical Spectrum Analyzer HP 75450A #101 Standard Lightwave HP 8153A Multimeter Mainframe Standard Optical Head HP 81533B Interface Module Uncertainty ±1.5% Standard Optical Head HP 81521B...
- Page 198 Appendix D. Performance Test General [1] If 2 Optical Heads are part of the DUT the quantity for all options changes to 2. General Setup and Performing the Performance Test • The performance test includes only tests with HP 81521B #001 Optical Head.
- Page 199 Setting the Wavelength Set the wavelength according to the laser option of your HP E5574A and perform the tests that you want to carry out. After setting the wavelength allow the laser to settle about 5 minutes. How to Set the Wavelength...
-
Page 200: Center Wavelength Test Setup
Appendix D. Performance Test Test I. Center Wavelength Test I. Center Wavelength 1 Set up and switch on the equipment: a Connect the equipment as shown in Figure D-1. HP E5574 Optical Loss Analyzer Optical Spectrum Analyzer Head A Head B Input Output Optical Interface... -
Page 201: Output Power Test Setup
Appendix D. Performance Test Test II. Output Power b Press S INGLE WEEP If the curve on the display is not clear, you can change resolution by using the S key and the Vernier knob. 5 From the displayed measurements check and note the value for the Mean Wavelength in the test record. -
Page 202: Cw-Stability Short Term Test Setup
Appendix D. Performance Test Test III. CW-Stability Short Term d Unmount the protection cap and connect the equipment as shown in Figure D-3. 3 Set up the HP 8153A: a Select Auto Range: Press A b Select averaging time to 100ms: Press P until the averaging time is displayed. - Page 203 Appendix D. Performance Test Test III. CW-Stability Short Term b Ensure that the instruments have warmed up and that the laser has settled. 2 Zero the HP 8153A: a Mount the protection cap on the head in order to keep the light out.
-
Page 204: Accuracy Test Setup
Note the displayed value in your test record. Test IV. Linearity and Accuracy The following steps describe the procedure for performing the accuracy test for the HP E5574A / 81521B#001: HP 8153A / 1 HP 8153A / 2 Standard Lightwave Multimeter... - Page 205 Appendix D. Performance Test Test IV. Linearity and Accuracy 1 Make sure that the cable connectors, lenses and detector windows are clean. Refer to the cleaning procedure. 2 Connect the equipment as shown in Figure D-4. (If a second HP 81521B #001 Head is part of your OLA repeat the test with this Head).
-
Page 206: Linearity Test Setup
Appendix D. Performance Test Test IV. Linearity and Accuracy The following steps describe the procedure to perform the linearity test for the HP E5574A / 81521B#001: HP 8153A Standard Lightwave Multimeter HP 8156 Attenuator Depending on Standard Optical Head Option of the... - Page 207 Appendix D. Performance Test Test IV. Linearity and Accuracy 5 Alter the attenuation until the HP 8153A displays –17.4dBm. a At the Attenuator: Press A and use the modify cursor keys to alter the attenuation. 6 On the HP 8153A: a Press D –>R then...
-
Page 208: Pdl/Pdg Uncertainty Test Setup
Appendix D. Performance Test Test V. PDL/PDG uncertainty (#020 only) Test V. PDL/PDG uncertainty (#020 only) The absolute PDL/PDG uncertainty is the maximum value of several PDL measurement when changing the alignment of the PDL generating components. 1 Set up and switch on the equipment: a Connect the equipment as shown in Figure D-6. -
Page 209: Example Drawings
Appendix D. Performance Test Test V. PDL/PDG uncertainty (#020 only) a Mount the protection cap on the head in order to keep the light out. b Press Press and wait while zeroing. d Unmount the protection cap and connect the equipment as shown in Figure D-6. -
Page 210: Repeatability Pdl/Pdg Test Setup
Appendix D. Performance Test Test VI. Repeatability PDL/PDG Test VI. Repeatability PDL/PDG 1 Set up and switch on the equipment: a Connect the equipment as shown in Figure D-8. (Set-up for performing the test with Head Input A. For performing the test with Head Input B connect the (second) HP 81521B#001 Head to Head Input B.) HP E5574 Optical Loss Analyzer Head A... - Page 211 Appendix D. Performance Test Test VI. Repeatability PDL/PDG 3 Zero the OLA: a Mount the protection cap on the head in order to keep the light out. b Press Press and wait while zeroing. d Unmount the protection cap and connect the equipment as shown in Figure D-8.
-
Page 212: Noise Test Setup
Appendix D. Performance Test Test VII. Noise Test VII. Noise This parameter ensures the dynamic range of PDL/PDG measurements, i.e. the Max. insertion loss of a DUT where the PDL specifications still apply. 1 Set up and switch on the equipment: a Connect the equipment as shown in Figure D-9. - Page 213 Appendix D. Performance Test Test VII. Noise 3 Setup the HP 8153A: a Select Auto Range: Press A b Select averaging time 1s: Press P until the averaging time is displayed. ARAM Use the modify keys to change to 1s. Select display in W: Press 4 Set power meter to datalogging:...
- Page 214 Appendix D. Performance Test Absolute PDCR Uncertainty, Repeatability for PDCR Absolute PDCR Uncertainty, Repeatability for PDCR It is guaranteed by design that PDCR performance (uncertainty and repeatability) directly relates to the performance of the two optical sensors used in PDCR measurements. Artisan Technology Group - Quality Instrumentation ...
- Page 215 Appendix D. Performance Test Performance Test Form Sheets Performance Test Form Sheets Please use copies of the following 6 form sheets for your individual performance tests. Artisan Technology Group - Quality Instrumentation ... Guaranteed | (888) 88-SOURCE | www.artisantg.com...
- Page 216 Date __________________________ __________________________ Customer __________________________ __________________________ Tested by __________________________ Model: HP E5574A Optical Loss Analyzer Serial No. __________________________ Options: __________________________ Firmware Rev. __________________ Model: HP 81521B #001 Optical Head First Optical Head Second Optical Head Serial No. __________________________ Serial No. ______________________ Ambient Temperature: _______________ ºC...
- Page 217 Appendix D. Performance Test Performance Test Form Sheets Performance Test for the HP 5574A Page 2 of 6 Model HP E5574A Optical Loss Analyzer No. ____________ Date ___ / ___ / ___ Test Test Description Minimum Result Maximum Measurement Spec.
- Page 218 Appendix D. Performance Test Performance Test Form Sheets Performance Test for the HP 5574A Page 3 of 6 Model HP E5574A Optical Loss Analyzer No. ____________ Date ___ / ___ / ___ Wavelength ____________ nm Optical Head ____________ (First / Second)
- Page 219 Appendix D. Performance Test Performance Test Form Sheets Performance Test for the HP 5574A Page 4 of 6 Model HP E5574A Optical Loss Analyzer No. ___________ Date ___ / ___ / ___ Wavelength ____________ nm Head Input ____________ Test Test Description...
- Page 220 Appendix D. Performance Test Performance Test Form Sheets Performance Test for the HP 5574A Page 5 of 6 Model HP E5574A Optical Loss Analyzer No. ___________ Date ___ / ___ / ___ Wavelength ____________ nm Head Input ____________ Test Test Description...
- Page 221 Appendix D. Performance Test Performance Test Form Sheets Performance Test for the HP 5574A Page 6 of 6 Model HP E5574A Optical Loss Analyzer No. ____________ Date ___ / ___ / ___ Test Test Description Minimum Result Maximum Measurement Spec.
- Page 222 Appendix D. Performance Test Performance Test Form Sheets Artisan Technology Group - Quality Instrumentation ... Guaranteed | (888) 88-SOURCE | www.artisantg.com...
- Page 223 Cleaning Procedure Artisan Technology Group - Quality Instrumentation ... Guaranteed | (888) 88-SOURCE | www.artisantg.com...
- Page 224 Cleaning Procedure In general, whenever possible use physically contacting connectors, and dry connections. Clean the connectors, interfaces and bushings carefully each time after use. WA R N I N G Make sure to disable all sources when you are cleaning any optical interfaces.
- Page 225 Appendix E. Cleaning Procedure The Cleaning Kit The Cleaning Kit A full cleaning kit contains the following items: Isopropyl alcohol This is usually available from pharmaceutical suppliers or chemists. If possible, use alcohol supplied for medical purposes, rather than impure alcohol or alcohol with additives. CAUTI ON Do not use other solvents as some can damage plastic materials and claddings.
- Page 226 Appendix E. Cleaning Procedure The Cleaning Kit Soft-tissues These are available from most stores and distributors of medical and hygiene products (such as supermarkets or pharmacies). Use multi-layer tissues made from non-recycled cellulose. These are more absorbent and softer than other types and they do not scratch the surface of your device.
- Page 227 Appendix E. Cleaning Procedure Other Cleaning Tools Other Cleaning Tools To examine devices you also require: Microscope Select a microscope with a magnification range of between 50X and 300X. These should be available from photographic stores or laboratory suppliers. Ensure that the light source of the microscope is flexible. This helps you to examine your device closely and from different angles.
- Page 228 Appendix E. Cleaning Procedure Other Cleaning Tools Premoistened cleaning wipes These are available from HP. The part number is HP 92193N (80 Wipes per box). These are tissues that are moistened with isopropyl alcohol. Polymer film This is typically available from professional photographic stores or laboratory suppliers.
- Page 229 Appendix E. Cleaning Procedure Preserving Connectors Preserving Connectors Listed below are some hints on how best to keep your connectors in the best possible condition. Making Connections Before you make any connection you must ensure that all cables and connectors are clean. If they are dirty, use the appropriate cleaning procedure.
- Page 230 Appendix E. Cleaning Procedure Cleaning Instrument Housings Cleaning Instrument Housings Use a dry and very soft cotton tissue to clean the instrument housing and the keypad. Do not open the instruments as there is a danger of electric shock, or electrostatic discharge. Opening the instrument can cause damage to sensitive components, and in addition your warranty will be voided.
- Page 231 Appendix E. Cleaning Procedure Cleaning Procedures To assess the projection of the emitted light beam you can use an infrared sensor card. Hold the card approximately 5 cm from the output of the connector. The invisible emitted light is project onto the card and becomes visible as a small circular spot.
- Page 232 Appendix E. Cleaning Procedure Cleaning Procedures Cleaning Connector Adapters CAUT ION Some adapters have an anti-reflection coating on the back to reduce back reflection. This coating is extremely sensitive to solvents and mechanical abrasion. Extra care is needed when cleaning these adapters. Preferred Procedure 1 Clean the adapter by rubbing a new, dry cotton-swab over the surface using a small circular movement.
- Page 233 Appendix E. Cleaning Procedure Cleaning Procedures Cleaning Connector Interfaces CAUTI ON Be careful when using pipe-cleaners, as the core and the bristles of the pipe- cleaner are hard and can damage the interface. Do not use pipe-cleaners on optical head adapters, as the hard core of normal pipe cleaners can damage the bottom of an adapter.
- Page 234 Appendix E. Cleaning Procedure Cleaning Procedures Cleaning Bare Fiber Adapters Bare fiber adapters are difficult to clean. Protect from dust unless they are in use. CAUT ION Never use any kind of solvent when cleaning a bare fiber adapter as solvents can damage the foam inside some adapters.
- Page 235 Appendix E. Cleaning Procedure Cleaning Procedures Cleaning Bare Fiber Ends Bare fiber ends are often used for splices or, together with other optical components, to create a parallel beam. The end of a fiber can often be scratched. You make a new cleave. To do this: 1 Strip off the cladding.
- Page 236 Appendix E. Cleaning Procedure Cleaning Procedures 4 Blow away any remaining lint with compressed air. Cleaning Large Area Lenses and Mirrors CAUT ION Some mirrors, as those from a monochromator, are very soft and sensitive. Therefore, never touch them and do not use cleaning tools such as compressed air or polymer film.
- Page 237 Appendix E. Cleaning Procedure Cleaning Procedures 4 Take a new, dry soft-tissue and remove the water, by rubbing gently over the surface using a small circular movement. 5 Blow away remaining lint with compressed air. Alternative Procedure A To clean lenses that are extremely sensitive to mechanical stress or pressure you can also use an optical clean polymer film.
- Page 238 Appendix E. Cleaning Procedure Cleaning Procedures Cleaning Optical Glass Plates Some instruments, for example, the optical heads from Hewlett- Packard have an optical glass plate to protect the sensor. Clean this glass plate in the same way as optical lenses (see “Cleaning Lenses”...
- Page 239 Appendix E. Cleaning Procedure Cleaning Procedures 3 Take a new, dry soft-tissue and remove the alcohol, dissolved sediment and dust, by rubbing gently over the surface using a small circular movement. 4 Blow away any remaining lint with compressed air. Cleaning Recessed Lens Interfaces Preferred Procedure 1 Blow away any dust or dirt with compressed air.
- Page 240 Appendix E. Cleaning Procedure Cleaning Procedures Cleaning Fragile Optical Devices Some optical devices, such as the HP 81000BR Reference Reflector, which has a gold plated surface, are very sensitive to mechanical stress or pressure. Do not use cotton-swabs, soft-tissues or other mechanical cleaning tools, as these can scratch or destroy the surface.
- Page 241 Appendix E. Cleaning Procedure Cleaning Procedures Cleaning Metal Filters or Attenuator Gratings This kind of device is extremely fragile. A misalignment of the grating leads to inaccurate measurements. Never touch the surface of the metal filter or attenuator grating. Be very careful when using or cleaning these devices.
- Page 242 Appendix E. Cleaning Procedure Cleaning Procedures Artisan Technology Group - Quality Instrumentation ... Guaranteed | (888) 88-SOURCE | www.artisantg.com...
- Page 243 Error Messages Artisan Technology Group - Quality Instrumentation ... Guaranteed | (888) 88-SOURCE | www.artisantg.com...
- Page 244 Error Messages There are only a few situations when the OLA does not know what to do. If this occurs, the instrument will question you. This appendix provides information on these questions. Artisan Technology Group - Quality Instrumentation ... Guaranteed | (888) 88-SOURCE | www.artisantg.com...
- Page 245 Appendix F. Error Messages Display Messages Display Messages Light A?, Light B?, Light A & B? An attempt was made to zero the optical heads without shielding them completely from light. Do one of the following: • Screw the protection caps onto the heads. •...
- Page 246 Appendix F. Error Messages HP-IB Messages HP-IB Messages Instrument Specific Errors These are error messages with positive numbers. No head connected. Wrong application for this command. Invalid channel selected. DAC value out of range. No valid result possible. Value out of range. See the command descriptions for details.
- Page 247 Appendix F. Error Messages HP-IB Messages -102 Syntax error. The command or data could not be recognized. -103 Invalid separator. The parser was expecting a separator (for example, a semicolon (;) between commands) but did not find one. -104 Data type error. The parser was expecting one data type, but found another (for example, was expecting a string, but received numeric data).
- Page 248 Appendix F. Error Messages HP-IB Messages -114 Header suffix out of range. The header contained an invalid character. This message sometimes occurs because the parser is trying to interpret a non-header as a header. -120 Numeric data error. This error shows that the parser has found an error in numeric data (including nondecimal numeric data) but cannot be more specific.
- Page 249 Appendix F. Error Messages HP-IB Messages -138 Suffix not allowed. A suffix was found where none is allowed. -140 Character data error. This error shows that the parser has found an error in character data but cannot be more specific. -141 Invalid character data.
- Page 250 Appendix F. Error Messages HP-IB Messages -168 Block data not allowed. Block data was found where none is allowed. Execution Errors (-200 to -299) These are error messages in the range -200 to -299. They show that an execution error has been detected by the execution control block. An execution error is signalled by the execution error bit (bit 4) in the event status register.
- Page 251 Appendix F. Error Messages HP-IB Messages -223 Too much data. The block, expression, or string data was too long for the instrument to handle. -224 Illegal parameter value. One value from a list of possible values was expected. The parameter received was not found in this list. -240 Hardware error.
- Page 252 Appendix F. Error Messages HP-IB Messages -314 Save/recall memory lost. The nonvolatile data saved by the *SAV command has been lost. -315 Configuration memory lost. The nonvolatile configuration data saved by the instrument has been lost. -330 Self-test failed. Further information about the self-test failure is available by using *TST?.
- Page 253 Appendix F. Error Messages HP-IB Messages -430 Query deadlock. A condition causing a deadlock query has occurred (for example, both the input and the output buffer are full and the device cannot continue). -440 Query unterminated after indefinite response. Two queries were received in the same message. The error occurs on the second query if the first requests an indefinite response and was already executed.
- Page 254 Appendix F. Error Messages HP-IB Messages Artisan Technology Group - Quality Instrumentation ... Guaranteed | (888) 88-SOURCE | www.artisantg.com...
- Page 255 Index commands device-specific errors 25, 72 IEEE common 107 ABORt 66, 71, 72 directivity PADDle 126 AC line power supply re- display messages SCAN 127 quirements SENSe 129 accuracy of results SOURce 156 activation of the automatic STATus 120 sweep SYSTem 158 angled contact connector 25, 72...
- Page 256 Index common commands linearity and accuracy, per- formance test gain measurement specifi- local mode standard 488.1, cations 488.2 95 25, 45, 58 25, 45 IL avg measurement of INITiate head connectors insertion loss 55 input queue heads optical coupler char- insertion loss how to zero them 33 acteristics 67...
- Page 257 Index 25, 50 PDCR polarization PDCR uncertainty reproducible state 87 noise, performance test 25, 51 PDEL sweeping through all 25, 44 states 85 nonlinearity PDL / Ins. Loss application polarization controller polarization dependent PDL and insertion loss characteristics simultaneous meas- couplers, measure- OLA specific commands urement 44...
- Page 258 Index ent coupling setup for coupler test 67 ratio 50 rack mount options insertion loss polarization depend- *RCL measure- excess reference power ments 56 loss 51 measurement 35 for PD Coupler Test polarization depend- storage 34 ent loss 44, remote state for PDL measure- remote with lockout ments 41...
- Page 259 Index grammable instruments zeroing the heads IEEE 488.1, 488.2 95 standard loss measure- ments, summary STATus-commands status registers *STB? storage of the reference power straight contact connector sweeping through all states of polarization SYST key SYSTem-commands system configuration technical data termination of the automat- ic sweep test equipment...