
Related Manuals for Sharp MX-C507P


Summary of Contents for Sharp MX-C507P
- Page 1 DIGITAL FULL COLOR PRINTER MX-C507P User's Guide Machine type(s): 5028 Model(s):...
-
Page 2: Table Of Contents
Contents Contents Safety information..................5 Conventions................................5 Product statements.............................5 Learning about the printer................8 Selecting a location for the printer........................8 Printer configurations............................9 Attaching cables..............................10 Using the control panel............................11 Understanding the status of the power button and indicator light............11 Using the home screen.............................12 Printing the Menu Settings Page........................13 Installing the printer software..........................13 Setting up and using the home screen applications......14 Customizing the home screen........................14... - Page 3 Contents Printing confidential and other held jobs....................26 Printing a font sample list..........................27 Canceling a print job............................27 Understanding the printer menus............28 Menu map................................28 Device..................................29 Print..................................37 Paper..................................46 USB Drive................................48 Network/Ports..............................50 Security................................60 Reports.................................67 Help..................................68 Troubleshooting..............................68 Securing the printer...................69 Locating the security slot..........................69 Erasing printer memory...........................69 Erasing printer hard disk memory.........................69 Encrypting the printer hard disk........................70 Restoring factory default settings.........................70...
- Page 4 Contents Paper jam in the multipurpose feeder......................84 Paper jam in the standard bin........................84 Paper jam in door A............................85 Troubleshooting..................89 Configuring the SMTP server.........................89 Network connection problems........................89 Hardware options problems..........................91 Issues with supplies............................92 Paper feed problems............................92 Printing problems..............................96 Color quality problems............................114 Contacting your dealer............................117 Notices......................118 Index......................129...
-
Page 5: Safety Information
Safety information Safety information Conventions Note: A note identifies information that could help you. Warning: A warning identifies something that could damage the product hardware or software. CAUTION: A caution indicates a potentially hazardous situation that could injure you. Different types of caution statements include: CAUTION—POTENTIAL INJURY: Indicates a risk of injury. - Page 6 Safety information CAUTION—SHOCK HAZARD: To avoid the risk of electrical shock, make sure that all external connections (such as Ethernet and telephone system connections) are properly installed in their marked plug-in ports. CAUTION—SHOCK HAZARD: To avoid the risk of electrical shock, if you are accessing the controller board or installing optional hardware or memory devices sometime after setting up the printer, then turn the printer off, and unplug the power cord from the electrical outlet before continuing.
- Page 7 Safety information CAUTION—POTENTIAL INJURY: This product uses a laser. Use of controls or adjustments or performance of procedures other than those specified in the User’s Guide may result in hazardous radiation exposure. CAUTION—POTENTIAL INJURY: The lithium battery in this product is not intended to be replaced. There is a danger of explosion if a lithium battery is incorrectly replaced.
-
Page 8: Learning About The Printer
Learning about the printer Learning about the printer Selecting a location for the printer When selecting a location for the printer, leave enough room to open trays, covers, and doors and to install hardware options. • Set up the printer near an electrical outlet. CAUTION—POTENTIAL INJURY: To avoid the risk of fire or electrical shock, connect the power cord to an appropriately rated and properly grounded electrical outlet that is near the product and easily accessible. -
Page 9: Printer Configurations
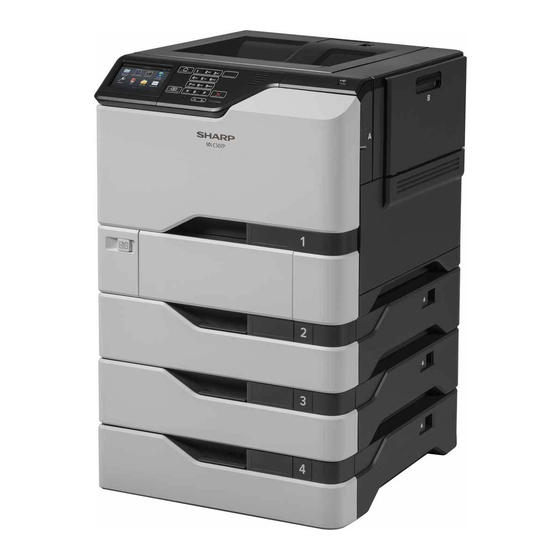
Learning about the printer Left side 127 mm (5 in.) Rear 76 mm (3 in.) Printer configurations CAUTION—TIPPING HAZARD: Installing one or more options on your printer or MFP may require a caster base, furniture, or other feature to prevent instability causing possible injury. For more information on supported configurations, contact the place where you purchased the printer. -
Page 10: Attaching Cables
Learning about the printer Attaching cables CAUTION—SHOCK HAZARD: To avoid the risk of electrical shock, do not set up this product or make any electrical or cabling connections, such as the power cord, fax feature, or telephone, during a lightning storm. CAUTION—POTENTIAL INJURY: To avoid the risk of fire or electrical shock, connect the power cord to an appropriately rated and properly grounded electrical outlet that is near the product and easily accessible. -
Page 11: Using The Control Panel
Learning about the printer Using the control panel Use the • Display View the printer messages and supply status. • Set up and operate the printer. Home button Go to the home screen. Keypad Enter numbers or symbols in an input field. Power button •... -
Page 12: Using The Home Screen
Learning about the printer Power button light Printer status The printer is off, ready, or processing data. Solid amber The printer is in Sleep mode. Blinking amber The printer is in Hibernate mode. Using the home screen When the printer is turned on, the display shows the home screen. Use the home screen buttons and icons to initiate an action. -
Page 13: Printing The Menu Settings Page
Learning about the printer These settings may also appear on the home screen Touch Bookmarks Access bookmarks. App Profiles Access application profiles. Lock Device Prevent users from accessing any printer functions from the home screen. Printing the Menu Settings Page From the home screen, touch Settings >... -
Page 14: Setting Up And Using The Home Screen Applications
Setting up and using the home screen applications Setting up and using the home screen applications Customizing the home screen From the control panel, touch Settings > Device > Visible Home Screen Icons. Select the icons that you want to appear on the home screen. Apply the changes. -
Page 15: Managing Contacts
Setting up and using the home screen applications Notes: • View the printer IP address on the printer home screen. The IP address appears as four sets of numbers separated by periods, such as 123.123.123.123. • If you are using a proxy server, then temporarily disable it to load the web page correctly. Click Bookmarks >... - Page 16 Setting up and using the home screen applications Notes: • View the printer IP address on the printer home screen. The IP address appears as four sets of numbers separated by periods, such as 123.123.123.123. • If you are using a proxy server, then temporarily disable it to load the web page correctly. Click Address Book.
- Page 17 Setting up and using the home screen applications Notes: • View the printer IP address on the printer home screen. The IP address appears as four sets of numbers separated by periods, such as 123.123.123.123. • If you are using a proxy server, then temporarily disable it to load the web page correctly. Click Address Book.
-
Page 18: Loading Paper And Specialty Media
Loading paper and specialty media Loading paper and specialty media Setting the size and type of the specialty media The trays automatically detect the size of plain paper. For specialty media like labels, card stock, or envelopes, do the following: From the home screen, navigate to: Settings >... - Page 19 Loading paper and specialty media Flex, fan, and align the paper edges before loading. Load the paper stack with the printable side faceup. Notes: • For one‑sided printing, load letterhead faceup with the header toward the front of the tray. •...
-
Page 20: Loading The Multipurpose Feeder
Loading paper and specialty media Loading the multipurpose feeder Open the multipurpose feeder. Adjust the guide to match the size of the paper you are loading. Flex, fan, and align the paper edges before loading. -
Page 21: Linking Trays
Loading paper and specialty media Load the paper. • Load paper and card stock with the printable side facedown and the top edge entering the printer first. • Load envelopes with the flap side up and against the right side of the paper guide. Load European envelopes with the flap entering the printer first. - Page 22 Loading paper and specialty media Save the settings. Click Settings > Device > Maintenance > Configuration Menu > Tray Configuration. Set Tray Linking to Automatic. Save the settings. To unlink trays, make sure that no trays have the same paper size and paper type settings. Warning—Potential Damage: The temperature of the fuser varies according to the specified paper type.
-
Page 23: Printing
Printing Printing Printing from a computer Note: For labels, card stock, and envelopes, set the paper size and type in the printer before printing the document. From the document that you are trying to print, open the Print dialog. If necessary, adjust the settings. Print the document. -
Page 24: Printing From A Flash Drive
Printing Notes: • Make sure that the Apple device and the printer are connected to the same network. If the network has multiple wireless hubs, then make sure that both devices are connected to the same subnet. • This application is supported only in some Apple devices. From your mobile device, select a document from your file manager or launch a compatible application. -
Page 25: Supported Flash Drives And File Types
Printing Notes: • If you insert the flash drive when an error message appears, then the printer ignores the flash drive. • If you insert the flash drive while the printer is processing other print jobs, then Busy appears on the display. -
Page 26: Configuring Confidential Jobs
Printing • .pdf • .xps Images: • .dcx • .gif • .jpeg or .jpg • .bmp • .pcx • .tiff or .tif • .png Configuring confidential jobs From the control panel, navigate to: Settings > Security > Confidential Print Setup Configure the settings. -
Page 27: Printing A Font Sample List
Printing Select Use Print and Hold, and then assign a user name. Select the print job type (Confidential, Repeat, Reserve, or Verify). If the print job is confidential, then enter a four‑digit PIN. Click OK or Print. From the printer home screen, release the print job. •... -
Page 28: Understanding The Printer Menus
Understanding the printer menus Understanding the printer menus Menu map Device • • Preferences Accessibility • • Eco‑Mode Restore Factory Defaults • • Remote Operator Panel Maintenance • • Notifications Visible Home Screen Icons • • Power Management About this Printer Print •... -
Page 29: Device
Understanding the printer menus Device Preferences Menu item Description Display Language Set the language of the text that appears on the display. Country/Region Identify the country or region that the printer is configured to operate. Run initial setup Run the setup wizard. Off* Keyboard Select a language as a keyboard type. - Page 30 Understanding the printer menus Menu item Description Screen Timeout Set the idle time before the display shows the home screen or before the printer logs out a user account automatically. 5–300 seconds (60*) Note: An asterisk (*) next to a value indicates the factory default setting. Eco-Mode Menu item Description...
- Page 31 Understanding the printer menus Menu item Description Supplies • Show the estimated status of the supplies. Show Supply Estimates (Show estimates*) • Set the number of times that the alarm sounds when the Cartridge Alarm (Single*) toner cartridge is low. E‑mail Alerts Setup Configure the e‑mail settings of the printer.
- Page 32 Understanding the printer menus Power Management Menu item Description Sleep Mode Profile Set the printer to stay in Ready mode or return to Sleep mode after printing. Print from Sleep Mode Stay awake after printing Enter Sleep Mode after printing* Timeouts Set the idle time before the printer begins operating in Sleep mode.
- Page 33 Understanding the printer menus Menu item Description Prolong Screen Timeout Let the user remain in the same location and reset the Screen Timeout timer when it expires instead of returning to the home screen. Off* Note: An asterisk (*) next to a value indicates the factory default setting. Restore Factory Defaults Menu item Description...
- Page 34 Understanding the printer menus Menu item Description Tray Configuration Determine the default loading orientation for the A5 size paper in all paper sources. A5 Loading Short Edge Long Edge* Tray Configuration Set the paper source that the user fills when a prompt to load paper appears.
- Page 35 Understanding the printer menus Menu item Description Printer Emulations Disable access to printer message during emulation. Emulator Security Disable Printer Message Access Print Configuration Print non‑copy jobs in grayscale. Black Only Mode Off* Print Configuration Enhance the printed output to compensate for misregistration in the printer.
- Page 36 Understanding the printer menus Menu item Description Device Operations Set the printer to detect the paper type of a page being loaded. Automatic Media Type Detection Toner patch sensor setup Set the printer to put down the correct amount of toner to maintain color consistency.
-
Page 37: Print
Understanding the printer menus Visible Home Screen Icons Menu Description Status/Supplies Specify which icons to show on the home screen. Job Queue Change Language Address Book Bookmarks Held Jobs App Profiles Eco-Settings Forms and Favorites About this Printer Menu item Description Asset Tag Show the serial number of the printer. - Page 38 Understanding the printer menus Menu item Description Separator Sheets Insert blank separator sheets when printing. None* Between Copies Between Jobs Between Pages Separator Sheet Source Specify the paper source for the separator sheet. Tray [x] (1*) Multipurpose Feeder Pages per Side Print multiple page images on one side of a sheet of paper.
- Page 39 Understanding the printer menus Setup Menu item Description Printer Language Set the printer language. PCL Emulation Note: Setting a printer language default does not prevent a software PS Emulation* program from sending print jobs that use another printer language. Job Waiting Preserve print jobs requiring supplies so that jobs not requiring the missing supplies can print.
- Page 40 Understanding the printer menus Quality Menu item Description Print Mode Set how the printer generates color content. Black and White Color* Print Resolution Set the resolution for the printed output. 4800 CQ* Note: 4800 CQ provides high‑quality output at maximum speed. 1200 dpi Toner Darkness Determine the lightness or darkness of text images.
- Page 41 Understanding the printer menus Menu item Description Color Correction Modify the color settings used to print documents. Notes: Auto* • Off sets the printer to receive the color correction from the software. Manual • Auto sets the printer to apply different color profiles to each object on the printed page.
- Page 42 Understanding the printer menus Menu item Description Log Action at Near Full Specify how the printer responds when the hard disk is nearly full. None* E‑mail Current Log E‑mail & Delete Current Log E‑mail & Delete Oldest Log Post Current Log Post &...
- Page 43 Understanding the printer menus Menu item Description Scale To Fit Scale the page content to fit the selected paper size. Off* Annotations Specify whether to print annotations in the PDF. Print Do Not Print* Print PDF Error Enable the printing of PDF error. Note: An asterisk (*) next to a value indicates the factory default setting.
- Page 44 Understanding the printer menus Menu item Description Font Source Choose the source which contains the default font selection. Resident* Notes: Disk • Flash and Disk appear only when a flash memory or hard disk is Flash installed. • For Flash and Disk to appear, make sure that they are not read‑ or write‑protected.
- Page 45 Understanding the printer menus Menu item Description Auto LF after CR Set the printer to perform a line feed after a carriage return control command. Off* Tray Renumber • Configure the printer to work with a different print driver or custom application that uses a different set of source assignments to request a Assign MP Feeder given paper source.
-
Page 46: Paper
Understanding the printer menus Menu item Description Invert Invert bitonal monochrome images. Off* Note: This menu item does not apply to GIF or JPEG image formats. Scaling Adjust the image to fit the printable area. Anchor Top Left Note: When Auto Fit is set to On, Scaling is automatically set to Best Fit. Best Fit* Anchor Center Fit Height/Width... - Page 47 Understanding the printer menus Menu item Description Configure MP Determine the behavior of the multipurpose feeder. Cassette* Notes: Manual • Cassette configures the multipurpose feeder as the automatic paper First source. • Manual sets the multipurpose feeder only for manual-feed print jobs. •...
-
Page 48: Usb Drive
Understanding the printer menus Media Types Menu item Description Plain Specify the texture, weight, and orientation of the paper. Card Stock Recycled Glossy Labels Vinyl Labels Bond Envelope Letterhead Preprinted Colored Paper Light Heavy Rough/Cotton Custom Type [X] USB Drive Flash Drive Print Menu item Description... - Page 49 Understanding the printer menus Menu item Description Flip Style Determine which side of the paper is bound when performing two‑sided printing. Long Edge* Short Edge Pages per Side Print multiple page images on one side of a sheet of paper. Off* 2 pages per side 3 pages per side...
-
Page 50: Network/Ports
Understanding the printer menus Network/Ports Network Overview Menu item Description Active Adapter Specify the type of the network connection. Auto* Note: Wireless is available only in printers connected to a wireless network. Standard Network Wireless Network Status Show the connectivity status of the printer network. Display Network Status on Show the network status on the display. - Page 51 Understanding the printer menus Menu item Description Setup On Printer Panel Configure the wireless connection using the control panel. Choose Network Add Wi‑Fi Network Network Name Network Mode (Infrastructure*) Wireless Security Mode (Disabled*) Wi‑Fi Protected Setup Establish a Wi‑Fi network and enable network security. Start Push Button Method Start PIN Method Enable Wi‑Fi Direct...
- Page 52 Understanding the printer menus Menu item Description PS SmartSwitch Set the printer to switch automatically to PostScript emulation when a print job requires it, regardless of the default printer language. Note: When this setting is disabled, the printer does not examine incoming data and uses the default printer language specified in the Setup menu.
- Page 53 Understanding the printer menus Menu item Description PS SmartSwitch Set the printer to switch automatically to PostScript emulation when a print job requires it, regardless of the default printer language. Note: When this setting is disabled, the printer does not examine incoming data and uses the default printer language specified in the Setup menu.
- Page 54 Understanding the printer menus Menu item Description Domain Search Order Specify a list of domain names to locate the printer and its resources that reside in different domains on the network. Enable DDNS Update the Dynamic DNS settings. Off* DDNS TTL Specify the current DDNS settings.
- Page 55 Understanding the printer menus SNMP Note: This menu appears only in network printers or printers that are attached to print servers. Menu item Description SNMP Versions 1 and 2c Configure Simple Network Management Protocol (SNMP) versions 1 and 2c to install print drivers and applications. Enabled Allow SNMP Set Enable PPM MIB...
- Page 56 Understanding the printer menus Menu item Description Enable IPSec Enable Internet Protocol Security (IPSec). Base Configuration Set the IPSec base configuration. Default* Compatibility Secure DH (Diffie‑Hellman) Group Proposal Set the IPSec base configuration. modp2048 (14)* Note: This menu item appears only when Base Configuration is set modp3072 (15) to Compatibility.
- Page 57 Understanding the printer menus Menu item Description Active Let the printer join networks that require authentication before allowing access. Off* Note: An asterisk (*) next to a value indicates the factory default setting. LPD Configuration Note: This menu appears only in network printers or printers that are attached to print servers. Menu item Description LPD Timeout...
- Page 58 Understanding the printer menus Menu item Description Local Domains Specify domain names for HTTP and FTP servers. HTTP Proxy IP Address Configure the HTTP and FTP server settings. FTP Proxy IP Address HTTP Default IP Port HTTPS Device Certificate FTP Default IP Port Timeout for HTTP/FTP Specify the amount of time before the server connection stops.
- Page 59 Understanding the printer menus Restrict external network access Menu item Description Restrict external network Restrict access to network sites. access Off* External network address Specify the network addresses with restricted access. E‑mail address for notification Specify an e‑mail address to send a notification of logged events. Ping frequency Specify the network query interval in seconds.
-
Page 60: Security
Understanding the printer menus Menu item Description SSID Specify the service set identifier (SSID) of the Wi‑Fi network. Preferred Channel Number Show the PSK on the Network Setup Page. Auto 1–11 (6*) Set PSK Set the preshared key (PSK) to authenticate and validate users on a Wi‑Fi connection. - Page 61 Understanding the printer menus Menu item Description Administrative Menus Control access to the printer menu settings. Security Menu Network/Ports Menu Paper Menu Reports Menu Function Configuration Menus Supplies Menu Option Card Menu SE Menu Device Menu Device Management Control access to the printer management options. Remote Management Firmware Updates Apps Configuration...
- Page 62 Understanding the printer menus Security Audit Log Menu item Description Enable Audit Record the events in the secure audit log and remote syslog. Off* Enable Remote Syslog Send audit logs to a remote server. Off* Remote Syslog Server Specify the remote syslog server. Remote Syslog Port Specify the remote syslog port.
- Page 63 Understanding the printer menus Menu item Description Severity of Events to Log Specify the priority level cutoff for logging messages and events. 0 ‑ Emergency 1 ‑ Alert 2 ‑ Critical 3 ‑ Error 4 ‑ Warning* 5 ‑ Notice 6 ‑...
- Page 64 Understanding the printer menus Menu item Description Digitally Sign Exports Add a digital signature to each exported log file. Off* Clear Log Delete all audit logs. Export Log Export a security log to a flash drive. Syslog (RFC 5424) Syslog (RFC 3164) Note: An asterisk (*) next to a value indicates the factory default setting.
- Page 65 Understanding the printer menus Menu item Description Repeat Job Expiration Set the expiration time for a print job that you want to repeat. Off* 1 Hour 4 Hours 24 Hours 1 Week Verify Job Expiration Set the expiration time that the printer prints a copy for the user to examine its quality, before printing the remaining copies.
- Page 66 Understanding the printer menus Erase Temporary Data Files Menu item Description Stored in onboard memory Delete all files stored on the printer memory. Off* Stored on hard disk Delete all files stored on the printer hard disk. 1 Pass Erase* Note: This menu item appears only when a printer hard disk is installed.
-
Page 67: Reports
Understanding the printer menus Menu item Description Minimum Password Length Specify the password length. 0–32 Note: An asterisk (*) next to a value indicates the factory default setting. Reports Menu Settings Page Menu item Description Menu Settings Page Print a report that contains the printer menus. Device Menu item Description... -
Page 68: Help
Understanding the printer menus Menu item Description Wi‑Fi Direct Connected Clients Print a page that shows the list of devices that are connected to the printer using Wi‑Fi Direct. Note: This menu item appears only when Enable Wi‑Fi Direct is set to On. Help Menu item Description... -
Page 69: Securing The Printer
Securing the printer Securing the printer Locating the security slot The printer is equipped with a security lock feature. Attach a security lock compatible with most laptop computers in the location shown to secure the printer in place. Erasing printer memory To erase volatile memory or buffered data in your printer, turn off the printer. -
Page 70: Encrypting The Printer Hard Disk
Securing the printer Note: This process can take from several minutes to more than an hour, making the printer unavailable for other tasks. Encrypting the printer hard disk This process erases all contents in the hard disk. If necessary, back up important data from the printer before starting the encryption. - Page 71 Securing the printer • The printer is removed from your premises for service. • The printer is sold to another organization. Disposing of a printer hard disk • Degaussing—Flushes the hard disk with a magnetic field that erases stored data •...
-
Page 72: Maintaining The Printer
Maintaining the printer Maintaining the printer Warning—Potential Damage: Failure to maintain optimum printer performance, or to replace parts and supplies, may cause damage to your printer. Adjusting the speaker volume Adjusting the default internal speaker volume From the control panel, navigate to: Settings >... - Page 73 Maintaining the printer Connecting the printer to a wireless network using Wi‑Fi Protected Setup (WPS) Before you begin, make sure that: • The access point (wireless router) is WPS‑certified or WPS‑compatible. For more information, see the documentation that came with your access point. •...
-
Page 74: Cleaning The Printer
Maintaining the printer Deactivating the Wi‑Fi network From the home screen, touch Settings > Network/Ports > Network Overview > Active Adapter > Standard Network. Follow the instructions on the display. Cleaning the printer CAUTION—SHOCK HAZARD: To avoid the risk of electrical shock when cleaning the exterior of the printer, unplug the power cord from the electrical outlet and disconnect all cables from the printer before proceeding. - Page 75 Maintaining the printer Ordering toner cartridges Notes: • The estimated cartridge yield is based on the ISO/IEC 19798 standard. • Extremely low print coverage for extended periods of time may negatively affect actual yield and may cause cartridge parts to fail before exhaustion of toner. To order toner cartridges, contact the place where you purchased the printer.
-
Page 76: Replacing Parts And Supplies
Maintaining the printer Replacing parts and supplies Replacing a toner cartridge Open door B. Remove the toner cartridge. Unpack the new toner cartridge. - Page 77 Maintaining the printer Insert the new toner cartridge. Close door B. Replacing the waste toner bottle Open door B.
-
Page 78: Moving The Printer
Maintaining the printer Remove the waste toner bottle. Unpack the new waste toner bottle. Insert the new waste toner bottle. Close door B. Moving the printer Moving the printer to another location CAUTION—POTENTIAL INJURY: If the printer weight is greater than 20 kg (44 lb), then it may require two or more people to lift it safely. -
Page 79: Saving Energy And Paper
Maintaining the printer CAUTION—POTENTIAL INJURY: When moving the printer, follow these guidelines to avoid personal injury or printer damage: • Make sure that all doors and trays are closed. • Turn off the printer, and then unplug the power cord from the electrical outlet. •... - Page 80 Maintaining the printer Adjusting the brightness of the printer display From the home screen, touch Settings > Device > Preferences > Screen Brightness. Adjust the setting. Conserving supplies • Print on both sides of the paper. Note: Two-sided printing is the default setting in the print driver. •...
-
Page 81: Clearing Jams
Clearing jams Clearing jams Avoiding jams Load paper properly • Make sure that the paper lies flat in the tray. Correct loading of paper Incorrect loading of paper • Do not load or remove a tray while the printer is printing. •... -
Page 82: Identifying Jam Locations
Clearing jams • Flex, fan, and align the paper edges before loading. • Do not use paper that has been cut or trimmed by hand. • Do not mix paper sizes, weights, or types in the same tray. • Make sure that the paper size and type are set correctly on the computer or printer control panel. •... -
Page 83: Paper Jam In Trays
Clearing jams Paper jam in trays Pull out the tray. Warning—Potential Damage: A sensor inside the optional tray is easily damaged by static electricity. Touch a metal surface before removing the jammed paper in the tray. Remove the jammed paper. Note: Make sure that all paper fragments are removed. -
Page 84: Paper Jam In The Multipurpose Feeder
Clearing jams Paper jam in the multipurpose feeder Remove paper from the multipurpose feeder. Pull out the tray. Remove the jammed paper. Note: Make sure that all paper fragments are removed. Insert the tray. Paper jam in the standard bin Remove the jammed paper. -
Page 85: Paper Jam In Door A
Clearing jams Close doors D and A. Paper jam in door A Paper jam in the fuser Open door A. CAUTION—HOT SURFACE: The inside of the printer might be hot. To reduce the risk of injury from a hot component, allow the surface to cool before touching it. Remove the jammed paper. - Page 86 Clearing jams Open the fuser access door. Remove the jammed paper. Note: Make sure that all paper fragments are removed.
- Page 87 Clearing jams Close door A. Paper jam in the duplex unit Open door A. CAUTION—HOT SURFACE: The inside of the printer might be hot. To reduce the risk of injury from a hot component, allow the surface to cool before touching it.
- Page 88 Clearing jams Open the duplex cover. Remove the jammed paper. Note: Make sure that all paper fragments are removed. Close the duplex cover and door A.
-
Page 89: Troubleshooting
Troubleshooting Troubleshooting Configuring the SMTP server Note: In some printer models, this setting can be configured only from the Embedded Web Server. From the control panel From the control panel, navigate to: Settings > Device > Notifications > E‑mail Alerts Setup > E‑mail Setup Configure the settings. - Page 90 Troubleshooting Action Step 3 Go to step 4. Install a supported browser. Check if you are using a supported browser: • Internet Explorer version 11 or later • Microsoft Edge • Safari version 6 or later • Google Chrome version 32 or later •...
-
Page 91: Hardware Options Problems
Troubleshooting Action Step 3 Go to step 4. Insert a supported flash drive. Check if the flash drive is supported. For more information, see “Supported flash drives and file types” on page Is the flash drive supported? Step 4 The problem is Contact your dealer. -
Page 92: Issues With Supplies
Troubleshooting Issues with supplies Replace cartridge, printer region mismatch Install the correct toner cartridge. Non‑Printer Manufacturer supply The printer has detected an unrecognized supply or part installed in the printer. Your printer is designed to function best with genuine supplies and parts made by the printer manufacturer. Use of third-party supplies or parts may affect the performance, reliability, or life of the printer and its imaging components. - Page 93 Troubleshooting Collated printing does not work Action Step 1 The problem is Go to step 2. solved. From the control panel, touch Settings > Print > Layout > Collate > On [1,2,1,2,1,2]. Print the document. Are the pages collated correctly? Step 2 The problem is Go to step 3.
- Page 94 Troubleshooting Action Step 2 Go to step 3. The problem is solved. Depending on your operating system, specify the paper type from the Printing Preferences or Print dialog. Notes: • Make sure that the setting matches the paper loaded. • You can also change the setting on the printer control panel.
- Page 95 Troubleshooting Action Step 3 The problem is Contact your dealer. solved. Make sure that Tray Linking is set to Automatic. For more information, see “Linking trays” on page Print the document. Do the trays link correctly? Paper frequently jams Action Step 1 Go to step 2.
-
Page 96: Printing Problems
Troubleshooting Jammed pages are not reprinted Action The problem is Contact your dealer. From the home screen, touch Settings > Device > Notifications solved. > Jam Content Recovery. In the Jam Recovery menu, select On or Auto. Print the document. Are the jammed pages reprinted? Printing problems Confidential and other held documents do not print... - Page 97 Troubleshooting Action Step 4 The problem is Contact your dealer. solved. Delete some held jobs to free up printer memory. Print the documents. Are the documents printed? Slow printing Action Step 1 Go to step 2. The problem is solved. Make sure that the printer cable is securely connected to the printer and to the computer, print server, option, or other network device.
- Page 98 Troubleshooting Action Step 5 Go to step 6. The problem is solved. Depending on your operating system, specify the paper type from the Printing Preferences or Print dialog. Notes: • Make sure that the setting matches the paper loaded. • You can also change the setting on the printer control panel.
- Page 99 Troubleshooting Print jobs do not print Action Step 1 The problem is Go to step 2. solved. From the document you are trying to print, open the Print dialog, and then check if you have selected the correct printer. Print the document. Is the document printed? Step 2 The problem is...
- Page 100 Troubleshooting Action Step 2 The problem is Go to step 3. solved. Depending on your operating system, specify the paper size and paper type from the Printing Preferences or Print dialog. Note: You can also change the settings on the printer control panel.
- Page 101 Troubleshooting Action Step 5 Go to step 6. Insert the cables to the correct ports. Check if the cables connecting the printer and the computer are inserted to the correct ports. Are the cables inserted to the correct ports? Step 6 The problem is Go to step 7.
- Page 102 Troubleshooting Action Step 1 Go to step 2. The problem is solved. Perform Color Adjust. From the control panel, navigate to: Settings > Print > Quality > Advanced Imaging > Color Adjust Print the document. Is the print too dark? Step 2 Go to step 3.
- Page 103 Troubleshooting Ghost images Note: Before solving the problem, print the Print Quality Test Pages. From the control panel, navigate to Settings > Troubleshooting > Print Quality Test Pages. For non-touch-screen printer models, press navigate through the settings. Action Step 1 Go to step 2.
- Page 104 Troubleshooting Gray or colored background Note: Before solving the problem, print the Print Quality Test Pages. From the control panel, navigate to Settings > Troubleshooting > Print Quality Test Pages. For non-touch-screen printer models, press navigate through the settings. Action Contact your dealer.
- Page 105 Troubleshooting Action Step 2 The problem is Contact your dealer. solved. Depending on your operating system, specify the paper size from the Printing Preferences or Print dialog. Notes: • Make sure that the setting matches the paper loaded. • You can also change the setting from the printer control panel.
- Page 106 Troubleshooting Action Step 3 Go to step 4. The problem is solved. Turn off Color Saver. From the control panel, navigate to: Settings > Print > Quality > Color Saver Print the document. Is the print light? Step 4 Go to step 5. The problem is solved.
- Page 107 Troubleshooting Missing colors Contact your dealer. Mottled print and dots Note: Before solving the problem, print the Print Quality Test Pages. From the control panel, navigate to Settings > Troubleshooting > Print Quality Test Pages. For non-touch-screen printer models, press navigate through the settings.
- Page 108 Troubleshooting Action Step 4 Contact your dealer. The problem is solved. Load paper from a fresh package. Note: Paper absorbs moisture due to high humidity. Store paper in its original wrapper until you are ready to use it. Print the document. Is the print mottled? Print crooked or skewed Note: Before solving the problem, print the Print Quality Test Pages.
- Page 109 Troubleshooting Solid color or black images Contact your dealer. Text or images cut off Note: Before solving the problem, print the Print Quality Test Pages. From the control panel, navigate to Settings > Troubleshooting > Print Quality Test Pages. For non-touch-screen printer models, press navigate through the settings.
- Page 110 Troubleshooting Toner easily rubs off Note: Before solving the problem, print the Print Quality Test Pages. From the control panel, navigate to Settings > Troubleshooting > Print Quality Test Pages. For non-touch-screen printer models, press navigate through the settings. Action Step 1 Go to step 2.
- Page 111 Troubleshooting Uneven print density Contact your dealer. Horizontal dark lines Notes: • Before solving the problem, print the Print Quality Test Pages. From the control panel, navigate to Settings > Troubleshooting > Print Quality Test Pages. For non-touch-screen printer models, press to navigate through the settings.
- Page 112 Troubleshooting Action Step 2 Contact your dealer. The problem is solved. Load paper from a fresh package. Note: Paper absorbs moisture due to high humidity. Store paper in its original wrapper until you use it. Print the document. Do dark lines appear on prints? Vertical dark lines Note: Before solving the problem, print the Print Quality Test Pages.
- Page 113 Troubleshooting Horizontal white lines Notes: • Before solving the problem, print the Print Quality Test Pages. From the control panel, navigate to Settings > Troubleshooting > Print Quality Test Pages. For non-touch-screen printer models, press to navigate through the settings. •...
-
Page 114: Color Quality Problems
Troubleshooting Action Step 1 Go to step 2. The problem is solved. Depending on your operating system, specify the paper type from the Printing Preferences or Print dialog. Notes: • Make sure that the setting matches the paper loaded. • You can also change the setting on the printer control panel. - Page 115 Troubleshooting Modifying the colors in printed output From the control panel, navigate to: Settings > Print > Quality > Advanced Imaging > Color Correction From the Color Correction menu, select Manual > Color Correction Content. Choose the appropriate color conversion setting. Object type Color conversion tables RGB Image...
- Page 116 Troubleshooting How does the printer know what color to print? When printing a document, information describing the type and color of each object is sent to the printer and is passed through color conversion tables. Color is translated into the appropriate amounts of cyan, magenta, yellow, and black toner used to produce the color you want.
-
Page 117: Contacting Your Dealer
Troubleshooting Action Step 2 Contact your dealer. The problem is solved. From the home screen, touch Settings > Print > Quality > Advanced Imaging > Color Balance. Adjust the settings. Print the document. Does the print appear tinted? Contacting your dealer Before contacting your dealer, make sure to have the following information: •... -
Page 118: Notices
Supplies Standard supplies for this product that can be replaced by the user include toner cartridges. Be sure to use only SHARP-specified products for the toner cartridges. - Page 119 Notices For best copying results, be sure to use only Sharp Genuine Supplies which are designed, engineered, and tested to maximize the life and performance of Sharp products. Look for the Genuine Supplies label on the toner package. GENUINE SUPPLIES Hot surface notice 此符號表示該表面或元件會發熱。...
- Page 120 Notices The WEEE logo signifies specific recycling programs and procedures for electronic products in countries of the European Union. We encourage the recycling of our products. If you have further questions about recycling options, contact your local sales office. India E-Waste notice This product complies with the India E-Waste (Management and Handling) Rules, 2011, which prohibit use of lead, mercury, hexavalent chromium, polybrominated biphenyls, or polybrominated diphenyl ethers in concentrations exceeding 0.1%...
- Page 121 Notices BSMI battery notice Taiwan RoHS information 限用物質含有情況標示 適用於印表機、雷射印表機、多功能複合機或多功能印表機。 Applies to Printer, Laser Printer, Multifunction Machine, or Multifunction Printer. 型號(型式):請參閱「注意事項」章節或「控管資訊」章節。 Type designation (Type): Please see the “Notices” section or the “Regulatory information” section. 單元 限用物質及其化學符號 鉛 汞 鎘 六價鉻 多溴聯苯 多溴二苯醚...
- Page 122 Notices This symbol identifies static-sensitive parts. Do not touch the areas near these symbols without first touching a metal surface in an area away from the symbol. To prevent damage from electrostatic discharge when performing maintenance tasks such as clearing paper jams or replacing supplies, touch any exposed metal frame of the printer before accessing or touching interior areas of the printer even if the symbol is not present.
- Page 123 Notices Laser notice The printer is certified in the U.S. to conform to the requirements of DHHS 21 CFR, Chapter I, Subchapter J for Class I (1) laser products, and elsewhere is certified as a Class I laser product conforming to the requirements of IEC 60825-1: 2014.
- Page 124 Notices response time of the product. Setting the Sleep Mode Timeout to a high value maintains a fast response, but uses more energy. Hibernate Mode This product is designed with an ultra‑low power operating mode called Hibernate mode. When operating in Hibernate Mode, all other systems and devices are powered down safely.
- Page 125 Notices Information for China RoHS program Part name Toxic and hazardous substances or elements Lead Mercury Cadmium Hexavalent Polybrominated Polybrominated (Pb) (Hg) (Cd) Chromium (Cr biphenyl (PBB) diphenylether (PBDE) Circuit boards Power supply Power cords Connectors Mechanical assemblies— shafts, rollers Mechanical assemblies—...
- Page 126 Notices Federal Communications Commission (FCC) compliance information statement This product has been tested and found to comply with the limits for a Class A digital device, pursuant to Part 15 of the FCC Rules. Operation is subject to the following two conditions: (1) this device may not cause harmful interference, and (2) this device must accept any interference received, including interference that may cause undesired operation.
- Page 127 Notices CCC EMC notice Japanese VCCI notice Korean KC statement Notice to users of Class A products in Brazil Este produto não é apropriado para uso em ambientes domésticos, pois poderá causar interferências eletromagnéticas que obrigam o usuário a tomar medidas necessárias para minimizar estas interferências. European Community (EC) directives conformity This product is in conformity with the protection requirements of EC Council directives 2014/30/EU, 2014/35/EU, and 2011/65/EU on the approximation and harmonization of the laws of the Member States relating to...
- Page 128 Notices This product satisfies the Class A limits of EN 55022 and EN55032 and safety requirements of EN 60950‑1 or EN 62368-1. Radio interference notice Warning This is a product that complies with the emission requirements of EN55022 and EN55032 Class A limits and immunity requirements of EN55024.
-
Page 129: Index
Index Index configuring supply encrypting notifications 75 printer hard disk 70 adding contacts 15 configuring the SMTP server 89 envelope seals when printing 92 adding groups 16 connecting the mobile device envelopes adjusting default volume to the printer wireless loading 20 headphone 72 network 73 environmental settings 79... - Page 130 Index home screen icons Flash Drive Print 48 multipurpose feeder displaying 14 Google Cloud Print 59 loading 20 horizontal dark lines 111 Help 68 horizontal white lines 113 HTML 45 humidity around the printer 122 HTTP/FTP Settings 57 noise emission levels 119 Image 45 nonvolatile memory IPSec 55...
- Page 131 Index print appears tinted 116 fully configured 9 print job minimum clearances 8 repeat print jobs 26 canceling from the moving 8 printing 26 computer 27 selecting a location 8 repeating print defects 114 canceling from the printer shipping 79 Replace cartridge, printer region control panel 27 printer configurations 9...
- Page 132 Index toner cartridge replacing 76 unable to read flash drive toner cartridges troubleshooting, print 90 ordering 75 uneven print density 111 toner darkness Unformatted flash detected 91 adjusting 114 Universal paper size toner easily rubs off 110 setting 18 tray linking does not work 94 unlinking trays 21 trays USB cable 10...