Advertisement
Quick Links
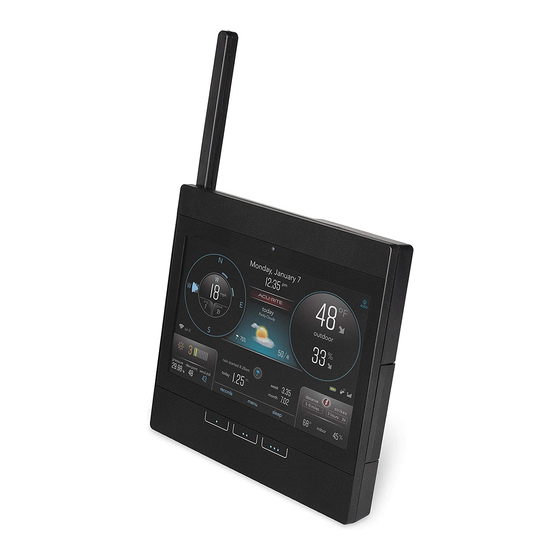
SETUP REQUIRES:
• Display
• Power Adapter (3 AA backup batteries recommended)
• AcuRite Atlas™ weather sensor (may be sold separately)
• 4 x AA alkaline or lithium batteries (not included)
1
INSTALL SENSOR BATTERIES IN ACURITE ATLAS™ WEATHER SENSOR.
PLUG IN DISPLAY WITH THE POWER ADAPTER,
2
LIFT ANTENNA, AND CONFIGURE DISPLAY SETTINGS:
• Clock Hour/Minute
• Auto Change for DST (Yes/No)
• Month/Day/Year
• Units Preference (Metric/U.S.)
• Wi-Fi Configuration (optional, recommended)
3
FIND A SUITABLE PLACE TO MOUNT THE OUTDOOR SENSOR:
• At least 5 feet (1.5 meters) off the ground
• Front solar cell facing south
• Away from heat and humidity sources
• Level for accurate rain reporting
Once the sensor is mounted, remove the rain gauge stabilizer from sensor.
For more information on sensor setup and placement, please see the AcuRite Atlas™
sensor manual.
TROUBLESHOOTING COMMON ISSUES
No outdoor data on main screen
• Verify the sensor is powered on and in range of the display.
See sensor manual for more information on optimal sensor placement.
• Verify the sensor has been linked with the display. To link the sensor:
1. On the Display, visit the Menu > Connections > Add A New Sensor.
2. The Display will search for sensors.
3. When sensor has been found, select Add New Sensor to link it to the Display.
Time, date, or units of measurement need to be adjusted.
• On the Display, visit the Menu > General Setup at any time to adjust the Display settings.
Visit support.acurite.com with any questions or for further support.
Set up your Weather Station
Connect to
My AcuRite with
Wi-Fi
SETUP REQUIRES:
• 2.4 GHz Wireless Network
• Phone, Tablet, or Computer with Wi-Fi
(computer recommended for initial setup)
• Display set up with AcuRite Atlas™
Weather Sensor
1
CONNECT TO DISPLAY WI-FI
Connect to the Wi-Fi signal coming
from your Display using your phone or
Wi-Fi compatible device.
2
ACCESS WI-FI SETUP PAGE
Open a web browser on your device.
Type "192.168.4.1" in the address bar
and press enter to access the AcuRite
Wi-Fi display settings website.
ADDITIONAL NOTES
The Wi-Fi set up page is available for 30 minutes after the display is powered on. On the
display, go to Menu > Connections > Wi-Fi Setup to re-activate the setup page at any time.
To retain Wi-Fi configuration details, backup batteries are strongly recommended in the
display. The display can be power cycled at any time to clear Wi-Fi credentials.
My AcuRite is compatible with Amazon Alexa and Google Assistant by adding the
AcuRite skill for your smart home system. For more information on setup,
visit: acurite.com/skill-setup
06099
3
ADD YOUR WI-FI CREDENTIALS
AND FORECAST LOCATION
Select your Wi-Fi network name and enter
your network password. If you want to
download a weather forecast, enter your
country and postal code. Press "Save".
Once your settings are saved, reconnect
to your normal Wi-Fi.
4
SET UP YOUR MY ACURITE ACCOUNT
Download the My AcuRite mobile app or
visit
www.myacurite.com
to complete
setup using the Device ID located on the
sticker inside the display battery case.
06099M INST 130720
www.acurite.com
Advertisement

Related Manuals for AcuRite Atlas 06099


Summary of Contents for AcuRite Atlas 06099
- Page 1 Once the sensor is mounted, remove the rain gauge stabilizer from sensor. Download the My AcuRite mobile app or Wi-Fi display settings website. For more information on sensor setup and placement, please see the AcuRite Atlas™ visit www.myacurite.com to complete sensor manual.
- Page 2 Quick Setup Guide 06099 AcuRite Atlas Direct to Wi-Fi Display WE’RE HERE TO HELP! For support, visit acurite.com/support. Limited 1-year warranty. Full product manuals, warranty and FCC statement available on acurite.com.