
Related Manuals for Samsung WD9 TA Series


Summary of Contents for Samsung WD9 TA Series
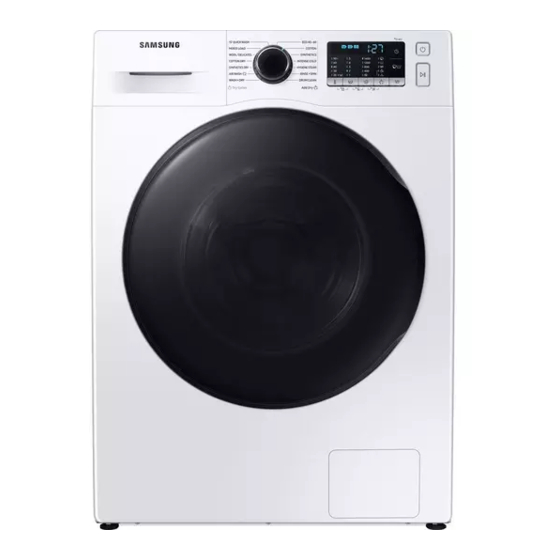
- Page 1 Washing Machine User manual WD9*TA***** / WD8*TA***** / WD7*TA***** WD80TA046BE_04200B-03_EN(Indicative).indd 1 2021/2/24 14:58:12...
-
Page 2: Table Of Contents
Contents Safety information What you need to know about the safety instructions Important safety symbols Important safety precautions Critical installation warnings Installation cautions Critical usage warnings Usage cautions Critical cleaning warnings Instructions about the WEEE Ecodesign Installation What’s included Installation requirements Step-by-step installation Before you start Initial settings... - Page 3 Maintenance Drum clean Smart check Emergency drain Cleaning Recovery from freezing Care against an extended time of disuse Troubleshooting Checkpoints Information codes Specifications Fabric care chart Protecting the environment Spare parts guarantee Specification sheet English 3 WD80TA046BE_04200B-03_EN(Indicative).indd 3 2021/2/24 14:58:12...
-
Page 4: Safety Information
Safety information Congratulations on your new Samsung washing machine. This manual contains important information on the installation, use and care of your appliance. Please take some time to read this manual to take full advantage of your washing machine’s many benefits and features. -
Page 5: Important Safety Precautions
Important safety precautions WARNING To reduce the risk of fire, electric shock, or injury to persons when using your appliance, follow basic precautions, including the following: 1. This appliance is not to be used by persons (including children) with reduced physical, sensory or mental capabilities, or lack of experience and knowledge, unless they have been given supervision or instruction concerning use of the appliance by a person responsible for their safety. - Page 6 Safety information 7. For use in Europe: Children of less than 3 years should be kept away unless continuously supervised. 8. CAUTION: In order to avoid a hazard due to inadvertent resetting of the thermal cut-out, this appliance must not be supplied through an external switching device, such as a timer, or connected to a circuit that is regularly switched on and off by the utility.
- Page 7 17. The final part of a tumble dryer cycle occurs without heat (cool down cycle) to ensure that the items are left at a temperature that ensures that the items will not be damaged. 18. Remove all objects from pockets such as lighters and matches. 19.
-
Page 8: Critical Installation Warnings
Safety information Critical installation warnings WARNING The installation of this appliance must be performed by a qualified technician or service company. • Failure to do so may result in electric shock, fire, an explosion, problems with the product, or injury. The appliance is heavy, therefore take care when lifting it. -
Page 9: Installation Cautions
Following the repair by a non-authorized service provider, self-repair or non-professional repair of the product, Samsung is not liable for any damage to the product, any injury or any other product safety issue caused by any attempt to repair the product which does not carefully follow these repair and maintenance instructions. -
Page 10: Critical Usage Warnings
Safety information Critical usage warnings WARNING If the appliance is flooded, turn off the water & power supplies immediately and contact your nearest service centre. • Do not touch the power plug with wet hands. • Failure to do so may result in electric shock. If the appliance generates a strange noise, a burning smell, or smoke, unplug the power plug immediately and contact your nearest service centre. -
Page 11: Usage Cautions
• Failure to do so may result in electric shock or fire. If any foreign substance enters into the appliance, unplug the power plug and contact you nearest Samsung Customer Service. • This may result in electric shock or fire. - Page 12 Using the product for business purposes qualifies as a product misuse. In this case, the product will not be covered by the standard warranty provided by Samsung and no responsibility can be attributed to Samsung for malfunctions or damages resulting from such misuse.
- Page 13 Do not wash, spin, or dry water-proof seats, mats, or clothing (*) unless your appliance has a special cycle for washing these items. (*): Woollen bedding, rain covers, fishing vests, ski pants, sleeping bags, diaper covers, sweat suits, and bicycle, motor cycle and car covers, etc. • Do not wash thick or hard mats even if the washing machine mark is on the care label.
-
Page 14: Critical Cleaning Warnings
Safety information Do not use dry cleaning detergent directly and do not wash, rinse, or spin laundry contaminated by dry cleaning detergent. • This may result in spontaneous combustion or ignition due to the heat from the oxidation of the oil. Do not use water from water cooling/heating devices. -
Page 15: Instructions About The Weee
This product and its electronic accessories should not be mixed with other commercial wastes for disposal. For information on Samsung’s environmental commitments and product regulatory obligations, e.g. REACH, WEEE or Batteries, visit our sustainability page available via www. samsung.com... -
Page 16: Installation
What’s included Make sure all the parts are included in the product package. If you have a problem with the washing machine or the parts, contact a local Samsung customer centre or the retailer. 01 Release lever 02 Detergent drawer... - Page 17 Spanner Bolt caps Hose guide Cold water hose Hot water hose Liquid detergent container Cap fixer NOTE • Spanner: For removing the shipping bolts and levelling the washing machine. • Bolt caps : For covering the holes after removing the shipping bolts. The provided number of bolt caps (3 to 6) depends on the model.
-
Page 18: Installation Requirements
Drain • Improperly connected grounding Samsung recommends a standpipe in conductors may cause electric shock. height of 60~90 cm. The drain hose must be connected through the hose clip to the standpipe, and the standpipe must fully cover the drain hose. - Page 19 Flooring Alcove or closet installation For best performance, the washing Minimum clearance for stable operation: machine must be installed on a solid floor. Sides 25 mm Rear 50 mm Wood floors may need to be reinforced 25 mm Front 550 mm to minimize vibration and/or unbalanced loads.
-
Page 20: Step-By-Step Installation
Installation Step-by-step installation STEP 1 Select a location Location requirements: • Solid, level surface without carpeting or flooring that may obstruct ventilation • Away from direct sunlight • Adequate room for ventilation and wiring • The ambient temperature is always higher than the freezing point (0 ˚C) • Away from a heat source STEP 2 Remove the shipping bolts Unpack the product package and remove all shipping bolts. - Page 21 1. Locate the shipping bolts (marked with circle in the figure) on the rear side of the washing machine. CAUTION Do not remove the screw (A) that fixes the hose clip. 2. Using the supplied spanner, loosen all the shipping bolts by turning them counterclockwise.
- Page 22 Installation 3. Insert the bolt caps (B) to the holes (marked with circle in the figure). STEP 3 Adjust the levelling feet 1. Gently slide the washing machine into position. Excessive force may damage the levelling feet. 2. Level the washing machine by manually adjusting the levelling feet.
- Page 23 3. When levelling is complete, tighten the nuts using the spanner. CAUTION When installing the product make sure the levelling feet is not pressing the power cord. CAUTION Make sure all the levelling feet are seating on the floor surface to avoid the washing machine from moving or generating noise due to vibration Then, check if the washing machine is not rocking.
- Page 24 If there is a water leak, stop operating the washing machine and disconnect from the electrical supply. Then, contact a local Samsung service centre in case of a leak from the water hose, or contact a plumbing technician in case of a leak from the water tap. Otherwise, this may cause electric shock.
- Page 25 CAUTION Do not stretch the water hose by force. If the hose is too short, replace the hose with a longer, high-pressure hose. Connecting to a non-threaded water tap 1. Remove the adaptor (A) from the water hose (B). 2. Use a Phillips screwdriver to loosen four screws on the adaptor.
- Page 26 Installation 4. Insert the adaptor onto the water tap, and then tighten the screws while lifting the adaptor. 5. Turn part (C) in the arrow direction to tighten it. 6. While pulling down part (D) on the water hose, connect the water hose to the adaptor.
- Page 27 For models with an additional hot water inlet: 1. Connect the red end of the hot water hose to the hot water inlet on the back of the machine. 2. Connect the other end of the hot water hose to the hot water tap. Aqua stop hose (applicable models only) The aqua stop hose alerts users of a risk of water leaks.
- Page 28 Installation STEP 5 Position the drain hose The drain hose can be positioned in three ways: Over the edge of a wash basin The drain hose must be placed at a height of between 60 cm and 90 cm (*) from the floor.
- Page 29 In a sink drain pipe branch The drain pipe branch mush be above the sink siphone so that the end of the hose is at least 60 cm above the ground. (*) : 60 cm CAUTION Remove the lid on the sink drain pipe branch before connecting the drain pipe to CAUTION Do not put the drain hose in places of...
-
Page 30: Before You Start
Before you start Initial settings Run Calibration (recommended) Calibration ensures accurate weight detection by the washing machine. Make sure the drum is empty before running Calibration. 1. Power off, and then power on the washing machine. 2. Hold down Temp. and Delay End simultaneously for 3 seconds to enter Calibration mode. - Page 31 Turn clothing with buttons and embroideries inside out • If pants or jacket zippers are open while washing, the drum may be damaged. Zippers should be closed and fixed with a string. • Clothing with long strings may become entangled with other clothes. Make sure to tie the strings before starting the wash.
- Page 32 Before you start NOTE • Follow the detergent manufacturer’s recommendations based on the weight of the laundry, the degree of soiling, and the hardness of the water in your local area. If you are not sure about the water hardness, contact a local water authority. • Do not use detergent that tends to be hardened or solidified.
-
Page 33: Detergent Recommendation
Detergent recommendation The recommendations apply to the temperature ranges given in the cycle chart. Recommended Liquid detergent only Not recommended Powder detergent only – Detergent Cycle Temp.(oC) Universal Delicates and woollens Specialist ECO 40-60 40~60 – – ... -
Page 34: Detergent Drawer Guidelines
Before you start Detergent drawer guidelines The washing machine provides a three-compartment dispenser: the left compartment for the main wash, the centre compartment for fabric softeners, and the right compartment for the preliminary wash. Prewash compartment: Apply prewash detergent. Main-wash compartment: Apply main-wash detergent, water softener, soaking detergent, bleach, and/or stain removers. - Page 35 3. Apply fabric softener to the softener compartment. Do not exceed the max line (A). 4. If you want to prewash, apply prewash detergent to the prewash compartment as instructed or recommended by the manufacturer. 5. Close the detergent drawer. CAUTION • Do not apply powder detergent to the liquid container.
- Page 36 Before you start To use liquid detergent (applicable models only) First insert the provided liquid container in the main-wash compartment. Then, apply liquid detergent to the container below the marked max line (A). CAUTION • Do not exceed the max line that is marked inside the container.
-
Page 37: Operations
Operations Control panel 01 Cycle Selector Turn the dial to select a cycle. The display shows current cycle information and estimated time 02 Display remaining, or an information code when a problem occurs. Press to change the water temperature for the selected cycle. Temp. -
Page 38: Simple Steps To Start
Operations Delay End lets you set the end time of the current cycle. Based on your settings, the start time of the cycle will be determined by the machine’s internal logic. For example, this setting is useful Delay End for programming your machine to finish a wash at the time you normally return home from work. -
Page 39: Drying Only
Drying Only You can dry your clothes directly or dry the washed clothes according to the following procedures. 1. Press Power button to turn on the washing machine. 2. Turn the Cycle Selector to select the appropriate drying cycle. 3. Press Dry Option button to select the appropriate drying mode. -
Page 40: Cycle Overview
Operations Cycle overview Standard ccycles Max load (kg) Cycle Description & Max load (kg) model model model • For cleaning normally soiled cotton items which are declared to be washable at 40 °C or 60 °C, together in the same cycle. This cycle is used to ECO 40-60 Max Max Max assess the compliance with the EU Ecodesign... - Page 41 Max load (kg) Cycle Description & Max load (kg) model model model • Cleans the drum by removing dirt and bacteria from it. • Perform once every 40 washes with no detergent or bleach applied. It notifies DRUM CLEAN automatically after every 40 washes. • Make sure the drum is empty.
- Page 42 Operations Dry cycles Cycle Description & Max load (kg) COTTON DRY • For general drying. • A low temperature drying cycle for heat-sensitive SYNTHETICS DRY garments. • This cycle is useful for removing bad odours. AIR WASH • For cleaning normally soiled cotton items which are declared to be washable at 40 °C or 60 °C, together in the same cycle, and to dry them in WASH+DRY...
- Page 43 Option Description • Bubble Soak helps remove a variety of stubborn stains. • With Bubble Soak selected, laundry is thoroughly soaked in water bubbles for effective washing. Bubble Soak • Bubble Soak is available with and adds up to 30 minutes to 5 cycles: Cotton, Synthetics, Hygiene Steam, Mixed Load and Wash+Dry.
-
Page 44: Settings
Operations Settings Child Lock Sound On/Off To prevent children or infants from You can turn on or off the sound from the accidentally starting or setting the washing washing machine. When this function is set machine, Child Lock locks all buttons except to Off, the melody of cycle completion, and for the Power button. -
Page 45: Maintenance
Maintenance Keep the washing machine clean to prevent deteriorated performance and to preserve its life cycle. Drum clean Perform this cycle regularly to clean the drum by removing bacteria from it. This cycle heats the water between 60 °C and 70 °C. 1. -
Page 46: Smart Check
Maintenance Smart check To enable this function, you must first download the Samsung Smart Washer app at the Play Store or the Apple Store, and install it on a mobile device featuring a camera function. The Smart Check function has been optimized for Galaxy & iPhone series (applicable models only). -
Page 47: Emergency Drain
Emergency drain In case of a power failure, drain the water inside the drum before taking out the laundry. 1. Power off and unplug the washing machine from the electrical outlet. 2. Gently press the top area of the filter cover (A) to open. -
Page 48: Cleaning
Maintenance Cleaning Surface of the washing machine Use a soft cloth with a nonabrasive household detergent. Do not spray water onto the washing machine. Mesh filter Clean the mesh filter of the water hose once or twice a year. 1. Turn off the washing machine, and unplug the power cord. - Page 49 Debris filter Clean the debris filter bi-monthly to prevent clogging. A clogged debris filter may reduce the bubble effect. 1. Turn off the washing machine, and unplug the power cord. 2. Drain the remaining water inside the drum. See the “Emergency drain” section.
- Page 50 Maintenance • Make sure the filter is inserted properly after cleaning it. Otherwise, this may cause an operational failure or a leak. Detergent Drawer 1. While holding down the release lever (A) on the inner of the drawer, slide open the drawer.
-
Page 51: Recovery From Freezing
Recovery from freezing The washing machine may freeze when it drops below 0 °C. 1. Turn off the washing machine, and unplug the power cord. 2. Pour warm water over the water tap to loosen the water hose. 3. Disconnect the water hose, and soak it in warm water. 4. -
Page 52: Troubleshooting
Troubleshooting If there is any problem, check the information message on the LED screen and follow the on- screen instructions. If the problem persists, please contact the service center. Checkpoints If you encounter a problem with the washing machine, first check the table below and try the suggestions. - Page 53 Problem Action • Make sure the washing machine is installed on a level, solid floor that is not slippery. If the floor is not level, use the levelling feet to adjust the height of the washing machine. • Make sure the shipping bolts are removed. • Make sure the washing machine is not in contact with any other object.
- Page 54 Troubleshooting Problem Action • Press or tap Start/Pause to stop the washing machine. • It may take a few moments for the door lock mechanism to disengage. • The door will not open until 3 minutes after the washing The door does not machine has stopped or the power has been off.
- Page 55 Problem Action • Fully open both taps. • Make sure the temperature selection is correct. • Make sure the hoses are connected to the correct taps. Flush water lines. • Make sure the water heater is set to supply a minimum of 49 °C hot water at the tap.
-
Page 56: Information Codes
If a problem persists, contact a service center. The number of the service center is on the label attached to the product. Samsung is not liable for any damage to the product, any injury, or any other product safety issue caused by a repair which does not follow the instructions in these Repair Guides. Any damage to the product caused by an attempted repair (by anyone other than a Samsung certified service provider) will also not be covered by the warranty. - Page 57 Water has overflowed. • Restart after spinning. • If the information code remains on the display, contact a local Samsung service centre. Check the drain hose. • Make sure the end of the drain hose is not placed on the floor.
- Page 58 • The machine operates normally without running the DRUM CLEAN cycle. However, it is recommended to run the cycle for hygienic purposes. If any information code keeps appearing on the screen, contact a local Samsung service centre. 58 English WD80TA046BE_04200B-03_EN(Indicative).indd 58...
-
Page 59: Specifications
Specifications Fabric care chart The following symbols provide garment care directions. The care labels include four symbols in this order: washing, bleaching, drying and ironing (and dry cleaning when necessary). The use of symbols ensures consistency among garment manufacturers of domestic and imported items. -
Page 60: Protecting The Environment
• Door, door hinges and seals, other seals, door locking assembly, and plastic peripherals such as detergent dispensers. • Listed parts can be purchased at below website. - http://www.samsung.com/support Specification sheet “ * ” Asterisk(s) means variant model and can be varied (0-9) or (A-Z). - Page 61 Type Front loading washing machine Model name WD9*TA***** A (Width) 600 mm B (Height) 850 mm Dimensions C (Depth) 650 mm 730 mm 1170 mm Water pressure 50 kPa ~ 1000 kPa NET weight 68 kg Wash and spin capacity 9.0 kg Dry capacity 6.0 kg...
- Page 62 Specifications Type Front loading washing machine Model name WD8*TA***** WD7*TA***** A (Width) 600 mm 600 mm B (Height) 850 mm 850 mm Dimensions C (Depth) 600 mm 550 mm 680 mm 620 mm 1120 mm 1070 mm Water pressure 50 kPa ~ 1000 kPa NET weight 68 kg 63 kg...
- Page 63 Indicative information (According to EU 2019/2023) Energy Water Maximum Remaining Spinning Capacity Program Time Model Cycles Consumption Consumption Temperature Moisture Content Speed (kg) (HH:MM) (kWh/Cycle) (L/cycle) (ºC) (RPM) 3:42 0.966 73.0 53.0 1400 Eco40-60 2:54 0.527 42.0 53.0 1400 2:44 0.265 35.0 53.0...
- Page 64 Specifications EPREL information To access the EPREL registration of the model : 1. Go to https://eprel.ec.europa.eu 2. Get the model identifier from the energy label of the product and type it in the search box 3. Energy Labelling information of the model is shown * You can directly access the product information via https://eprel.ec.europa.eu/ qr/#####(registration no.) The registration no.
- Page 65 Memo WD80TA046BE_04200B-03_EN(Indicative).indd 65 2021/2/24 14:58:28...
- Page 66 WD80TA046BE_04200B-03_EN(Indicative).indd 66 2021/2/24 14:58:28...
- Page 67 WD80TA046BE_04200B-03_EN(Indicative).indd 67 2021/2/24 14:58:28...
- Page 68 QUESTIONS OR COMMENTS? COUNTRY CALL OR VISIT US ONLINE AT 0333 000 0333 www.samsung.com/uk/support IRELAND (EIRE) 0818 717100 www.samsung.com/ie/support DC68-04200B-02 WD80TA046BE_04200B-03_EN(Indicative).indd 68 2021/2/24 14:58:28...