
Related Manuals for Grundig Music 5000 DAB+


Summary of Contents for Grundig Music 5000 DAB+
- Page 1 Digital Radio User Manual Music 5000 DAB+ Music 50 DAB+ DE - EN - FR 01M-GDB1010-4620-04 01M-GDB1050-4620-04 01M-GDB1020-4620-04 01M-GDB1060-4620-04...
-
Page 2: Grundig Kundenberatungszentrum
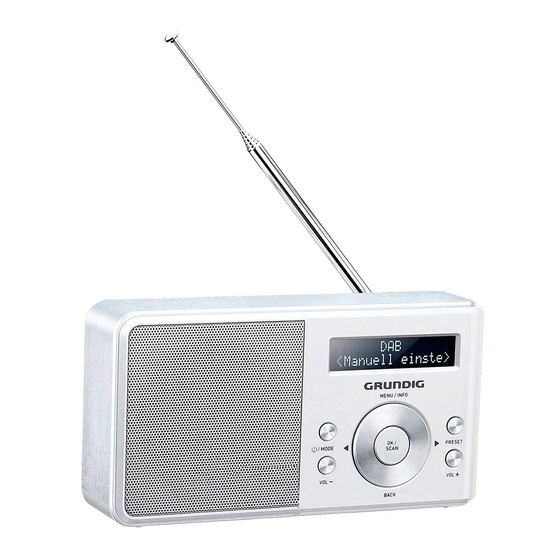
GRUNDIG Kundenberatungszentrum Haben Sie Fragen? Montag bis Freitag von 8.00 bis 18.00 Unser Kundenberatungszentrum steht Ihnen werktags stets von Deutschland: 0911 / 590 597 30 8.00 – 18.00 Uhr zur Verfügung. Österreich: 0820 / 220 33 22 * * gebührenpflichtig (0,14 €/Min. aus dem Festnetz, Mobilfunk: max. - Page 3 Display PRESET /MODE Menu/ INFO VOL+ BACK VOL- SCAN ON/OFF Antenna...
- Page 4 ---------------------------------------------------------------------------------------------------------------------------------------------- DEUTSCH 05-19 ENGLISH 20-33 FRANÇAIS 34-48...
- Page 5 SICHERHEIT UND INFORMATIONEN ------ Diese Zusätze können u.a. das Ma- Dieses Gerät ist für die Wiederga- terial der Gerätefüße angreifen, wo- be von Ton-signalen bestimmt. Jede durch Rückstände auf der Möbelober- andere Verwendung ist ausdrücklich fläche entstehen, die sich nur schwer ausgeschlossen.
-
Page 6: Technische Daten
Nur durch den gleichen oder einen gleichwertigen Typ ersetzen. Den genauen Wortlaut der Konformi- tätserklärung (DOC finden Sie auf der Wichtige Hinweise zu GRUNDIG Homepage Hochfrequenzaussendun- www.grundig.com/downloads/doc. Das Typenschild befindet sich an der Dieses Gerät muss wie in der mitgelie- Rückseite des Gerätes. -
Page 7: Entsorgung Von Altgeräten
SICHERHEIT UND INFORMATIONEN ------ Einhaltung von RoHS-Vor- Anzeige LED-Display mit 2 Zeilen x 16 Zeichen gaben: Anschlüsse Das von Ihnen erworbene Produkt erfüllt Micro-USB-Port (für Stromversorgung), die Vorgaben der EU-RoHS Direktive 3,5-mm-Kopfhöreranschluss. (2011/65/EU). Es enthält keine in der Direktive angegebenen gefährlichen Leistungsaufnahme im Bereitschaftsmo- dus <... - Page 8 STROMVERSORGUNG -------------------------------------------------------- Netz-Betrieb Umwelthinweis: Die Batterien – auch schwermetall- Verbinden Sie das USB-Kabel mit freie – dürfen nicht im Hausmüll ent- dem Micro-USB-Anschluss am Gerät. sorgt werden. Verbrauchte Batterien müssen in die Caution: Altbatteriesammelgefäße bei Han- Dieses Gerät ist über das Micro- del und öffentlich-rechtlichen Entsor- USB-Kabel mit der Stromversor- gungsträgern...
-
Page 9: Auf Einen Blick
AUF EINEN BLICK ---------------------------------------------------------------------------- Beachten Sie die Abbildung auf Seite 3. Menu/INFO Halten Sie die Taste dann zum Aufrufen Bedienelemente an der Vorder- des Menüs gedrückt. seite Drücken Sie diese Taste, um Informatio- Durch Gedrückthalten /MODE nen über DAB- oder der Taste schalten Sie UKW-Radiosender das Gerät ein und... - Page 10 – Der automatische Programm- Betätigen Sie die » «-Taste ON/OFF Suchlauf startet, sucht und spei- zum Einschalten des Gerätes. chert die gefundenen Rundfunk- – Display: » «. GRUNDIG Programme. – Danach schaltet das Gerät ab, die Uhrzeit wird angezeigt. DEUTSCH...
- Page 11 EINSTELLUNGEN ----------------------------------------------------------------------------- DAB-Rundfunk-Programme DAB-Rundfunk-Programme auf Programmplätze einstellen und speichern – speichern manuell Nach dem automatischen Programm- Programmquelle Suchlauf werden alle DAB-Rund- » /MODE« wählen. funk-Programme in der Programmliste Das Menü mit » « au- MENU/INFO gespeichert. Ihre bevorzugten DAB- frufen. Rundfunk-Programme können Sie auch auf den Programmplätzen (Presets) 1 Menüpunkt »...
- Page 12 EINSTELLUNGEN ----------------------------------------------------------------------------- UKW-Rundfunk- » « drücken und gedrückt PRESET Programme einstellen und halten. speichern – Anzeige: » « und Preset Store der erste Programmplatz. Programmquelle » MODE« wählen. Gewünschten Programmplatz » « oder » « wählen und mit » Das Menü mit » MENU/INFO «...
-
Page 13: Lautstärke Ändern
RADIO-BETRIEB --------------------------------------- Allgemeine Funktionen DAB-Programm wählen Gewünschtes Programm aus der Pro- Teleskopantenne grammliste mit » « oder » « schritt- Für den bestmöglichen DAB/UKW- weise wählen und mit » OK/SCAN « Empfang Teleskopantenne bestätigen. herausziehen. Gespeicherte Programme Ein- und ausschalten aufrufen Schalten Sie das Gerät vom Bere- »... - Page 14 DRC muss vom jeweiligen DAB-Pro- Hinweise: gramm unterstützt werden. Es kann einige Zeit dauern, bis alle RDSInformationen übertragen wor- den sind. GRUNDIG hat keinen Einfluss auf die Richtigkeit dieser Informationen. » « wiederholt drücken. INFO – Die folgenden Informationen wer-...
-
Page 15: Alarm Timer
WECK-BETRIEB ---------------------------------------- Alarmtimer Weckmodus (Weekdays Wochentag, Weekends Alarmtimer einstellen Wochenende, 1 -6 = ausser Sontag, Daily = Täglich, ONCE = Einmal) Das Menü mit » « au- MENU/INFO mit » « oder » « eingeben und mit frufen. » « bestätigen. OK/SCAN«... -
Page 16: Sleep Timer
WECK-BETRIEB ---------------------------------------- Wecken unterbrechen Sleep-Timer Während Weckens Das Gerät verfügt über einen Sleep- » « drücken. OK/SCAN Timer, der es während des Betriebes zu – Das Wecksignal (Rundfunk-Pro- einer voreingestellten Zeit ausschaltet. gramm oder Signalton) stoppt. Die mögliche Ausschaltzeit ist von 10 –... - Page 17 « (Ja) mit » « oder » « wählen. Hinweis: Zum Abbrechen der Resetfunktion die Option » « (Nein) mit » « oder » « wählen. Einstellung mit » « bestäti- OK /SCAN gen. – Anzeige: » «. GRUNDIG DEUTSCH...
- Page 18 SONDERFUNKTIONEN ------------------------- Zeiteinstellungen Uhrzeit aktualisieren – au- tomatisch Zeitformat für die Uhrzeit ein- stellen (12- oder 24 Stunden) Die Uhrzeit wird automatisch aktualisi- ert, wenn ein Rundfunk-Programm ein Das Menü mit » « au- MENU/INFO Zeitsignal sendet. frufen. Sie können einstellen, ob die Aktualisier- Menüpunkt »...
- Page 19 SONDERFUNKTIONEN ------------------------- Uhrzeit einstellen – manuell Das Menü mit » MENU/INFO « au- frufen. Menüpunkt » « mit » « oder S y stem » « wählen und mit » « OK/SCAN bestätigen. Menüpunkt » « mit » « OK/SCAN Time bestätigen.
-
Page 20: Safety And Information
SAFETY AND INFORMATION --------------------------------- This device is designed for the play- Never open the device casing. The back of audio signals. manufacturer will not accept any li- Any other use is expressly prohibited. ability for damage resulting from im- proper handling. Make sure the device is protected Make sure the power plug is freely from dripping or splashing water. -
Page 21: Rf Exposure Warning
European directives 2014/53/EU and 2011/65/EU. You can find the CE declaration of con- formity for the device in the form of a pdf file on the Grundig Homepage www.grundig.com/downloads/doc. The type plate is located on the back side of the device. -
Page 22: Compliance With The Weee Directive And Disposing Of The Waste Product
SAFETY AND INFORMATION --------------------------------- Compliance with the WEEE Package information Directive and Disposing of Packaging materials of the the Waste Product: product are manufactured from recyclable materials in This product complies with EU WEEE accordance with our Na- Directive (2012/19/EU). This product tional Environment Regulations. -
Page 23: Power Supply
POWER SUPPLY --------------------------------------------------------------------------------- Mains operation Environmental note: Batteries, including those which con- Connect the USB cable on the tain no heavy metal, must not be MICRO USB socket on the device. disposed of with household waste. Please dispose of used batteries in an Caution: environmentally sound manner. -
Page 24: Controls On The Front
OVERVIEW -------------------------------------------------------------------------------------------------- See the figure on page 3. BACK Press to go back one step. Controls on the front Controls on the right Press and hold the but- /MODE ON/OFF It is a switch , to power ton, turns the device on or off the device. -
Page 25: Connection And Preparation
Switch » ON/OFF « button dio stations. to switch on the device. – After the automatic scan, the de- – Display: » «. GRUNDIG vice switches to standby, the cur- rent time lights up. ENGLISH... - Page 26 SETTINGS -------------------------------------------------------------------------------------------------------- Storing DAB radio stations Programming DAB radio to presets stations – manually After the automatic station search, all ra- Select the input source DAB with dio stations will be stored in the program /MODE«. » list. You can store your favored DAB ra- Open the menu with »...
- Page 27 SETTINGS -------------------------------------------------------------------------------------------------------- Tuning and storing FM Press and hold down » «. PRESETS radio stations – Display: » « and Preset Store the first preset. Select the input source FM with Select the preset with » « or » « and /MODE«.
-
Page 28: Adjusting The Volume
RADIO MODE------------------------------------------ General functions Selecting DAB radio station Select the desired station from the Telescopic antenna program list step by step by pressing For the best DAB/FM (UHF) recep- » « or » « and confirm by pressing tion, it is sufficient to extend the tel- »... -
Page 29: Selecting Stored Stations
« Notes: It may take some time before all RDS information is available. Select the option » « with GRUNDIG has no influence on the » « or » « and confirm by pressing correctness of such information. » OK/SCAN «. - Page 30 TIMER MODE ------------------------------------------- Alarm mode Select the desired alarm mode (Weekdays, Weekends, 1 - 6, Daily, Setting the alarm time Once) with » « or » « and confirm Open menu with by pressing » OK/SCAN «. » «. MENU/INFO Note: If the alarm is set to „Once“, select Select the option »...
-
Page 31: Activating And Deactivating The Alarm
TIMER MODE ------------------------------------------- End the alarm Activating the sleep timer Open the menu with » MENU/INFO «. Press » « while the alarm is MODE sound. Select the option » « with System – The alarm signal (radio station, or »... - Page 32 Select the option » « with » « or » «. Note: To cancel the function select the op- tion » « with » « or » «. Press » « to confirm setting. OK/SCAN – Display: » «. GRUNDIG ENGLISH...
-
Page 33: Updating The Time - Automati- Cally
SPECIAL FUNCTIONS ----------------------------- Time settings Select the option » « Auto update with » « or » « and confirm by press- Setting the clock format (12 or ing » «. OK/SCAN 24 hours) Select the desired source (Any = DAB Open menu with... - Page 34 INFORMATIONS RELATIVES À LA SÉCURITÉ -------- Cet appareil est conçu pour la lecture Lors de l’installation de votre appareil, des signaux audio. tenez compte du fait que la plupart Son utilisation à d’autres fins est for- des meubles sont recouverts de vernis, mellement interdite.
-
Page 35: Données Techniques
PDF sur la page d’accueil du une explosion. Remplacez-la unique- site Web de Grundig ou à l’adresse ment avec le même type de pile ou www.grundig.com/downloads/doc. l’équivalent. -
Page 36: Information Sur L'embal- Lage
INFORMATIONS RELATIVES À LA SÉCURITÉ -------- Alimentation électrique : Ce symbole indique que ce Port Micro USB : 5 V 2,0 A produit ne doit pas être jeté Piles : 4 x 1,5 V AA avec les déchets ménagers à Sortie de puissance : la fin de sa vie utile. - Page 37 INFORMATIONS RELATIVES À LA SÉ- CURITÉ ------------------------------------------------------------------------------------------------------------------- points de collecte d’éléments d’embal- lage que vous indiquera l’autorité locale dont vous dépendez. L’éclair représenté par le sym- bole de la flèche dans un triangle équilatéral est destiné à alerter les utilisateurs de la présence de la haute tension dans l’ap- pareil qui pourrait causer une électrocu- tion.
-
Page 38: Alimentation Électrique
ALIMENTATION ÉLECTRIQUE --------------------------------- Fonctionnement sur secteur Fermer le compartiment à piles. Connecter le câble USB au port Remarques : MICRO USB sur l’appareil. Ne pas exposer les piles à une chaleur extrême, provoquée par ex- Attention : emple par la lumière directe du soleil, L’appareil est connecté... - Page 39 APERÇU -------------------------------------------------------------------------------------------------------------- Voir la figure en page 3. Dérouler vers gauche dans le menu. Commandes sur la partie fron- Menu/INFO Appuyer et maintenir tale pour entrer dans le menu. Actionner et maintenir /MODE Appuyer pour afficher le bouton, pour allu- l’information mer ou éteindre l’ap- radio DAB ou FM.
-
Page 40: Remarque Relative À L'envi- Ronnement
« ON/OFF pour mettre l’appareil en service. les stations de radio (DAB et FM) – installation initiale – Écran : » GRUNDIG «. chargement... Lorsque l'appareil est mis sous tension pour la première fois ou après une ré- Syntonisation et initialisation aux paramètres d'origine,... - Page 41 PARAMÈTRES ------------------------------------------------------------------------------------------ Programmation manuelle Sélectionner l’option » Recherche « avec » « totale des stations des stations de radio DAB ou » « et confirmer en appuyant sur Sélectionner source d'en- » OK/SCAN «. trée DAB à l'aide du bouton –...
- Page 42 PARAMÈTRES ------------------------------------------------------------------------------------------ Réglage et mémorisation des stations de radio FM appuyer brièvement sur » « ou » « jusqu'à avoir trouvé la fréquence choi- Sélectionner la source d’entrée sie. /MODE«. FM avec » – La fréquence change par inter- valles de 50 kHz. Ouvrir menu avec...
-
Page 43: Mode Radio
MODE RADIO ----------------------------------------------------------------------------------------- Fonctions générales Sélection des stations radio Antenne télescopique Sélectionner la station souhaitée Pour une meilleure réception DAB/ de la liste des programmes en ap- FM(UHF), il suffit de déployer l'an- puyant étape par étape sur » « tenne télescopique et de l'orienter ou »... - Page 44 DRC faible tions RDS peut prendre du temps. ou » « avec » « ou » « DRC élevé GRUNDIG ne saurait garantir l'exacti- et confirmer en actionnant » tude de ces informations. «. SCAN Actionner » « à plu- MENU/INFO Actionner et maintenir »...
-
Page 45: Mode Minuterie
MODE MINUTERIE ------------------------------------------------------------------------ Mode Alarme Sélectionner le mode d’alarme désiré (jours de la semaine, weekends, 1 - Réglage de l’heure de 6, quotidien, unique) avec » « ou l'alarme » « et confirmer en actionnant » Ouvrir menu avec SCAN «. -
Page 46: Arrêt Programmé
MODE MINUTERIE ------------------------------------------------------------------------ Désactive l'alarme Activation de la minuterie sommeil Appuyer sur » « pendant MODE Ouvrir le menu avec » «. que l’alarme retentit. MENU/INFO – Le signal d’alarme (station radio ou Sélectionner l’option » Confi- signal) s'arrête. « avec » «... -
Page 47: Fonctions Spéciales
« ou » «. Sélectionner l’option » Actionner » OK/SCAN « pour confir- Configura- « avec » « ou » « et confirmer mer le réglage. tion en actionnant » «. – Écran : » GRUNDIG charge- «. ment... FRANÇAIS... - Page 48 FONCTIONS SPÉCIALES ---------------------------------------------------- Confirmer l’option » « en Sélectionner la source désirée (parmi Heure/date actionnant » «. = DAB et FM, ou DAB ou FM) à partir OK/SCAN de laquelle commence la mise à jour, – Écran : » «. Réglage heure/date à...
- Page 49 Beko Grundig Deutschland GmbH Thomas-Edison-Platz 3 D-63263 Neu-Isenburg www.grundig.com...