
Related Manuals for Kohler Eir Comfort Height K-77795-0


Summary of Contents for Kohler Eir Comfort Height K-77795-0
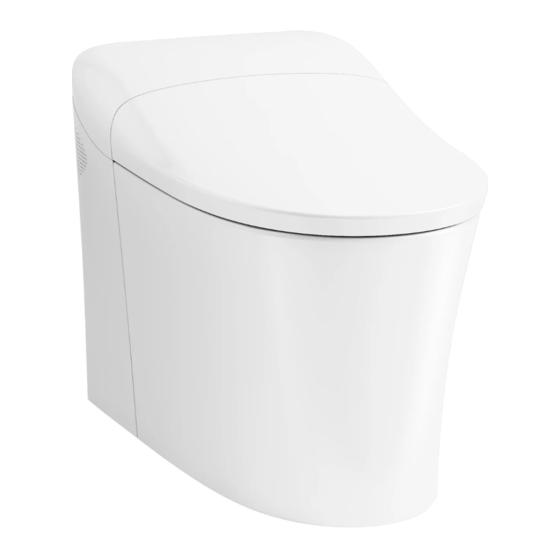
- Page 1 Installation Guide Intelligent Toilet Français, page “Français-1” Español, página “Español-1” 1295780-2-A...
-
Page 2: Tools And Materials
WARNING: Risk of electric shock. Grounding is required. A qualified electrician should make all electrical connections. WARNING: Risk of personal injury. The vitreous shell weighs 105 lbs (36 kg). Use proper lifting technique when handling the vitreous shell. Lift and position the vitreous shell with a partner. 1295780-2-A Kohler Co. - Page 3 Observe all local plumbing and building codes. Carefully inspect the new toilet for any damage. There is a wiring schematic on the inside of the access cover. Consult the Homeowners Guide for user directions. Consult the Homeowners Guide for troubleshooting instructions. Kohler Co. 1295780-2-A...
- Page 4 *Outside North America, this device may be known as a Residual Current Device (RCD). For hardwired installations, see the ″Roughing-In, Hardwired″ section. Make sure that the supply stop and electrical outlet are located within the supplied dimensions. Install the electrical outlet at the location shown. 1295780-2-A Kohler Co.
- Page 5 Route the branch circuit supply conductors through UL Listed flexible conduit from the junction box or other approved enclosure to the field wiring compartment at the rear of the toilet as shown and in accordance with local electrical installation codes. Kohler Co. 1295780-2-A...
- Page 6 Disconnect the line (black), neutral (white), and ground (green) wires from the connections. Remove the two screws and remove the cord retainer. Remove the cord from the toilet. Retain all screws and panels for reinstallation. Continue to the ″Prepare the Site″ section. 1295780-2-A Kohler Co.
-
Page 7: Prepare The Site
NOTE: Do not install the wax ring at this time. Install two 5/16″ diameter x 2-1/4″ long T-bolts into the floor flange. Set the adapter in place over the flange as shown. Mark the adapter rear mounting hole. Kohler Co. 1295780-2-A... -
Page 8: Prepare The Adapter
5. Prepare the Adapter Remove the adapter from the flange. Drill a 3/16″ hole at the mark. Press the wax ring onto the bottom of the adapter as shown. 1295780-2-A Kohler Co. -
Page 9: Install The Adapter
Align and lower the adapter over the floor flange and T-bolts. Install a washer and nut on each T-bolt. Secure the rear of the adapter with a 1/4″ lag bolt and washer. If not already done, remove the access panels from the toilet. Kohler Co. 1295780-2-A... - Page 10 Mark the two mounting holes on the floor. Remove the toilet. Drill a 3/16″ hole at each mark. Replace the toilet. Secure the toilet with a 1/4″ lag bolt and washer in each hole. Connect the supply stop. 1295780-2-A Kohler Co.
- Page 11 Using a suitable strain relief, connect the Line, Neutral, and Ground wires to the electrical connections as shown. Install the electrical connection cover with the four screws. Install the electrical panel cover with the two screws. Continue to the ″Check Operation″ section. Kohler Co. 1295780-2-A...
-
Page 12: Check Operation
Check for leaks. For plug-in installations, plug the power cord into the outlet. For hardwired installations, turn on the electricity to the circuit. Press the power switch to turn the toilet on. The toilet will complete a startup cycle. 1295780-2-A Kohler Co. -
Page 13: Complete The Installation
IMPORTANT! Do not install the access covers until the 100% silicone sealant has cured. Apply 100% silicone sealant around the base of the toilet as shown. Do not apply sealant where the access covers meet the floor. Attach the access covers. Kohler Co. 1295780-2-A... - Page 14 Install the batteries in the docking station (consult the Homeowners Guide for instructions if needed). Attach the docking station to the mounting bracket. To pair the remote control to the toilet, consult the Homeowners Guide for instructions. 1295780-2-A Kohler Co.
- Page 15 Position the mounting bracket into docking station, which will be offset to the left. Slide the docking station to the right. Firmly push down on the docking station to fully seat the docking station onto the mounting bracket. To pair the remote control to the toilet, consult the Homeowners Guide. Kohler Co. 1295780-2-A...
-
Page 16: Renseignements Importants
3/16 po et 1/4 po à la silicone à 100% Boulons en T Tire-fonds de 1/4 po Plus : Robinet d'arrêt Joint de cire 5/16 po x et rondelles • Outils électriques assortis 2-1/4 po Kohler Co. Français-1 1295780-2-A... -
Page 17: Avant De Commencer
Inspecter soigneusement la toilette neuve afin de vérifier qu’il n’y a pas de dommages. Un diagramme de câblage se trouve sur l’intérieur du couvercle d’accès. Consulter le guide du propriétaire pour obtenir des instructions d’utilisation. Consulter le guide du propriétaire pour obtenir des instructions de dépannage. Kohler Co. Français-2 1295780-2-A... - Page 18 *Hors de l’Amérique du Nord, ce dispositif peut être connu sous le nom de dispositif à courant résiduel (RCD). Pour les installations câblées, consulter la section « Raccordement, câblé ». S’assurer que le robinet d’arrêt d’arrivée et la prise électrique sont compris dans les dimensions fournies. Installer la prise électrique à l’emplacement indiqué. 1295780-2-A Français-3 Kohler Co.
- Page 19 UL à partir de la boîte de jonction ou de tout autre logement vers le compartiment de câblage d’excitation à l’arrière de la toilette comme illustré et conformément aux codes locaux pour une installation électrique. Kohler Co. Français-4 1295780-2-A...
- Page 20 Retirer les deux vis et retirer le dispositif de retenue du cordon. Retirer le cordon de la toilette. Conserver les vis et les panneaux pour la réinstallation. Continuer jusqu’à la section « Préparer le site ». 1295780-2-A Français-5 Kohler Co.
-
Page 21: Préparer Le Site
Installer deux boulons en T d’un diamètre de 5/16 po x 2-1/4 po de longueur dans la bride de plancher. Mettre l’adaptateur en place par-dessus la bride comme sur l’illustration. Marquer le trou de fixation arrière de l’adaptateur. Kohler Co. Français-6 1295780-2-A... - Page 22 5. Préparer l’adaptateur Retirer l’adaptateur de la bride. Percer un trou de 3/16 po au niveau du repère. Enfoncer l’anneau de cire sur le fond de l’adaptateur comme sur l’illustration. 1295780-2-A Français-7 Kohler Co.
- Page 23 Installer une rondelle et un écrou sur chaque boulon en T. Fixer l’arrière de l’adaptateur avec un tire-fond de 1/4 po et une rondelle. Si cela n’a pas encore été effectué, retirer les panneaux d’accès de la toilette. Kohler Co. Français-8 1295780-2-A...
- Page 24 Percer un trou de 3/16 po au niveau de chaque repère. Remettre la toilette en place. Fixer la toilette avec un tire-fond de 1/4 po et une rondelle dans chaque trou. Connecter le robinet d’arrêt d’arrivée. 1295780-2-A Français-9 Kohler Co.
- Page 25 À l’aide d’un réducteur de tension approprié, connecter les fils de ligne, neutre et de masse aux connexions électriques comme sur l’illustration. Installer le couvercle des connexions électriques avec les quatre vis. Installer le couvercle du panneau électrique avec les deux vis. Continuer jusqu’à la section « Vérifier le fonctionnement ». Kohler Co. Français-10 1295780-2-A...
- Page 26 Pour les installations à brancher, brancher le cordon d’alimentation dans la prise. Pour les installations câblées, mettre le circuit sous tension électrique. Appuyer sur l’interrupteur d’alimentation pour mettre la toilette en marche. La toilette effectuera un cycle de démarrage. 1295780-2-A Français-11 Kohler Co.
-
Page 27: Terminer L'installation
Appliquer du mastic d’étanchéité à la silicone à 100% autour de la base de la toilette comme sur l’illustration. Ne pas appliquer de mastic d’étanchéité à l’emplacement où les couvercles d’accès entrent en contact avec le plancher. Attacher les couvercles d’accès. Kohler Co. Français-12 1295780-2-A... - Page 28 Installer les piles dans la station d’accueil (consulter le guide du propriétaire pour obtenir des instructions si nécessaire). Attacher la station d’accueil sur le support de fixation. Pour apparier la télécommande à la toilette, consulter le guide du propriétaire afin d’obtenir des instructions. 1295780-2-A Français-13 Kohler Co.
- Page 29 Faire glisser la station d’accueil vers la droite. Appuyer fermement sur la station d’accueil afin de faire complètement siéger la station d’accueil sur le support de fixation. Pour apparier la télécommande à la toilette, consulter le guide du propriétaire. Kohler Co. Français-14 1295780-2-A...
- Page 30 3/16 y 1/4 pulg. de silicona Pernos en T de Pernos de fijación y Más: Llave de Sello de cera 5/16 pulg. x arandelas de 1/4 pulg. • Herramientas eléctricas paso de 2-1/4 pulg. diversas suministro Kohler Co. Español-1 1295780-2-A...
-
Page 31: Antes De Comenzar
Hay un esquema de cableado en el interior de la tapa de acceso. Consulte las instrucciones para el usuario en la Guía del usuario. Consulte las instrucciones de resolución de problemas en la Guía del usuario. Kohler Co. Español-2 1295780-2-A... - Page 32 En el caso de instalaciones de cableado directo, consulte la sección ″Diagrama de instalación, Cableado directo″. Asegúrese de que la llave de paso de suministro y que el tomacorriente estén ubicados de acuerdo a las dimensiones indicadas. Instale el tomacorriente en el lugar que se indica. 1295780-2-A Español-3 Kohler Co.
- Page 33 UL de la caja de empalmes, o de otra caja aprobada, al compartimiento de cableado en la parte posterior del inodoro, como se muestra, y de acuerdo a lo códigos eléctricos locales de instalación. Kohler Co. Español-4 1295780-2-A...
- Page 34 Desconecte los alambres de línea (negro), neutro (blanco) y tierra (verde) de las conexiones. Saque los 2 tornillos y retire el retenedor de cables. Retire el cable del inodoro. Retenga todos los tornillos y paneles para volverlos a instalar. Continúe a la sección ″Prepare el sitio″. 1295780-2-A Español-5 Kohler Co.
-
Page 35: Prepare El Sitio
Instale 2 pernos en T de 5/16 pulg. de diámetro x 2-1/4 pulg. de largo en la brida del piso. Coloque el adaptador en su lugar sobre la brida, como se muestra. Marque el orificio de montaje posterior del adaptador. Kohler Co. Español-6 1295780-2-A... - Page 36 5. Prepare el adaptador Retire el adaptador de la brida. Taladre un orificio de 3/16 pulg. en la marca. Oprima el anillo de cera en la parte inferior del adaptador, como se muestra. 1295780-2-A Español-7 Kohler Co.
- Page 37 Instale una arandela y una tuerca en cada perno en T. Fije la parte posterior del adaptador con un tornillo para madera de 1/4 pulg. y una arandela. Si no lo ha hecho, retire los paneles de acceso del inodoro. Kohler Co. Español-8 1295780-2-A...
- Page 38 Taladre un orificio de 3/16 pulg. en cada lugar marcado. Vuelva a colocar el inodoro. Fije el inodoro con un tornillo de rosca para madera de 1/4 pulg. y una arandela en cada orificio. Conecte la llave de paso de suministro. 1295780-2-A Español-9 Kohler Co.
- Page 39 Con un protector contra tirones adecuado, conecte los alambres de línea, neutro y tierra a las conexiones eléctricas, como se muestra. Instale la cubierta de conexiones eléctricas con los 4 tornillos. Instale la cubierta del panel de sistema eléctrico con los 2 tornillos. Continúe a la sección ″Revise el funcionamiento″. Kohler Co. Español-10 1295780-2-A...
-
Page 40: Verifique El Funcionamiento
En instalaciones de enchufe, enchufe el cable de suministro eléctrico al tomacorriente. En instalaciones de cableado directo, abra el suministro eléctrico al circuito. Oprima el interruptor de encendido para activar el inodoro. El inodoro realizará un ciclo de inicio. 1295780-2-A Español-11 Kohler Co. - Page 41 Aplique sellador 100 % de silicona alrededor de la base del inodoro, como se muestra. No aplique sellador al área donde las cubiertas de acceso hacen contacto con el piso. Fije las tapas de acceso. Kohler Co. Español-12 1295780-2-A...
- Page 42 Instale las pilas en la estación de conexión (de ser necesario consulte las instrucciones en la Guía del usuario). Fije la estación de conexión al soporte de montaje. Para conectar el control remoto al inodoro, consulte las instrucciones en la Guía del usuario. 1295780-2-A Español-13 Kohler Co.
- Page 43 Deslice la estación de conexión hacia la derecha. Empuje la estación de conexión hacia abajo con firmeza para asentarla por completo en el soporte de montaje. Para aparear el control remoto al inodoro, consulte la Guía del usuario. Kohler Co. Español-14 1295780-2-A...
- Page 44 USA/Canada: 1-800-4KOHLER México: 001-800-456-4537 kohler.com ©2019 Kohler Co. 1295780-2-A...