Samsung CLP-775ND User Manual
Color laser printer
Hide thumbs
Also See for CLP-775ND:
- Service manual (134 pages) ,
- Manual del usuario (117 pages) ,
- User manual (103 pages)

Related Manuals for Samsung CLP-775ND


Summary of Contents for Samsung CLP-775ND
- Page 1 CLP-775 Series Color Laser Printer User’s Guide imagine the possibilities Thank you for purchasing a Samsung product.
- Page 2 This user’s guide is provided for information purposes only. All information included herein is subject to change without notice. Samsung Electronics is not responsible for any direct or indirect damages, arising from or related to use of this user’s guide.
-
Page 3: Safety Information
safety information These warnings and precautions are included to prevent injury to you and others, and to prevent any potential damage to your machine. Be sure to read and understand all of these instructions before using the machine. Use common sense for operating any electrical appliance and whenever using your machine. Also, follow all warnings and instructions marked on the machine and in the accompanying literature. -
Page 4: Operating Method
•If the machine gets overheated, it releases smoke, makes strange noises, or generates an odd odor, immediately turn off the power switch and unplug the machine. •The user should be able to access the power outlet in case of emergencies that might require the user to pull the plug out. - Page 5 Be care when replacing paper or removing jammed paper. ► New paper has sharp edges and can cause painful cuts. Installation / Moving Warning Do not place the machine in an area with dust, humidity or water leaks. ► This could result in electric shock or fire. Caution Before moving the machine, turn the power off and disconnect all cords.
- Page 6 •Fuser units should only be repaired by a certified service technician. Repair by non-certified technicians could result in fire or electric shock. ► The machine should only be repaired by a Samsung service technician. Supply usage Caution Do not disassemble the toner cartridge.
-
Page 7: Regulatory Information
regulatory information This machine is designed for our sound environment and certified with several regulatory statements. Laser safety statement The printer is certified in the U.S. to conform to the requirements of DHHS 21 CFR, chapter 1 Subchapter J for Class I(1) laser products, and elsewhere is certified as a Class I laser product conforming to the requirements of IEC 60825-1 : 2007. -
Page 8: Power Saver
The United States of America only Dispose unwanted electronics through an approved recycler. To find the nearest recycling location, go to our website:www.samsung.com/recyclingdirect Or call, (877) 278 - 0799 Regulatory information_ 8... -
Page 9: Radio Frequency Emissions
Correct disposal of batteries in this product (Applicable in the European Union and other European countries with separate battery return systems.) This marking on the battery, manual or packaging indicates that the batteries in this product should not be disposed with other household waste at the end of their working life. - Page 10 Taiwan only Russia only Turkey only Replacing the Fitted Plug (for UK Only) Important The mains lead for this machine is fitted with a standard (BS 1363) 13 amp plug and has a 13 amp fuse. When you change or examine the fuse, you must re-fit the correct 13 amp fuse.
- Page 11 Hereby, Samsung Electronics, declares that this [CLP-775 Series] is in compliance with the essential requirements and other relevant provisions of R&TTE Directive (1999/5/EC). The declaration of conformity may be consulted at www.samsung.com/printer, go to Support > Download center and enter your printer (MFP) name to browse the EuDoC.
-
Page 12: Regulatory Compliance Statements
Regulatory Compliance Statements Wireless Guidance Low power, Radio LAN type devices (radio frequency (RF) wireless communication devices), operating in the 2.4 GHz/5 GHz Band, may be present (embedded) in your printer system. The following section is a general overview of considerations while operating a wireless device. Additional limitations, cautions, and concerns for specific countries are listed in the specific country sections (or country group sections). -
Page 13: China Only
China only Regulatory information_ 13... - Page 14 about this user’s guide This user’s guide provides information about basic understanding of the machine as well as detailed explanation on each step during actual usage. Valuable for both novice and professional users can refer to this as a guide for installing and using the machine.
-
Page 15: Finding More Information
This help provides you with help information on printer driver and instructions for setting up the options for printing. (See "Using help" on page 53.) Samsung website If you have Internet access, you can get help, support, machine drivers, manuals, and order information from the Samsung website, www.samsungprinter.com. Description Web Admin Service or Samsung AnyWeb Print on About this user’s guide_ 15... -
Page 16: Features Of Your New Product
features of your new product Your new machine is equipped with a number of special features that improve the quality of the documents you print. Special Features Print with excellent quality and speed • You can print with a resolution of up to 9600x600 dpi effective output. -
Page 17: Features By Model
IEEE1284 Parallel Connector Memory module a. Depending on your country, wireless LAN cards may not be available. Contact your local Samsung dealer or the retailer where you bought your printer b. If you use the parallel port, you cannot use the USB cable. -
Page 18: Machine Overview
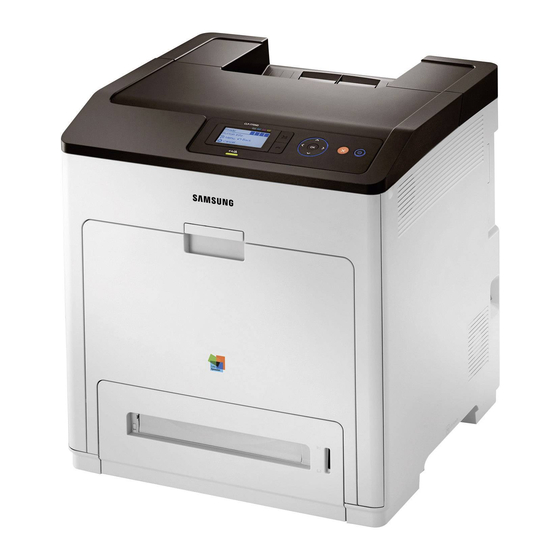
introduction These are the main components of your machine: This chapter includes: • Machine overview • Control panel overview Machine overview Front view Output tray Front cover handle Output support Front cover Paper level indicator Control panel Paper width guides on a Optional tray multi-purpose tray Tray 1... -
Page 19: Rear View
Control board cover Network port Power receptacle USB port Power-switch External device interface (EDI) IEEE 802.11 b/g/n Wireless Handle IEEE1284 Parallel Connector a. External device interface for Samsung and third party solutions. b. This is an optional feature. Introduction_ 19... -
Page 20: Control Panel Overview
Control panel overview Shows the current status and prompts during an operation. Display Show the status of each toner cartridge. (See "Understanding the control panel" on page 21.) Toner colors Enters menu mode and scrolls through the available menus. (See "Accessing the Menu" on page 56.) (Menu) Sends you back to the upper menu level. -
Page 21: Understanding The Control Panel
Understanding the control panel Status LED The color of the status LED indicates the machine's current status. Status Description • The machine is off-line. • The machine is in power saver mode. When data is received, or any button is pressed, it switches to on-line automatically. -
Page 22: Getting Started
If you are a Windows or Macintosh OS, install the software from the supplied CD and if you are a Linux OS user or UNIX OS user, download the software from the Samsung website (www.samsung.com/printer) and install. -
Page 23: System Requirements
Contents Linux • Unified Linux Driver: Use this driver to take full advantage of your machine’s features. • Printer Description (PPD) file: Use this file to run your machine from a Linux computer and print documents. • Smart Panel: This program allows you to monitor the machine’s status and alerts you when an error occurs during printing. - Page 24 For Mac OS X 10.5~10.6, click Default and find the USB connection. 17. For Mac OS X 10.3, if Auto Select does not work properly, select Samsung in Printer Model and your machine name in Model Name. • For Mac OS X 10.4, if Auto Select does not work properly, select Samsung in Print Using and your machine name in Model.
-
Page 25: Installing The Smartpanel
You must log in as a super user (root) to install the machine software. If you are not a super user, ask your system administrator. 3. From the Samsung website, download the Smart Panel package to your computer. 4. Right click the Smart Panel package and extract the package. -
Page 26: Network Setup
network setup This chapter gives you step-by-step instructions for setting up the network connected machine and software. This chapter includes: • Network environment • Introducing useful network programs • Using a wired network • If you are using wired network environment, see "Using a wired network"... -
Page 27: Setting Ip Address
2. Follow the instructions in the installation window. 3. Connect your machine to the network with a network cable. 4. Turn on the machine. 5. From the Windows Start menu, select All Programs > Samsung Printers > SetIP > SetIP. 6. Click the icon (third from left) in the SetIP window to open the TCP/IP configuration window. -
Page 28: Network Parameter Setting
1. Open /opt/Samsung/mfp/share/utils/. 2. Double-click the SetIPApplet.html file. 3. Click to open the TCP/IP configuration window. 4. Enter the machine’s new information into the configuration window. In a corporate intranet, you may need to have this information assigned by a network manager before proceeding. - Page 29 window appears. 6. Follow the instructions in the installation window. Silent installation Mode Silent installation mode is an installation method that does not require any user intervention. Once you start the installation, the machine driver and software are automatically installed on you computer. You can start the silent installation by typing /s or /S in the command window.
- Page 30 18. For Mac OS X 10.3, if Auto Select does not work properly, select Samsung in Printer Model and your machine name in Model Name. •...
- Page 31 Driver package from the Samsung website. Installing the UNIX printer driver package Installation procedure is common for all variants of UNIX OS mentioned. 1. From the Samsung website, download and unpack the UNIX Printer Driver package to your computer. 2. Acquire root privileges.
-
Page 32: From The Computer
Macintosh operating systems are supported (see "Setup using Windows" on page 32 or "Setup using Macintosh" on page 35). You can also install a wireless network in Samsung Easy Printer Manager (Device Settings) or Printer Settings Utility with a USB cable after installing the driver (Windows and Macintosh operating systems are supported). - Page 33 4. Select the Wireless Setting and Installation option. • Install Now: If you have already set up the wireless network, click this button to install the machine’s driver to use the wireless network machine. If you have not set up the wireless network, click the Wireless Setting and Installation button to set up the wireless network before you click this button.
- Page 34 7. After searching the wireless networks, a list of wireless networks your machine has searched appears. If you want to use the Samsung default ad hoc setting, select the last wireless network on the list, Network Name(SSID) is portthru and Signal is Printer Self Network.
- Page 35 15. If the test page prints out correctly, click Yes. If not, click No to reprint it. 16. To register as a user of the machine in order to receive information from Samsung, click On-line Registration. 17. Click Finish. Setup using Macintosh Items to prepare •...
- Page 36 14. After searching the wireless networks, a list of wireless networks your machine has searched appears. If you want to use the Samsung default ad hoc setting, select the last wireless network on the list, which Network Name(SSID) is portthru and Signal is Printer Self Network.
-
Page 37: Using A Network Cable
• For the Static method If the IP address assignment method is Static, check if Static is shown in the Wireless Network Setting Confirm window. If it shows DHCP, click Change TCP/IP to enter the IP address and other network configuration values for the machine. -
Page 38: Other Problems
Windows Vista, you might need to set the wireless connection setting every time you use the wireless machine. • You cannot use Infrastructure mode and Ad hoc mode at the same time for Samsung wireless network machines. • The machine is within the range of the wireless network. •... -
Page 39: Ipv6 Configuration
IPv6 configuration IPv6 is supported properly only in Windows Vista or higher. Activating IPv6 1. Connect your machine to the network with a network cable. 2. Turned on the machine. 3. Press on the control panel. 4. Press up/down arrow to highlight Network and press OK. 5. -
Page 40: Basic Setup
basic setup After installation is complete, you may want to set the machine’s default settings. Refer to the next section if you would like to set or change values. This chapter gives you step-by-step instructions for setting up the machine. This chapter includes: •... -
Page 41: In The Computer
Using power saving feature When you are not using the machine for a while, use this feature to save power. 1. Press on the control panel. 2. Press up/down arrow to highlight System Setup and press OK. 3. Press up/down arrow to highlight Power Save and press OK. 4. -
Page 42: Media And Tray
media and tray This chapter provides information on how to load print media into your machine. This chapter includes: • Selecting print media • Changing the tray size • Loading paper in the tray Selecting print media You can print on a variety of print media, such as plain paper, envelopes, labels, and transparencies. -
Page 43: Loading Paper In The Tray
3. Flex or fan the edge of the paper stack to separate the pages before loading papers. To keep paper with perforated lines from sticking together when printing, you must fan the sheets before feeding them into the machine. 4. After inserting paper into the tray, squeeze the paper width guides and slide them to the desired paper size marked at the bottom of the tray. - Page 44 Multi-purpose tray The multi-purpose tray can hold special sizes and types of print material, such as postcards, note cards, and envelopes. It is useful for single page printing on letterhead or colored paper. Print media should be loaded face down with the top edge going into the multi-purpose tray first and be placed in the center of the tray.
-
Page 45: Printing On Special Media
For example, if you want to use a label, set the paper type to Label. Select MP Tray in paper source, then press OK. Start printing in application. After printing, close the multi-purpose tray. Printing on special media The table below shows the available special media for each tray. When using special media, we recommend you feed one paper at a time. -
Page 46: Used Paper
• To prevent transparencies from sticking to each other, do not let the printed sheets stack up as they are begin printed out. • Recommended media: Transparency for color laser printers produced by Xerox, such as 3R 91331(A4) and 3R 2780(Letter), are recommended. -
Page 47: Setting The Paper Size And Type
• Used paper ink must be non-flammable and should not adversely affect machine rollers. • Before you load used paper, verify that the ink on the paper is dry. During the fusing process, wet ink can come off used paper, reducing print quality. -
Page 48: Opening Printing Preferences
Using a favorite setting The Presets option, which is visible on each preferences tab except for on the control the Samsung tab, allows you to save the current preferences for future use. To save a Presets item, follow these steps:... -
Page 49: Using Advanced Print Features
1. Change the settings as needed on each tab. 2. Enter a name for the item in the Presets input box. 3. Click (Add). When you save Presets, all current driver settings are saved. Select more options and click (Update), settings will be added to the Presets you made. -
Page 50: Understanding Special Printer Features
Understanding special printer features You can use advanced printing features when using your machine. To take advantage of the printer features provided by your printer driver, click Properties or Preferences in the application’s Print window to change the print settings. The machine name, that appears in the printer properties window may differ depending on the machine in use. - Page 51 Item Description Watermark To change the print settings from your (Creating a watermark) software application, access Printing Preferences. Click the Advanced tab, select Edit from the Watermark drop-down list. The Edit Watermarks window appears. Enter a text message in the Watermark Message box.
-
Page 52: What Is Direct Printing Utility
Item Description Overlay Click the Advanced tab. (Using a page overlay) Select the desired overlay from the Text drop-down list. If the overlay file you want does not appear in the Text drop-down list, select Edit... from the list and click Load. Select the overlay file you want to use. -
Page 53: Printing A Document
Printing There are several ways you can print using the Direct Printing Utility. 1. From the Start menu select Programs or All Programs > Samsung Printers > Direct Printing Utility > Direct Printing Utility. The Direct Printing Utility window appears. -
Page 54: Unix Printing
1. Open an application, and select Print from the File menu 2. Select Print directly using lpr. 3. In the LPR GUI window, select the model name of your machine from the printer list and click Properties. 4. Change the print job properties using the following four tabs displayed at the top of the window. -
Page 55: Text Tab
Text tab Set the character margin, line space, or the columns of the actual print output. HPGL/2 tab • Use only black pen: To print all graphics in black. • Fit plot to page: Fit the entire graphic into a single page. •... -
Page 56: Accessing The Menu
machine status and advanced features This chapter explains how to browse the current status of your machine, and the method of setting for the advanced machine setup. Read this chapter carefully in order to use your machine's diverse features. This chapter includes: •... -
Page 57: System Setup
Item Description Duplex To print on both sides of paper, choose the binding edge. • Off: Set this option off. • Long Edge: This item is the conventional layout used in bookbinding. • Short Edge: This item is the conventional layout used in calendars. - Page 58 Option Description Form overlay is images stored in the printer Select Form hard disk drive (HDD) as a special file format that can be printed in layers on any document. (See "Form file" on page 89.) • Select Form is not displayed when Form Menu is set as Off.
-
Page 59: Job Management
Option Description TCP/IP (IPv4) Select appropriate protocol and configure parameters to use the network environment. There are lots of parameters to be set; therefore, if you are not sure, leave as is, or consult the network administrator. TCP/IP (IPv6) Selects this option to use the network environment through IPv6. -
Page 60: Management Tools
This tool helps you screen-capture, preview, scrap, and print Windows Internet Explorer pages more easily, than when you use an ordinary program. Click Start > All programs > Samsung Printers > Samsung AnyWeb Print > Download the latest version to link to the website where the tool is available for download. - Page 61 Understanding Samsung Easy Printer Manager To open the program: Select Start > Programs or All Programs > Samsung Printers > Samsung Easy Printer Manager > Samsung Easy Printer Manager. The Samsung Easy Printer Manager interface is comprised of various basic...
-
Page 62: Advanced Settings User Interface Overview
SyncThru™ or CounThru™ admin software. Using Samsung Printer Status (Windows only) The Samsung Printer Status is a program that monitors and informs you of the machine status. • The Samsung Printer Status window and its contents shown in this user’s guide may differ depending on the machine or operating... -
Page 63: Printers Configuration
Opening the Unified Driver Configurator 1. Double-click the Unified Driver Configurator on the desktop. You can also click the startup menu icon and select Samsung Unified Driver > Unified Driver Configurator. 2. Click each button on the left to switch to the corresponding configuration window. -
Page 64: Ports Configuration
Shows the status, model name and URI of your machine. The printer control buttons are, as follows: • Refresh: Renews the available machines list. • Add Printer: Allows you to add a new machines. • Remove Printer: Removes the selected machine. •... -
Page 65: Printing A Machine Report
maintenance This chapter provides information for maintaining your machine and the toner cartridge. This chapter includes: • Printing a machine report • Monitoring the supplies life • Cleaning a fuser belt • Using Toner Low Alert Printing a machine report You can print the machine's information. - Page 66 the OPC drum can be exposed to light. This will cause damage to the OPC drum. Cover the OPC drum of the print cartridge with the clean paper to avoid damaging it from the light while you clean the inside. 3.
-
Page 67: Estimated Cartridge Life
Use of non-Samsung and refilled toner cartridge Samsung Electronics does not recommend or approve the use of non-Samsung brand toner cartridges in your printer including generic, store brand, refilled, or remanufactured toner cartridges. -
Page 68: Troubleshooting
troubleshooting This chapter gives helpful information for what to do if you encounter an error. If your machine has a display screen, check the message on the display screen first to solve the error. If you cannot find a solution in this User's Guide or the problem consists, call for service. -
Page 69: Tips For Avoiding Paper Jams
of the fuser unit might be high and could damage your skin. When you open the front cover and work inside the machine, it is highly recommend that you remove the paper transfer belt first. Because the work you do could contaminate the paper transfer belt. -
Page 70: Clearing Paper Jams
To avoid tearing the paper, pull the jammed paper out slowly and gently. Follow the instructions in the following sections to clear the jam. In tray 1 Click this link to open an animation about clearing a jam. If paper is jammed in the paper feed area, follow the next steps to release the jammed paper. -
Page 71: In Multi-Purpose Tray
4. Pull the jammed paper out in the direction shown. To avoid tearing the paper, pull it out gently and slowly. 5. Close the front cover and insert the trays back into the machine. Printing automatically resumes. If the front cover is not completely closed, the machine will not operate. -
Page 72: In The Duplex Unit Area
2. Open the inner cover using the handle on it. Do not touch the fuser inside the inner cover. It is hot and could cause burns! The fuser's operating temperature is 180°C (356°F). Take care when removing paper from the machine. 3. -
Page 73: Understanding Display Messages
3. Remove the jammed paper by pulling in the direction shown. To avoid tearing the paper, pull it out gently and slowly. 4. Holding the handle on the paper transfer belt, align it with the slots on the inside of the front cover. 5. -
Page 74: Understanding Display Messages
Using a cartridge beyond this stage can result in printing quality issues. (See "Replacing the toner cartridge" on page 84.) Samsung does not [ccc] toner Not recommend using Compatible non-genuine [ccc] toner Samsung toner cartridge is not cartridge such as compatible. - Page 75 Cleaning Kit has expired. The toner cartridge Replace the toner has reached the end cartridge with a of its lifespan. Samsung-genuine toner cartridge. (See "Replacing the toner cartridge" on page 84.) The engine in your Please wait a few printer is checking minutes.
-
Page 76: Paper Feeding Problems
Paper does not feed into the machine. Reinstall the optional trays. If the problem persists, call for service. Install the a Samsung-genuine part designed for your machine. (See "Replacing the paper The paper keeps transfer belt" on jamming. -
Page 77: Printing Problems
Printing problems Condition Possible cause The machine The machine is not Check the power cord does not print. receiving power. connections. Check the power switch and the power source. The machine is not Select your machine as your selected as the default machine in your default machine. -
Page 78: Printing Quality Problems
Condition Possible cause Pages print, but The toner cartridge Redistribute the toner, if they are blank. is defective or out of necessary. toner. If necessary, replace the toner cartridge. The file may have Check the file to ensure that blank pages. it does not contain blank pages. - Page 79 Condition Suggested Solutions Dropouts If faded areas, generally rounded, occur randomly on the page: A a B b C • A single sheet of paper may be defective. Try reprinting the job. A a B b C • The moisture content of the paper is uneven or A a B b C the paper has moist spots on its surface.
- Page 80 Condition Suggested Solutions Misformed • If characters are improperly formed and characters producing hollow images, the paper stock may be too slick. Try different paper. (See "Print media specifications" on page 92.) • If characters are improperly formed and producing a wavy effect, the scanner unit may need service.
-
Page 81: Common Windows Problems
Condition Suggested Solutions An unknown image Your machine is probably being used at an repetitively altitude of 1,000 m (3,281 ft) or above. appears on a few The high altitude may affect the print quality, such sheets or loose as loose toner or light imaging. Change the toner, light print, or correct altitude setting to your machine. -
Page 82: Common Macintosh Problems
condition Suggested solutions Some color images This is a known bug in Ghostscript (until GNU come out in Ghostscript version 7.xx) when the base color unexpected colors. space of the document is indexed RGB color space and it is converted through CIE color space. -
Page 83: Supplies And Accessories
How to purchase To order Samsung-authorized supplies, accessories and, maintenance parts, contact your local Samsung dealer or the retailer where you purchased your machine. You can also visit www.samsung.com/supplies, select your country/region, and obtain information on calling for service. -
Page 84: Replacing The Toner Cartridge
USB cable. a. Depending on your country, wireless LAN cards may not be available. Contact your local Samsung dealer or the retailer where you bought your printer. Available maintenance parts To avoid print quality and paper feed problems resulting from worn parts... -
Page 85: Replacing The Paper Transfer Belt
3. Grasp the handles on the empty print cartridge and pull to remove the cartridge from the machine. If you open the front cover, be careful not to touch the underneath the control panel (the lower part of the fuser unit). The temperature of the fuser unit might be high and could damage your skin. - Page 86 belt. After the life span of the paper transfer belt is complete, you have to replace • The transfer belt-related message appears on the display, telling it's time for a replacement. The life span of the paper transfer belt may be affected by operating environment, printing interval, media type, and media size.
-
Page 87: Upgrading A Memory Module
When installing accessories, the battery inside the machine is a service component. Do not change it by yourself. There is a risk of an explosion if battery is replaced by an incorrect type. Dispose used batteries according to the instructions. Activating the added accessories in printer properties After installing added accessories, you need to select it in the printer... -
Page 88: Installing A Hard Disk
3. Detach the dummy panel on your machine using a strong stick-like tool, such as a screwdriver. 4. Take out a new wireless interface card from its plastic bag. 5. Align the wireless network interface card into the guide, and align the connector on the card with the connector on the control board. -
Page 89: Form File
3. Select your machine from Select Printer. 4. Click Properties or Preferences. 5. Click the Advanced tab and click Job Setting. 6. Select the print mode you want from the drop-down list. (See "Using help" on page 53.) 7. Enter the user’s name and file name. 8. - Page 90 4. Press the up/down arrow to highlight the desired setting and press • Automatic : All residual image data from the machine will be erased immediately after each job has been processed. • Manual : This option provides an on-demand facility for a system administrator to erase all the real image data remained in HDD after this option enabled.
-
Page 91: Specifications
This chapter include: • General specifications • Print media specifications General specifications The specification values listed below are subject to change without notice. See www.samsung.com/printer for possible changes in information. Items Dimension Width x Length x Height Weight Machine with consumables... -
Page 92: Print Media Specifications
Print media specifications Type Size Plain paper Letter 216 x 279 mm (8.5 x 11 inches) Legal 216 x 356 mm (8.5 x 14 inches) US Folio 216 x 330 mm (8.5 x 13 inches) 210 x 297 mm (8.27 x 11.69 inches) Oficio 216 x 343 mm (8.5 x 13.5 inches) JIS B5... -
Page 93: Contact Samsung Worldwide
If you have any comments or questions regarding Samsung products, contact the Samsung customer care center. Country/Region ALBANIA 42 27 5755 ARGENTINE 0800-333-3733 ARMENIA 0-800-05-555 AUSTRALIA 1300 362 603 AUSTRIA 0810-SAMSUNG (7267864, € 0.07/min) AZERBAIJAN 088-55-55-555 BAHRAIN... - Page 94 Country/Region GREECE IT and Mobile : 80111-SAMSUNG (80111 7267864) from land line, local charge/ from mobile, 210 6897691 Cameras, Camcorders, Televisions and Household Appliances From mobile and fixed 2106293100 GUATEMALA 1-800-299-0013 HONDURAS 800-27919267 HONG KONG (852) 3698-4698 HUNGARY 06-80-SAMSUNG (726-7864)
- Page 95 0 801 1SAMSUNG (172678) 022-607-93-33 PORTUGAL 80820-SAMSUNG (726-7864) PUERTO RICO 1-800-682-3180 RUMANIA 08010 SAMSUNG (08010 726 7864) only from landline, local network Romtelecom - local tariff / 021 206 01 10 for landline and mobile, normal tariff. RUSSIA 8-800-555-55-55 SAUDI ARABIA 9200-21230...
-
Page 96: Control Panel
glossary The following glossary helps you get familiar with the product by understanding the terminologies commonly used with printing as well as mentioned in this user’s guide. 802.11 802.11 is a set of standards for wireless local area network (WLAN) communication, developed by the IEEE LAN/MAN Standards Committee (IEEE 802). -
Page 97: Fuser Unit
DIMM Dual Inline Memory Module (DIMM), a small circuit board that holds memory. DIMM stores all the data within the machine like printing data, received fax data. DLNA The Digital Living Network Alliance (DLNA) is a standard that allows devices on a home network to share information with each other across the network. -
Page 98: Mac Address
Hard Disk Drive (HDD), commonly referred to as a hard drive or hard disk, is a non-volatile storage device which stores digitally-encoded data on rapidly rotating platters with magnetic surfaces. IEEE The Institute of Electrical and Electronics Engineers (IEEE) is an international non-profit, professional organization for the advancement of technology related to electricity. -
Page 99: Printer Driver
Modified Modified READ (MMR) is a compression method recommended by ITU-T T.6. Modem A device that modulates a carrier signal to encode digital information, and also demodulates such a carrier signal to decode transmitted information. Modified Read (MR) is a compression method recommended by ITU-T T.4. -
Page 100: Toner Cartridge
between nodes on a network. It also provides an authenticated Inter-process communication mechanism. SMTP Simple Mail Transfer Protocol (SMTP) is the standard for e-mail transmissions across the Internet. SMTP is a relatively simple, text-based protocol, where one or more recipients of a message are specified, and then the message text is transferred. - Page 101 XML Paper Specification (XPS) is a specification for a Page Description Language (PDL) and a new document format, which has benefits for portable document and electronic document, developed by Microsoft. It is an XML-based specification, based on a new print path and a vector-based device-independent document format.