Samsung CLX-6220FX User Manual
Hide thumbs
Also See for CLX-6220FX:
- Brochure & specs (6 pages) ,
- Quick install manual (2 pages) ,
- Service manual (168 pages)

Related Manuals for Samsung CLX-6220FX


Summary of Contents for Samsung CLX-6220FX
- Page 1 CLX-6220 Series CLX-6250 Series Multi-Functional Printer User’s Guide imagine the possibilities Thank you for purchasing a Samsung product.
- Page 2 This user’s guide is provided for information purposes only. All information included herein is subject to change without notice. Samsung Electronics is not responsible for any direct or indirect damages, arising from or related to use of this user’s guide.
-
Page 3: Safety Information
safety information These warnings and precautions are included in order to prevent injury to you and others, as well as preventing any potential damage to your machine. Be sure to read and understand all of these instructions before using the machine. Use common sense for operating any electrical appliance and whenever using your machine. - Page 4 If the machine gets overheated, it releases smoke, makes strange noises, or generates an odd odor, immediately turn off the power switch and unplug the machine. ► This could result in electric shock or fire. Caution During an electrical storm or for a period of non-operation, remove the power plug from the electrical outlet.
- Page 5 Installation / Moving Warning Do not place the machine in an area with dust, humidity or water leaks. ► This could result in electric shock or fire. Caution When moving the machine, turn the power off and disconnect all cords; then lift the machine with at least two people.
- Page 6 ► This could result in electric shock or fire. Do not remove any covers or guards that are fastened with screws. ► The machine should only be repaired by Samsung service technician. Supply usage Caution Do not disassemble the toner cartridge.
-
Page 7: Regulatory Information
regulatory information This machine is certified with several regulatory statements. Laser Safety Statement The printer is certified in the U.S. to conform to the requirements of DHHS 21 CFR, chapter 1 Subchapter J for Class I(1) laser products, and elsewhere is certified as a Class I laser product conforming to the requirements of IEC 60825-1:1993 + A1:1997 + A2:2001. Class I laser products are not considered to be hazardous. -
Page 8: Ozone Safety
During normal operation, this machine produces ozone. The ozone produced does not present a hazard to the operator. However, it is advisable that the machine be operated in a well ventilated area. If you need additional information about ozone, request your nearest Samsung dealer. Mercury Safety Contains Mercury, Dispose According to Local, State or Federal Laws. -
Page 9: Radio Frequency Emissions
Correct Disposal of This Product (Waste Electrical & Electronic Equipment) (Applicable in the European Union and other European countries with separate collection systems) This marking on the product, accessories or literature indicates that the product and its electronic accessories (e.g. charger, headset, USB cable) should not be disposed of with other household waste at the end of their working life. -
Page 10: United States Of America
UNITED STATES OF AMERICA Federal Communications Commission (FCC) Intentional emitter per FCC Part 15 Low power, Radio LAN type devices (radio frequency (RF) wireless communication devices), operating in the 2.4 GHz/5 GHz Band, may be present (embedded) in your printer system. This section is only applicable if these devices are present. Refer to the system label to verify the presence of wireless devices. -
Page 11: Ringer Equivalence Number
Russia only Fax Branding The Telephone Consumer Protection Act of 1991 makes it unlawful for any person to use a computer or other electronic device to send any message via a telephone facsimile machine unless such message clearly contains in a margin at the top or bottom of each transmitted page or on the first page of the transmission the following information: 1. - Page 12 You should also know that: • Your machine is not designed to be connected to a digital PBX system. • If you intend to use a computer modem or fax modem on the same phone line as your machine, you may experience transmission and reception problems with all the equipment.
- Page 13 PBXs of the European countries: In the event of problems, you should contact the Euro QA Lab of Samsung Electronics Co., Ltd. in the first instance. The product has been tested against TBR21. To assist in the use and application of terminal equipment which complies with this standard, the European Telecommunication Standards Institute (ETSI) has issued an advisory document (EG 201 121) which contains notes and additional requirements to ensure network compatibility of TBR21 terminals.
-
Page 14: Openssl License
REGULATORY COMPLIANCE STATEMENTS Wireless Guidance Low power, Radio LAN type devices (radio frequency (RF) wireless communication devices), operating in the 2.4 GHz/5 GHz Band, may be present (embedded) in your printer system. The following section is a general overview of considerations while operating a wireless device. Additional limitations, cautions, and concerns for specific countries are listed in the specific country sections (or country group sections). -
Page 15: Original Ssleay License
SUBSTITUTE GOODS OR SERVICES; LOSS OF USE, DATA, OR PROFITS; OR BUSINESS INTERRUPTION) HOWEVER CAUSED AND ON ANY THEORY OF LIABILITY, WHETHER IN CONTRACT, STRICT LIABILITY, OR TORT (INCLUDING NEGLIGENCE OR OTHERWISE) ARISING IN ANY WAY OUT OF THE USE OF THIS SOFTWARE, EVEN IF ADVISED OF THE POSSIBILITY OF SUCH DAMAGE. This product includes cryptographic software written by Eric Young(eay@cryptsoft.com). - Page 16 China only Regulatory information_ 10...
- Page 17 about this user’s guide This user’s guide provides information about how to use the machine. Both novice and professional users can refer to this as a guide for installing and using the machine. •Read the safety information before using the machine. •If you have a problem using the machine, refer to the troubleshooting chapter (See "Troubleshooting"...
-
Page 18: Finding More Information
This help provides you with help information on printer driver and instructions for setting up the options for printing (See "Using help" on page 3). Samsung website If you have Internet access, you can get help, support, machine drivers, manuals, and order information from the Samsung website, www.samsung.com/printer. Downloadable You can download useful software from the Samsung website. -
Page 19: Features Of Your New Product
features of your new product Your new machine is equipped with a number of special features that improve the quality of the documents you print. Special Features Print with excellent quality and speed • You can print in a full range of colors using cyan, magenta, yellow, and black. -
Page 20: Features By Models
Network Interface 802.11 b/g wireless LAN Duplex (2-sided) printing Optional Tray 2 a. Depending on your country, wireless LAN cards may not be available. Contact your local Samsung dealer or the retailer where you bought your printer. ( ●: Included, ○: Optional, Blank: Not available) CLX-6220 Series ●... -
Page 21: Machine Overview
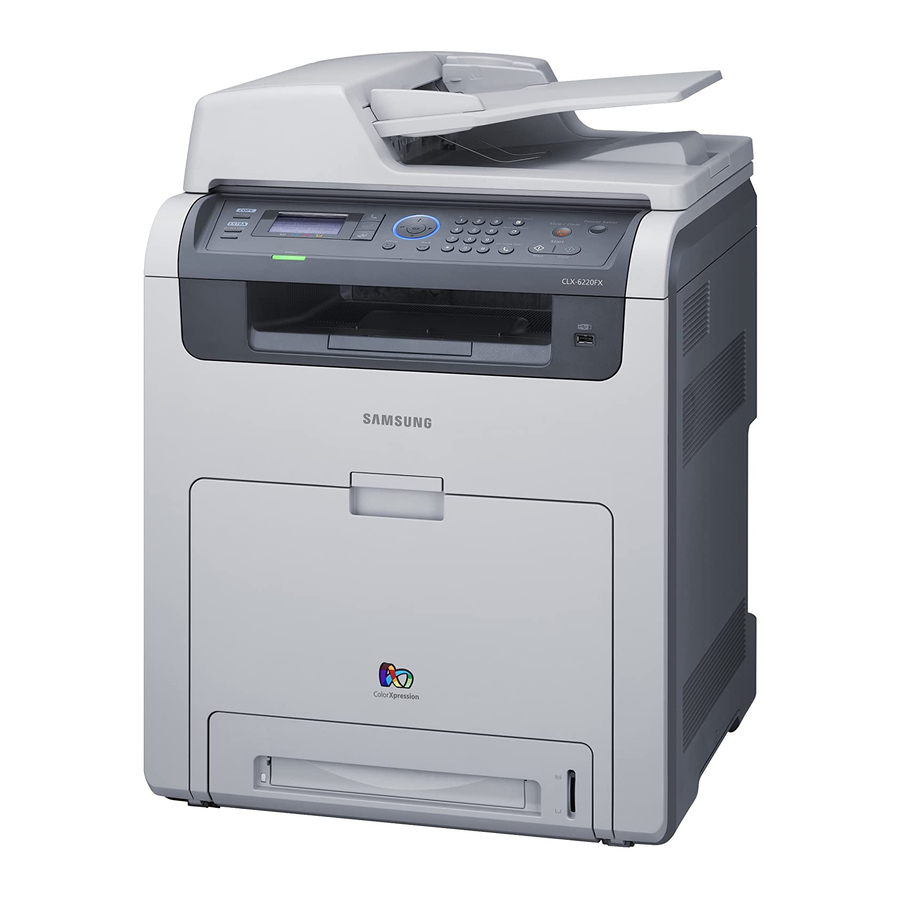
introduction This chapter gives you an overview of your machine: This chapter includes: • Machine overview • Control panel overview Machine overview Front view Document feeder cover Front door Document feeder width Document output tray guides Document feeder input tray Control panel Multi-purpose tray paper Document feeder output tray... -
Page 22: Rear View
Rear view Extension telephone socket Control board cover (EXT) Rear door Telephone line socket Cable organizer Optional tray 2 cable connector Power receptacle Network port USB port Power-switch Handle IEEE 802.11 b/g Wireless LAN a. Optional device. Introduction_ 2... -
Page 23: Control Panel Overview
Control panel overview You can copy both sides of an ID Card such as a driver’s license to a single side of paper (See "ID card copying" on page 2). ID Copy Allows you to directly print files stores on a USB memory device when it is inserted into the USB memory port on your Direct USB machine (See "About USB memory device"... - Page 24 Starts a job in black or color mode. Start Introduction_ 4...
-
Page 25: Understanding The Status Led
Samsung cannot guarantee a non-genuine Samsung toner cartridge's quality. Service or repair required as a result of using non-genuine Samsung toner cartridges will not be covered under the machine warranty. •All printing errors will be appear in the Smart Panel program window. -
Page 26: Getting Started
If you are a Windows or Macintosh OS, install the software from the supplied CD and if you are a Linux OS user or UNIX OS user, download the software from the Samsung website (www.samsung.com/printer) and install. -
Page 27: System Requirements
• Samsung Network PC Fax: You can find out about fax manager program information. You can send a fax from your computer without going to the machine. •... - Page 28 Macintosh Requirements (recommended) OPERATING SYSTEM Mac OS X • Intel • 128 MB for a 10.3 ~ 10.4 Processors PowerPC based Mac (512 MB) • PowerPC G4/ • 512 MB for a Intel-based Mac (1 GB) Mac OS X • Intel 512 MB (1 GB) 10.5...
- Page 29 Start menu, select Programs or All Programs > Samsung Printers > your printer driver name > Maintenance. c)Select the option you want, follow the instruction on the window. Macintosh...
-
Page 30: Installing The Smartpanel
•For Mac OS X 10.5~10.6, click Default and find the USB connection. 17. For Mac OS X 10.3, if Auto Select does not work properly, select Samsung in Printer Model and your machine name in Model Name. •For Mac OS X 10.4, if Auto Select does not work properly, select Samsung in Print Using and your machine name in Model. -
Page 31: Sharing Your Machine Locally
You must log in as a super user (root) to uninstall the printer driver. If you are not a super user, ask your system administrator. c)Click the icon at the bottom of the desktop. When the Terminal screen appears, type in: [root@localhost root]#cd /opt/Samsung/mfp/uninstall/ [root@localhost uninstall]#./uninstall.sh d)Click Uninstall. e)Click Next. f)Click Finish. -
Page 32: Using Wired Network
network setup This chapter gives you step-by-step instructions for setting up the network connected machine and software. This chapter includes: • Network environment • Introducing useful network programs • Using a wired network Network environment You need to set up the network protocols on the machine to use it as your network machine. - Page 33 Starting the program 1.Connect your machine and the computer using network cable. 2.Turn on the machine. 3.From the Windows Start menu, select All Programs > Samsung Printers > SetIP > SetIP. 4.Click on the icon (third from left) in the SetIP window to open the TCP/IP configuration window.
-
Page 34: Network Parameter Setting
Linux OS manual to turn firewall off. 1.Print the machine’s network configuration report to find your machine’s MAC address. 2.Open the /opt/Samsung/mfp/share/utils/. 3.Double click the SetIPApplet.html file. 4.Click to open the TCP/IP configuration window. 5.Enter the MAC address, IP address, subnet mask, default gateway, and then click Apply. - Page 35 Otherwise, just click Next and skip to step 8. 7. If the test page prints out correctly, click Yes. If not, click No to reprint it. 8. To register as a user of the machine in order to receive information from Samsung, click On-line Registration. Network setup_ 4...
- Page 36 20. For Mac OS X 10.3, if Auto Select does not work properly, select Samsung in Printer Model and your machine name in Model Name. •For Mac OS X 10.4, if Auto Select does not work properly, select Samsung in Print Using and your machine name in Model.
-
Page 37: Ipv6 Configuration
Installing the UNIX printer driver package Installation procedure is common for all variants of UNIX OS mentioned (See "UNIX" on page 3). 1.From the Samsung website, download and unpack the UNIX Printer Driver package to your computer. 2.Acquire root privileges. -
Page 38: Installing Printer Driver
Setting IPv6 addresses Machine supports following IPv6 addresses for network printing and managements. • Link-local Address: Self-configured local IPv6 address. (Address starts with FE80.) • Stateless Address: Automatically configured IPv6 address by a network router. • Stateful Address: IPv6 address configured by a DHCPv6 server. •... -
Page 39: Altitude Adjustment
Mac OS X (See "Understanding Smart Panel" on page 2). Or, if you are a Windows user, you can launch it from the Start menu, select Programs or All Programs > Samsung Printers > your printer driver name > Smart Panel. -
Page 40: Changing The Clock Mode
6. Press OK to save the selection. 7. Press Stop/Clear to return to ready mode. Changing the clock mode You can set your machine to display the current time using either a 12-hour or 24-hour format. 1. Press Menu on the control panel. 2. -
Page 41: Correcting Numbers Or Names
Correcting numbers or names If you make a mistake while entering a number or name, press the left/right arrow button to delete the last digit or character. Then enter the correct number or character. Inserting a pause With some telephone systems, you must dial an access code (9, for example) and listen for a second dial tone. -
Page 42: Changing The Font Setting
Notification Area in Linux). You can also click Smart Panel on the status bar in Mac OS X. Or, if you are a Windows user, you can launch it from the Start menu, select Programs or All Programs > Samsung Printers > your printer driver name > Smart Panel. 2. Click Printer Setting. -
Page 43: Media And Tray
media and tray This chapter provides information on how to load originals and print media into your machine. This chapter includes: • Preparing originals • Loading originals • Selecting print media • Changing the tray size Preparing originals • Do not load paper smaller than 142 x 148 mm (5.6 x 5.8 inches) or larger than 216 x 356 mm (8.5 x 14 inches). -
Page 44: Selecting Print Media
•Be careful not to break the scanner glass. You may get hurt. •Do not put hands while closing the scanner lid. The scanner lid may fall on your hands and get hurt. •Do not look the light from inside of the scanner while copying or scanning. -
Page 45: Changing The Tray Size
Changing the tray size The tray is preset to Letter or A4 size, depending on your country. To change the size, you need to adjust the paper guides. 1. Hold the tray with one hand, and with the other hand squeeze and slide the paper length guide to locate them in the correct paper size slot marked at the bottom of the tray. - Page 46 Paper quantity indicator shows the amount of paper in the tray. Full Empty 4. When you print a document, set the paper type and size for the tray. For information about setting the paper type and size on the control panel (See "Setting the paper size and type"...
-
Page 47: Printing On Special Media
5.When you print a document, set the paper type and size for the multi-purpose tray. For information about setting the paper type and size on the control panel (See "Setting the paper size and type" on page 7). The settings made from the machine driver override the settings on the control panel. - Page 48 Acceptable Unacceptable • Envelopes with a peel-off adhesive strip or with more than one flap that folds over to seal must use adhesives compatible with the machine’s fusing temperature about 170°C (338 °F) for 0.1 second. The extra flaps and strips might cause wrinkling, creasing, or jams and may even damage the fuser.
-
Page 49: Setting The Paper Source
machine’s fusing temperature for 0.1 second. Check your machine’s specification to view the fusing temperature about 170°C(338 °F). • Used paper ink must be non-flammable and should not adversely affect machine rollers. • Before you load used paper, verify that the ink on the paper is dry. During the fusing process, wet ink can come off used paper, reducing print quality. - Page 50 For Letter-sized paper Pull out the output support to the location indicated LTR as shown, and unfold the extension. For A4- or Legal-sized paper Pull out the output support to the location indicated A4, LGL as shown, and unfold the extension. Media and tray_ 8...
-
Page 51: Pcl Printer Driver
This tool helps you to screen-capture, preview, scrap and print the screen of Windows Internet Explorer more easily, than when you use the ordinary program. Click Start > All programs > Samsung Printers > Samsung AnyWeb Print > Download the lastest version to link the website where the tool is available for the download. -
Page 52: Basic Printing
•If you are using Windows Internet Explorer, the Samsung AnyWeb Print too will save your time for screen-captured images or printing the image. Click Start > All programs > Samsung Printers > your machine name > Samsung AnyWeb > Download the lastest version to link the website where the tool is available for the download. -
Page 53: Using Help
Then a pop up window appears with information about that option's feature which is provided from the driver. If you want to search information via a keyword, click the Samsung tab in the Printing Preferences window, and enter a keyword in the input line of the Help option. -
Page 54: Printing Booklets
1. To change the print settings from your software application, access Printing Preferences (See "Opening printing preferences" on page 2) 2. Click the Basic tab, select Poster Printing in the Type drop-down list. 3. Select the page layout you want. Specification of the page layout: •Poster 2x2: Document will be enlarged and be divided into 4 pages. -
Page 55: Using Watermarks
1. To change the print settings from your software application, access Printing Preferences (See "Opening printing preferences" on page 2). 2. Click the Paper tab. 3. Select the paper size you want from the Fit to Page. 4. Select the Size, Source and Type in Paper Options. 5. -
Page 56: Job Setting
5.If the overlay file you want does not appear in the Text drop-down list, select Edit from the list and click Load. Select the overlay file you want to use. If you have stored the overlay file you want to use in an external source, you can also load the file when you access the Load window. -
Page 57: Postscript Options
There are several ways you can print using the Direct Printing Utility. From the Direct Printing Utility window 1.From the Start menu select Programs or All Programs > Samsung Printers > Direct Printing Utility > Direct Printing Utility. Or, double-click the Direct Printing Utility shortcut icon on your desktop. -
Page 58: Changing The Default Print Settings
Using the shortcut icon 1. Select the PDF file you wish to print, drag and drop it to the Direct Printing Utility shortcut icon on your desk top. The selected PDF file is sent to the default machine. If the default machine does not support Direct Printing Utility, the message window alerting you to select the appropriate machine opens. -
Page 59: Macintosh Printing
•If you want to encrypt job accounting password, check Job Accounting Password Encryption. •Administrators can enable job accounting and configure permissions in SyncThru™ Web Admin Service. 8. Click OK until you exit the Printer properties window. Macintosh printing This section explains how to print using Macintosh. You need to set the print environment before printing. -
Page 60: Printing On Both Sides Of Paper
•Administrators can enable job accounting and configure permissions in SyncThru™Web Admin Service. Job Setting (CLX-6250 Series only) This option allows you to choose how to print the printing file by using the 512 MB optional memory or Hard disk. Store, Spool, Normal and Print Schedule mode is available only if you have installed the optional hard disk. -
Page 61: Printing Files
system , printer models or the application you are using. There are a lot of Linux applications that allow you to print using Common UNIX Printing System (CUPS). You can print on your machine from any such application. 1. Open an application, and select Print from the File menu 2. -
Page 62: Unix Printing
•Unit: Change the units to points, inches or centimeters. Samsung Printer tab Select various options in the JCL and General frames to customize various settings. These options are specific to the printer and depend on the PPD file. -
Page 63: Basic Copy
copying This chapter gives you step-by-step instructions for copying documents. This chapter includes: • Basic copy • Changing the settings for each copy • Changing the default copy settings Basic copy This is the normal and usual procedure for copying your originals. 1. -
Page 64: Reducing Or Enlarging Copies
Reducing or enlarging copies You can reduce or enlarge the size of a copied image from 25% to 400% when you copy original documents from the scanner glass, or from 25% to 100% from the document feeder. To select from the predefined copy sizes: 1.Press (Copy) on the control panel. -
Page 65: Clone Copying
•On: Prints output in sets to match the sequence of originals. •Off: Prints output sorted into stacks of individual pages. 9. Press Stop/Clear to return to ready mode. 10. Press Start to begin copying. One complete document will print followed by the second complete document. -
Page 66: Edge Erase Copying
7. Press the up/down arrow until the binding option you want is highlighted. •Off: Does not use this feature. •Left Page: Use this option to print left page of the book. •Right Page: Use this option to print right page of the book. •Both Page: Use this option to print both pages of the book. -
Page 67: Setting Copy Timeout
1. Press (Copy) on the control panel. 2. Place originals, face up, in the document feeder. Or you can use the scanner glass with a single original document face down and closed the scanner lid. 3. Press Menu on the control panel. 4. -
Page 68: Scan To Email
The following methodoloqies can be used for scanning your documents: • Samsung Scan and Fax Manager: Scan the originals from the control panel. Then, the scanned data will be stored in the connected computers My Documents folder. When you install all the software in the supplied CD, the Samsung Scan and Fax Manager is also automatically installed on your computer. -
Page 69: Sending A Scanned Image To Several Destinations As An Email Attachment
Sending a scanned image to several destinations as an email attachment 1. Load originals face up into the document feeder, or place a single original face down on the scanner glass (See "Loading originals" on page 1). 2. Press (Scan/Email) on the control panel. 3. -
Page 70: For Usb Connected Machine
Your Address Book information prints out. Scanning originals and sending to your computer (Scan to PC) You can scan an image on the machine via the Samsung Scan and Fax Manager program that is installed in your networked computer. For USB connected machine This is a basic scanning method for usb connected machine. -
Page 71: Registering Local Authorized Users
Samsung Scan and Fax Manager > Quick Scan. Scanning originals and sending via SMB/FTP (Scan to server) You can scan an image and send it to a total of five destinations via the SMB or FTP. Setting up an FTP server To use an FTP server, you need to set up parameters to access the FTP servers using SyncThru™... -
Page 72: Scan Assistant
Using Samsung Scan and Fax Manager If you have installed the printer driver, the Samsung Scan and Fax Manager program is installed too. Start Samsung Scan and Fax Manager program to find out about this program information and the installed scan driver's condition. -
Page 73: Changing The Scan Feature Settings
into a single image, processing of scanned books and watermark stamping. Click the Help button from the lower-left corner of the window and click on any option you want to know about. Then a pop up window appears with information about that option's feature which is provided from the Scan Assistant. -
Page 74: Windows Vista
Windows Vista 1. Make sure that the machine is connected to your computer and powered 2. Load originals face up into the document feeder, or place a single original face down on the scanner glass (See "Loading originals" on page 1). 3. -
Page 75: Linux Scanning
5.When done, press OK. Linux scanning You can scan a document using the Unified Driver Configurator window. Scanning 1. Double-click the Unified Driver Configurator on your desktop. 2. Click the button to switch to Scanners Configuration. 3. Select the scanner on the list. If you use only one machine device and it is connected to the computer and turned on, your scanner appears on the list and is automatically selected. -
Page 76: Using The Image Manager
To delete a Job Type setting 1.Select the setting you want to delete from the Job Type drop-down list. 2.Click Delete. The setting is deleted from the list. Using the Image Manager The Image Manager application provides you with menu commands and tools to edit your scanned image. -
Page 77: Preparing To Fax
You can send a fax from your computer without going to the machine. Sending a fax To send a fax from your computer, the Samsung Network PC Fax program must be installed. This program will be installed when you installed the printer driver. -
Page 78: Sending A Fax Manually
Printers > Samsung Scan & Fax Manager > Samsung Scan & Fax Manager. Or you can open this program by right clicking the Smart Panel icon in the Windows task bar and selecting the Samsung Scan & Fax Manager. •For Macintosh, from the Smart Panel menu on status bar, click Samsung Scan &... -
Page 79: Confirming A Transmission
When you want to cancel a fax job, press Stop/Clear at any time while sending. Confirming a transmission When the last page of your original has been sent successfully, the machine beeps and returns to ready mode. When something goes wrong while sending your fax, an error message appears on the display. -
Page 80: Receiving A Fax
6.Press Stop/Clear to return to ready mode. Canceling a reserved delay fax job You can cancel the delayed fax job which is saved in memory. 1.Press Menu on the control panel. 2.Press the up/down arrow to highlight Fax Feature and press OK. 3.Press the up/down arrow to highlight Cancel Job and press OK. -
Page 81: Activating Secure Receiving Mode
•If you have set your machine to this mode and your answering machine is switched off, or no answering machine is connected to EXT socket, your machine automatically goes into Fax mode after a predefined number of rings. •If your answering machine has a user-selectable ring counter, set the machine to answer incoming calls within 1 ring. -
Page 82: Receiving Faxes In Memory
•Off: Prints in Normal mode. •Long Edge: Prints pages to be read like a book. •Short Edge: Prints pages to be read by flipping like a note pad. 7. Press OK to save your selection. 8. Press Stop/Clear to return to ready mode. Receiving faxes in memory Since your machine is a multi-tasking device, it can receive faxes while you are making copies or printing. -
Page 83: Setting Up Address Book
1. Press (Fax) on the control panel. 2. Press Menu on the control panel. 3. Press the up/down arrow to highlight Fax Feature and press OK. 4. Press the up/down arrow to highlight Forward and press OK. 5. Press the up/down arrow to highlight Fax and press OK. 6. -
Page 84: Speed Dial Numbers
is in Fax mode. Speed dial numbers You can store up to 240 frequently-used fax numbers in speed dial numbers. Registering a speed dial number 1.Press (Fax) on the control panel. 2.Press Address Book on the control panel. 3.Press the up/down arrow to highlight New & Edit and press OK. 4.Press the up/down arrow to highlight Speed Dial and press OK. -
Page 85: Printing Address Book
Searching sequentially through the memory 1.Press (Fax) on the control panel. 2.Press Address Book on the control panel. 3.Press the up/down arrow to highlight Search & Dial and press OK. 4.Press the up/down arrow to highlight Group Dial and press OK. 5.Press the up/down arrow to highlight Search ID and press OK. -
Page 86: Using Usb Memory Device
using usb memory device This chapter explains how to use a USB memory device with your machine. This chapter includes: • About USB memory device • Scanning to an USB memory device • Printing from a USB memory device About USB memory device USB memory devices are available with a variety of memory capacities to give you more room for storing documents, presentations, music and videos, high resolution photographs, or whatever other files you want to... -
Page 87: Backing Up Data
The scan size options may vary between document feeder or scanner glass. •Original Type: Sets the original document’s type. •Resolution: Sets the image resolution. •Scan Color: Sets the color mode. If you select Mono in this option, you cannot select JPEG in Scan Format. •Scan Format: Sets the file format in which the image is to be saved. -
Page 88: Formatting A Usb Memory Device
If you see + in the front of a folder name, there are one or more files or folders in the selected folder. If you selected a file, the display shows the size of the file for about 2 seconds. Go to the next step. If you selected a folder, press the up/down arrow until the file you want to delete highlights and press OK. -
Page 89: Fax Setup
machine status and advanced feature This chapter explains how to browse the current status of your machine, and the method of setting for the advanced machine setup. Read this chapter carefully in order to use your machine's diverse features. This chapter includes: •... -
Page 90: Change Default
Option Description Stamp RCV Name This option allows the machine to automatically print the page number, and the date and time of reception at the bottom of each page of a received fax. Rcv Start Code This code allows you to initiate fax reception from an extension phone plugged into the EXT socket on the back of the machine. -
Page 91: Printing A Report
4. Press the up/down arrow until the copy setup item you want is highlighted and press OK. 5. Press the up/down arrow until the setup option you want is highlighted and press OK. 6. Press the up/down arrow until the setting you want is highlighted and press OK. -
Page 92: Clearing Memory
Option Description User Auth List This list shows authorized users who are allowed to use the email function. PCL Font List You can print the PCL font list. You can print the PS3 font list. PS3 Font List Accounting Report This is used only when network authentication in enabled with SyncThru™... -
Page 93: Menu Overview
•Common Box is provided by default. 1. Press Menu on the control panel. 2. Press the up/down arrow to highlight Document Box and press OK. 3. Press the up/down arrow until the setup option you want is highlighted and press OK. Option Description Doc Box Feature... - Page 94 Items Option Copy Setup Change Default Scan Size # of Copies Collation Reduce/Enlarge Darkness Original Type Scan Feature USB Feature Scan Size Original Type Resolution Scan Color Scan Format Email Feature Scan Size Original Type Resolution Scan Color FTP Feature Scan Size Original Type Resolution...
- Page 95 Items System Setup Clear Setting All Settings Fax Setup Copy Setup Scan Setup System Setup Network Setup Address Book Sent Report Fax Rcv Report Job Management Active Job Stored Job File Policy Image Overwrite Immediate On Demand Network TCP/IP (IPv4) DHCP BOOTP Static...
-
Page 96: Management Tools
management tools This chapter introduces management tools provided to help you make full use of your machine. This chapter includes: • Introducing useful management tools • Using SyncThru™ Web Service • Using the Smart Panel program Introducing useful management tools The programs below help you to use your machine conveniently. -
Page 97: Address Book Tab
This tab allows you to maintain your machine by upgrading firmwares and setting contact information for sending emails. You can also connect to Samsung website or download drivers by selecting the Link menu. •Firmware Update: You can upgrade your machine’s firmware. -
Page 98: Smarthru Office
Click this icon in Linux. Or, if you are a Windows user, you can launch it from the Start menu, select Programs or All Programs > Samsung Printers > your machine name > Smart Panel. •If you have already installed more than one Samsung machine, first select the correct machine model you want in order to access the corresponding Smart Panel. -
Page 99: Opening The Unified Driver Configurator
Opening the Unified Driver Configurator 1. Double-click the Unified Driver Configurator on the desktop. You can also click the Startup Menu icon and select Samsung Unified Driver > Unified Driver Configurator. 2. Click each button on the left to switch to the corresponding configuration window. -
Page 100: Printers Configuration
•Remove Class: Removes the selected machine class. Scanners configuration In this window, you can monitor the activity of scanner devices, view a list of installed Samsung machine devices, change device properties and scan images. Switches to Scanners configuration. Shows all of the installed scanners. -
Page 101: Ports Configuration
“consumer” applications to these devices via the single I/O port. The Unified Linux Driver package provides an appropriate port sharing mechanism that is used by Samsung printer and scanner drivers. The drivers talk to their devices via so-called machine ports. The current status of any machine port can be viewed via the Ports configuration. -
Page 102: Printing A Machine Report
CLX-6250 Series only. Finding the serial number When you call for service or register as a user on the Samsung website, the machine’s serial number by taking the following steps: Maintenance_ 1... -
Page 103: Using Toner Low Alert
1. Press Menu on the control panel. 2. Press the up/down arrow to highlight System Setup and press OK. 3. Press the up/down arrow to highlight Maintenance and press OK. 4. Press the up/down arrow to highlight Serial Number and press OK. 5. -
Page 104: Cleaning The Scan Unit
5. With a dry, lint-free cloth, wipe away any dust and spilled toner from the toner cartridge area. While cleaning the inside of the machine, be careful not to damage the transfer roller or any other inside parts. Do not use solvents such as benzene or thinner to clean. -
Page 105: Estimated Cartridge Life
Use of non-Samsung and refilled toner cartridge Samsung Electronics does not recommend or approve the use of non-Samsung brand toner cartridges in your printer including generic, store brand, refilled, or remanufactured toner cartridges. -
Page 106: Troubleshooting
troubleshooting This chapter gives helpful information for what to do if you encounter an error. This chapter includes: • Redistributing toner • Clearing original document jams • Tips for avoiding paper jams Redistributing toner When the toner cartridge is near the end of its life: •... -
Page 107: Exit Misfeed
place completely. 5. Close the front door. Ensure that the cover is securely closed. If the front door is not completely closed, the machine will not operate. Clearing original document jams When an original jams while passing through the document feeder, a warning message appears on the display screen. -
Page 108: Clearing Paper Jams
3. Close the scanner lid. Load the removed pages back into the document feeder. Tips for avoiding paper jams By selecting the correct media types, most paper jams can be avoided. When a paper jam occurs, refer to the next guidelines. •... -
Page 109: Inside The Machine
1. Pull out optional tray 2. 2. Remove the jammed paper by pulling in the direction shown. To avoid tearing the paper, pull it out gently and slowly. If the paper does not move when you pull or if you do not see the paper in this area, stop and go to the next step. -
Page 110: In Exit Area
2. Press the green release handle to release the paper transfer belt. Holding the handle on the paper transfer belt, lift it out of the machine. 3. Remove the jammed paper by pulling in the direction shown. To avoid tearing the paper, pull it out gently and slowly. 4. - Page 111 3. Open the scan unit. When the scanner lid is open, the scan unit cannot be opened. Do not force the scan unit open, it can cause damage to the machine. Close the scanner lid before opening the scan unit. 4.
-
Page 112: In The Duplex Unit Area
shown to remove the misfed paper. 10. Close the inner cover of the reverse unit. 11. Lowering down the scan unit gently and slowly until it is completely closed. Make sure that it is securely latched. Be careful not to pinch your fingers! If the scan unit is not completely closed, the machine will not operate. -
Page 113: Understanding Display Messages
4. Holding the handle on the paper transfer belt, align it with the slots on the inside of the front door. 5. Lower the paper transfer belt until it is parallel with the front door and firmly seated. 6. Close the front door to resume printing. If the front door is not completely closed, the machine will not operate. - Page 114 Check USB Memory quality issues. (See Data Write Fail "Replacing the toner cartridge" on page 2) Check USB Memory Door is open. Samsung does Close it not recommend using Door is open or non-genuine Check Transfer belt Samsung toner...
- Page 115 Message Meaning Paper Empty in There is no paper in the [yyy] tray. Paper is empty in [yyy]. Load paper Jam bottom of Paper has jammed duplex during duplex printing. Jam in exit area Paper has jammed in exit area. Jam inside machine Paper has jammed inside the machine.
- Page 116 Turn off then on administrator. Mail Size Error Replace the toner One Page is cartridge with a Too Large Samsung-genuine toner Too many Faxes cartridge (See Too may faxes are "Replacing the toner received. Print or cartridge" on page 2).
-
Page 117: Solving Other Problems
Follow the suggested solutions until the problem is Install a corrected. If the problem persists, call for service. Samsung-genuine transfer belt. Power problems To close the tray, lower Click this link to open an animation about power problems. -
Page 118: Paper Feeding Problems
Condition Suggested solutions The machine is • Plug in the power cord and then press the power not receiving switch to turn the machine on. power; or the printer cable connection between the computer and the machine is not connected properly. -
Page 119: Printing Problems
Printing problems Condition Possible cause The machine The machine is not does not print. receiving power. The machine is not selected from the available printers list. Check the machine for the following: • The front door is not closed. Close the front door. - Page 120 Condition Possible cause The document size Make available more hard is so big that the disk space and print the hard disk space of document again. the computer is insufficient to access the print job. The machine The paper option For many software selects print that was selected in...
-
Page 121: Printing Quality Problems
Condition Possible cause The print quality The resolution of Reduce the photo size. If of photos is not the photo is very you increase the photo size good. Images are low. in the software application, not clear. the resolution will be reduced. - Page 122 Condition Suggested Solutions Toner smear If toner smears on the page: • Clean the inside of the machine (See "Cleaning the inside" on page 2). • Check the paper type and quality (See "Print media specifications" on page 3). • Remove the toner cartridge and then, install a new one (See "Replacing the toner cartridge"...
-
Page 123: Copying Problems
Condition Suggested Solutions Loose toner • Clean the inside of the machine (See "Cleaning the inside" on page 2). • Check the paper type and quality (See "Print media specifications" on page 3). • Remove the toner cartridge and then, install a new one (See "Replacing the toner cartridge"... -
Page 124: Scanning Problems
Scanning problems Condition Suggested solutions The scanner does not • Make sure that you place the original to be work. scanned face down on the scanner glass, or face up in the document feeder. • There may not be enough available memory to hold the document you want to scan. -
Page 125: Common Postscript Problems
Macintosh (See "System requirements" on page 2). • Check that the Samsung Scan and Fax Manager is installed by looking under “All programs” in windows. If not installed and/or working correctly, reinstalled using the CD supplied with the product, or download the latest version from the Samsung website. -
Page 126: Common Linux Problems
Refer to Microsoft Windows User’s Guide that came with your computer for further information on Windows error messages. Common Linux problems condition Suggested solutions The machine does • Check if the printer driver is installed in your not print. system. Open Unified Driver Configurator and switch to the Printers tab in Printers configuration window to look at the list of available machines. -
Page 127: Common Macintosh Problems
condition Suggested solutions The machine does • Ensure your machine is attached to your not appear on the computer, connected properly via the USB scanners list. port, and is turned on. • Ensure the scanner driver for your machine is installed in your system. -
Page 128: Supplies And Accessories
How to purchase To order Genuine Samsung supplies, accessories and, maintenance parts, contact your local Samsung dealer or the authorized retailer where you purchased your machine. You can also visit www.samsung.com/supplies, select your country/region, and obtain information on calling for service. -
Page 129: Available Accessories
Depending on your country, wireless LAN cards may not be available. Contact your local Samsung dealer or the retailer where you bought your printer. Maintenance parts To purchase maintenance parts, contact the source where you bought the machine. -
Page 130: Replacing The Paper Transfer Belt
skin. When you open the front door and work inside the machine, it is highly recommend that you remove the paper transfer belt first. Because the work you do could contaminate the paper transfer belt. 3. Remove the new toner cartridge from its bag. •Don't use sharp objects, such as a knife or scissors, to open the print cartridge package. -
Page 131: Upgrading A Memory Module
When you are expanding the memory capacity, you can add a memory module to the vacant memory slot (See "Available accessories" on page 2). We recommend the use of only genuine Samsung DIMM's. You may void your warranty if it is determined that your machine problem is being caused by third party DIMM's. -
Page 132: Installing A Memory Module
Installing a memory module 1. Turn the machine off and unplug all cables from the machine. 2. Remove the screws and remove the rear cover. 3. Remove the screws, then lift up the cover slightly and pull the cover to the right. -
Page 133: File Policy
Installing a wireless network interface card Depending on your country, wireless LAN cards may not be available. Contact your local Samsung dealer or the retailer where you bought your printer. The machine is equipped with a network interface which allows you to use your machine on a network. -
Page 134: Configuring The Machine's Wireless Network
8. Install the control board cover with the screws removed in step 3. 9. Install the rear cover with the screws removed in step 2. 10. Plug all the cables back into the machine, and turn the machine on. 11. Set the wireless network environment. For information about configuring and using the printer on a wireless network environment, refer to the Wireless network install guide provided with the wireless network interface card. -
Page 135: Installing A Hard Disk
-Open System: Authentication is not used, and encryption may or may not be used, depending on the need for data security. Enter the WEP Key using number keypad after selecting Open System and then press OK. -SharedKey: Authentication is used. A device that has a proper WEP Key can access the network. -
Page 136: Form File
1.Press Menu on the control panel. 2.Press the up/down arrow to highlight System Setup and press OK. 3.Press the up/down arrow to highlight Job Management and press 4.Press the up/down arrow to highlight Stored Job and press OK. 5.Press the up/down arrow to highlight the user’s name and file name you want use and press OK. - Page 137 same name when you enter a new file name, the file will be saved as a different name that is automatically programmed. •Overwrite : You can set the machine to delete previous job information on hard disk drive (HDD) as you store new job information.
-
Page 138: Specifications
• Hardware specifications • Environmental specifications • Electrical specifications • Print media specifications The specification values are listed below, specification are subject to change without notice. See www.samsung.com/printer for possible changes in information. Hardware specifications Item Dimension Height Depth Width... - Page 139 Item Power consumption Average operating mode Ready mode Power save mode Power off mode a. See the rating label on the machine for the correct voltage, frequency (hertz) and type of current for your machine. Description • CLX-6220 Series: Less than 550 W •...
-
Page 140: Print Media Specifications
Print media specifications Type Size Plain paper Letter Legal US Folio Oficio JIS B5 ISO B5 Executive Statement Envelope Envelope Monarch Envelope No. 10 Envelope DL Envelope C5 Envelope C6 Envelope No. 9 Envelope 6 3/4 Thick paper Refer to the Plain paper section Thin paper Refer to the Plain paper... - Page 141 b. Maximum capacity may differ depending on media weight, thickness, and environmental conditions. c. Smoothness: 100 to 250 (sheffield). Specifications_ 4...
- Page 142 (windows only) This chapter gives helpful information and troubleshooting tips for system administrators using Samsung Installer. Overview Samsung provides convenient installation methods useful for administrators. Administrators can remotely install the machine driver to multiple client computers or use command window to install the driver at once.
- Page 143 16. Select the group(s) and click Next to start remote installation. Remote installation begins, you can see the installation status from the window. 17. When installation is completed, Results of remote installation window appears. Check the result. For failed client computers, you can reinstall again by clicking the Reinstall button.
- Page 144 Error log messages Message Meaning Connection Unable to bind the socket. Error [Port number:..] Unable to listen the socket. [Port number:..] Unable to connect to the client computer. Client computer’s socket is closed. Setup Error Unable to access the default shared folder(C$) in the client computer.
- Page 145 4. Read License Agreement, and select I accept the terms of the License Agreement. Then, click Next. 5. Select Package Type window appears. Select Normal(setup.exe) or Self-Extraction Package. If you place the mouse cursor over the package type, you can see the detailed information on the bottom right side of the window.
- Page 146 •If you use Windows Vista, Windows 7 and Windows 2008 Server R2 click Start > All programs > Accessories > Run. Type X:\Setup.exe replacing “X” with the letter which represents your CD-ROM drive and click OK. •If the AutoPlay window appears in Windows Vista, click Run Setup.exe in Install or run program field, and click Continue in the User Account Control windows.
- Page 147 Command- Definition line /i”<script Specifies customized install filename>” or script file for custom operation. /I”<script filename>” The script filename should be a fully qualified filename. /n”<Printer Specifies printer name. name>” or Printer instance shall be created as specified printer /N”<Printer name.
- Page 148 Code Language 0X0422 Ukraine 0X041B Slovakia 0X0421 Indonesian 0x041E Thai 0X0429 Farsi Frequently Asked Question Remote Installation related questions Question Client computers are not Primary DNS address in all client listed in the list when computers should be specified as logging on as a domain.
-
Page 149: Contact Samsung Worldwide
If you have any comments or questions regarding Samsung products, contact the Samsung customer care center. Country/Regio Customer Care Center ARGENTINE 0800-333-3733 AUSTRALIA 1300 362 603 AUSTRIA 0810-SAMSUNG (7267864, € 0.07/min) BELARUS 810-800-500-55-500 BELGIUM 02 201 2418... - Page 150 UKRAINE 8-800-502-0000 UZBEKISTAN 8-10-800-500-55-500 VENEZUELA 0-800-100-5303 VIETNAM 1 800 588 889 Web Site www.samsung.com/pt www.samsung.com/latin www.samsung.com/latin www.samsung.com/ie www.samsung.ru www.samsung.com/sg www.samsung.com/sk www.samsung.com/za www.samsung.com/es www.samsung.com/se www.samsung.com/ch www.samsung.com/tw www.samsung.com/th www.samsung.com/latin www.samsung.com/tr www.samsung.com/ae www.samsung.com/uk www.samsung.com/us www.samsung.ua www.samsung.com/ua_r www.samsung.com/kz_ru www.samsung.com/latin www.samsung.com/vn Contact SAMSUNG worldwide_ 2...
-
Page 151: Control Panel
glossary The following glossary helps you get familiar with the product by understanding the terminologies commonly used with printing as well as mentioned in this user’s guide. 802.11 802.11 is a set of standards for wireless local area network (WLAN) communication, developed by the IEEE LAN/MAN Standards Committee (IEEE 802). -
Page 152: Fuser Unit
The Domain Name Server (DNS) is a system that stores information associated with domain names in a distributed database on networks, such as the Internet. Dot Matrix Printer A dot matrix printer refers to a type of computer printer with a print head that runs back and forth on the page and prints by impact, striking an ink-soaked cloth ribbon against the paper, much like a typewriter. -
Page 153: Mac Address
Intranet A private network that uses Internet Protocols, network connectivity, and possibly the public telecommunication system to securely share part of an organization's information or operations with its employees. Sometimes the term refers only to the most visible service, the internal website. -
Page 154: Printer Driver
NetWare A network operating system developed by Novell, Inc. It initially used cooperative multitasking to run various services on a PC, and the network protocols were based on the archetypal Xerox XNS stack. Today NetWare supports TCP/IP as well as IPX/SPX. Organic Photo Conductor (OPC) is a mechanism that makes a virtual image for print using a laser beam emitted from a laser printer, and it is usually green or rust colored and a cylinder shaped. -
Page 155: Toner Cartridge
Subnet Mask The subnet mask is used in conjunction with the network address to determine which part of the address is the network address and which part is the host address. TCP/IP The Transmission Control Protocol (TCP) and the Internet Protocol (IP); the set of communications protocols that implement the protocol stack on which the Internet and most commercial networks run.