Advertisement
Quick Links
BEFORE YOU BEGIN
BEFORE YOU BEGIN
·
Please read these instructions carefully to familiarize
yourself with the required tools, materials, and installation
sequences. Follow the sections that pertain to your
particular installation. This will help you avoid costly
mistakes. In addition to proper installation, read all
operating and safety instructions.
·
All information in these instructions is based upon the
latest product information available at the time of
publication. Kohler China reserves the right to make
changes in product characteristics, packaging, or
availability at any time withoutnotice.
·
These instructions contain important care, cleaning, and
warranty information-please leave instructions for the
consumer.
ORDERING INFORMATION
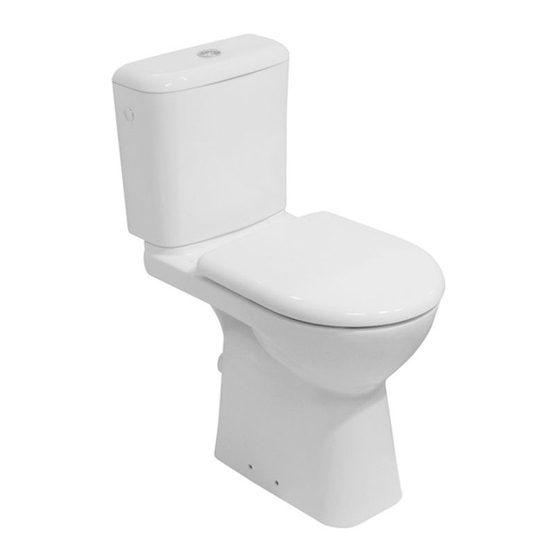
ODEON P-trap 180mm Toilet .................................K-8711T-2
®
Includes Tank ........................................................K-8710T
Includes Bowl .....................................................K-8709T-2
Includes
ODEON
Quiet-close
®
ODEON P-trap 180mm Toilet .................................K-8711T-2
®
Includes Tank ........................................................K-8710T
Includes Bowl .....................................................K-8709T-2
Includes
Toilet Seat
...............................................K-8020T
ODEON S-trap 305mm Toilet...............................K-8766T-S2
®
Includes Tank ........................................................K-8710T
Includes Bowl .....................................................K-8767T-2
Includes
ODEON
Quiet-close
®
ODEON S-trap 305mm Toilet .................................K-8766T-2
®
Includes Tank ........................................................K-8710T
Includes Bowl .....................................................K-8767T-2
Includes
Toilet Seat
...............................................K-8020T
No.2 KOHLER ROAD, SANSHUI CENTRAL INDUSTRIAL PARK, LEPING TOWN, SANSHUI DIST., FOSHAN, GUANGDONG, PRC POST CODE 528137
8# MENGSHAN RD, ECONOMIC DEVELOPMENT ZONE OF HUANTAI, ZIBO, SHANDONG, CHINA POST CODE: 256410
1037406-T01-N
Toilet Seat
...........K-8827T
Toilet Seat
...........K-8827T
VITREOUS CHINA P/S-TRAP TOILET
P-TRAP 180mm K-8711T-S2/K-8711T-2
S-TRAP 305mm K-8766T-S2/K-8766T-2
·
,
·
·
·
180mm
....................................................................K-8710T
.................................................................K-8709T-2
180mm
....................................................................K-8710T
.................................................................K-8709T-2
(
305mm
....................................................................K-8710T
.................................................................K-8767T-2
305mm
....................................................................K-8710T
.................................................................K-8767T-2
(
2
528137
8
256410
©
Copyright Kohler China Investment Co., Ltd. 2016
-1-
©
ODEON
®
INSTALLATION INSTRUCTIONS
P/S-
..............................K-8711T-2
................................K-8827T
..............................K-8711T-2
).....................................K-8020T
...........................K-8766T-S2
................................K-8827T
..............................K-8766T-2
).....................................K-8020T
-
2016
Advertisement

Related Manuals for Kohler ODEON K-8711T-2


Summary of Contents for Kohler ODEON K-8711T-2
- Page 1 Includes Bowl .............K-8767T-2 Includes Toilet Seat ..........K-8020T )........K-8020T No.2 KOHLER ROAD, SANSHUI CENTRAL INDUSTRIAL PARK, LEPING TOWN, SANSHUI DIST., FOSHAN, GUANGDONG, PRC POST CODE 528137 528137 8# MENGSHAN RD, ECONOMIC DEVELOPMENT ZONE OF HUANTAI, ZIBO, SHANDONG, CHINA POST CODE: 256410 256410 ©...
-
Page 2: Tools And Materials Required
NOTES · · Observe all local plumbing and building codes. · · Shut off the water supply. · · 155mm(6-1/8") Seat post holes are on 155mm (6-1/8") centers. · · 60mm(2-3/8") Passageways is 60mm (2-3/8"). · · 245mm(9-5/8") Water depth from rim is 245mm (9-5/8") ·... -
Page 3: Installation
S-trap K-8766T-S2/K-8766T-2 K-8711T-S2/K-8711T-2 Fig.#1 Kohler reserves the right to change marked dimensions without prior notice. INSTALLATION 1. REMOVE EXISTING TOILET Turn off water supply. flush the toilet and use a sponge to remove the remaining water from the tank and bowl. - Page 4 NOTE: Do not use white cement or high lime content cements to install this toilet. The expansion of cement due to a rise in temperature may make the toilet crack or cause damage. Kohler is not responsible for any damage caused by installation with the use of cement. Fig.#2a Fig.#2b...
- Page 5 The expansion of cement due to a rise in temperature may make the toilet crack or cause damage. Kohler is not responsible for any damage caused by installation with the use of cement. 4 Connect fill valve to water supply with hose only.
- Page 6 5.CHECK WATER LEVEL Turn on water supply check for leaks. Float Fig. #5 Make sure the arrow on the green float on the white flush valve is secure and pointing to # 6 . 6. MINOR ADJUSTMENT OF WATER Snap LEVEL Move the snap along "OPEN"...
- Page 7 Fasten the snap along "CLOSE" CLOSE direction. Fig.#6d Float adjustment instructions: Make Screw G 2-4mm sure the height of surface E is 2-4mm lower than surface G. Float Water Cup Fig.#6e 7. ADJUST OVERFLOW HEIGHT (If necessary) Adjust overflow tube so that the top is 20mm above the 20mm waterline.
- Page 8 8. INSTALL AND ADJUST PUSH BUTTONS (1) Fix tank cover onto the tank. (2) Unscrew the big white nut on the push button and insert the button into the hole on the tank. (3) Test the push buttons. 1) No need for any adjustment if the rods just touch the push buttons on the flush valve.
-
Page 9: Troubleshooting Chart
TROUBLESHOOTING CHART TROUBLESHOOTING CHART SYMPTOMS PROBABLE CAUSES CORRECTIVE ACTION 1. Float valve turns on/off A. Flush valve seal worn, dirty or damaged. A. Inspect, clean and, if necessary replace seal. by itself without toilet being flushed. 2. Float valve continues A. -
Page 10: Consumer Responsibilities
CAUTION: Don t use any cement while installing the toilet. Heat expansion of the toilet may damage the feet of the toilet. Kohler will not be responsible for any damage because of using cement. WARNING: Risk of product damage. Do not throw into the toilet what is easy to block it, such as newspaper, paper pilch, sanitary towel.