Table of Contents
Advertisement
Quick Links
Advertisement
Table of Contents

Related Manuals for Ariston NIV 320B


Summary of Contents for Ariston NIV 320B
- Page 1 NIV 320B lnduction Hob Instruction Manual...
-
Page 2: Table Of Contents
CONTENTS IMPORTANT SAFETY INSTRUCTIONS p.3-4 SAFEGUARDING THE ENVIRONMENT BEFORE USE COOKWARE INSTALLATION p.6-7 ELECTRICAL CONNECTION PRODUCT DESCRIPTION CONTROL PANEL DESCRIPTION INSTRUCTIONS FOR USE p.10-13 CLEANING p.14 TROUBLESHOOTING p.15 GUIDE POWER LEVEL TABLE p.16 p.17 TECHNICAL SPECIFICATIONS... - Page 3 SAFETY INSTRUCTIONS PERMITTED USE CAUTION: The appliance is not intended to IMPORTANT TO BE READ AND OBSERVED be operated by means of an external switching Before using the appliance, read these safety device, such as a timer, or separate remote instructions.
- Page 4 DECLARATION OF CONFORMITY Do not use extension leads, multiple sockets This appliance meets Ecodesign requirements of or adapters. The electrical components must European Regulation 66/2014 in compliance with the not be accessible to the user after installation. European standard EN 60350-2. Do not use the appliance when you are wet or NOTE barefoot.
-
Page 5: Before Use
TO MAINTAIN THE EFFICIENCY AND SAFETY OF YOUR APPLIANCE, WE RECOMMEND YOU ALWAYS USE ORIGINAL SPARE PARTS AND TO CALL ONLY OUR AUTHORIZED SERVICE AGENTS IN CASE OF NEED. BEFORE USE IMPORTANT: The cooking zones will not switch on if pots are not the right size. Only use pots bearing the symbol “INDUCTION SYSTEM”. -
Page 6: Installation
INSTALLATION After unpacking the product, check for any damage during transport. In the event of problems, contact the dealer or the After-Sales Service. - The electrical connection of this hob must be carried out by qualified technician, according to the instructions in this user manual and in compliance with the local regulations. - Page 7 Secure the hob in place by putting it into cutout on the work surface. When installed above oven, it is necessary to remove the rear kitchen element panel in the area of the oven opening, in order to supply ventilation. Also, the front part of the kitchen element must have an opening of no less than 5 mm tall.
-
Page 8: Electrical Connection
ELECTRICAL CONNECTION - Disconnect the appliance from the power supply. - Installation must be carried out by qualified personnel who know the current safety and installation regulations. - The manufacturer declines all liability for injury to persons or animals and for damage to property resulting from failure to observe the regulations provided in this chapter. -
Page 9: Product Description
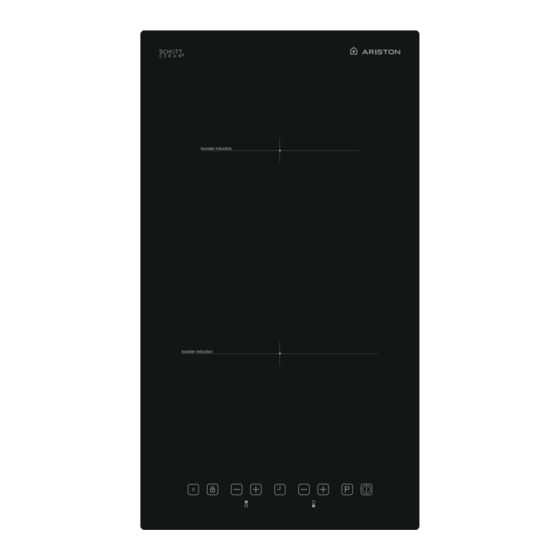
PRODUCT DESCRIPTION Induction heating element Control panel CONTROL PANEL DESCRIPTION... -
Page 10: Instructions For Use
INSTRUCTIONS FOR USE Use the induction cooking zones with suitable cookware. After mains voltage is applied, all displays are on for a moment. When this time is over, the hob is in the standby mode and it is ready for operation. The hob is controlled with electronic sensors which are operated by touching the related sensors. - Page 11 Switching the cooking-zones OFF Select the cooking zone to be switched off by pressing the button. Press the button to set the level to “0”. The cooking zone can also be switched off by pressing the buttons at the same time. The cooking zone switches off and the residual heat indicator “H” lights up. If the cooking zone is hot, “H”...
- Page 12 LOCKED will appear in all displays and the control panel is locked. (If a cooking zone is in hot condition,“L”and “H”will be displayed in alternation.) The hob will remain in a locked condition, even if the control panel has been switched off and on. To deactivate the child lock, first switch on the hob, press the buttons simultaneously and then press the...
- Page 13 between 0 to 99 minutes. If there is no operation in 10 seconds, the minute minder will be sent and the blinking dot will disappear. Once the set time has elapsed, an acoustic signal sounds and the display blinks and timer begins the countdown.
-
Page 14: Cleaning
CLEANING - Do not use steam cleaners. - Before cleaning, make sure the cooking zones are switched off and that the residual heat indicator“H”is not displayed. IMPORTANT: Do not use abrasive sponges or scouring pads. Their use could eventually ruin the glass. -
Page 15: Troubleshooting
TROUBLESHOOTING GUIDE Read and follow the instructions given in the section “SAFETY INSTRUCTIONS”. Make sure there is not a power outage. Dry the hob thoroughly after cleaning it. If, when the hob is switched on, alphanumeric codes appear on the display, consult the following table for instructions. - Page 16 POWER LEVEL TABLE The information given in below table is for reference. Power level Type of cooking Level use (Indicating cooking experience and habits) Ideal for rapidly increasing the temperature of food to Boost Fast heating fast boiling in the case of water or rapidly heating Max.
- Page 17 TECHNICAL SPECIFICATIONS Brand NIV 320B Model Type of Hob Electric Number of Cooking Zones Heating Technology-1 Induction Size-1 Ø16,0 Energy Consumption-1 Wh/kg 189,0 Heating Technology-2 Induction Size-2 Ø20,0 Energy Consumption-2 Wh/kg 189,0 Energy Consumption of Hob Wh/kg 189,0 Rated Voltage...