Advertisement
Quick Links
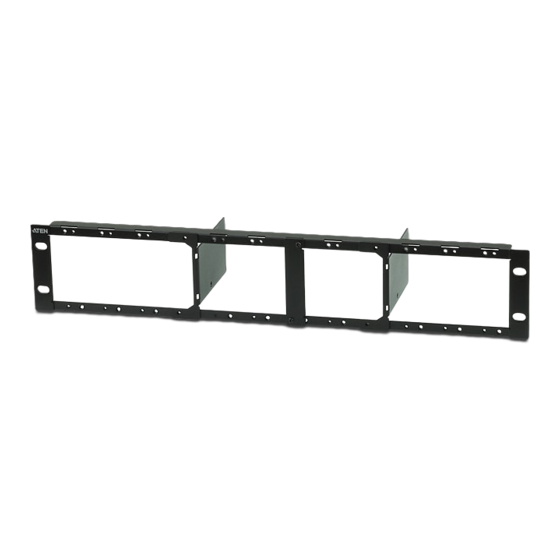
Video Extender Rack Mount Kit
VE-RMK2U
The VE-RMK2U kit provides a mounting frame and accessories to install
12 ATEN Video Extenders in 2U of rack space. Compatible with ATEN
models VE800A, VE803, VE810, VE600A, VE602A, VE560, and CE100.
Installation:
1. (A) Position the VE-RMK2U Frame on the front of the rack and align the holes in the mounting brack-
ets with the holes in the rack, then screw the mounting brackets to the rack. Rack screws are not
provided. (B) Remove the two screws to detach the center brace.
A
2. Place the video extender on the 2U Mounting Plate and align the holes, then screw the video extender
to the mounting plate.
M3X5 Countersunk
Head Screws
User Instructions
Package Contents:
1 x VE-RMK2U Frame
12 x 2U Mounting Plates
26 x Plastic Captive Screws
36 x Countersunk Head Screws
B
Front
Rear
Advertisement

Related Manuals for ATEN VE-RMK2U

Summary of Contents for ATEN VE-RMK2U
- Page 1 Installation: 1. (A) Position the VE-RMK2U Frame on the front of the rack and align the holes in the mounting brack- ets with the holes in the rack, then screw the mounting brackets to the rack. Rack screws are not provided.
- Page 2 User Instructions VE-RMK2U 5. Slide a 2U Mounting Plate with video extender attached onto a slot in the VE-RMK2U Frame, align- ing the screw holes and fitting the notches. Secure the mounting plate to the frame with two Plastic Captive Screws. Repeat the process with each video extender you are installing.