LG DLEX5000 Series Service Manual
Hide thumbs
Also See for DLEX5000 Series:
- Owner's manual (108 pages) ,
- Owner's manual (100 pages) ,
- Owner's manual (108 pages)
Table of Contents
Advertisement
MODEL :
Electric
Gas
DLEX5000*
DLGX5001*
Any reproduction, duplication, distribution (including by way of email, facsimile or other electronic means),
publication, modification, copying or transmission of this Service Manual is STRICTLY PROHIBITED unless you
have obtained the prior written consent of the LG Electronics entity from which you received this Service Manual.
The material covered by this prohibition includes, without limitation, any text, graphics or logos in this Service
Manual.
Copyright ©
2016 - 2017
LG Electronics Inc. All rights reserved. Only training and service purposes.
Advertisement
Table of Contents

Related Manuals for LG DLEX5000 Series


Summary of Contents for LG DLEX5000 Series
- Page 1 Service Manual is STRICTLY PROHIBITED unless you have obtained the prior written consent of the LG Electronics entity from which you received this Service Manual. The material covered by this prohibition includes, without limitation, any text, graphics or logos in this Service Manual.
- Page 3 Copyright © 2016 - 2017 LG Electronics Inc. All rights reserved. Only training and service purposes.
- Page 4 ACCESSORIES Included accessories Optional accessory Y connector Hose Dryer rack (1 each) See page 6 of this manual for usage instruction.
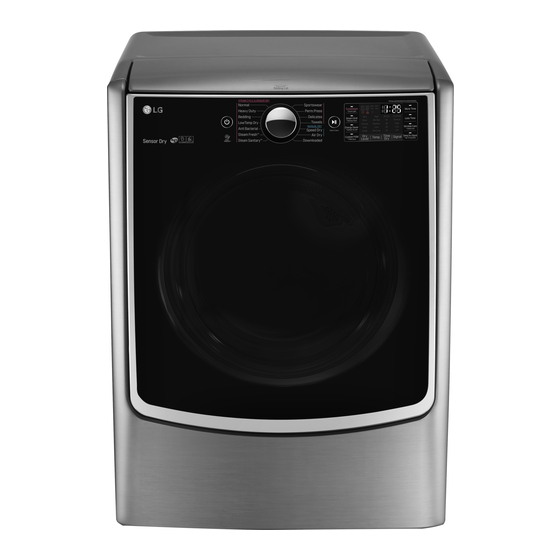
- Page 5 DLEX5000* DLGX5001* Chrome 7.4cu.ft 151.7 / 148.6 27 X 30 X 40 11/16 (inch) 29 1/10 X 33 1/10 X 42 2/5 (inch)
-
Page 7: Connecting Electric Dryers
3-1. Connecting Electric Dryers 4-wire direct If this type is available at your home. you will be connecting to a fused disconnect or circuit breaker 3-wire direct 5" (12.7 cm) If this type is available at your home. you will be connecting to a fused disconnect or circuit breaker... -
Page 9: Connecting The Gas Supply
3-2 Connecting the gas supply... -
Page 10: Connect Inlet Hose
Connect Inlet Hose 21.8 150~800... - Page 11 Mid High 10min Steam Fresh™ Adjustable Adjustable Steam High 31min Sanitary™ Antibacterial High NORMAL Bedding Medium NORMAL Heavy Duty High NORMAL Perm.Press 32min NORMAL Elec : 67 Normal Medium Gas : 63 NORMAL Delicates 28min NORMAL Mid High Towels Sportswear 27min ELECTRIC:HIGH NORMAL...
- Page 12 Auto reset -31°F (-35°C) Same shape as outlet thermostat. 4. LED Lamp Schematic: If the lamp is turned on It is not by connecting is normal. measured by multimeter because V is 3.2V Measure resistance of the following terminal 1) Door open Terminal: COM - NC (1-3) Terminal: COM - NO (1-2) 2) Door closed...
- Page 14 Ω Ω Electric type 15. Inlet. valve Measure resistance of the Following terminal Left picture -.plate...
- Page 15 When checking Component, be sure to turn Power off, then do voltage discharge sufficiently. Ω Ω Ω Ω...
- Page 16 Heater Relay(Black) Heater Relay(Blue) AG Heater Relay(White)
- Page 17 Heater Relay(Black) Heater Relay(Blue)
- Page 18 TurboSteam™ helps prevent the overdrying of clothes by injecting steam during the drying process. The Steam Shield Function extends the life of clothes.
- Page 20 Thermistor of blower 1 error is displayed in the Outlet thermistor open or shorted. housing drying cycle or test mode. Thermistor of blower 2 error is displayed in the Outlet thermistor open or shorted. housing drying cycle or test mode. 4 error is only displayed in the Thermistor of steam Steam generator thermistor open...
- Page 22 Once you have completed the installation of the dryer, During the two minute test cycle, monitor the FLOW use this test to make sure the condition of the exhaust SENSE display on the control panel. If the Flow system is adequate for proper operation of the dryer. Sense indicator text lights up, the exhaust system This test should be performed to alert you to any serious is restricted.
- Page 23 • Check the Error Code before you call for service Error Code Possible Causes Solutions or tE2 • Temperature sensor failure • • Humidity Sensor failure. • • Electric dryer power cord is not • Check the power supply or the connection of connected correctly, or house power power cord to the terminal block.
- Page 24 L06(Elec Type) L07(Gas Type) Main PGM Display PGM Thermistor open Thermistor shorted 180 in normal condition. ELECTRIC TYPE Mist Valve on, Motor+ Heater1+Heater2 off Water Supply Valve Mist Valve GAS TYPE Mist Valve on, Motor+ Gas Valve off Loads off Water Level Sensor...
- Page 25 120V AC Electrical Supply...
- Page 26 ✽...
- Page 27 ✽...
- Page 28 Thermistor Test --- Measur e with Power Off...
-
Page 29: Motor Test
Motor Test Drum does not rotate, fan does not turn, heater does not function. Ω Ω Ω Ω page 12 Ω page 15... - Page 30 Moisture Sensor Moistur e sensor Ω...
- Page 31 Door Switch Test half- Ω Ω Ω Ω...
- Page 32 Heater Switch Test - Electric Type Ω Ω Ω Ω Ω Ω...
- Page 33 GAS Valve Test - Gas Type GAS V alve test - Gas T ype Ω...
- Page 34 Test 8 Motor Assembly, DC, Pump Before measuring resistance, be sure to turn power off, and do voltage discharge. Caution (When discharging, contact the metal plug of power cord with the ground wire.) Trouble Symptom During the diagnostic test, E5 error occurs. Measurement Condition Turn the dryer’s power off, then measure resistance.
-
Page 35: Change Gas Setting (Natural Gas, Propane Gas)
CHANGE GAS SETTING (NATURAL GAS, PROPANE GAS) Changing orifices and gas valve adjustments improperly can result in an Warning explosion and/or fire. Conversion must be made by a qualified technician. Initially, The burner is set for natural gas at the factory. The propane orifice conversion kit is sold as a service part to authorized servicers only. -
Page 37: Top Plate
Unplug the dryer before servicing. WARNING ! TOP PLATE ① When you disassemble the top plate, be sure to disconnect the dryer from its electrical supply. Protect your hands and arms from sharp edges when working. To reduce the risk of injury to persons adhere to all industry recommended safety procedures including the use of long sleeved gloves and safety glasses. - Page 38 Disassembling the Top Plate 1. Top plate when assembled 3. Disassemble the dispenser cover. Remove 1 screw on the left and right. Lift the dispenser cover assembly. Save parts for reassembly. 2. Disassemble the protective cover. Remove 3 screws on the left and right. Lift the protective cover.
- Page 39 6. Disassemble the cover guide. 5. Disassemble the lid assembly. Slowly push the lid assembly until it meets the Remove 4 screws on the left and right. end rail. Lift the cover guides. Lift the lid assembly. Save parts for reassembly. Do not scratch the lid assembly when lifting it.
- Page 40 CABINET COVER 1. Open the door. 2. Remove 4 screws. 1. Remove 2 screws. 2. Lift and pull to remove the cabinet cover. PANEL FRAME 1. Remove 2 screws on the panel frame and then remove the panel frame.
-
Page 41: Drum Assembly
TUB DRUM [FRONT] WARNING ! When you disassemble the lamp connector, be sure to disconnect the dryer from its electrical supply. Protect your hands and arms from sharp edges when working. To reduce the risk of Injury to persons adhere to all industry recommended safety procedures including the use of long sleeved gloves and safety glasses. - Page 42 WARNING ! DRYER EXHAUST CHANGE Before performing this exhaust installation, be sure to disconnect the dryer from its electrical supply. Protect your hands and arms from sharp edges when working inside the cabinet. To reduce the risk of Injury to persons adhere to all industry recommended safety procedures including the use of long sleeved gloves and safety glasses.
- Page 43 AIR DUCT & FILTER ASSEMBLY Remove 5 screws. Pull down to remove the air duct. Remove the filter. Remove cover filter and guide filter. Disconnect the electrode sensor.
-
Page 44: Blower Housing
BLOWER HOUSING Remove the top plate. Remove the cabinet cover and front bulkhead. Remove the drum assembly. Remove 2 screws and cover (air guide). Remove the bolt and washer. Remove the blower wheel. (Left-hand thread). Disconnect the motor clamp and motor. BACK COVER Open the top plate. - Page 45 Replacing the Inlet Hose 1. Press and hold the release ring to remove the hose from the nozzle. 2. Remove the 7 screws from the rear cover. 3. Lift the rear tub off the support and pull it out. 4. Replace the hose, and assemble the cable tie holder in the rear tub.
- Page 46 5. Remove the hose in generator. 6. Remove the cable tie holder in the rear tub. 7. Replace the hose, and assemble the cable tie holder in the rear tub. 8. After connection the hose to the generator, install the clamp.
- Page 47 1. Remove the six connectors from the generator. 2. Remove the thermistor screw from the generator. 3. Remove the steam harness cable tie holder in the rear tub. 4. Replace the steam harness and assemble the cable tie holder in the rear tub. 5.
- Page 48 1. Remove the cover and screws. 2. To remove the rear tub, take off the steam 3. Remove the bracket from the generator first. Then remove the rear tub. steam generator. 4. Reassemble the steam generator and bracket. 5. Assemble the cover and screws.
- Page 49 How to Replace Main PCB & Display PCB 1. Main PCB disassembly 1. Remove 1 screw. 2. Disassemble main PCB. 2. Display PCB disassembly 1. Remove 6 screws on the service cover. 2. Pull the knob assembly. 3. Remove 5 screws on the display PCB.
-
Page 50: Plate Assembly
13-1. Plate Assembly A210 A214 A228 A227 A211 A212 A218 A229 A213 A217 A216... - Page 51 13-2-1. A800 A300 A610 A350 A330 A570 A130 A560 A590 A390 A316 A325 K730 A131 A600 A314 A320 A550 A500 A315 A317 A530 A520 A310 A525 A308 A540 A400 A451 A125 A410 A121 A122 A120 A452 A140 A430 A142 A453 A141 A412 A425...
- Page 52 13-2-2. A800 A350 A130 A390 A300 A590 A330 A131 K730 A316 A325 A500 A600 A314 A320 A315 A530 A520 A550 A317 A525 A540 A400 A310 A308 A451 A125 A410 A121 A122 A120 A430 A140 A452 A142 A453 A141 A412 A425 A411 A426 A427...
- Page 53 13-3-1. K400 K740 F200 K742 K509 K502 K507 K505 K743 K120 K410 K741 K141 K100 K720 K140 K411 K130 K251 K211 K250 K221 K336 K212 K210 K350 K320 K335 K310 K330 K250 K620 K550 K560 K610 K251 K540 K240 K530 F150 K520 K515...
- Page 54 13-3-2. F200 K740 K509 K502 K507 K742 K743 K400 K120 K410 K505 K741 K141 K100 K140 K411 K720 K130 K251 K250 K336 K211 K221 K212 K350 K210 K320 K335 K310 K330 K250 K620 K550 K560 K610 K251 K540 K240 K530 K520 K510 K651...
- Page 55 MFL69290403 MAR, 2017 PRINTED IN KOREA...