Metra Electronics 95-3305 Installation Instructions Manual
Gm multi-kit 2006-up
Hide thumbs
Also See for 95-3305:
- Installation instructions manual (24 pages) ,
- Installation instructions manual (24 pages)
Advertisement
Quick Links
GM multi-kit 2006-up
95-3305 or 99-3305
95-3305:
• ISO DDIN radio provision
99-3305:
• DIN radio provision with pocket
• ISO DIN radio provision with pocket
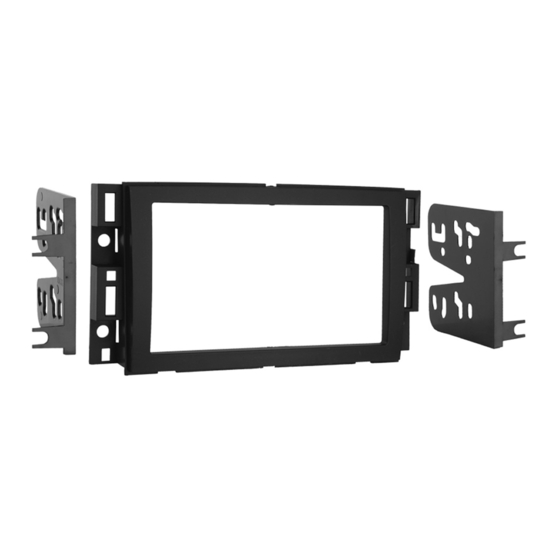
95-3305: • A1) ISO DDIN radio housing • B1) ISO DDIN radio brackets
99-3305: • A2) Radio housing • B2) ISO DIN radio brackets • C2) ISO DIN trim plate
A1
B1
METRA - The World's best kits
Installation instructions for part 95-3305 or 99-3305
A2
See application list inside cover
®
metraonline.com
®
Wiring Harness:
• Please visit metraonline.com for harness options
Antenna Adapter:
• Please visit metraonline.com for antenna
adapter options
• Panel removal tool • Phillips screwdriver
• 7mm & 10mm Socket Wrench • Torx driver
• Allen wrench
B2
C2
CAUTION!
especially air bag indicator lights must be connected before cycling
the ignition. Also, do not remove the factory radio with the key in the
on position, or while the vehicle is running.
(sold separately)
All accessories, switches, climate controls panels, and
© COPYRIGHT 2016 METRA ELECTRONICS CORPORATION
Advertisement

Related Manuals for Metra Electronics 95-3305


Summary of Contents for Metra Electronics 95-3305
- Page 1 • DIN radio provision with pocket • ISO DIN radio provision with pocket 95-3305: • A1) ISO DDIN radio housing • B1) ISO DDIN radio brackets • Panel removal tool • Phillips screwdriver • 7mm & 10mm Socket Wrench • Torx driver 99-3305: •...
- Page 2 ® 95-3305 or 99-3305 Applications Table of Contents Dash Disassembly Buick - Buick Enclave 2008-2012 ....................7 Acadia ......2007-2012 Enclave ......2008-2012 - Buick Lucerne 2006-2011 ....................3 Savana ........2008-up Lucerne ......2006-2011 - Chevrolet Avalanche 2007-2013 ..................3 Sierra** ......
- Page 3 ® 95-3305 or 99-3305 Dash Disassembly Buick Lucerne 2006-2011/ Chevrolet Avalanche 2007-2013, Silverado (excluding classic models) 2007-2013, Tahoe/Suburban 2007-2014, Chevrolet Impala 2006-2013 , Impala Limited (Fleet) 2014-2016 , Silverado 2500/3500 2014 / GMC Yukon 2007-2014, Sierra (excluding classic models) 2007-2013, Sierra 2500/3500 2014 Monte Carlo 2006-2007 1.
- Page 4 ® 95-3305 or 99-3305 Dash Disassembly Chevy Express/GMC Savana 2008-up 1. Remove (2) 10mm bolts from below knee bolster under steering column and remove panel. (Figure A) 2. Remove (2) 10mm bolts from panel below passenger dash airbag and remove panel.
- Page 5 ® 95-3305 or 99-3305 Dash Disassembly Suzuki XL-7 2007-2009 1. Press in on sides of the shifter boot to release it unsnap the shifter trim panel. Unplug and remove the panel. (Figure D) from the shifter trim panel. (Figure A) 4.
- Page 6 ® 95-3305 or 99-3305 Dash Disassembly Chevy Equinox/Pontiac, Torrent 2007-2009 1. Unsnap panel below power window switch and remove. (Figure A) 3. Remove (4) 7mm screws securing radio. Unplug and remove the radio. (Figure C, next page) Note: This allows you to unplug the window switch easier.
- Page 7 ® 95-3305 or 99-3305 Dash Disassembly Buick Enclave 2008-2012/Chevy Traverse 2009-2012/ GMC Acadia 2007-2012/Saturn Outlook 2007-2010 1. Unclip the radio trim panel including the climate controls. 2. Unplug the climate controls and remove the panel. 3. Remove (4) 7mm screws securing the radio.
- Page 8 ® 95-3305 or 99-3305 Dash Disassembly Hummer H2 2008-2009 Chevrolet Captiva Sport 2012-2015/Saturn Vue 2008-2010 1. Unclip the radio trim panel including the A/C vents. 1. Unclip and remove the trim panel on top of the 4. Unclip and remove the trim panel surrounding the radio trim panel.
- Page 9 ® 95-3305 Kit Assembly ISO DDIN radio provision dash and complete all necessary connections to the radio. Metra 1. Slide the ISO DDIN radio brackets recommends using the proper into the radio housing, aligning the mating adapter from Metra or holes in the radio housing to the clips AXXESS.
- Page 10 ® 99-3305 Kit Assembly DIN radio provision with pocket 1. Remove the metal DIN sleeve from the aftermarket radio. 2. Slide the sleeve into the radio housing and secure by bending the metal locking tabs down. (Figure A) 3. Slide the radio into the sleeve until it clicks in. (Figure B) 4.
- Page 11 ® 99-3305 Kit Assembly ISO DIN radio provision with pocket 1. Remove the metal DIN sleeve and trim ring from the aftermarket radio. 2. Secure the ISO DIN radio brackets to the radio with the screws supplied with the radio. (Figure A) 3.
- Page 12 ® Installation instructions for part 95-3305 or 99-3305 IMPORTANT If you are having difficulties with the installation of this product, please call our Tech Support line at 1-800-253-TECH. Before doing so, look over the instructions a second time, and make sure the installation was performed exactly as the instructions are stated.