Table of Contents
Advertisement
Advertisement
Table of Contents

Related Manuals for Yamaha Clavinova CVP-89


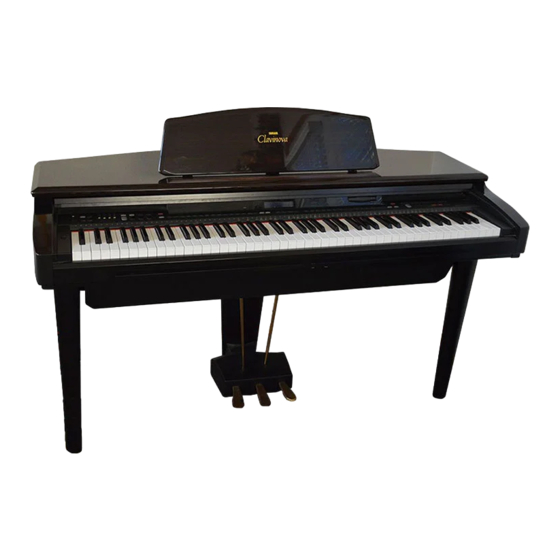
Summary of Contents for Yamaha Clavinova CVP-89
- Page 1 Owner’s Manual Bedienungsanleitung Mode d’emploi Manual de instrucciones...
- Page 2 SPECIFICATIONS SUBJECT TO CHANGE: The information contained in this manual is believed to be correct at the time of printing. However, Yamaha reserves the right to change or modify any of the specifications without notice or obligation to update existing units.
- Page 3 English Deutsch Français Español...
- Page 4 Thank you for choosing a Yamaha Clavinova. Your Clavinova is a fine musical instrument that employs advanced Yamaha music technology. With the proper care, your Clavinova will give you many years of musical pleasure. In order to make the most of your Clavinova’s performance potential and features, we urge you to read this...
- Page 5 Taking Care of Your Clavinova...
-
Page 6: The Panel Controls
The Panel Controls 2 4 5 & we r POWER... - Page 7 & The Panel Controls...
- Page 8 To open the CVP-89 key cover lift it just enough to clear the keys (do not lift excessively) then slide the cover back into the main unit. To close the cover slide it forward all the way and then lower it gently until it closes completely.
-
Page 9: The Volume Controls
“Accompaniment Volume Mode” utility function (page 61). They can be used to control modulation, pitch bend, and expression; or individual reverb depth for the rhythm, chord 1, chord 2, and bass parts. An optional Yamaha EP-1 Expression Pedal can be plugged into the EXP... -
Page 10: Demonstration Playback
Demonstration Playback The 25 demo tunes are selected via the STYLE and VOICE selectors — the corresponding selector indicators light when the [DEMO] button is pressed. Press a selector to start playback of the corresponding tune. You can also select continuous repeat playback of all demo tunes by pressing the [START/STOP] button. -
Page 11: Voice Selection
Voice Selection accessed by pressing the corresponding VOICE selector. When a voice selector is pressed the corresponding indicator will light and the number and name of the se- lected voice will appear on the display. 13-60] button to select a voice number between 13 and 60. Press either button briefly to select the next voice number in the specified direction, or hold the button for continuous scrolling in the specified direction. - Page 12 Voice Selection When the [DRUMS] voice selector is pressed (its indicator will light), you can play 44 different drum and percussion instruments on the keyboard. The symbols above the keys correspond to the NORMAL drum kit instruments (keys with no symbols produce no sound).
-
Page 13: Dual Mode
Dual Mode Dual mode voice combinations can be broadly divided into three categories: panel voice + panel voice, panel voice + voice number 13-60, and two voices in the 13-60 range. The dual mode for each combination is selected in a different way, as described below: To combine two panel voices simply press two voice selectors at the same time —... -
Page 14: Split Mode
Split Mode When the [SPLIT] button is pressed and its indicator lights, the keyboard is split into left- and right-hand sections and different voices can be assigned to each. The split point is initially set at the F#2 key when the power is turned on, and the UPRIGHT BASS voice is initially assigned to the left-hand section of the keyboard (all keys up to and including F#2). - Page 15 justed by using the TEMPO [ ] and [ ] buttons while holding the [SPLIT] but- ton. The selected balance value (1 … 15) will be shown on the display while the [SPLIT] button is held. signed to the left voice only, the right voice only, or to both voices in the split mode.
-
Page 16: Digital Reverb Effects
Digital Reverb Effects Each time the [TAP] or [METRONOME] button is pressed while the [REVERB] button is held, the next reverb effect is selected. The currently selected reverb effect and the reverb depth setting appear on the display while the [REVERB] button is held. - Page 17 The Keyboard & Polyphony The pan settings are as follows: The number of available notes is further reduced if the dual mode, the performance memory, or a Disk Orchestra Collec- tion disk is being played at the same time. The Clavinova also offers keyboard touch response, so the volume and timbre of notes played can be controlled accord- ing to how “hard”...
-
Page 18: The Pedals
The Pedals The damper pedal functions in the same way as a damper pedal on an acoustic piano. When the damper pedal is pressed notes played have a long sustain. Releasing the pedal immediately stops (damps) any sustained notes. If you play a note or chord on the keyboard and press the sostenuto pedal while the note(s) are held, those notes will be sustained as long as the pedal is held (as if the damper pedal had been pressed) but all subsequently played notes will not be sustained. - Page 19 The left pedal performs the same function as the panel [START/STOP] buttons. For details on the START/STOP function, refer to the “Accompaniment” section, page 18. For details on the RHYTHM BREAK function, refer to the “Accompaniment” section, page 20. When this function is selected the center and left pedals can be used to bend the pitch of notes played on the keyboard up or down, respectively, while the center or left pedal is held.
-
Page 20: Pitch Control
Pitch Control To tune up (raise pitch), hold the A-1 and B-1 keys simultaneously (A-1 and B- 1 are the two lowest white keys on the keyboard) and press any key between C3 and B3. Each time a key in this range is pressed the pitch is raised by approxi- mately 1.2 cents, up to a maximum of about 50 cents above standard pitch. - Page 21 Accompaniment accessed by pressing the corresponding STYLE selector. When a style selector is pressed the corresponding indicator will light and the number and name of the se- lected style will appear on the display. in the 13-50 range. The STYLE [s] and [t] buttons can be used to select a style number between 13 and 50.
- Page 22 Accompaniment There are several ways to start the accompaniment: Whenever you select a different style, the preset tempo for that style is also selected, and the tempo is displayed on the display in quarter-note beats per minute (unless the accompaniment is playing, in which case the same tempo is main- tained).
- Page 23 Press the [INTRO/ENDING] button. If you press the [NORMAL/FILL TO NORMAL] button (or left FILL IN bar) or the [VARIATION/FILL TO VARIATION] button (or right FILL IN bar) while holding the [INTRO/ENDING] button, the rhythm will start with an appropriate fill and then go to the normal rhythm or variation rhythm, respectively.
- Page 24 STOP] button. Press the [INTRO/ENDING] button if you want to go to the ending pattern and then stop. The CVP-89 also offers a metronome function that is ideal for practice. To start the metronome, simply press the [METRONOME] button so that its indicator lights.
- Page 25 Auto Bass Chord (ABC) This mode lets you create accompaniment in two ways. “Single Finger” accompaniment makes it simple to produce accompaniment using major, seventh, minor and minor- seventh chords by pressing a minimum number of keys in the ABC section of the keyboard. The automatic accompaniment consists of rhythm, bass and chords.
- Page 26 ABC mode*). The name of the detected chord will appear on the display. If the chord played is not recognized by the CVP-89, only the root note will be displayed followed by an asterisk (“ ”).
- Page 27 The Conventional Full-keyboard ABC mode can be engaged by pressing the [FULL KEYBOARD] and [SINGLE/FINGERED] buttons simultaneously (both indicators will light). In this mode the split point is de-activated and notes played any- where on the keyboard are detected and used to determine the harmonization of the accompaniment.
- Page 28 Custom Rhythm [ 0 0 1 ] Begin by selecting one of the preset rhythms (NORMAL or VARIATION), a previously-recorded custom rhythm, or a loaded disk style rhythm (NORMAL or VARIATION) that is close to the rhythm you want to create. For example, select a WALTZ rhythm if you want to program a rhythm pattern in 3/4 time.
- Page 29 Although you can cancel all instruments in a pattern by pressing the [CLEAR ALL] and [CANCEL] keys, it is also possible to cancel a single instrument to erase a mistake or simply eliminate an unwanted instrument. While holding the [CANCEL] key, press the key corresponding to the instrument you want to cancel. The selected instrument should now be cleared from the pattern.
-
Page 30: Disk Styles
Disk Styles Insert the Style Disk into the disk drive with the sliding door on the disk facing the drive slot and the label side facing upward. The disk should click into place and the disk lamp will light briefly while the Clavinova reads and identifies the disk. The [SONG SELECT] indicator will light automatically when the disk is ready. - Page 31 Repeat steps X through V to select and load a second pattern into the other [DISK STYLE] button if you like. When you’ve finished with the Style Disk, press the disk drive EJECT button to remove it. After you’ve loaded the desired Disk Styles, the [DISK STYLE 1] and [DISK STYLE 2] buttons can be used in exactly the same way as the other STYLE but- tons to select the loaded patterns for ABC accompaniment (see “Auto Bass Chord (ABC)”...
-
Page 32: Solo Styleplay
Solo Styleplay Press the [SOLO STYLEPLAY] button to turn the SOLO STYLEPLAY mode on. The SINGLE/FINGERED mode is automatically selected when SOLO STYLEPLAY is turned on. If a FULL KEYBOARD mode is selected, the SIN- GLE/FINGERED mode will automatically be selected since Solo Styleplay cannot be used with the FULL KEYBOARD modes. -
Page 33: Registration Memory
Registration Memory Set the CVP-89 panel controls to the state you want to memorize. The settings that are memorized by the Registration Memory are listed below. Press one of the VOICE selectors while holding the [MEMORY] button. The indicator of the pressed voice selector will glow green indicating that the panel data has been memorized in that location. -
Page 34: Disk Orchestra
Disk Orchestra Insert the DISK ORCHESTRA disk into the disk drive with the sliding door facing the drive slot and the label side facing upward. The disk should click into place and the disk lamp will light briefly while the Clavinova reads and identifies the disk. - Page 35 EJECT button to remove it. select playback of specific parts. The [LEFT/2] button turns the left-hand part on or off, the [RIGHT/1] button turns the right-hand part on or off, the [ORCH/3-10] button turns the ORCHESTRA parts on or off, and the [RHYTHM] button turns the rhythm part on or off.
- Page 36 Clavinova will stop and wait for you to play the next key(s). The CVP-89 indicates the next key(s) to be played via the guide lamps above the keyboard. As you play the appropriate keys, the piece will continue, pausing until you play the right keys each time.
- Page 37 Use this function if you want to practice a specific phrase within a song, as indicated by the phrase marks on the Disk Orchestra Collection score. This function allows you to specify any section of a DISK ORCHESTRA song for continuous repeat playback. Press the [SONG SELECT] button so that its indicator lights and select the desired song by using the SONG/PHRASE NUMBER [ ] and [ ] buttons.
- Page 38 The [ORCH/3-10] and [RHYTHM] parts of songs from DISK ORCHESTRA COLLECTION disks — the disk sup- plied with the Clavinova and others available from Yamaha — can be copied to separate disks by following the “Copying Disk Orchestra Disks” instructions given on page 47. Data copied in this way can be played back and manipu- lated via the Performance Memory (page 35) —...
-
Page 39: Performance Memory
Performance Memory into the Clavinova disk drive (see page 48), and that the disk’s write protect tab is set to the “write” position (tab closed). (up to 60 different songs, each with a different song number, can be recorded on a single disk). - Page 40 Performance Memory < Play on the keyboard. Recording will begin automatically as soon as you start playing. Stop recording by pressing the [START/STOP] button or the [REC] button. When recording has finished the indicator of the recorded track will glow green, indicating that the track is ready for playback.
- Page 41 ] REC ] REC ] REC The following parameters will be recorded in addition to notes you play: Only one track can be recorded at a time. If you press [RIGHT/1] you will record on track number 1. If you press [LEFT/2] you will record on track number 2.
- Page 42 Performance Memory When you’ve finished recording the first track, you can simply play it back as described in the previous section or add a new track to your song. To record a new track: ] REC Select a voice and other parameters for the new track. Try out the voice and selected parameters before proceeding.
- Page 43 “Punch-in recording” allows you to start recording from any “punch-in” point within a previously-recorded track and stop recording at any “punch -out” point, leaving all recorded material up to the punch-in point and following the punch- out point intact. also use the [FF] and [REW] buttons to locate the punch-in point. want to start recording.
- Page 44 Performance Memory Data from an external MIDI device such as a sequencer or music computer can also be recorded to the Performance Memory as follows: Connect the MIDI OUT terminal of the trans- mitting device to the Clavinova’s MIDI IN terminal using a standard MIDI cable.
- Page 45 The CHORD SEQUENCE function provides a convenient way to enter chord sequences and style changes one at a time. Press the [CHORD SEQUENCE] button. The [ORCH/3-10] and [RHYTHM] track button indicators will glow red, and the ABC SINGLE/FINGERED mode will be automatically selected. Make the required style changes (style number, normal/variation, fill-in, intro/ ending, and tempo, as necessary), play and hold a chord on the left-hand section of the keyboard, and press the [q] key (look for the “q”...
-
Page 46: Utility Functions
Utility Functions Most of the CVP-89 utility functions are selected and set in the same way for consistent, easy operation. The general selection and setting procedure is as follows: While holding the [UTILITY] button use the [TAP] and/or [METRONOME] buttons to select the desired utility function display. It is also possible to step... - Page 47 The amount of transposition selected is shown on the display as shown to the left. A preset chorus effect is provided with each of the CVP-89 voices (this may be ON or OFF, depending on the voice). This function allows the chorus effect to be turned ON or OFF for the currently selected voice.
- Page 48 Utility Functions This group of utility functions covers a range of disk-related jobs: formatting new disks, copying songs, deleting songs, saving and loading various types of data, and more. This function saves the contents of all 12 registration memory locations (page 29) to disk. The data can then be reloaded at any time by using the Load Registration function, described next.
- Page 49 This function saves all the 12 current Custom Rhythm data created via the CVP-89’s Custom Rhythm programmer (page 24) to disk. The data can then be reloaded at any time by using the Load Custom Rhythm function, described next.
- Page 50 Utility Functions This function reloads the custom rhythm data saved to disk by the Save Custom Rhythm function, described above. Performance Memory song data — including any existing registration, individual key tuning, and custom rhythm data — can be “backed up” by copying to a new song number or a different disk, as follows: Insert the disk containing the custom rhythm data you want to load into the Clavinova disk drive, then select the Load Custom Rhythm function —...
- Page 51 All Disk Orchestra data except the right-hand and left-hand parts can be copied to a separate disk by following the standard copy procedure outlined above. The copied data cannot, however, be copied a second time to another disk. All Style Disk data can be copied to a separate disk by following the standard copy procedure outlined above.
- Page 52 Utility Functions The Clavinova uses only 3.5" 2DD floppy disks. We recommend that you use Yamaha 2DD disks. Before you can use a new disk for recording, the disk must be “formatted” so that the Clavinova can recognize it and correctly write the music data onto it.
- Page 53 This function “quantizes” song memory data that has already been recorded to disk. This means that all notes are aligned to the nearest specified beat, thereby “tightening up” the overall timing. Clavinova disk drive, and that the song to be quantized is selected. tions”, page 42.
- Page 54 Utility Functions Extra Performance Memory track space can be created by using this function to mix the data from two tracks to a single track. The data from the “source” and “destination” tracks is mixed and the result placed in the destination track. You can also use this function to copy data from one track to another by specifying a blank destination track (i.e.
- Page 55 tions”, page 42. Use the TEMPO [s] and [t] buttons to turn Volume Control ON or OFF. Once you’ve turned ON to engage the function you can release the [UTILITY] button. want to change the volume level. volume range is from “0” (no sound) to “127” (maximum volume). the “ARE YOU SURE?”...
- Page 56 Utility Functions This function can be used to convert the performance memory voice assignments used by the CVP-89 to DOC Voice Assignments so songs recorded on CVP-89 can be played back on other Clavinovas. The following keys on the CVP-89 keyboard enter the corresponding characters...
- Page 57 This function can be used to convert the performance memory data used by the CVP-89 to Standard MIDI File (SMF) format so songs recorded on the CVP-89 can be played back on SMF-compatible devices. then select the Convert to SMF function — see “Selecting & Using the Utility Func- tions”, page 42.
- Page 58 In any MIDI control setup, the MIDI channels of the transmitting and receiving equipment must be matched for proper data transfer (there are 16 MIDI channels). This function sets the MIDI send (transmit) channel of the CVP-89. Select the Send Channel function as described in “Selecting & Using the Utility Functions”...
- Page 59 In addition to the 16 MIDI channels, an “OMNI” receive mode is also available which allows reception on all 16 MIDI channels. In the OMNI mode it is not necessary to match the receive channel of the receiving device to the transmit channel of the transmitting device.
- Page 60 Utility Functions Normally the Clavinova will respond to MIDI program change numbers received from an external keyboard or other MIDI device, causing the correspondingly numbered Clavinova voice to be selected. The Clavinova will normally also send a MIDI program change number whenever one of its voices is selected, causing the correspondingly numbered voice or program to be selected on the external MIDI device if the device is set up to receive and respond to MIDI program change numbers.
- Page 61 The Multi-Timbre mode is a special mode in which the Clavinova voices can be independently controlled on different MIDI channel numbers (1—15 in the CVP mode; 1—10,15, 16 in the DOC mode; 1—16 in the GM mode) by an external MIDI device.
- Page 62 Utility Functions In the split send mode notes played on the left-hand section of the keyboard (to the left of and including the split point key — see “Changing the Split Point” on page 10) are transmitted on MIDI channel 2, while the upper keyboard section transmits on the MIDI channel set using the Send Channel Select function described earlier.
- Page 63 The CVP-89 includes two different GM drum kits that can be selected via this function. There’s also an “AUTO” setting that allows automatic GM drum kit selection. Select the MIDI Transpose Transmit function as described in “Selecting & Using...
- Page 64 The functions in this group apply to a wide range of functions and features. The Individual Key Tuning Feature makes it possible to individually tune each key on the CVP-89 keyboard in order to match different tuning standards. The pitch of each key can be raised or lowered by a maximum of 50 cents (approximately) from the standard pitch.
- Page 65 The Clavinova can be set to one of three different types of keyboard touch sensitivity to match different playing styles and preferences. Normally the Auto Accompaniment volume controls are used to adjust the volume of the Rhythm, Chord 1, Chord 2, and Bass accompaniment parts, as labelled on the Clavinova panel.
- Page 66 Utility Functions This function determines whether the “Synchro Start” mode will automatically be turned ON and OFF when an ABC mode is turned ON and OFF (refer to page 19, 22). This function determines whether the songs are played back and repeated in sequential or random order when “ALL” is selected when playing back a disk (refer to page 30).
- Page 67 The CVP-89 has two drum kits — NORMAL and PROCESSED — and this function allows either kit to be selected for each individual drum instrument. Individual reverb depth and pan settings are also possible. Select the Edit Drum Instrument function — see “Selecting & Using the Utility Functions”, page 42.
- Page 68 Utility Functions This function determines whether the left-hand voice in a split keyboard setup will be automatically shifted up one oc- tave (refer to page 10). Determines whether the tempo setting in a recalled registration memory will be used or not (refer to page 29). Turns the Auto Accompaniment mute function on or off (refer to page 23).
-
Page 69: The Connectors
The MIDI IN connector receives MIDI data from an external MIDI device More details on MIDI are given in “MIDI Functions” on page 54. An optional Yamaha EP-1 Expression Pedal can be plugged into this jack for A standard microphone with a 1/4" phone plug can be connected to the MIC. -
Page 70: Factory Preset Recall
Check the Auto Accompaniment volume control settings. No sound is produced if these are set to their minimum positions. This can occur if there is a high-power transmitter in your vicinity. Contact your Yamaha dealer. This is usually due to turning on or off a household appliance or other electronic equipment which is fed by the same AC mains line as your Clavinova. - Page 71 Index...
- Page 72 Assembly/Zusammenbau/Montage/Montaje Assembly On opening the box you should find the parts shown in the illustration above. Check to make sure that all the required parts are provided. To make it easier to install the legs, place a soft blanket or similar material on the floor near a wall, close the Clavinova keyboard cover, place the front panel of the Clavinova (the side...
- Page 73 Zusammenbau Montage Der Karton sollte alle in der Abbil- dung gezeigten Teile enthalten. Verge- wissern Sie sich, daß alle Teile vollzäh- lig vorhanden sind. Um das Anschrauben der Beine zu erleichtern, breiten Sie eine Decke oder ein weiches Tuch neben der Wand auf dem Boden aus, schließen den Tastatur- deckel des Clavinova, stellen das Instru- ment mit der Vorderkante (Seite mit der...
- Page 74 MIDI Data Format/ MIDI-Datenformat/ Format des...
- Page 75 s donées MIDI/Formato de datos MIDI...
- Page 76 MIDI Data Format/ MIDI-Datenformat/ Format des donées MIDI/Formato de datos MIDI...
- Page 78 Voice List/Stimmenverzeichnis/Liste des voix...
-
Page 79: Lista De Voces
/Lista de voces viii... - Page 80 Percussion Kit List/Verzeichnis der Schlagzeug- und Percussion-...
- Page 81 Sets/Liste des kits de percussion/Lista de juegos de percusió...
- Page 82 Specifications/Technische Daten/Spécifications/Especificaciones...
- Page 83 Fingering Chart/Akkordliste/Tablature/Gráfica de digitado...
- Page 84 xiii Fingering Chart/Akkordliste/Tablature/Gráfica de digitado...
- Page 85 Fingering Chart/Akkordliste/Tablature/Gráfica de digitado...
- Page 86 Fingering Chart/Akkordliste/Tablature/Gráfica de digitado...
- Page 87 Fingering Chart/Akkordliste/Tablature/Gráfica de digitado...
-
Page 88: Midi Implementation Chart
xvii MIDI Implementation Chart Not Available... - Page 89 Connecting the Plug and Cord...
- Page 90 Some of these items are de- signed to be dealer assembled or installed Please make sure that benches are stable and any optional fixtures (where applicable) are well secured BEFORE using. Benches supplied by Yamaha are designed for seating only. No other uses are recommended.
- Page 91 M.D.G., EMI Division © Yamaha Corporation 1994 VS18130 410POCP5.2-02B0 Printed in Japan...