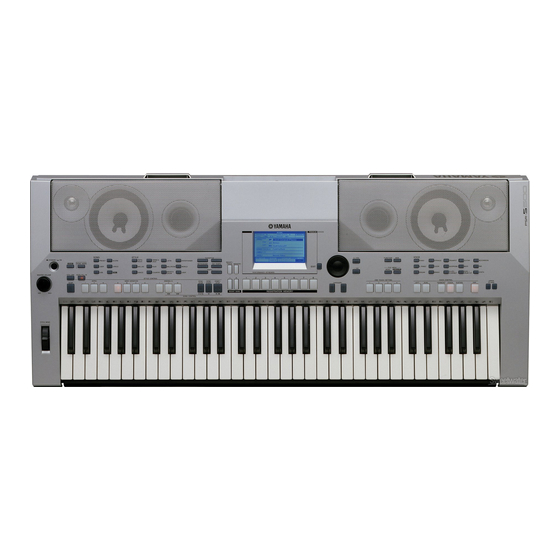
Yamaha PORTATONE PSR-S500 Owner's Manual
Yamaha electronic keyboard user manual
Hide thumbs
Also See for PORTATONE PSR-S500:
- Manual de instrucciones (122 pages) ,
- Service manual (82 pages)
Table of Contents
Advertisement
Advertisement
Table of Contents
Troubleshooting

Related Manuals for Yamaha PORTATONE PSR-S500


Summary of Contents for Yamaha PORTATONE PSR-S500
- Page 1 Owner’s Manual...
-
Page 2: Special Message Section
Yamaha. This product should be used only with the components supplied or; a cart, rack, or stand that is recommended by Yamaha. If a cart, etc., is used, please observe all safety markings and instructions that accom- pany the accessory product. - Page 3 Compliance with FCC regulations does * This applies only to products distributed by YAMAHA CORPORATION OF AMERICA. OBSERVERA! Apparaten kopplas inte ur växelströmskällan (nätet) så länge som den ar ansluten till vägguttaget, även om själva apparaten har stängts av.
- Page 4 • Use the specified adaptor (PA-300, PA-301 or an equivalent recommended by Yamaha) only. Using the wrong adaptor can result in damage to the instrument or overheating. • Check the electric plug periodically and remove any dirt or dust which may have accumulated on it.
- Page 5 Yamaha cannot be held responsible for damage caused by improper use or modifications to the instrument, or data that is lost or destroyed. Always turn the power off when the instrument is not in use.
-
Page 6: Logos
This product incorporates and bundles computer programs and contents in which Yamaha owns copyrights or with respect to which it has license to use others’ copyrights. Such copyrighted materials include, without limitation, all computer software, style files, MIDI files, WAVE data, musical scores and sound recordings. Any unauthorized use of such programs and contents outside of personal use is not permitted under relevant laws. -
Page 7: Accessories
Congratulations and thank you for purchasing the Yamaha PSR-S500 PortaTone! Please read this owner’s manual carefully before using the instrument in order to take full advantage of its various features. Make sure to keep this manual in a safe and handy place even after you finish reading, and refer to it often when you need to better understand... -
Page 8: Special Features Of The Psr-S500
Special Features of the PSR-S500 ■ Play a Variety of Instrument Voices The instrument voice that sounds when you play the keyboard can be changed to violin, flute, harp, or any of an extensive range of voices. You can change the mood of a song written for piano, for example, by using vio- lin to play it instead. -
Page 9: Table Of Contents
Logos... 6 Accessories ... 7 Special Features of the PSR-S500 ... 8 Setting Up Power Requirements ... 10 Connecting Headphones (PHONES/OUTPUT Jack) ... 10 Connecting a Footswitch (SUSTAIN Jack)... 10 Connecting to a Computer (USB Terminal)... 11 Turning the Power On ... 11 Changing the Display language ... -
Page 10: Setting Up
Make sure that the [STANDBY/ON] switch of the instrument is set to STANDBY. • Use ONLY a Yamaha PA-300 or PA-301 AC Power Adaptor (or other adaptor specifically recommended by Yamaha) to power your instrument from the AC mains. The use of other adaptors may result in irreparable damage to both the adaptor and the instrument. -
Page 11: Connecting To A Computer (Usb Terminal)
Connecting to a Computer (USB Terminal) Connect the instrument’s USB terminal to the USB ter- minal of a computer, and you can transfer performance data and song files between the two (page 85). To use the USB data-transfer features you’ll need to do the fol- lowing: •... -
Page 12: Changing The Display Language
Setting Up Changing the Display language This instrument allows you to select English or Japa- nese as the display language. The default display lan- guage is English, but if you switch to Japanese the lyrics, file names and some messages will be displayed in Japanese where appropriate. - Page 13 Setting Up ● Music Rest Insert the music rest into the slots as shown. PSR-S500 Owner’s Manual...
-
Page 14: Panel Controls And Terminals
Panel Controls and Terminals Front Panel q [STANDBY/ON] switch ... page 16 w [MASTER VOLUME] control... pages 16, 40 e [DEMO] button ... page 16 r [SONG MODE] button ... page 27 t SONG [PRESET], [USER], [USB] buttons ... page 27 [SCORE] button ... -
Page 15: Rear Panel
Rear Panel !9 Dial... page 41 @0 [+/YES] and [-/NO] buttons ... page 41 @1 CATEGORY [ ] and [ ] buttons ... page 41 @2 [FUNCTION] button ... page 70 @3 [MDB] button ... page 26 @4 FILE MENU [MENU] and [EXECUTE] buttons... -
Page 16: Playing Songs
Playing Songs Quick Guide This instrument include a Demonstration Song. Let’s start by playing the Demonstration Song. Press the [STANDBY/ON] button until it locks in the ON position. The Main display appears in the LCD. Press the [DEMO] button to start the Demo. The Demo display appears in the LCD. -
Page 17: Try Playing A Variety Of Instrument Voices
Try playing a variety of Instrument Voices In addition to piano, organ, and other “standard” keyboard instruments, this instrument has a large range of realistic Voices—including guitar, bass, strings, sax, trumpet, drums and percussion, sound effects, and a wide variety of other musical sounds. Select and Play a Voice In this operation, you’ll select a Main Voice and play it on the keyboard. -
Page 18: Playing Two Voices Simultaneously-Dual
Try playing a variety of Instrument Voices Playing Two Voices Simultaneously—DUAL This lets you select a second Voice which you can play in addition to the Main Voice. The second Voice is known as the “Dual” Voice. Press the [DUAL] button. The [DUAL] button turns the Dual Voice on or off. -
Page 19: Playing Different Voices With The Left And Right Hands-Left
Select the Voice you want to play. Look at the highlighted Voice name and rotate the dial. The available Voices will be selected and displayed in sequence. The Voice selected here becomes the Dual Voice. For this example, select the “003 Marimba” Voice. Play the keyboard. - Page 20 Try playing a variety of Instrument Voices Press and hold the [LEFT] button for longer than a sec- ond. The LEFT Voice selection display will appear. The currently selected category name, Voice number and name will be highlighted. Hold for longer than a second Select and press the desired Voice category button in the VOICE section.
-
Page 21: Playing Drum Kits
Playing Drum Kits Drum Kits are collections of drum and percussion instruments. When you select a violin or other normal instrument—as a Main Voice, for example—all keys produce the sound of the same violin, only at different pitches. If you select a Drum Kit as the Main Voice, however, each key produces the sound of a different drum or percussion instrument. -
Page 22: Playing Styles
Playing Styles This instrument includes an auto-accompaniment feature that plays appropriate “Styles” (rhythm + bass + chord accompaniment) when you play left-hand chords. You can select from 150 different Styles covering a range of musical genres and time signatures (see page 107 for a complete list of the avail- able Styles). -
Page 23: Playing Along With A Style
Playing Along with a Style You learned how to select a Style rhythm on the preceding page. Here we’ll see how to add bass and chord accompaniment to the basic rhythm to produce a full, rich accom- paniment that you can play along with. Select and press the desired Style category button in the Style section. - Page 24 Playing Styles Play a left-hand chord to start the Style. You can still “play” chords even if you don’t actually know any chords. This instrument will recognize even a single note as a chord. Try play- ing from one to three notes at the same time to the left of the split point. The chord will change according to the left-hand notes you play.
-
Page 25: Playing Auto-Accompaniment Chords
Playing Auto-accompaniment Chords There are two ways of playing auto-accompaniment chords: ● Easy Chords ● Standard Chords The instrument will automatically recognize the different chord types. The keyboard to the left of the split point (default: 54/F#2) becomes the “accompaniment range.” Play the accompaniment chords in this area of the keyboard. -
Page 26: Playing With The Music Database
Playing with the Music Database You want to play music in your favorite Style, but you’re not sure how to select the best Voice and Style for the type of music you want to play, sim- ply select the appropriate Style from the Music Database. The panel set- tings will automatically be adjusted for the ideal combination of sounds and Style! Press the [MDB] button. -
Page 27: Using Songs
Using Songs With this instrument the term “Song” refers the data that makes up a piece of music. In this section we’ll learn how to select and play Songs. Listen Selecting and Listening to a Song Select and press one of the Song category buttons, which corresponds to the type of Song you want to listen to. -
Page 28: Song Fast Forward, Fast Reverse, And Pause
Using Songs Built-in Songs 1 Annie Laurie (Traditional) 2 Oh, Susanna (Sunny Skylar, S. Foster) PRESET 3 Little Brown Jug (Traditional) 4 Waltz Op.18 (F. Chopin) 5 Piano Concerto No.21 2nd Mov. (W.A. Mozart) User Songs (Songs you record yourself) or Songs transferred from a USER computer (pages 85–87) Songs in a USB flash memory connected to the instrument (page 74) -
Page 29: Types Of Songs
Types of Songs The following four types of Songs can be used by this instrument. ● Preset Songs (the five Songs built into the instrument)... Preset Song numbers 001–005. ● User Songs (recordings of your own performances) ... USER Song numbers 001–005. ●... -
Page 30: Displaying The Song Score
Using Songs Displaying the Song Score This instrument is capable of display the scores (notation) of Songs. Scores are displayed for the preset Songs. Scores can also be displayed for Songs loaded from computer as well as Songs played back from USB flash memory. Although User Songs you record yourself cannot display a score as is, they can be converted to SMF (Stan- dard MIDI File) format and stored to USB flash memory, from where they can be played with score display. -
Page 31: Displaying The Lyrics
Displaying the Lyrics If a Song contains lyric data, the lyrics can be made to appear on the display. No lyrics will be displayed for a Song that contains no lyric data, even if the [LYRICS] button is pressed. Select a Song. Follow steps 1 and 2 of the procedure described on page 27. -
Page 32: Recording Your Own Performance
Recording Your Own Performance You can record up to five of your own performances and save them as user Songs 001 through 005. These Songs can be played in the same manner as the preset Songs. Once your performances have been saved as user Songs, they can be converted to SMF (Standard MID File) format files and saved to USB flash memory (page 77) and used with the score display function. -
Page 33: Quick Recording Procedure
Melody or other parts Track Track Track Main Dual Left Voice Voice Voice part part part Example: Part settings in Multi Recording Quick Recording Procedure You can easily start recording your performance by simply pressing the [REC] button. In this case, the track number and part number of tracks are set automatically. -
Page 34: Multi-Track Recording Procedure
Recording Your Own Performance Recording will start when you play the keyboard. Stop recording by pressing the [> > > > /■] or [REC] button. Track numbers containing recorded data are indicated with framed rect- angles. Press the [> > > > /■] button to play back the recording. Multi-track Recording Procedure You can set the recorded user Song number and the parts for tracks individually. - Page 35 Select the recording part for each track (Part Assign). ◆ Selecting the part for the Melody track (tracks 1–8) While holding down the [REC] button, press one of the track buttons [1]–[8] until the desired part is shown at the track button. Each time you press the button, the part is changed in order (such as MAIN, DUAL, LEFT) in the Main display.
- Page 36 Recording Your Own Performance Recording will start when you play the keyboard. You can also start recording by pressing the [ > / ■ ] button. Press the [EXIT] button, and the measure number is shown in the Main display. When recording is started, the display automatically returns to the Main display.
-
Page 37: Song Clear-Deleting User Songs
● Not recorded data The following data is recorded before the beginning of the Song. Even if you change the data while recording is in progress, the data is not recorded. Reverb type, Chorus type, DSP type, DSP send level, Dry level, Style number, Style volume, Time signature Song Clear—Deleting User Songs This function clears an entire user Song (all tracks). -
Page 38: Track Clear-Deleting A Specified Track From A User Song
Recording Your Own Performance Track Clear—Deleting a Specified Track From a User Song This function lets you delete a specified track from a User Song. From the MAIN display select the User Song (001 to 005) you want to clear. Press the [REGIST/TRACK] button a number of times until the item you want to clear appears. -
Page 39: Backup And Initialization
Backup and Initialization Backup The following data items are automatically saved as backup data in the internal memory even if you turn the power off. To recall the default settings and data, use the Initialization operation. ● Backup parameters • USER Song •... -
Page 40: Basic Operation And Displays
Basic Operation and Displays Basic Operation Overall PSR-S500 control is based on the following simple operations. Use the category buttons to select a CATEGORY. Use the dial to select an item or value. Starting/stopping a Song or Style. Song Style category category ●... -
Page 41: Use The Dial To Select An Item Or Value
● Category buttons [ ], [ ] You can change the category after you’ve selected a Song, Style or Voice category. Pressing these buttons allow you to step in sequence through the catego- ries. Use the dial to select an item or value. When you select the category such as Song, Style or Voice, the selected category name and item is shown on the display. -
Page 42: The Displays
Basic Operation and Displays The Displays ● Display names The display provides important, easy-to-understand indications for performing all operations. The name of the current display appears at the top of the display. You can see the “MAIN” indication at the top on the display. ●... -
Page 43: Main Display Items
MAIN Display Items The MAIN display shows all of the current basic settings: Song, Style, Voice. It also includes a range of indicators that show the on/off status of a range of functions. Transpose (page 53) Tempo (page 49, 51) Chord Display (page 25) Measure number... -
Page 44: Playing With The Effects
Reference Playing with the Effects Adding Harmony This feature adds Harmony, Tremolo or Echo effects to the Main Voice. Press the [HARMONY] button to turn the Harmony function on. The [HARMONY] button lights indicating that Harmony is on. To turn Harmony off, press the [HARMONY] button again. -
Page 45: Changing The Reverb Type
Changing the Reverb Type Reverb enhances the sound of the Voices with the rich ambience of a concert hall. When you select a Style or Song the optimum reverb type for the Voice used is automatically selected. If you want to select a different reverb type, use the operation described below. Press the [FUNCTION] button to call up the FUNCTION display. -
Page 46: Changing The Chorus Type
Playing with the Effects Changing the Chorus Type The Chorus effect creates a thick sound that is similar to many of the same Voices being played in unison. When you select a Style or Song the optimum chorus type for the Voice used is automatically selected. If you want to select a different Chorus Type, use the procedure described below. -
Page 47: Panel Sustain
Panel Sustain This function adds sustain to the keyboard Voices. Use it when you want to add sustain to the Voices at all times, regardless of footswitch operation. The sustain function does not affect the Left Voice. Press the [SUSTAIN] button to turn the sustain function on. -
Page 48: Pitch Bend
Playing with the Effects Pitch Bend The pitch bend wheel can be used to add smooth pitch variations to notes you play on the keyboard. Roll the wheel upward to raise the pitch, or downward to lower the pitch. If you use this feature with a Voice such as the “042 Overdriven”... -
Page 49: Using Various Functions
Using Various Functions Playing with the metronome This instrument includes a metronome with adjustable tempo and time signature. Play and set the tempo that is most comfortable for you. ■Turn the metronome on Press the [METRONOME] button to start the metronome. To stop the metronome, press the [METRO- NOME] button again. -
Page 50: Changing The Time Signature
Using Various Functions ■Changing the Time Signature In this example we’ll set up a 3/8 time signature. Press and hold the [METRONOME] but- ton for longer than a second. The currently selected time signature is dis- played. Hold for longer than a second Number of beats Note value (the note value... -
Page 51: Using Tap Start
Using Tap Start You can also set the tempo by simply tapping the [TAP TEMPO] button at the required tempo—four times for time signatures in 4, and three times for time signatures in 3. You can change the tempo during Song or Style playback by pressing the button just twice. Touch Response ■Turning Touch Response on/off Keyboard Touch Response can be turned on by... -
Page 52: Eq Settings
Using Various Functions EQ settings Five pre-programmed EQ settings are available. Settings 1 and 2 are best for listening via the instrument’s built-in speakers, setting 3 is for headphones, and settings 4 and 5 are ideal for listening via external speak- ers or when connecting to an external mixer. -
Page 53: Pitch Controls
Pitch Controls ◆ Large Pitch Changes (Transpose) The overall pitch of the instrument can be shifted up or down by a maximum of one octave in semitone increments. Press one of the TRANSPOSE [+]/[-] buttons. The value is shown in the display, indicating the amount of transposition over or below the normal value. -
Page 54: Changing The Pitch Of The Instrument In Octaves
Using Various Functions Changing the pitch of the instrument in octaves You can change the playing pitch of the Main and Dual Voices in octave intervals. Press the UPPER OCTAVE [+] button to raise the pitch by one octave. The newly changed value is shown in the LCD. Press the [EXIT] button to return to the Main display. -
Page 55: Style (Auto Accompaniment) Functions
Style (Auto Accompaniment) Functions Basic operation of the Style (Auto Accompaniment) feature is described on page 22 of the Quick Guide. Included here is information on how you can play the Styles in various ways, how to adjust the Style volume, how you can play chords using the Styles, and more. Pattern Variation (sections) The instrument features a wide variety of Style “sections”... -
Page 56: [Acmp] Button
Style (Auto Accompaniment) Functions Select the desired Style. (See page 22.) Press the [ACMP] button to turn Auto Accompaniment on. The [ACMP] button lights when ACMP is turned on. Press the [AUTO FILL IN] button to turn the Auto Fill In function on. The initial default setting for Auto Fill In is “on.”... -
Page 57: Ending/Rit. [I]-[Iii] Buttons
Press one of the MAIN VARIATION [A]– [D] buttons. When the fill-in is finished, it leads smoothly into the selected Main section A–D. Press one of the ENDING/rit. [I]–[III] but- tons. This switches to the Ending section. When the Ending is finished, the Auto Accom- paniment stops automatically. -
Page 58: One Touch Setting
Style (Auto Accompaniment) Functions One Touch Setting Sometimes selecting the ideal Voice to play with a Song or Style can be confusing. The One Touch Setting feature automatically selects four ideally matched Voices for the Style you’ve selected. Select the desired Style. (See page 22.) Press one of the ONE TOUCH SETTING [1]–[4] buttons. -
Page 59: Setting The Split Point
Setting the Split Point The initial default Split Point is key number 54 (the F#2 key), but you can change it to another key using the procedure described below. Press the [FUNCTION] button. Use the CATEGORY [ ] and [ ] but- tons as many times as necessary to call up Split Point. -
Page 60: Playing A Style With Chords But Without Rhythm (Stop Accompaniment)
Style (Auto Accompaniment) Functions Playing a Style with Chords but without Rhythm (Stop Accompaniment) When Auto Accompaniment is on (ACMP button lights) and Synchro Start is off, you can play chords in the left-hand accompaniment range of the keyboard while the Style is stopped and still hear the accompani- ment chords. -
Page 61: Chord Basics
Chord Basics Two or more notes played together constitute a “chord”. The most basic chord type is the “triad” consisting of three notes: the root, third, and fifth degrees of the corresponding scale. A C major triad, for example, is made up of the notes C (the root), E (the third note of the C major scale), and G (the fifth note of the C major scale). - Page 62 Style (Auto Accompaniment) Functions ■Recognized Standard Chords All chords in the chart are “C-root” chords. Chord Name/[Abbreviation] Major [M] Add ninth [(9)] Sixth [6] Sixth ninth [6(9)] Major seventh [M7] Major seventh ninth [M7(9)] Major seventh add sharp eleventh [M7(#11)] Flatted fifth [(b5)] Major seventh flatted fifth [M7b5] Suspended fourth [sus4]...
-
Page 63: User Style
User Style This instrument features 11 internal Style categories, but it also allows you to import additional Styles (only those with an “.sty” extension) that you’ve downloaded from the Internet or gotten from other sources, and load them into a User Style and use them in the same way as the internal Styles. For details on loading a Style file, see “... -
Page 64: Song Settings
Song Settings Song Volumes Press the [FUNCTION] button. Use the CATEGORY [ ] and [ ] but- tons as many times as necessary to call up Song Volume. Changing the Tempo When playing the Song you can change the tempo as required. Press the TEMPO [+]/[-] buttons. The tempo display will appear and you can use the dial or the TEMPO [+]/[-] buttons to set to tempo to anywhere from 011 and 280 quarter-note beats per minute. -
Page 65: A-B Repeat
A-B Repeat You can specify a section of a Song—“A” is the start point and “B” is the end point—for repeat playback. The A-B Repeat function is also very convenient for practicing when used along with the score display fea- tures of the instrument (page 30). -
Page 66: Muting Independent Song Parts
Song Settings Muting Independent Song Parts Each “track” of a Song plays a different part of the Song—melody, percussion, accompaniment, etc. You can mute individual tracks and play the muted part on the keyboard yourself, or simply mute tracks other than the ones you want to listen to. Use the [REGIST/TRACK] button to select the TR 1–8, TR 9–16 or ACMP.TR and use the REGISTRA- TION MEMORY [1]–[8] buttons to mute or un-mute the corresponding tracks ([1]–[8], [9]–[16] or ACMP). -
Page 67: Memorize Your Favorite Panel Settings
Memorize Your Favorite Panel Settings This instrument has a Registration Memory feature that lets you save your favorite set- tings for easy recall whenever they’re needed. Up to 64 complete setups can be saved (8 banks of 8 setups each). 8 Banks Memory 1 Memory 2... -
Page 68: Recalling A Registration Memory
Memorize Your Favorite Panel Settings Recalling a Registration Memory Make sure that “REGIST” appears in the display (press the [REGIST/TRACK] button until it is shown). Press the REGIST BANK [+]/[-] button to select the desired bank. You can also use the dial to select the bank number. -
Page 69: Registration Clear-Deleting A Specified Registration Memory
Registration Clear—Deleting a Specified Registration Memory Keep in mind that groups of data cannot be deleted or cleared from the instrument at a single time. Press the [REGIST/TRACK] button a number of times until the “REGIST.” item appears. The item changes in order from “REGIST.” to “TR 1–8”... -
Page 70: The Functions
The Functions The “Functions” provide a wide range of both detailed and overall instrument parame- ters, such as adjusting the tuning, setting the split point, and editing the voices and effects. Selecting and Setting Functions There are 49 function parameters in all. Find the function you want to set in the list that begins on page 71. - Page 71 ■ Function Setting List Group Function Item Display Indication VOLUME Style Volume Style Volume Song Volume Song Volume OVERALL Tuning Tuning Pitch Bend Pitch Bend Range 01–12 Range Split Point Split Point Touch Sensitivity Touch Sensitivity Chord Fingering Chord Fingering MAIN Volume Main Volume...
- Page 72 The Functions Group Function Item Display Indication EFFECT Reverb Type Reverb Type Chorus Type Chorus Type DSP Type DSP Type Master EQ Type Master EQ Type HARMONY Harmony Type Harmony Type Harmony Volume Harmony Volume PC MODE PC Mode PC Mode MIDI Local ON/OFF Local...
-
Page 73: Using Usb Flash Memory
Yamaha cannot guarantee operation of USB storage devices that you pur- chase. Before purchasing a USB storage device, please consult your Yamaha dealer, or an authorized Yamaha distributor (see list at end of the Owner’s Manual) for advice. USB Flash Memory Before using a USB device, read through the “Precautions when using the USB TO DEVICE terminal”... -
Page 74: Using Usb Flash Memory
Using USB Flash Memory Using USB Flash Memory Connect a USB flash memory to the USB TO DEVICE terminal, being careful to insert it in the proper direction. (Do not try to force an improper connec- tion.) IMPORTANT • In order to play songs copied to a USB flash memory from a computer or other device, the songs must be stored either in the USB flash memory’s root directory or a first-level/second- level folder in the root directory. -
Page 75: Formatting Usb Flash Memory
Formatting USB Flash Memory A new USB flash memory device must be formatted before it can be used by this instrument. CAUTION • If you format a USB flash memory that already contains data, all of the data will be erased. Be careful not to erase important data when using the format function. -
Page 76: Saving Data
Using USB Flash Memory Saving Data Three types of data are saved to one “User File” by this operation: user song, style file, and registration mem- ory data. When you save a “User File” the style file and registration memory are also saved automatically. Make sure that a appropriately format- ted USB flash memory device has been properly connected to the instrument’s... -
Page 77: Convert A User Song To Smf Format And Save
Convert a User Song to SMF Format and Save This operation converts a user song (song numbers 001–005) to SMF Format 0 and saves the file to USB flash memory. ● What is SMF (Standard MIDI File)? The SMF (Standard MIDI File) format is one of the most common and widely compatible sequence formats used for storing sequence data. -
Page 78: Loading User Files And Style Files
Using USB Flash Memory Loading User Files and Style Files User files and style file residing on a USB flash memory can be loaded to the instrument. CAUTION • Save important data to a USB flash memory before loading data that will overwrite it. -
Page 79: Deleting Data From Usb Flash Memory
Deleting Data from USB Flash Memory This procedure deletes selected user files and SMF files from a USB flash memory device. Make sure that the USB flash memory device containing the file(s) you want to delete has been properly connected to the instrument’s USB TO DEVICE termi- nal, and that the “CONNECT”... -
Page 80: Connections
Before purchasing USB storage devices, please consult your Yamaha dealer, or an authorized Yamaha distributor (see list at end of the Owner’s Manual) for advice. CAUTION • Avoid frequently turning the power on/off to the USB storage device, or connecting/disconnecting the cable too often. - Page 81 Backing up the instrument data to a computer Once you’ve saved data to a USB flash memory device, you can copy the data to the hard disk of your computer, then archive and organize the files as desired. Simply reconnect the device as shown below.
-
Page 82: Connecting A Personal Computer
Connections Connecting a Personal Computer The following functions become available when this instrument is connected to a computer. ● Performance data can be transferred between the instrument and the computer (page 83). ● Files can be transferred between the instrument and the computer (page 85). The connection procedure is as follows: Install the USB-MIDI driver on your computer. -
Page 83: Transferring Performance Data To And From A Computer
Transferring Performance Data to and from a Computer By connecting the instrument to a computer, the instrument’s performance data can be used on the com- puter, and performance data from the computer can be played on the instrument. ● When the instrument is connected with computer, it transmits/receives performance data. -
Page 84: Initial Send
Connections ■PC Mode ● ● ● ● ● ● ● ● ● ● ● ● ● ● ● ● ● ● ● A number of MIDI settings need to be made when you want to transfer performance data between the computer and the instrument. -
Page 85: Transferring Data Between The Computer And Instrument
Transferring Data Between the Computer and Instrument MIDI songs and Style files stored to a computer can be transferred to the instrument. Backup files can also be transferred from the instrument to the computer and back. In order to transfer songs between your computer and the instrument you will need to install the Musicsoft Downloader application and the USB MIDI Driver included on the Accessory CD-ROM... - Page 86 Connections A copy of the selected MIDI song file will appear in the “List of files stored temporarily” at the top of the window. The memory medium will also be dis- played at the bottom of the window to specify the destination for the transfer. Click “Instrument,”...
- Page 87 ■Transferring Backup files from the Instrument to a Computer You can use the Musicsoft Downloader to transfer Backup files containing backup data (page 39 ), including the five User Songs stored on the instru- ment, to a computer. If you click “Electronic Musi- cal Instruments”...
-
Page 88: Accessory Cd-Rom Installation Guide
• Yamaha makes no representations or warranties with regard to the use of the software and documentation and can- not be held responsible for the results of the use of this manual and the software. -
Page 89: Cd-Rom Contents
CD-ROM Contents Folder Name Application / Data Name MSD_ Musicsoft Downloader DMN_FlashDemo Flash Demo USB-MIDI Driver (Windows 98/Me) USB-MIDI Driver USBdrv2k (Windows 2000/XP) ■Using the CD-ROM ● ● ● ● ● ● ● ● ● ● ● Please read the Software License Agreement on page 94 before opening the CD-ROM pack- age. -
Page 90: System Requirements
Accessory CD-ROM Installation Guide System Requirements Application/Data Windows 98SE/Me/2000/ Musicsoft Downloader XP Home Edition/ XP Professional USB Driver for Windows Windows 98/Me 98/Me USB Driver for Windows Windows 2000/XP Home 2000/XP Edition/XP Professional Windows ® Digital Music Notebook Professional Edition, SP1a more Windows ®... - Page 91 When the system detects the driver on the CD-ROM and is ready for installation, it is shown as a message on the screen. Make sure that the “YAMAHA USB MIDI Driver” is listed, and click [Next]. The sys- tem starts the installation.
-
Page 92: Downloader And Digital Music Notebook Applications
Downloader application and click “Help”. * You can obtain the latest version of the Musicsoft Downloader at the following Internet URL. http://music.yamaha.com/download/ IMPORTANT • Only Musicsoft Downloader can be used to transfer files between this instrument and a computer. No other file transfer application can be used. -
Page 93: Troubleshooting
When the instrument is recognized cor- rectly, double-click “System” in the Con- trol Panel to open the System window. Double-click the “Device Manager” tab, select “YAMAHA USB MIDI Driver” and delete it. Use the MS-DOS prompt or Explorer to delete the following three files. - Page 94 (14) days from the date of receipt, as evidenced by a copy of the receipt. Yamaha’s entire liability and your exclusive remedy will be replacement of the defective media if it is returned to Yamaha or an authorized Yamaha dealer within fourteen days with a copy of the receipt.
-
Page 95: Troubleshooting
Appendix Troubleshooting Problem When the instrument is turned on or off, a popping sound is temporarily produced. When using a mobile phone, noise is produced. There is no sound even when the keyboard is played or when a song or style is being played back. -
Page 96: Messages
Messages LCD Message Access error! All Memory Clearing... Are you sure? Backup Clearing... Cancel Clearing... Com Mode Completed Copy File Create Directory Data Error! Delete File Delete OK ? Delete Directory Deleting... Error! File information area is not large enough. File is not found. - Page 97 LCD Message Saving... Send OK? Sending... Since the media is in use now, this function is not available. Sure ? [YES/NO] The limit of the media has been reached. The media is not formatted. The media is write-protected. The song data is too large to be converted to notation.
-
Page 98: Voice List
Voice List Voice List ■ Maximum Polyphony ● ● ● ● ● ● ● ● ● ● ● ● ● ● ● ● ● ● The instrument has 32-note maximum polyphony. This means that it can play a maximum of up to 32 notes at once, regard- less of what functions are used. - Page 99 Bank Select MIDI Voice Program Voice Name Change# (0–127) (0–127) (1–128) FullHorns SmoothTromb HighBrass OberBrass TrumpetEns MellowHorns BigBandBrs PopBrass AnalogBrs Trb.Section SmallBrass SoftAnalog FunkyAnalog TechnoBrass SynthBrass Trumpet Sweet! Trumpet Sweet! Trombone JazzTrumpet SoloTrumpet FlugelHorn Trombone SoftTromb SoloTromb MellowTromb MutedTrump BaritonHorn BaritonHit Tuba AlpBass...
- Page 100 Voice List Bank Select MIDI Voice Program Change# (0–127) (0–127) (1–128) AnalogKit DanceKit SymphonyKit CubanKit PopLatinKit ArabicKit SFXKit1 SFXKit2 Accordion Musette Steirisch TuttiAccrd SmallAccrd Accordion TangoAccrd Bandoneon SoftAccrd ModernHarp BluesHarp Insomnia NeoWarmPad CyberPad Wave2001 Atmosphere XenonPad Equinox Fantasia DX Pad Symbiont Stargate Area51...
- Page 101 ● XGlite Voice/XGlite Optional Voice* List Bank Select MIDI Voice Program Change# (0–127) (0–127) (1–128) Grand Piano Grand Piano KSP Piano Strings Dream Bright Piano Bright Piano KSP Electric Grand Piano Electric Grand Piano KSP Detuned CP80 Honky-tonk Piano Honky-tonk Piano KSP Electric Piano 1 Electric Piano 1 KSP Chorus Electric Piano 1...
- Page 102 Voice List Bank Select MIDI Voice Program Change# (0–127) (0–127) (1–128) Timpani Strings 1 Stereo Strings Slow Strings 60's Strings Orchestra Orchestra 2 Tremolo Orchestra Velocity Strings Strings 2 Stereo Slow Strings Legato Strings Warm Strings Kingdom Synth Strings 1 Synth Strings 2 Choir Aahs Stereo Choir...
- Page 103 Bank Select MIDI Voice Program Voice Name Change# (0–127) (0–127) (1–128) Muted Banjo Rabab Gopichant Shamisen Koto Taisho-kin Kanoon Kalimba Bagpipe Fiddle Shanai Tinkle Bell Bonang Altair Gamelan Gongs Stereo Gamelan Gongs Rama Cymbal Agogo Steel Drums Glass Percussion Thai Bells Woodblock Castanets Taiko Drum...
-
Page 104: Drum Kit List
Drum Kit List Drum Kit List • “ ” indicates that the drum sound is the same as “Standard Kit 1”. • Each percussion voice uses one note. • The MIDI Note # and Note are actually one octave lower than keyboard Note # and Note. For example, in “128: Standard Kit 1”, the “Seq Click H”... - Page 105 Voice No. MSB (0–127) / LSB (0–127) / PC (1–128) Keyboard MIDI Alternate Note Note# Note Note# Note C# -1 D# -1 G# -1 127/000/001 127/000/28 127/000/033 Standard Kit 1 Dance Kit* Jazz Kit Surdo Mute Kick Dance 1 Surdo Open Kick Dance 2 Hi Q Whip Slap...
- Page 106 Drum Kit List Voice No. MSB (0–127) / LSB (0–127) / PC (1–128) Keyboard MIDI Alternate Note Note# Note Note# Note C# -1 D# -1 G# -1 PSR-S500 Owner’s Manual 127/000/001 126/000/001 126/000/002 Standard Kit 1 SFX Kit 1 SFX Kit 2 Surdo Mute Surdo Open Hi Q...
-
Page 107: Style List
Style List Style List Style No. Style Name Pop&Rock FunkPopRock AcousticRock Cool8Beat 60'sRock1 60'sRock2 VintageGtrPop 60'sGuitarPop 70's8Beat 90'sGuitarPop KoolShuffle BubblegumPop BritPopSwing JazzPop HardRock RootRock RockShuffle Unplugged Ballad 8BeatAdria OrganBallad PianoBallad 8BeatBallad EPBallad 6-8Modern Chillout NewR&BBallad 16BeatBallad PowerBallad EasyBallad Dance Ibiza TechnoParty DiscoHouse DiscoPhilly... -
Page 108: Music Database List
Music Database List Music Database List MDB Name Christmas Manger Away Noel First Rednosed Rudolph Silent Christmas Wonderful Time Traditional Abide This Hymn Ave Maria NoMore Can Can Orpheus Moulin Heart Texas YellowRose Showtime Dance Lord For Cabaret! Night Time NoBusiness Like! The Cat's Memory The Great Times... - Page 109 MDB Name Espana Viva Hard To SaySorry Eyes Of Green Hi, Greetings Face Dance Music I T'Aime Free Best Things I'm Saving Love Green Mountain Know Me Now Hear Music Leave Me Now Heaven Blue Live Without You He's Got To Go London Streets High Moon Love's Glory...
-
Page 110: Effect Type List
Effect Type List Effect Type List ● Harmony Types Type Duet Trio Block Country Octave Trill 1/4 note Trill 1/6 note Trill 1/8 note Trill 1/12 note Trill 1/16 note Trill 1/24 note Trill 1/32 note Tremolo 1/4 note Tremolo 1/6 note Tremolo 1/8 note Tremolo 1/12 note Tremolo 1/16 note... - Page 111 ● Chorus Types Type CHORUS1 CHORUS2 CHORUS3 CHORUS4 CHORUS5 CHORUS6 CHORUS7 Conventional chorus program with rich, warm chorusing. CHORUS8 GM CHORUS1 GM CHORUS2 GM CHORUS3 GM CHORUS4 FB CHORUS CELESTE1 A 3-phase LFO adds modulation and spaciousness to the sound. CELESTE2 FLANGER1 FLANGER2...
- Page 112 Effect Type List Type SYMPHONIC1 Adds more stages to the modulation of Celeste. SYMPHONIC2 ENS DETUNE Chorus effect without modulation, created by adding a slightly pitch-shifted sound. KARAOKE1 KARAOKE2 Echo for karaoke. KARAOKE3 This effect isolates only the early reflection components of the reverb. GATE REVERB Simulation of gated reverb.
- Page 113 Type PHASER1 PHASER2 EP PHASER1 Cyclically modulates the phase to add modulation to the sound. EP PHASER2 EP PHASER3 DYN PHASER PITCH CHG1 PITCH CHG2 Changes the pitch of the input signal. PITCH CHG3 ROTARY SP1 ROTARY SP2 ROTARY SP3 ROTARY SP4 ROTARY SP5 ROTARY SP6...
-
Page 114: Midi Implementation Chart
MIDI Implementation Chart MIDI Implementation Chart PSR-S500 Owner’s Manual... - Page 115 MIDI Implementation Chart PSR-S500 Owner’s Manual...
-
Page 116: Midi Data Format
MIDI Data Format MIDI Data Format NOTE: 1 By default (factory settings) the instrument ordinarily functions as a 16-channel multi-timbral tone generator, and incoming data does not affect the panel voices or panel settings. How- ever, the MIDI messages listed below do affect the panel voices, auto accompaniment, and songs. -
Page 117: Specifications
• Footswitch: FC4/FC5 * Specifications and descriptions in this owner’s manual are for infor- mation purposes only. Yamaha Corp. reserves the right to change or modify products or specifications at any time without prior notice. Since specifications, equipment or options may not be the same in ev- ery locale, please check with your Yamaha dealer. -
Page 118: Index
Index +/YES, -/NO button ... 15, 41 >/■ button... 14, 28, 41 button ... 14, 28 B button... 14, 65 button... 14, 28 button ... 14, 28 A-B Repeat... 65 Accessories... 7 ACMP button ... 14, 23 Auto Accompaniment Region... 23 AUTO FILL IN button... - Page 119 PAUSE ... 28 PC ... 84 PHONES/OUTPUT jack... 10, 15 Pitch Bend ... 48 Pitch Bend Range ... 71 PITCH BEND wheel... 15, 48 Power Adaptor ... 10 PRESET button ... 14, 27 Preset Song... 29 Quantize ... 72 Quick Recording ... 33 REC button...
-
Page 120: Limited Warranty
PSR SERIES OF PORTATONE ELECTRONIC KEYBOARDS If during the first 90 days that immediately follows the purchase date, your new Yamaha product covered by this warranty is found to have a defect in material and/or workmanship, Yamaha and/or its authorized representative will repair such defect without charge for parts or labor. - Page 121 For details of products, please contact your nearest Yamaha representative or the authorized distributor listed below. Pour plus de détails sur les produits, veuillez-vous adresser à Yamaha ou au distributeur le plus proche de vous figurant dans la liste suivante.
- Page 122 Yamaha Home Keyboards Home Page (English Only) http://music.yamaha.com/homekeyboard Yamaha Manual Library http://www.yamaha.co.jp/manual/ U.R.G., Pro Audio & Digital Musical Instrument Division, Yamaha Corporation © 2006 Yamaha Corporation WH27920 XXXPOXXX.X-01A0 Printed in China...