Table of Contents
Advertisement
Advertisement
Table of Contents

Related Manuals for Generac Power Systems PWRview


Summary of Contents for Generac Power Systems PWRview
- Page 1 W E LC O M E GUI DE...
- Page 2 * NOT E : The voltage cables on the PWRview Meter need to be installed on two empty breakers (one for each phase) or one empty dual (double) pole breaker. However, some regional codes allow you to piggyback wires on existing breakers by using the supplied wiretaps and attaching the voltage wires from PWRview to the existing cables before they go into a breaker.
- Page 3 PWRview. If power cannot be disconnected, high voltages may still be present, and warning must be taken to avoid injury. If PWRview is not used as instructed, its protection mechanisms may be impaired.
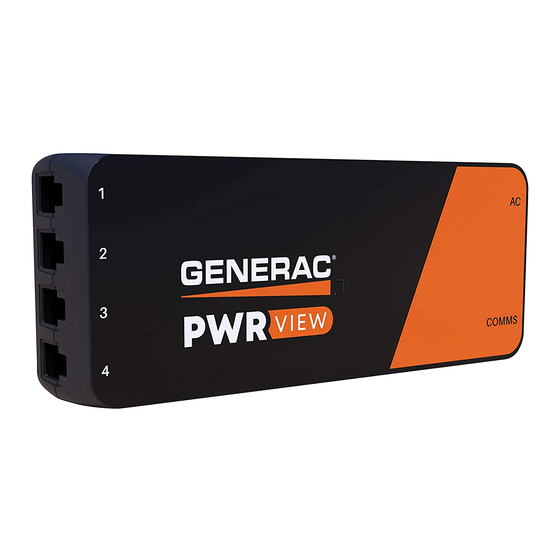
- Page 4 W H AT' S I NC LUDE D PWRview Meter Current Transformers x2 Voltage Cable Antenna and cable Mounting Plate Antenna Mounts x2 A LS O IN C LUDE D Wire Nut x1 Screws x2 Jumper Wires x3 Wiretaps x3...
-
Page 5: Table Of Contents
Step 2 Step 7 Mount the PWRview Check your work Step 3 Step 8 Connect the voltage cable Connect to the PWRview App Step 4 Step 9 Connect the CTs Replace the panel cover Step 5 Connect the antenna If you get stuck at any point, visit www.generac.com/service-... -
Page 6: Step 1
Step 1 RE M OVE PAN EL C OV E R Turn off the main breaker. Remove the screws on the corners of the panel, then remove the cover. After opening the panel, you should see the wires going into each breaker and main lines from the utility. - Page 7 If your panel has a secondary cover that hides the main utility line, please remove that as well. O F F O F F O F F...
-
Page 8: Step 2
Step 2 MO U NT T H E P WRV I E W Find an empty space in the panel where PWRview can comfortably fit. Secure the mounting plate to your panel. Ensure that there is enough room for the wiring to reach PWRview once it’s clipped into place, but do NOT clip it into place yet. - Page 9 NOTE : Be sure to account for the length of the CTs and the 2-foot voltage cable, and ensure that there is enough room on the sides of PWRview for the wires and antenna to connect to.
-
Page 10: Step 3
CT to Port 3, which is not used in a 2-phase, consumption only installation. If the blue wire is not needed, twist the wire nut onto the blue wire. For more installation types, visit www.generac.com/ service-support/PWRview... - Page 11 Then take the wiretap and insert the jumper wire, the wire from the PWRview, and the original wire you removed from the breaker. It might take a little force to ensure the wires are secured into the wiretap all the way.
-
Page 12: Step 4
Step 4 CO NNE C T TH E C TS For Universal CTs, pinch the handle at the bottom to open the jaws. WA R N I N G : Do not touch the exposed main line connections to the main breaker, as death or serious bodily harm may result. - Page 13 Clamp the CT around each of the main power lines. Ensure CT1 goes to Phase A, the same phase for the black voltage wire, CT2 goes to Phase B, the same phase for the red voltage wire. Pay close attention to the direction that the label on the CT is facing;...
-
Page 14: Step 5
Step 5 HO O K U P T H E A NTE NNA Locate the available knockout hole(s) or cover(s) to determine where to use the 3/4" antenna mount. If panel is situated outside, knock should be on the bottom or through back, into wall, to prevent water intrusion. - Page 15 Thread the extension cable through the antenna knockout mount, then screw on the antenna. Insert the antenna through the open knockout until the antenna mount clicks into place.
-
Page 16: Connect The Antenna
Step 6 CO NNE C T PWRV I EW Connect the antenna extension cable to the side of PWRview. Connect the CT’s to the appropriate ports on the side of PWRview. - Page 17 Insert the voltage cable into the side of PWRview. Snap PWRview onto the mounting plate.
-
Page 18: Step 7
Connectors should be clamped around the mains Make sure the labels are facing the utility Turn the main breaker to the 'ON' position. The next steps will guide you through configuration and confirming the operation of the PWRview meter PWRVIEW PORT PWRVIEW CONNECTION... - Page 19 O F F O F F O F F NOT E : You can use the 2 cable ties to clean up your PWRview's wiring.
-
Page 20: Step 8
Step 8 C O NNE C T TO TH E P WRVI EW I N STA L L ER AP P Now that the PWRview Meter has been installed, use the PWRview Installer App to complete the installation. Installer Installer... -
Page 22: Step 9
P UT O N PAN EL C OV E R You're almost done. Screw the cover back onto your panel. Make sure to place the supplied Generac breaker label next to the breaker with PWRview's black wire: F LASHING LI GH T DEFINI TIO NS STATE... - Page 23 When powered on, PWRview will play the following tones to indicate its status in sequential order: TO NE IND ICATION D ES CRIPT I O N One beep for each voltage wire that is Short beeps connected. For a 2-phase installation there...
- Page 24 User Manual for PWRview’s acceptable operating environment. 1. l’appareil ne doit pas produire de brouillage; 5. PWRview must be installed in a location that limits access to only 2. l’utilisateur de l’appareil doit accepter tout brouillage radioélectrique qualified personnel.