
Related Manuals for Extron electronics XTP T HWP 101 4K


Summary of Contents for Extron electronics XTP T HWP 101 4K
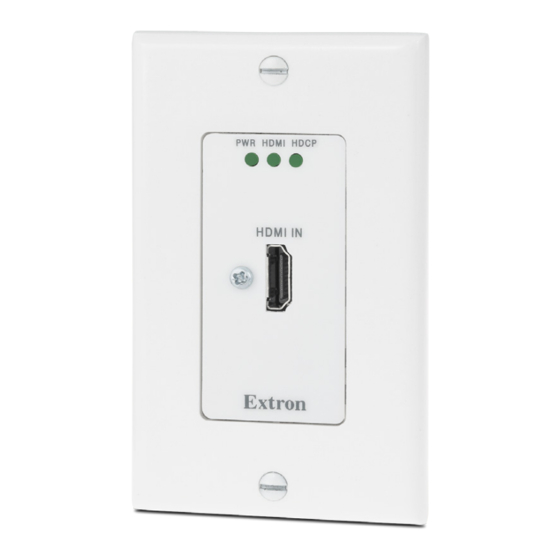
- Page 1 User Guide XTP Systems XTP T HWP 101 4K XTP Transmitter — Decorator-Style Wallplate 68-2876-01 Rev. C 01 19...
- Page 2 Safety Instructions Safety Instructions • English Istruzioni di sicurezza • Italiano AVVISO: Il simbolo, , se usato sul prodotto, serve ad avvertire l’utente WARNING: This symbol, , when used on the product, is intended to della presenza di tensione non isolata pericolosa all’interno del contenitore alert the user of the presence of uninsulated dangerous voltage within the del prodotto che può...
- Page 3 より 『Extron Safety www.extron.com and Regulatory Compliance Guide』 (P/N 68-290-01) をご覧ください。 Copyright © 2017-2019 Extron Electronics. All rights reserved. Trademarks All trademarks mentioned in this guide are the properties of their respective owners. The following registered trademarks ( ), registered service marks ( ), and trademarks (™) are the property of RGB Systems, Inc.
- Page 4 FCC Class A Notice This equipment has been tested and found to comply with the limits for a Class A digital device, pursuant to part 15 of the FCC rules. The Class A limits provide reasonable protection against harmful interference when the equipment is operated in a commercial environment.
- Page 5 Conventions Used in this Guide Notifications The following notifications are used in this guide: Potential risk of severe injury or death. WARNING: AVERTISSEMENT : Risque potentiel de blessure grave ou de mort. ATTENTION: • Risk of property damage. • Risque de dommages matériels. NOTE: A note draws attention to important information.
-
Page 7: Table Of Contents
Mounting Template ........... 34 Recommendations for XTP Firmware Download .......... 35 Communication ........... 11 Power Connection ........13 Operation .............. 16 Front Panel Features ......... 16 EDID ..............16 Reset Modes ............ 17 XTP T HWP 101 4K Wallplate Transmitter • Contents... - Page 8 XTP T HWP 101 4K Wallplate Transmitter • Contents viii...
-
Page 9: Introduction
4K. It works with Extron XTP devices in matrix or point-to-point applications for signal distribution and long-distance transmission between XTP devices. The XTP T HWP 101 4K device can be powered locally or remotely through an Extron Power Injector or XTP matrix switcher (see Power Connection on page 13). -
Page 10: System Compatibility
System Compatibility The XTP T HWP 101 4K is compatible with XTP Systems, but the maximum video resolution may be limited with different twisted pair models. See the table below for maximum video resolutions and refresh rates for various inputs and outputs. -
Page 11: Video Features
Provides worldwide power compatibility, with high demonstrated reliability and low power consumption for reduced operating costs. • Wall mountable — Mounts in a one-gang metal junction box or the provided mud ring. XTP T HWP 101 4K Wallplate Transmitter • Introduction... -
Page 12: Installation
• Connection Details Installation Overview The XTP T HWP 101 4K can be installed into the provided mud ring or a UL Listed metal electrical junction box. NOTE: If a junction box is required, it must be metal. Prepare the mounting surface. -
Page 13: Metal Junction Box Or Mud Ring Installation
7). Route and connect cables to the rear panel connectors (see Rear Panel Connectors on page 8). Mount the XTP T HWP 101 4K to the mud ring or metal junction box (see Mounting the Device on page 9). -
Page 14: Mud Ring Installation
Backing Clip 0.75" #6-32 Screw 1.25" #6-32 Screw Layout A Layout B Figure 3. Backing Clip Installation Use a cross-head (Phillips) screwdriver to fasten the screws and backing clips in place. XTP T HWP 101 4K Wallplate Transmitter • Installation... -
Page 15: Ul Listed Metal Junction Box Installation
Le blindage tressé et le blindage en aluminium devraient être connectés à la masse d’un équipement à l’autre bout du câble. XTP T HWP 101 4K Wallplate Transmitter • Installation... -
Page 16: Rear Panel Connectors
(see Power Connection on page 13). The Power LED lights to indicate the device is receiving power. NOTE: The XTP T HWP 101 4K can also be powered remotely (see Remote power on page 15). Configuration port — Connect a host device to the female USB mini-B port to configure the connected transmitter or update firmware. -
Page 17: Mounting The Device
Figure 7. Installing the XTP T HWP 101 4K in a Metal Junction Box Align the mounting screws on the XTP T HWP 101 4K with the available holes on the mud ring (see figure 6, ) or metal junction box (see figure 7,... -
Page 18: Front Panel Connectors
The maximum cable length for HDMI cables is 15 feet (4.6 meters). • To secure an HDMI connector to the device, use an Extron LockIt Cable Lacing HDMI Connection Bracket (see on the next page). XTP T HWP 101 4K Wallplate Transmitter • Installation... -
Page 19: Connection Details
Orange White-orange White-green White-green Blue Blue Blue White-blue White-blue Orange Green White-blue White-brown White-brown Green Brown Brown Insert Twisted Pair Wires White-brown RJ-45 Brown Connector Figure 10. Twisted Pair Cable Termination XTP T HWP 101 4K Wallplate Transmitter • Installation... - Page 20 Do not comb the cable for the first 20 m, where cables are straightened, aligned, and secured in tight bundles. • Loosely place cables and limit the use of tie wraps or hook-and-loop fasteners. • Separate twisted pair cables from AC power cables. XTP T HWP 101 4K Wallplate Transmitter • Installation...
-
Page 21: Power Connection
Tie Wrap SECTION A–A 3/16” (5 mm) Max. Smooth Ridges Power Supply Output Cord Figure 11. Power Wiring See the notifications on the next page for local power information and considerations. XTP T HWP 101 4K Wallplate Transmitter • Installation... - Page 22 La longueur idéale est de 5 mm (3/16 inch). TIP: Do not tin the stripped power supply leads. Tinned wires are not as secure in the captive screw connectors and could be pulled out. XTP T HWP 101 4K Wallplate Transmitter • Installation...
- Page 23 Remote power The XTP T HWP 101 4K can be powered remotely through an XTP Power Injector or through an XTP matrix switcher. ATTENTION: • XTP remote power is intended for indoor use only. No part of the network that uses XTP remote power should be routed outdoors.
-
Page 24: Operation
Hotline. See the contact numbers on the last page of this guide for the nearest Extron office. This section contains information about the local operation of the XTP T HWP 101 4K as well as the operational indicators. Topics in this section include the following: •... -
Page 25: Reset Modes
Reset mode Reset default values including Reset (<1 second). command on page 22). real-time adjustments. (mode 5) • The front panel Power LED blinks four times in quick succession during the reset. XTP T HWP 101 4K Wallplate Transmitter • Operation... -
Page 26: Sis Configuration And Control
SIS Configuration and Control This section contains SIS communication details and SIS commands and responses when the host device is connected directly to an XTP T HWP 101 4K. Topics in this section include the following: • Host Device Connection •... -
Page 27: Command And Response Table Overview
= Carriage return with no line feed = Pipe (can be used interchangeably with the character). = Space • = Escape key = Can be used interchangeably with the character. XTP T HWP 101 4K Wallplate Transmitter • SIS Configuration and Control... -
Page 28: Command And Response Tables For Sis Commands
Command and Response Tables for SIS Commands The following commands are for direct connection to the XTP T HWP 101 4K (see the XTP matrix switcher user guide for commands sent from the matrix switcher to the transmitter). Command ASCII Command... -
Page 29: Advanced Configuration Commands
View HDCP Authorized status EHDCP HdcpE NOTES: = input does not report as an HDCP Authorized device = HDCP Authorized device = input reports as an HDCP Authorized device (default) XTP T HWP 101 4K Wallplate Transmitter • SIS Configuration and Control... -
Page 30: Device Commands
= video or TMDS signal not detected = Video signal status = video or TMDS signal detected = no source detected = Input HDCP status = HDCP-compliant source detected = non-compliant source detected XTP T HWP 101 4K Wallplate Transmitter • SIS Configuration and Control... -
Page 31: Configuration Software
Software This section contains installation and configuration procedures for the XTP System Configuration Software to directly configure and control the XTP T HWP 101 4K. The device can also be configured and controlled remotely through the XTP System Configuration Software and the XTP matrix switcher (see the XTP System Configuration Software Help file). - Page 32 Submit any required information to start the download. Note where the file is saved. Open the saved executable (.exe) file. Follow the instructions that appear on the screen to install the program. XTP T HWP 101 4K Wallplate Transmitter • Configuration Software...
-
Page 33: Software Product Page
Submit any required information to start the download. Note where the file is saved. Open the saved executable (.exe) file. Follow the instructions that appear on the screen to install the program. XTP T HWP 101 4K Wallplate Transmitter • Configuration Software... -
Page 34: Software Connection
Software Connection To connect the software directly to the XTP T HWP 101 4K, connect the computer running the software to the configuration connector (see figure on page 8). Connections Screen To connect to a device: Open the XTP System Configuration Software. The screen opens. -
Page 35: Software Operation
Backup and Restore Commissioning Report available when the computer is directly connected to the XTP T HWP 101 4K. See an XTP matrix switcher user guide (www.extron.com) for more information on these features. XTP T HWP 101 4K Wallplate Transmitter • Configuration Software... - Page 36 This option resets all disabled confirmation dialogs to the default settings. From the menu, select . The Tools Software Preference Software Preference dialog box opens. Figure 22. Software Preference Dialog Box Click the button. The dialog box closes. Reset XTP T HWP 101 4K Wallplate Transmitter • Configuration Software...
- Page 37 This option opens the XTP System Configuration Software help file in a web browser. From the menu, select Help Help Extron Website This option opens the Extron website in a web browser. From the menu, select Help Extron Website XTP T HWP 101 4K Wallplate Transmitter • Configuration Software...
-
Page 38: Device Settings
(see mode 5 in Reset Modes on page 17). NOTE: This is the same as the SIS command (see the Reset mode ZXXX command on page 22). XTP T HWP 101 4K Wallplate Transmitter • Configuration Software... - Page 39 Signal Present — Indicates whether an active signal is on the input. HDCP — Displays the HDCP status of an active input. EDID — Displays the current resolution and refresh rate. XTP T HWP 101 4K Wallplate Transmitter • Configuration Software...
- Page 40 Navigate to and select the desired EDID file and click . The EDID file appears in the Open panel ( Available EDID Assign the EDID file from the panel to import the EDID to the device. Available EDID XTP T HWP 101 4K Wallplate Transmitter • Configuration Software...
- Page 41 (located to the right of the panel) appears, Common Timings Connected Outputs listing the EDID settings common among the selected outputs. Select the desired common EDID. The EDID is shown in the panel. Available EDID XTP T HWP 101 4K Wallplate Transmitter • Configuration Software...
-
Page 42: Reference Information
FOR WALL MOUNT Top Panel Figure 26. Mounting Template for 1-Gang Mud Rings (Not to Full Scale) Please measure the printed template before cutting. NOTE: Measure the template before cutting. XTP T HWP 101 4K Wallplate Transmitter • Reference Information... -
Page 43: Firmware Download
Click the link ( ) to the right of the desired product. Download Submit any required information to start the download. Note where the file is saved. XTP T HWP 101 4K Wallplate Transmitter • Reference Information... - Page 44 Extron Electronics makes no further warranties either expressed or implied with respect to the product and its quality, performance, merchantability, or fitness for any particular use. In no event will Extron Electronics be liable for direct, indirect, or consequential damages resulting from any defect in this product even if Extron Electronics has been advised of such damage.