National Instruments SCXI-1126 User Manual
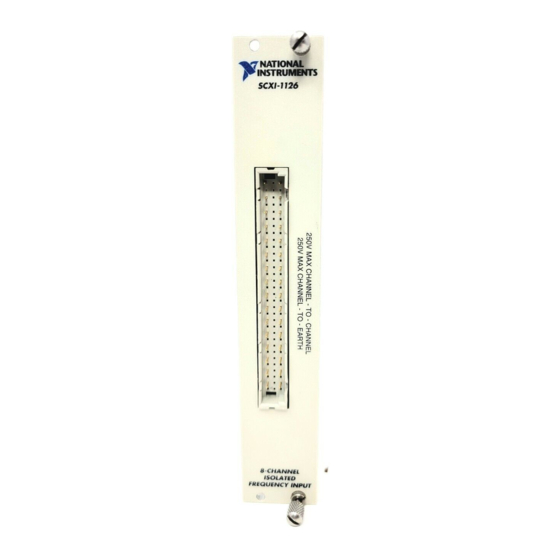
Eight-channel isolated frequency input module for signal conditionin
Hide thumbs
Also See for SCXI-1126:
- Quick start manual (61 pages) ,
- Getting started (158 pages) ,
- Quick start manual (25 pages)

Related Manuals for National Instruments SCXI-1126


Summary of Contents for National Instruments SCXI-1126
- Page 1 SCXI SCXI-1126 User Manual Eight-Channel Isolated Frequency Input Module for Signal Conditioning SCXI-1126 User Manual March 2003 Edition Part Number 321844C-01...
- Page 2 Switzerland 41 56 200 51 51, Taiwan 886 2 2528 7227, United Kingdom 44 0 1635 523545 For further support information, refer to the Signal Conditioning Technical Support Information document. To comment on the documentation, send email to techpubs@ni.com. © 1998–2003 National Instruments Corporation. All rights reserved.
- Page 3 The reader should consult National Instruments if errors are suspected. In no event shall National Instruments be liable for any damages arising out of or related to this document or the information contained in it.
- Page 4 Conventions The following conventions are used in this manual: <> Angle brackets that contain numbers separated by an ellipsis represent a range of values associated with a bit or signal name—for example, DIO<3..0>. » The » symbol leads you through nested menu items and dialog box options to a final action.
-
Page 5: Table Of Contents
Installing the SCXI-1126 ....................1-10 Unpacking......................1-10 Installing the SCXI-1126 Module into the SCXI Chassis.......1-11 Connecting the SCXI-1126 to an E Series DAQ Device for Multiplexed Scanning in an SCXI Chassis..........1-12 Connecting the SCXI-1126 to an E Series DAQ Device for Multiplexed Scanning in a PXI Combination Chassis......1-13 Configuring and Self-Testing ..................1-14... - Page 6 Contents Threshold Level ................1-22 Threshold Hysteresis ................ 1-22 Removing the SCXI-1126 ..................... 1-22 Removing the SCXI-1126 from Measurement & Automation Explorer ..1-22 Removing the SCXI-1126 from an SCXI Chassis.......... 1-23 Chapter 2 Using the SCXI-1126 Signal Connections......................2-1 Analog Input Channels..................
- Page 7 Front Signal Pin Assignments ..............2-5 Table 2-2. SCXI-1126 Front Connector Signal Descriptions.........2-6 Table 2-3. Rear Connector Signal Descriptions .............2-8 Table 2-4. SCXIbus to SCXI-1126 Rear Signal Connector to E Series DAQ Device Pin Equivalencies ..........2-9 © National Instruments Corporation SCXI-1126 User Manual...
-
Page 8: Installing And Configuring The Scxi-1126
This manual describes the electrical and mechanical aspects of the SCXI-1126 module and contains information concerning its installation and operation. The SCXI-1126 is a member of the NI Signal Conditioning eXtensions for Instrumentation (SCXI) family of modules. Specifically, the SCXI-1126 module is designed for signal conditioning of frequency-generating sensors and other analog and digital periodic signal sources. -
Page 9: Theory Of Operation
Chapter 1 Installing and Configuring the SCXI-1126 For easy signal attachment to the SCXI-1126, you can use a terminal block to connect such signal connection options as screw terminals and BNC connectors. With the SCXI-1126, the SCXI chassis can serve as a fast-scanning signal conditioner for laboratory testing, production testing, and industrial process monitoring. -
Page 10: Channel-To-Channel Isolated Analog Input Stage
4-pole, lowpass output filter with software-programmable cutoffs of 1 Hz, 40 Hz, 320 Hz, and 1 kHz. The SCXI-1126 also has a digital section for automatic control of channel scanning, frequency range selection, filter selection, and input threshold and hysteresis level setting. -
Page 11: Frequency-To-Voltage Conversion Stage
The analog bus switch circuitry, which can route the buffer output to AB0 on the SCXIbus connector instead of CH0 under software control. If the SCXI-1126 is the cabled module, you can configure the analog bus switch circuitry to route a signal placed on AB0 by another SCXI module, using the output buffer, to CH0 where it can be read by the E Series DAQ device. -
Page 12: Multiplexed Mode (Recommended)
SCXIbus and are then sent to the E Series DAQ device through CH0 on the cabled module. The output signals for channels 1 through 7 on the SCXI-1126 are always sent to the rear signal connector and drive pins 5 through 18. In multiplexed mode, these output signals are ignored by the E Series DAQ device and are short-circuit protected. -
Page 13: Parallel Mode
SCXI-1180 feedthrough panel to make each of the outputs available at the front of the chassis. An E Series DAQ device cabled to an SCXI-1126 in parallel mode reads a separate output signal from the module on each of its analog inputs. -
Page 14: What You Need To Get Started
A computer National Instruments Documentation The SCXI-1126 User Manual is one piece of the documentation set for your data acquisition (DAQ) system. You could have any of several types of manuals depending on the hardware and software in your system. Use the manuals you have as follows: •... -
Page 15: Software Programming Choices
NI-DAQ, which shipped with the SCXI-1126 module, has an extensive library of functions that you can call from the ADE. These functions allow you to use all the features of the SCXI-1126. For more information on these functions, refer to the NI-DAQ C Function Reference Help. -
Page 16: National Instruments Ade Software
You must install the software before you install the E Series DAQ device. Note You can control the SCXI-1126 in an ADE using NI-DAQ. The supported ADEs include LabVIEW, LabWindows/CVI, Visual Basic (ComponentWorks), C, and C++ environments. Complete the following steps to install your SCXI-1126 software. -
Page 17: Installing The Scxi-1126
You must uninstall the version of NI-DAQ you are using before you update NI-DAQ to the current version. Installing the SCXI-1126 The following section describes how to install the SCXI-1126 for use with the SCXI chassis and E Series DAQ device. Note Refer to the Read Me First: Radio-Frequency Interference document before removing equipment covers or connecting or disconnecting any signal wires. -
Page 18: Installing The Scxi-1126 Module Into The Scxi Chassis
Power off the computer that contains the E Series DAQ device, or disconnect it from the SCXI chassis. Power off the SCXI chassis. Do not insert the SCXI-1126 module into a chassis that is powered on. Insert the SCXI-1126 into an open slot in the SCXI chassis. Gently... -
Page 19: Connecting The Scxi-1126 To An E Series Daq Device For Multiplexed Scanning In An Scxi Chassis
Chapter 1 Installing and Configuring the SCXI-1126 Connecting the SCXI-1126 to an E Series DAQ Device for Multiplexed Scanning in an SCXI Chassis In this configuration, you can multiplex all eight input channels of the SCXI-1126 into a single channel of the E Series DAQ device. -
Page 20: Connecting The Scxi-1126 To An E Series Daq Device For Multiplexed Scanning In A Pxi Combination Chassis
Scanning in a PXI Combination Chassis In this configuration, you can multiplex all eight channels of the SCXI-1126 into a single channel of the E Series DAQ device in a combination PXI chassis. You need the following items for this installation: •... -
Page 21: Configuring And Self-Testing
Measurement & Automation Explorer (MAX). Configuring SCXI Using Traditional NI-DAQ Use MAX to configure and test the SCXI-1126. If you need help during the configuration process, open the MAX Help for Traditional NI-DAQ by selecting Help Topics from the Help menu. Complete the following steps to configure the SCXI system. - Page 22 If you selected auto-detection, select the communication path and click Next. Select the cabled module by clicking the module in the list box and clicking Finish. You have completed configuring the SCXI-1126 using Traditional NI-DAQ. © National Instruments Corporation 1-15...
-
Page 23: Manually Adding And Configuring Modules In Traditional Ni-Daq
Chapter 1 Installing and Configuring the SCXI-1126 Manually Adding and Configuring Modules in Traditional NI-DAQ If you did not auto-detect the SCXI modules, you must manually add and configure each of the modules. Complete the following steps to manually add modules. -
Page 24: Configuring Scxi Using Ni-Daqmx
Configuring SCXI Using NI-DAQmx Use MAX to configure and test the SCXI-1126. If you need help during the configuration process, open the MAX Help for NI-DAQmx by selecting Help Topics from the Help menu. Complete the following steps to configure the SCXI system. -
Page 25: Manually Adding And Configuring Modules In Ni-Daqmx
Chapter 1 Installing and Configuring the SCXI-1126 Manually Adding and Configuring Modules in NI-DAQmx You must add and configure each of the modules in the Chassis Configuration window. If you are not in the Chassis Configuration window, right-click on the chassis in which the module is installed and select Properties. -
Page 26: Troubleshooting The Self-Test Verification
If the test did not complete successfully, refer to the Troubleshooting the Self-Test Verification section for troubleshooting steps. To configure the frequency range, filter range, threshold level, and threshold hysteresis of the SCXI-1126, refer to the SCXI-1126 Configuration Settings section. -
Page 27: Scxi-1126 Configuration Settings
SCXI-1126 Configuration Settings This section describes how to set the frequency range, filter frequency, threshold level, and threshold hysteresis of each channel. After you have installed and verified the SCXI chassis and SCXI-1126, you can configure the SCXI-1126. Configuring Using Traditional NI-DAQ... -
Page 28: Configuring Using Ni-Daqmx
Chapter 1 Installing and Configuring the SCXI-1126 Configuring Using NI-DAQmx To configure the SCXI-1126 using NI-DAQmx, complete the following steps: Right-click Data Neighborhood and select Create New. Select DAQmx Task or DAQmx Channel. To configure multiple channels, select DAQmx Task. Otherwise, select DAQmx Channel. -
Page 29: Threshold Level
MAX: Display the list of installed devices and interfaces by clicking the + next to the Devices and Interfaces icon. If the SCXI-1126 is configured under NI-DAQmx, remove the module under NI-DAQmx Devices. If the SCXI-1126 is configured under Traditional NI-DAQ, remove the module under Traditional NI-DAQ Devices. -
Page 30: Removing The Scxi-1126 From An Scxi Chassis
SCXI-1126 module from an SCXI chassis, complete the following steps while referring to Figure 1-4: Power off the SCXI chassis. Do not remove the SCXI-1126 module from a chassis that is powered on. If the SCXI-1126 is the cabled module, disconnect the cable running from the SCXI-1126 to the E Series DAQ device. -
Page 31: Figure 1-4. Removing The Scxi-1126
Chapter 1 Installing and Configuring the SCXI-1126 ® 1 Cable 4 Terminal Block 2 SCXI-1126 5 SCXI Chassis Power Switch 3 SCXI Module Thumbscrews 6 SCXI Chassis Figure 1-4. Removing the SCXI-1126 SCXI-1126 User Manual 1-24 ni.com... -
Page 32: Using The Scxi-1126
SCXI-1126 front connector and rear signal connector. Signal Connections If you are using a terminal block with the SCXI-1126, refer to the terminal block installation guide documentation for signal connection information. This section provides information about various signal types such as... -
Page 33: Figure 2-1. Ground-Referenced Signal Connection For The Scxi-1126
Analog bias Ground Ground CHSGND Optional Figure 2-2. Floating Signal Connection for the SCXI-1126 Referenced to Chassis Ground for Better Signal-to-Noise Ratio Adding the bias resistor (R ), shown in Figure 2-2, breaks the isolation barrier. Caution bias SCXI-1126 User Manual... -
Page 34: Figure 2-3. Floating Ac Coupled Signal Connection For The Scxi-1126
Figure 2-4. AC Coupled Signal Connection for the SCXI-1126 with High Common-Mode Voltage When you connect AC coupled signals to the SCXI-1126, as shown in Figures 2-3 and 2-4, connect an external resistor from the positive input channel to the signal reference to provide the DC path for the positive input bias current. -
Page 35: Scxi-1126 Front Connector
Chapter 2 Using the SCXI-1126 The input signal range of an SCXI-1126 input channel is −0.5 to 4.5 V referenced to its negative input. In addition, the input channels are overvoltage protected to 250 V with power on or off at a maximum of 5 mA sink or source. -
Page 36: Table 2-1. Front Signal Pin Assignments
Chapter 2 Using the SCXI-1126 Table 2-1. Front Signal Pin Assignments Front Connector Diagram Pin Number Column A Column B Column C CH0+ — CH0– — — — Column CH1+ — CH1– — — — — — — — CH2+ —... -
Page 37: Front Connector Signal Descriptions
7 through 0, respectively. SCXI-1126 Rear Signal Connector If you are using the SCXI-1126 with an E Series DAQ device and cable assembly, Note you do not need to read the remainder of this chapter. If you are using the SCXI-1180 feedthrough panel, the SCXI-1343 rear screw terminal adapter, or the SCXI-1351 one-slot cable extender with the SCXI-1126, read this section. -
Page 38: Rear Connector Signal Descriptions
NC = No Connection Figure 2-5. SCXI-1126 Rear Signal Connector Pin Assignments Rear Connector Signal Descriptions SCXI-1126 rear connector signal descriptions are listed in Table 2-3. For more information on differential (DIFF), referenced single-ended (RSE), or nonreferenced single-ended (NRSE) modes, go to and enter ni.com/info... -
Page 39: Table 2-3. Rear Connector Signal Descriptions
Reserved. Note: All other pins are not connected. The digital I/O (DIO) and timing signals of the SCXI-1126 connect to the DIO and timing lines of the E Series DAQ devices, as shown in Table 2-4. For more information on these signals, consult the E Series DAQ device user manual. -
Page 40: Table 2-4. Scxibus To Scxi-1126 Rear Signal Connector To
Chapter 2 Using the SCXI-1126 Table 2-4. SCXIbus to SCXI-1126 Rear Signal Connector to E Series DAQ Device Pin Equivalencies SCXI-1126 Rear SCXIbus Line Signal Connector E Series DAQ Device MOSI SERDATIN DIO0 D*/A DAQD*/A DIO1 INTR* SLOT0SEL* DIO2 SPICLK... - Page 41 Specifications All specifications for the SCXI-1126 assume a 20 to 30 °C ambient operating temperature and are valid for one year from the date of purchase unless otherwise noted. All specifications are relative to calibration standards and require a 15 minute warm-up period. Specifications do not include transducer error.
- Page 42 Input bias current ........500 pA max (over operating temperature range) Threshold (software programmable) Range..........−0.5 to 4.48 V (−50 to 250 V with SCXI-1327 high-voltage attenuator terminal block) Voltage is limited to 30 V (±42.4 V) if you are using an SCXI-1305 terminal block. SCXI-1126 User Manual ni.com...
- Page 43 Accuracy based on combination of all errors, including effects of temperature drift over 20 to 30 °C range. Noise specifications include effects of PCI-6030E with 1, 2, or 5 m SCXI cable assembly. © National Instruments Corporation SCXI-1126 User Manual...
- Page 44 Multiplexed output mode ....100 Ω Parallel output mode......330 Ω Output short-circuit protection ....Indefinite duration Outputs protected........CH<0..7> Includes effects of PCI-6060E with 1 or 2 m SCXI cable assembly Includes effects of PCI-6030E with 1 or 2 m SCXI cable assembly SCXI-1126 User Manual ni.com...
- Page 45 0–128 kHz 0–128 kHz Filter setting 1 Hz 1 Hz 1 Hz Threshold level –0.5 V –0.5 V Retains last setting prior to software reset Hysteresis level Retains last setting prior to software reset © National Instruments Corporation SCXI-1126 User Manual...
- Page 46 0.0009% ± 0.407 Hz 128 kHz 0.0009% ± 0.814 Hz Calibration cycle........one year Physical Dimensions ..........17.2 by 20.3 cm (6.8 by 8.0 in.) I/O connectors.........50-pin male ribbon cable rear signal connector; 32-pin male DIN C front I/O connector SCXI-1126 User Manual ni.com...
- Page 47 Emissions ..........EN 55011 Class A at 10 m. FCC Part 15A above 1 GHz Immunity..........EN 61326:1997 + A2:2001, Table 1 EMC/EMI..........CE, C-Tick and FCC Part 15 (Class A) Compliant Note For EMC compliance, operate this device with shielded cabling. © National Instruments Corporation SCXI-1126 User Manual...
- Page 48 Low-Voltage Directive (safety)....73/23/EEC Electromagnetic Compatibility....89/336/EEC Directive (EMC) Note Refer to the Declaration of Conformity (DoC) for this product for any additional regulatory compliance information. To obtain the DoC for this product, click Declarations of Conformity Information at ni.com/hardref.nsf/ SCXI-1126 User Manual ni.com...
-
Page 49: Common Questions
SCXI_Set_Gain SCXI_Set_Gain 4 channels of the SCXI-1126, it takes about 12 seconds for all the calls to return (3 seconds per channel × 4 channels = 12 seconds). When I try to manually add and configure my module, it is not in the list of modules. - Page 50 Symbols ° degree Ω percent positive of, or plus – negative of, or minus amperes analog-to-digital alternating current AC coupled allowing the transmission of AC signals while blocking DC signals © National Instruments Corporation SCXI-1126 User Manual...
- Page 51 Devices with simultaneous sampling do not have this clock. chassis bit SCXI-1126 User Manual © National Instruments Corporation...
- Page 52 SCXI-1200, which is a hybrid. digital trigger a TTL level signal having two discrete levels—a high and a low level DIGGND digital ground signal Deutsche Industrie Norme © National Instruments Corporation SCXI-1126 User Manual...
- Page 53 (1) Mega, the standard metric prefix for 1 million or 10 , when used with units of measure such as volts and hertz; (2) mega, the prefix for 1,048,576, or 2 , when used with B to quantify data or computer memory megabytes SCXI-1126 User Manual © National Instruments Corporation...
- Page 54 E Series DAQ device connected to the module peak to peak a measure of signal amplitude; the difference between the highest and lowest excursions of the signal parts per million © National Instruments Corporation SCXI-1126 User Manual...
- Page 55 SCANCLK scan clock signal used to increment to the next channel after each E Series DAQ device analog-to-digital conversion SCXI-1126 User Manual © National Instruments Corporation...
- Page 56 © National Instruments Corporation SCXI-1126 User Manual...
- Page 57 SCXI-1126 User Manual © National Instruments Corporation...
- Page 58 1-4 excitation level, 1-21 isolated input stage, 1-3 filter bandwidth, 1-22 multiplexed mode output stage, 1-5 connecting SCXI-1126 to DAQ device. See output stage, 1-4 DAQ devices parallel mode output stage, 1-6 conventions used in the manual, iv ©...
- Page 59 Measurement Studio software, 1-8 pin assignments (table), 2-5 Module ID register, 1-6 signal descriptions (table), 2-6 multiplexed mode operation connecting to SCXI-1126 for DAQ device in PXI combination, 1-13 in SCXI chassis, 1-12 ground-referenced signal connections multiplexed mode output stage, 1-5...
- Page 60 SCANCLK signal (table), 2-8 (figure), 2-2 scanning, direct and indirect, 1-4 ground-referenced signal SCXI chassis connections (figure), 2-2 connecting SCXI-1126 to DAQ pin assignments (table), 2-5 device, 1-12 signal descriptions (table), 2-6 installing SCXI-1126, 1-10 rear connector removing SCXI-1126, 1-22...
- Page 61 A-3 stability, A-6 troubleshooting transfer characteristics, A-3 self-test verification, 1-19 stability specifications, A-6 unpacking SCXI-1126, 1-10 theory of operation block diagram, 1-2 digital control circuitry, 1-6 verifying and self-testing the configuration digital interface, 1-6 steps for, 1-16, 1-18...