Raymarine C-Series Reference Manual
Hide thumbs
Also See for C-Series:
- Reference manual (244 pages) ,
- Installation manual (64 pages) ,
- Operating manual (20 pages)

Related Manuals for Raymarine C-Series


Summary of Contents for Raymarine C-Series
- Page 1 C-Series Display Reference Manual Document number: 81221_2 Date: March 2004...
- Page 2 C-Series Reference Manual Trademarks and registered trademarks Autohelm, HSB, Raymarine, RayTech Navigator, Sail Pilot, SeaTalk and Sportpilot are registered trademarks of Raymarine Limited. Apelco is a registered trademark of Raymarine Holdings Limited.(Registered in all Major marketing territories. AST, Autoadapt, Auto GST, Autoseastate, Autotrim, Bidata, Marine Intelligence, Maxiview, On Board, Raychart, Raynav, Raypilot, Raystar, ST40, ST60, Seaclutter, Smart Route, Tridata and Waypoint Navigation are trademarks of Raymarine Limited.
-
Page 3: Table Of Contents
Safety notices ....................xi EMC conformance ..................xii Electronic Chart Cards ................... xii Chapter 1: Using the Display ................1-1 1.1 The C-Series wallet ....................1-1 1.2 System Overview ....................1-1 1.3 The Controls ......................1-2 Displaying information .................1-3 1.4 The Simulator .....................1-3 1.5 The Applications ....................1-3... - Page 4 C-Series Reference Manual Databar Setup ....................2-12 Select Page Set ...................2-12 System Diagnostics ..................2-12 Remove CF Card ..................2-12 2.4 How is system information shown on the screen? ...........2-13 Status bar ....................2-13 Data bar .....................2-13 2.5 How is control information shown on the screen? ...........2-15 Soft Keys ....................2-15...
- Page 5 Contents 3.4 How do I view waypoint information? ...............3-6 3.5 How can I edit a waypoint? ................3-7 How do I change the waypoint details? ............3-7 How can I move a waypoint? ...............3-7 How do I erase a waypoint? .................3-8 How do I change the default symbol and group? .........3-8 3.6 How can I sort waypoints in the waypoint list? ..........3-9 3.7 How can I organize my waypoints into groups? ..........3-10 How do I make a new waypoint group? .............3-10...
- Page 6 C-Series Reference Manual 4.8 How do I monitor where I am going? ...............4-17 ... using chart vectors .................4-17 ... using cross track error (XTE) ..............4-18 ... using the Course Deviation Indicator (CDI) ..........4-18 4.9 How do I record where I have been? ..............4-19 What is a track? ..................4-19...
- Page 7 Contents What factors can impair a radar picture? .............5-2 5.3 How do I power on /off the various operating modes ........5-6 5.4 What does the radar picture show me? .............5-7 What does the status bar tell me? ..............5-8 5.5 How can I change what I see in the radar window? ...........5-8 How do I set the orientation of the radar? ............5-8 How do I set the motion mode? ..............5-9 How do I show/hide the range rings? ............5-10...
- Page 8 C-Series Reference Manual Chapter 7: Using the Fishfinder ................7-1 7.1 Introduction .......................7-1 7.2 How does the Fishfinder work? ................7-1 7.3 What can the fishfinder show me? ..............7-2 How do I interpret the bottom structure? .............7-3 How are targets displayed? ................7-4 How do I see a live image? ................7-5...
- Page 9 8.5 How can I get Technical Support? ..............8-4 World wide web ...................8-4 Help us to help you ..................8-4 How can I contact Raymarine in the US? ............8-5 How can I contact Raymarine in Europe? .............8-6 Appendix A: Specification ..................A-1 C70, C80 and C120 LCD Color Displays ............A-1 General .......................
- Page 10 C-Series Reference Manual...
-
Page 11: Important Information
Purpose This handbook contains important information on the operation and maintenance of your C-Series Display. To get the best results in operation and performance, please take the time to read this handbook thoroughly. For full details of installation and system integration, please refer to the C-Series System Integration and Installation Guide supplied with the display. -
Page 12: Emc Conformance
Electronic Chart Cards To use your C-Series Display as a navigation aid, charts with the appropriate level of detail for the geographic area you wish to navigate are required. The charts are available an electronic format on Navionics®... -
Page 13: Chapter 1: Using The Display
When used as part of a SeaTalk system it will display information from other SeaTalk instruments. It can also be integrated to an autopilot and display Digital Selective Calling (DSC) messages from a DSC VHF radio if fitted. Information from the C-Series display can also be transferred between applications and to other SeaTalk instruments within the system. -
Page 14: The Controls
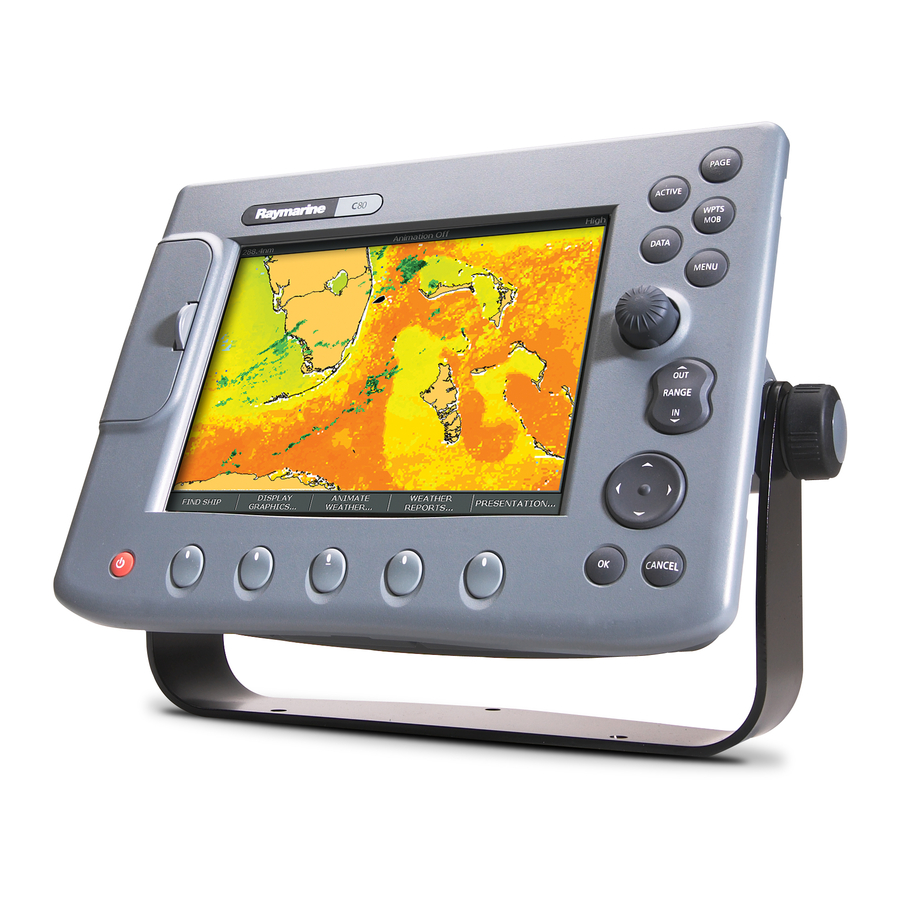
C-Series Display Reference Manual 1.3 The Controls DATA ACTIVE PAGE Pressing this button When multiple windows are open: Press to scroll through displays the function bar - Press to select required window. available pages. menu to access data - Press and hold to maximise the Press and hold as a short cut functions. -
Page 15: Displaying Information
1.4 The Simulator The C-Series Display includes a simulator mode, which allows you to practice operating your display without data from a GPS antenna, radar scanner or transducer. How do I set up... -
Page 16: Chartplotter
C-Series Display Reference Manual Chartplotter The chartplotter includes a small-scale world map enabling route plotting and tracking even when an electronic chart card is not installed. Detailed navigation information is ® displayed when a Navionics electronic chart card is installed. For more information... -
Page 17: Radar
Chapter 1: Using the Display Radar The radar application gives you information on what is around your vessel at any particular moment in time. This includes positions of landmasses, other vessels and navigation markers such as buoys. A typical radar plot is shown below: North-Up (Relative Motion) Rings 1nm... -
Page 18: Fishfinder
C-Series Display Reference Manual Fishfinder The Fishfinder application gives you a detailed view of what is below your vessel. This includes, the seabed and its texture, fish and other underwater objects. A typical Fishfinder image is shown below: 200kHz: Auto... -
Page 19: Course Deviation Indicator
Chapter 1: Using the Display Course Deviation indicator The course deviation indicator (CDI) assists you to accurately maintain your course to your destination. A ‘rolling road’ in three dimensional perspective provides a real-time display of your vessel’s course and any deviation as Cross Track Error (XTE) It will give such information as any corrections required to your course and data about the target waypoint, its bearing, distance and the time to go (TTG). -
Page 20: Getting Started
C-Series Display Reference Manual 1.6 Getting started This section describes how to set-up your C-Series display the first time you use it. After this initial set-up, the display will memorize your chosen settings, and these will be shown each time you power on the display. You can, of course change these settings as many times as you wish. -
Page 21: How Do I Select How The Applications Are Displayed
Chapter 1: Using the Display How do I select how the applications are displayed? page sets The applications are shown on the display screen using a combination of pages windows Page set Page Window (1, 2, 3 or 4 window options) There are four pre-configured page sets each containing four pages with a combination of windows and applications in each. - Page 22 1-10 C-Series Display Reference Manual How do I select a page? Once you have selected the appropriate page set (see previous section), you can choose a page in one of two ways: • Press PAGE. This will display the four available pages in the soft key bar.
-
Page 23: How Do I Adjust The Display Lighting
Chapter 1: Using the Display 1-11 4. Select the layout you require for the chosen page using the trackpad or rotary control. To exclude this page from the available selection, set the PAGE setting to 5. Press OK. The Select Application window is displayed. If a page with multiple windows has been selected, the first window is bordered in red. - Page 24 1-12 C-Series Display Reference Manual...
-
Page 25: Chapter 2: General Operation And System Setup
Chapter 2: General Operation and System Setup Chapter 2: General Operation and System Setup 2.1 Introduction This chapter gives details of the general operation of the C-Series display, and covers the following subjects: • Using the controls. • Setting up the display. - Page 26 C-Series Display Reference Manual PAGE Press to scroll through available pages. PAGE Press and hold as a short-cut to page-set options. D6579-1 DATA Press to display the soft key menus for accessing databar and data DATA functions. D6580-1 ACTIVE Press to select the window that you wish to work on from those that are ACTIVE open on a page.
-
Page 27: Soft Keys
Chapter 2: General Operation and System Setup Soft keys There are five soft keys in the bar below the display screen.When a system function button is pressed, the primary soft keys for that function are shown. Pressing a soft key will carry out one of the following functions: •... -
Page 28: Cursor
C-Series Display Reference Manual Cursor The cursor appears on the screen as a white cross. If it has not been moved for a short period of time, it will change to a circle with a cross in it, to make it easier to identify on the screen. -
Page 29: How Do I Set Up My Display
Chapter 2: General Operation and System Setup 2.3 How do I set up my display? You can set up the display so that the applications being used are presented in the way that suits how you work. This section shows you how to access and change these settings. -
Page 30: System Setup
C-Series Display Reference Manual System Setup MENU ITEM OPTIONS (Default in bold) Position Mode Lat/Long Controls whether the position is expressed in latitude and TD’s longitude co-ordinates or Loran TDs. TD Setup Various Position Mode If the is set to TD’s, this function controls the selected chain identifier, slave and ASF. - Page 31 Chapter 2: General Operation and System Setup MENU ITEM OPTIONS (Default in bold) Settings and Data Reset Resets system setup options including fishfinder. The DSM is not reset.. Date /Time Setup See sub-menu below Units Setup See sub-menu below System Integration See sub-menu below Date/Time Setup Menu OPTIONS...
-
Page 32: Alarm Setup Menu
C-Series Display Reference Manual System Integration Setup Menu MENU ITEM OPTIONS (Default in bold) DSC Message When set to ON, details of distress DSC messages are dis- played on screen SeaTalk Alarms When set to enabled, all SeaTalk system alarms are received Enabled and displayed on the chartplotter. - Page 33 Chapter 2: General Operation and System Setup MENU ITEM OPTIONS (Default in bold) Timer Period Timer If the is set to ON, the system counts down from the 1min - 99hrs 59mins time you specify. An alarm is triggered when zero is reached. Alarm Clock Switches the alarm clock on or off.
- Page 34 2-10 C-Series Display Reference Manual Radar Alarms Setup These alarms will only sound when you are in the radar applicaiton. MENU ITEM OPTIONS (Default in bold) Guard Zone Sensitivity Ensure that this is not set too low or targets will be missed.
-
Page 35: Gps Status
Chapter 2: General Operation and System Setup 2-11 MENU ITEM OPTION (Default in bold) Deep Depth Alarm Switches the deep depth alarm on or off. If a DSM is not connected, this cannot be set. Deep Depth Alarm Value > 1 fathom Deep Depth Alarm If the is set to ON, an alarm is triggered if... -
Page 36: Databar Setup
2-12 C-Series Display Reference Manual Databar Setup How do I change the This sub-menu accesses the Configure Data Bar Menu - refer to data bar? page 2-14 for full details. Alternately this setup can be accessed by pressing the DATA button and then pressing and holding DATABAR ON OFF. -
Page 37: How Is System Information Shown On The Screen
Chapter 2: General Operation and System Setup 2-13 2.4 How is system information shown on the screen? Information associated with an application, your vessel or the environment can be shown on the screen in the following ways: • Status Bar. •... - Page 38 2-14 C-Series Display Reference Manual What do the status icons tell me? The status icons on the data bar confirm whether the appropriate connections to your C-Series has been made: Status icon Description The boat and fish icon indicates the current status of your fish- finder: Icon animated - connection to a DSM has been successful.
-
Page 39: How Is Control Information Shown On The Screen
Chapter 2: General Operation and System Setup 2-15 3. Press OK to select the highlighted data. The Menu will disappear from the screen and the Data soft keys will re-appear. The selected data is added to the top of the bar. -
Page 40: Pop-Up Messages
2-16 C-Series Display Reference Manual How do I edit dialog box information? You can edit dialog box information using the trackpad, rotary control and the soft keys: 1. Select the field you want to edit using the trackpad. 2. Press EDIT. The first entry of the selected field will be highlighted. -
Page 41: How Do I Mark A Man Overboard Position
• Navigation to any active waypoint is suspended and any existing navigation func- tion is cancelled. No further GOTO or route functions will be selectable. • Other Raymarine equipment acknowledges the MOB. • As your vessel moves away from the MOB position, a dotted line is displayed from your current position to the MOB position. -
Page 42: How Do I Get Warning Of A Hazard
If an instrument that is connected to the display generates alarms, these will sound on your C-Series display accompanied by a pop-up message box. You can cancel these alarms by pressing the ACKNOWLEDGE soft key. The alarm will be silenced, but no other action will be taken by the C-Series display. -
Page 43: How Do I Insert Or Remove A Compactflash Card
Chapter 2: General Operation and System Setup 2-19 2.9 How do I insert or remove a CompactFlash card? CAUTION: CompactFlash Card Installation When installing CompactFlash cards ensure that the card is being fitted the correct way around. DO NOT try and force the card into position as this may result in irreparable damage to the card. - Page 44 2-20 C-Series Display Reference Manual 3. Insert the card as shown, with the lip of the card facing inwards, it should position easily. If it does not, DO NOT force it, check the direction in which the lip is facing.
-
Page 45: How Do I Save Or Retrieve Information
Chapter 2: General Operation and System Setup 2-21 5. To prevent the ingress of water and consequent damage, close the chart card door and press firmly until an audible click is heard. 6. Press OK. Improper card removal If you try to remove a card when the unit is powered, without accessing the setup menu, an warning message is displayed. -
Page 46: How Do I Erase Information From A Card
2-22 C-Series Display Reference Manual 3. Press the ARCHIVE & TRANSFER. 4. Press the RETRIEVE FROM CARD. 5. From SELECT LIST, choose WPT (Waypoint), RTE (Route), or TRK (Track). 6. The card contents for your selection appears on the screen. -
Page 47: How Can I Set Up My Gps
• D-FIX - a differential fix has been acquired. • SD-FIX - a satellite differential fix has been acquired. If your boat is equipped with a Raymarine GPS, the Differential GPS can to switched on or off using the appropriate soft key. - Page 48 2-24 C-Series Display Reference Manual...
-
Page 49: Chapter 3: Working With Waypoints
Chapter 3: Working with Waypoints 3.1 Introduction Waypoints are a core feature of the C-series display. They can be created in the radar, chart or fishfinder application and used by all the applications. Waypoints can be stored in the system, archived to a CompactFlash card or transferred to another NMEA compatible instrument. -
Page 50: How Are Waypoints Stored
The details of all waypoints, irrespective of the application they were created in, are stored in a dedicated waypoint list. The C-Series display is capable of storing up to 1,000 waypoints. If you reach this limit you can either delete those waypoints that you no longer use or archive those that are... -
Page 51: How Can I Place A Waypoint
Chapter 3: Working with Waypoints 3.2 How can I place a waypoint? WAYPOINT AT WAYPOINT AT WAYPOINT AT GOTO WAYPOINT REVIEW AND EDIT CURSOR VESSEL POSITION... OPTIONS... WAYPOINTS... A waypoint can be placed at the cursor position, the boat’s position or at a position of you choosing (using lat./long or Loran TD coordinates). - Page 52 C-Series Display Reference Manual ...at a known position WPTS/ WAYPOINT AT POSITION... 1. Press WPTS. 2. Press WAYPOINT AT POSITION. The Edit Waypoint box is displayed with the highlight flashing in the position field. 3. Use the trackpad and/or the rotary control to enter the required position.
-
Page 53: How Do I Navigate To A Waypoint
Chapter 3: Working with Waypoints 3.3 How do I navigate to a waypoint? You can navigate to an existing waypoint by using the GOTO WAYPOINT OPTIONS soft key. This can either be accessed by selecting the required waypoint on screen with the cursor (chart and radar only) or via the WPTS/MOB button (all applications). -
Page 54: How Do I View Waypoint Information
C-Series Display Reference Manual 3.4 How do I view waypoint information? You can view the details of any waypoint that you have placed, by either selecting it with the cursor or by selecting it on the waypoint list. Once you are viewing a waypoint’s details, a variety of editing and managing options are available. -
Page 55: How Can I Edit A Waypoint
Chapter 3: Working with Waypoints 3.5 How can I edit a waypoint? Once a waypoint has been placed it can be edited in a variety of ways. You can: • Change the waypoint details - name, symbol, group. • Move a waypoint. •... -
Page 56: How Do I Erase A Waypoint
C-Series Display Reference Manual ...by dragging the waypoint to a new position You can drag a waypoint to a new position using the cursor and trackpad: 1. Use the cursor to select the waypoint that you want to move. 2. Press MOVE WAYPOINT. -
Page 57: How Can I Sort Waypoints In The Waypoint List
Chapter 3: Working with Waypoints 1. Press REVIEW AND EDIT WAYPOINTS. 2. Press SET DEFAULT SYM & GROUP. 3. Press SET UP DEFAULT, to highlight either the symbol or group option. The current default is displayed. 4. Press EDIT DEFAULT. The selection of available symbols or the list of group names is displayed. -
Page 58: How Can I Organize My Waypoints Into Groups
3-10 C-Series Display Reference Manual 3.7 How can I organize my waypoints into groups? WPTS/ REVIEW AND EDIT WAYPOINT WAYPOINTS ... GROUPS ... Provided that you have not changed the default group, all waypoints are automatically placed in the default “My Waypoints” group when they are created. In order to make your waypoints easier to manage, you can organize them into groups of your choice. -
Page 59: How Do I Move Waypoints Between Groups
Chapter 3: Working with Waypoints 3-11 How do I move waypoints between groups? Waypoints can be easily moved between groups using the MOVE BETWEEN GROUPS option. To move a waypoint: 1. Select MOVE BETWEEN GROUPS. The first two groups stored are displayed as GROUP A and GROUP B. Fishing 2. -
Page 60: How Do I Rename An Existing Group
3-12 C-Series Display Reference Manual How do I rename an existing group? You can change the name of an existing waypoint group: 1. Select the required group in from the GROUP LIST and press RENAME GROUP. The group name is displayed in a dialog box 2. -
Page 61: Display By Symbol Or Group
Chapter 3: Working with Waypoints 3-13 SHOW BY ON CHART WAYPOINT NAME GROUP SHOW HIDE Display by symbol or group You can determine which waypoint groups or symbol types are shown using the SHOW BY soft key. This is used in conjunction with the ON CHART soft key when the chartplotter is active or the ON RADAR soft key when radar is active. - Page 62 3-14 C-Series Display Reference Manual...
-
Page 63: Chapter 4: Using The Chart
Chapter 4: Using the Chart Chapter 4: Using the Chart 4.1 Introduction This chapter describes how to use the chartplotter application of the C-Series display. To access full functionality your chartplotter requires position and heading data from your boat’s Global Positioning System (GPS). -
Page 64: What Can The Chartplotter Show Me
C-Series Display Reference Manual 4.2 What can the chartplotter show me? The chartplotter has a built in world map; most areas are displayed at a scale of 72 nm from the top to the bottom of the screen and can be overzoomed as required. -
Page 65: The Chartplotter Display
Chapter 4: Using the Chart The chartplotter display Chart range Chart orientation Motion mode Chart view North-Up (Relative Motion) Local Status bar Chart boundary Gully Ridge Route Portside Cursor Port point Creek point Waypoint Active waypoint Current position Cartographic object Track Soft keys FIND SHIP... -
Page 66: How Do I See Details Of Cartographic Objects
C-Series Display Reference Manual • Use the search facility to find the nearest waypoints, ports, port services, wrecks, page 35 obstructions or tidal stations.(see How do I display • View details of available port services for a selected port. (see... -
Page 67: How Do I Find Nearby Features And Services
Chapter 4: Using the Chart How do I find nearby features and services? You can use your chartplotter to identify and display the details of the waypoints, port services, ports, tidal stations, wrecks or obstructions that are closest to the cursor position. -
Page 68: How Do I Move Around The Chart
C-Series Display Reference Manual • Depth contours. • Light sectors. • Caution & routing Information. • Land and marine features. For more information on changing the appearance of the chart and cartographic data, How do I set up my chart and its cartography? page 38 4.5 How do I move around the chart? -
Page 69: How Do I Navigate To A Specific Point
Chapter 4: Using the Chart 4.6 How do I navigate to a specific point? You can use your Chartplotter to navigate to a specific point marked by the cursor or to a waypoint. When you are steering manually, you can also use the chartplotter to determine the bearing or direction to steer. - Page 70 C-Series Display Reference Manual 4. When you arrive at the target waypoint an alarm sounds and a warning message is displayed. To de-activate this alarm, either wait 10 seconds or press ACKNOWL- EDGE. To stop navigating to the cursor, press .
-
Page 71: How Do I Build And Follow A Route
Chapter 4: Using the Chart 4.7 How do I build and follow a route? This section describes how to use routes and includes the following: • What is a route? • Building and saving a route. • Following a route. •... - Page 72 4-10 C-Series Display Reference Manual • When a route is being built it is not active and does not affect any current naviga- tion. • You can include a waypoint more than once in a route, but the same waypoint can- not be placed consecutively.
- Page 73 Chapter 4: Using the Chart 4-11 North-Up (Relative Motion) Local Sunday Trip# PORT POINT Sunday Trip# Portside GULLY RIDGE Port point Sunday Trip# CREEK VIEW PORTSIDE CREEK POINT SHOW/HIDE FOLLOW ROUTE BUILD NEW REVIEW AND EDIT ROUTES… OPTIONS… ROUTE ROUTES… 4.
- Page 74 4-12 C-Series Display Reference Manual • If you wish to abandon the route that you are building, press CANCEL. You are asked to confirm your request to delete the route. 3. Continue entering waypoints until your route is complete. 4. You now have the following options: i.
-
Page 75: How Do I See Details Of My Routes
Chapter 4: Using the Chart 4-13 ii. To save the built route for later use (and rename it if required), press SAVE ROUTE. Using the display and the waypoint list to build your route You can build your route using both the on-screen and the waypoint list methods described on the previous pages. -
Page 76: How Do I Follow A Route
4-14 C-Series Display Reference Manual How do I follow a route? There are several ways that you can follow a route: • Using Quick Route. • Using the cursor. • Via the route list. North-Up (Relative Motion) Local NORTH POINT... - Page 77 Chapter 4: Using the Chart 4-15 ... using Quick Route This option follows a route as soon as it is built..using the cursor FOLLOW (QUICK) Build your route ROUTE You can either use the cursor to select and follow a route from the start, or to follow a route from a selected waypoint within the route.
- Page 78 4-16 C-Series Display Reference Manual ... in reverse order This option reverses the waypoint order in the selected route and then follows it. REVERSE AND FOLLOW ROUTE ROUTES… FOLLOW OPTIONS ... 1. Press ROUTES. 2. Press FOLLOW ROUTE OPTIONS. The route list is displayed with the highlight on the most recently built, edited or followed route.
-
Page 79: How Do I Monitor Where I Am Going
Chapter 4: Using the Chart 4-17 4.8 How do I monitor where I am going? ... using chart vectors DATA CHART VECTORS You can display a variety of graphical indicators to help monitor where you are going: Heading (HDG) and course over ground (COG) vectors Heading vector (HDG) Course over ground... -
Page 80: Using Cross Track Error (Xte)
4-18 C-Series Display Reference Manual ... using cross track error (XTE) Following a route RESTART XTE When you are following a route or going to a waypoint, you can restart the XTE. This sets the XTE to zero and moves the origin to the actual vessel position. -
Page 81: How Do I Record Where I Have Been
Chapter 4: Using the Chart 4-19 4.9 How do I record where I have been? What is a track? A track is an on-screen trail that represents the course you have taken. This trail is made up of a series of track points which are created automatically. You can save the track to create a permanent record of where you have been. -
Page 82: How Do I Create A Route From A Track
4-20 C-Series Display Reference Manual A track starts to be laid from the stern of the boat using the minimum number of track points necessary. If the maximum number of tracking points is reached, you will be warned. The track will continue to be recorded with the earlier tracking points being overwritten. -
Page 83: How Do I Edit My Routes And Tracks
Chapter 4: Using the Chart 4-21 2. Press CREATE ROUTE FROM TRACK again. The system generates the route, displays the maximum deviation from the recorded track and asks if you want to give the route a name of your choosing. 3. -
Page 84: How Do I Select A Route Or Track For Editing
4-22 C-Series Display Reference Manual How do I select a route or track for editing? To select a route... REVIEW AND ROUTES ... EDIT ROUTES ... 1. Press REVIEW & EDIT ROUTES. The route list together with the associated soft... -
Page 85: How Do I Reverse A Route
Chapter 4: Using the Chart 4-23 How do I reverse a route? REVERSE ROUTE You can reverse the course of a route as follows: 1. Select the appropriate route on screen. 2. Press REVERSE ROUTE. The route name moves to new starting point and the way- points within the route renumber accordingly . - Page 86 4-24 C-Series Display Reference Manual ‘ 4. Use the trackpad (right) to move control from the Waypoint column to the New Route column. 5. Use the trackpad (up) to move the highlight immediately above the waypoint that is currently first in the route. column. A blank line is created: 6.
- Page 87 Chapter 4: Using the Chart 4-25 • An existing waypoint for inclusion in your route. The soft key USE THIS WAY- POINT is displayed or: • The position for a new waypoint. The soft key PLACE WAYPOINT is displayed. North-Up (Relative Motion) Local PLACE WAYPOINT...
-
Page 88: How Do I Change The Name Or Color Of A Route Or Track
4-26 C-Series Display Reference Manual ... by moving a waypoint 1. Move the cursor over the waypoint that is to be repositioned within the route. 2. Press MOVE WAYPOINT. The route legs connected to the selected waypoint are now represented by a dashed line. -
Page 89: How Do I Erase A Route Or Track
Chapter 4: Using the Chart 4-27 3. Use the trackpad to select the name or color box. 4. Press EDIT NAME or EDIT COLOUR to access the appropriate editing option. 5. Edit the required setting. 6. Press OK to save your selection. The route or track list is updated accordingly. -
Page 90: How Can I Change What I See In The Chart Window
4-28 C-Series Display Reference Manual 4.11 How can I change what I see in the chart window? The chart screen can be tailored to your particular needs. You can: • Change the chart view (see below). page 29 • Change how the chart is orientated (see page 30 •... -
Page 91: How Do I Set The Orientation Of The Chart
Chapter 4: Using the Chart 4-29 If you change any of these options in one window, ALL system windows will update. When a chart application is started it defaults to system view. The motion mode will be set but not synchronized across windows when the Note: chart view is set to shared. -
Page 92: How Do I Set The Motion Mode
4-30 C-Series Display Reference Manual If heading data becomes unavailable whilst in this mode, a warning message will be shown and the chart uses 0° heading in relative motion. How do I set the motion mode? CHART MODE AND MOTION MODE PRESENTATION…... -
Page 93: How Do I Show Or Hide The Chart Grid
Chapter 4: Using the Chart 4-31 In the following example the motion mode has been set to Relative with a vessel offset of 1/3. The boat is fixed in the offset position and the chart moves acordingly: True motion (TM) When the motion mode is set to True, the chart is fixed and the boat moves in true perspective to fixed landmasses on the screen. - Page 94 4-32 C-Series Display Reference Manual Showing/hiding waypoints by group/symbol SHOW BY SHOW/HIDE ON CHART PRESENTATION... WAYPOINTS... GROUP SHOW HIDE You can show or hide waypoints that have a particular symbol or belong to a specified group: 1. Press PRESENTATION and then SHOW/HIDE WAYPOINTS.
-
Page 95: How Do I Show Or Hide The Waypoint Index
Chapter 4: Using the Chart 4-33 How do I show or hide the waypoint index? WAYPOINT INDEX SHOW/HIDE ROUTES… ROUTES… The order of waypoints within a route is indicated by the waypoint index. To show/hide this index: 1. Press SHOW/HIDE ROUTES. The Route list is displayed. 2. -
Page 96: How Do I Get More From My Chartplotter
4-34 C-Series Display Reference Manual 3. Press OK to exit the presentation options. The top level soft keys for the chart appli- cation change to reflect that radar overlay is in operation: RADAR NAVIGATION FIND SHIP GO TO... PRESENTATION... OPTIONS... -
Page 97: How Do I Display Details Of Ports Services
Chapter 4: Using the Chart 4-35 How do I display details of ports services You can display details of port services by either selecting the appropriate port symbol with the cursor or by using the port search option. Port symbol You can display the services available at a particular port by selecting it on screen with the cursor. -
Page 98: How Do I Display Details Of Tides
4-36 C-Series Display Reference Manual 5. Press SEARCH. The port(s) that match your search are displayed in the Select Port pop-up e.g 6. Use the trackpad to select the appropriate port. A list of the facilities and services available at that port are displayed. -
Page 99: How Do I Measure Distances On The Chart
• Press SHOW ON CHART, to centre the screen on the selected port. How do I measure distances on the chart? You can use your C-Series display to obtain an accurate measurement of the distance and bearing between two points:... -
Page 100: How Do I Set Up My Chart And Its Cartography
4-38 C-Series Display Reference Manual 4.13 How do I set up my chart and its cartography? The set up for your chartplotter and its cartography can be changed from the standard configuration to suit your particular needs. Although you will probably only do this when you first use the chartplotter, you may decide to make subsequent adjustments once you become more familiar with the system. - Page 101 Chapter 4: Using the Chart 4-39 Cartography set up FUNCTION OPTIONS Description (Default in bold) Chart Display Detailed The level of detail shown on the chart. Simple Chart Grid Grid lines of latitude and longitude. Chart Text Text appearing on the chart e.g. place names etc. Chart Boundaries The line indicating the boundary of the chart.
-
Page 102: How Does My Chart Warn Me Of Potential Dangers
4-40 C-Series Display Reference Manual 4.14 How does my chart warn me of potential dangers? If switched on, the following alarms will be triggered when you are in the radar application: • System alarms - Anchor, Timer, Alarm clock and Temperature •... -
Page 103: Chapter 5: Using The Radar
Chapter 5: Using the Radar 5.1 Introduction This chapter describes the basics of radar and the things that can affect your radar picture. It then shows you how to use your radar and its various functions including: • Setting up the radar display. •... -
Page 104: What Is The Maximum Range Of My Radar
C-Series Display Reference Manual What is the maximum range of my radar? Maximum radar range is essentially line-of-sight, so is limited by the height of the scanner and the height of the target as illustrated below: R max Earth Radar R max = 2.23 (... - Page 105 Chapter 5: Using the Radar Side lobes Side lobe patterns are produced by small amounts of energy from the transmitted pulses that are radiated outside the narrow main beam. The effects of side lobes are most noticeable with targets at short ranges (normally below 3 nm), and in particular with larger objects.
- Page 106 C-Series Display Reference Manual Multiple echoes Multiple echoes are not very common but can occur if there is a large target with a wide vertical surface at a comparatively short range. The transmitted signal will be reflected back and forth between the target and your own ship, resulting in multiple echoes, displayed beyond the range of the true target echo, but on the same bearing.
- Page 107 Chapter 5: Using the Radar Rain clutter The radar can see echoes from rain or snow. Returns from storm areas and rain squalls consist of countless small echoes that continuously change size, intensity and position. These returns sometimes appear as large hazy areas, depending on the intensity of the rainfall or snow in the storm cell.
-
Page 108: How Do I Power On /Off The Various Operating Modes
C-Series Display Reference Manual 5.3 How do I power on /off the various operating modes RADAR SCANNER PALETTE STDBY NIGHT To control the power to the radar, press the POWER button and use the appropriate soft key or menu to to select the required operating mode. The scanner icon in the data bar indicates the chosen status. -
Page 109: What Does The Radar Picture Show Me
Chapter 5: Using the Radar 5.4 What does the radar picture show me? You will need heading and position data for full functionality of your radar. A fast heading sensor is also needed for operation of MARPA and radar/chart overlay functions. -
Page 110: What Does The Status Bar Tell Me
C-Series Display Reference Manual • Vertical objects such as cliffs reflect signals better than sloping ones such as sand- banks • High coastlines and mountainous coastal regions can be observed at longer radar ranges. Therefore, the first sight of land may be a mountain several miles inland from the coastline. -
Page 111: How Do I Set The Motion Mode
Chapter 5: Using the Radar This is the default mode for the radar application. North Up (N-UP) In North Up mode, the radar picture is fixed with true north upwards. As your boat changes its heading, the SHM will move accordingly. Notes: (1) If heading data becomes unavailable whilst in this mode, a warning message will be shown and the radar uses 0°... -
Page 112: How Do I Show/Hide The Range Rings
5-10 C-Series Display Reference Manual Relative motion (RM) with optional vessel offset When the motion mode is set to Relative, the position of your boat is fixed on the screen and all the targets move relative to the boat. You can specify using the VESSEL OFFSET soft key, whether the boat is fixed in the... -
Page 113: How Can I Get The Best Picture
The gain function reduces the effects of false echoes and clutter. For the best results Raymarine recommends that you retain the AUTO default setting. You can however adjust these settings if required. Any adjustments that you make are retained by the radar when it is switched off. - Page 114 You should adjust the control to obtain the maximum signal strength (indicated by the eight step horizontal bar.). If you cannot tune the radar successfully, refer to C-Series Displays - Installation Manual. You can use the Fast Time Constant (FTC) function to remove areas of clutter at a...
- Page 115 Chapter 5: Using the Radar 5-13 storm cells are usually visible for long distances due to their extreme altitude, you may wish to leave them displayed so that you can observe the location of bad weather. Notes: (1) You should use this function in conjunction with the RAIN function to obtain the best picture.
-
Page 116: How Do I Use The Target Functions
5-14 C-Series Display Reference Manual How do I use the TARGET functions? You can use the TARGET functions to improve target visibility. TARGETS DISPLAY... INT REJECT EXPANSION WAKES CLEAR WAKES Interference Rejection The interference rejection function automatically reduces any mutual radar... -
Page 117: How Do I Set Up My Radar Display
Chapter 5: Using the Radar 5-15 5.7 How do I set up my radar display? Display ranges You can zoom in or out to view your radar picture at varying scales. The scale is measured from the centre to the top of the radar picture and is displayed in the right hand corner of the status bar. -
Page 118: How Do I Measure Distances, Ranges And Bearings
5-16 C-Series Display Reference Manual 5.8 How do I measure distances, ranges and bearings? When you are using the radar application, you can measure distances, ranges and bearings in a variety of ways.. These options are detailed in the table below:... - Page 119 Chapter 5: Using the Radar 5-17 How do I create a VRM/EBL? VRM/EBL VRM/EBL 1 ADJUST VRM ADJUST EBL FLOATING SET UP 1.991nm 124ºP EBL... VRM/EBL 2 The first VRM/EBL will be placed at a location of 1/3 of the current range and 030° relative to your boat’s head.
-
Page 120: Using Floating Vrms/Ebls
5-18 C-Series Display Reference Manual The distance and bearing of the target is now shown in the ADJUST VRM and ADJUST EBL soft key labels. You will be able to tell which way the target is traveling by watching how it moves in relation to the EBL. If it continues traveling directly along the EBL, it shows that it is on a possible collision course with your boat - take the appropriate action. -
Page 121: How Do I Use Radar To Avoid A Collision
Chapter 5: Using the Radar 5-19 Unfloating a VRM/EBL • To unfloat VRM/EBL 1, toggle VRM/EBL 1 to CENTER. • To unfloat VRM/EBL 2, press SET UP VRM/EBL 2 and repeat the above. 5.9 How do I use radar to avoid a collision? Your radar includes numerous functions to help you avoid a collision. - Page 122 5-20 C-Series Display Reference Manual Sector guard zone Head-Up Relative Motion Rings 1nm Sector Guard Zone To set up a sector guard zone: ZONE SHAPE SET INNER SET OUTER SET WIDTH SET BEARING SECTOR CIRCLE xx.xx nm xx.xx nm 1. Toggle ZONE SHAPE to SECTOR.
- Page 123 Chapter 5: Using the Radar 5-21 Circular guard zone Circular Guard Zone To set up a circular guard zone: ZONE SHAPE SET INNER SET OUTER SECTOR CIRCLE xx.xx nm xx.xx nm 1. Toggle ZONE SHAPE to CIRCLE. 2. Press SET INNER to highlight the soft key label. The inner limit is highlighted. 3.
-
Page 124: Marpa
5-22 C-Series Display Reference Manual MARPA SAFETY NOTICES MARPA can improve collision avoidance when used wisely. It is the User’s responsibility to exercise common prudence and navigational judgements. There are conditions where acquiring a target may become difficult. These same conditions may be a factor in successfully tracking a target. - Page 125 Chapter 5: Using the Radar 5-23 SOG and COG, but only relative vector, CPA, and TCPA are shown. Target course and speed cannot be calculated. How is a risk assessed? Each target is monitored to see if it will be within a certain distance from your boat within a certain time.
- Page 126 5-24 C-Series Display Reference Manual How are targets displayed on screen? Each target is displayed as a symbol which indicates its status: MARPA targets D6810_1 *The ‘dangerous’ and ‘lost ‘symbols will flash when displayed on-screen. What are CPA graphics and what do they show me? CPA graphics show vectors for your vessel and a selected target.
-
Page 127: How Do I Set Up Marpa
Chapter 5: Using the Radar 5-25 your boat’s vector at the point of the CPA. The length and direction of the arrow indicate the distance and bearing of the target at CPA. The text indicates CPA and TCPA. The text next to the target symbol indicates its course and speed. Relative mode With the graphic set in Relative mode, no vector extension is shown. -
Page 128: How Do I Acquire Targets To Track
5-26 C-Series Display Reference Manual How do I acquire targets to track? TARGET ACQUIRE TARGET TRACKING 1. Press TARGET TRACKING. The MARPA soft keys are displayed. 2. Use the trackpad to place the cursor over the target you want to acquire. -
Page 129: How Do I Set Up My Radar
5 minutes scanner does not rotate and the display is in standby mode. 10 minutes 15 minutes Bearing alignment Corrects for display azimuth error. Please refer to the C-Series Installation Guide. Radar Advanced Setup Please refer to the C-Series Installation Guide. -
Page 130: How Does My Radar Warn Me Of Potential Dangers
5-28 C-Series Display Reference Manual 5.12 How does my radar warn me of potential dangers? If switched on, the following alarms will be triggered when you are in the radar application: • System alarms - Anchor, Timer, Alarm clock and Temperature •... -
Page 131: Chapter 6: Using The Course Deviation Indicator
Chapter 6: Using the Course Deviation Indicator Chapter 6: Using the Course Deviation Indicator 6.1 Introduction With your display receiving accurate heading and position information, you can use the Course Deviation Indicator (CDI) to monitor your course and accurately steer to a target waypoint. -
Page 132: What Do The Steering Instructions Tell Me
C-Series Display Reference Manual Target waypoint Indicates direction of next waypoint North-Up Relative Motion Local Indicates direction Boat off Target On course to steer to maintain course waypoint line course name What do the steering instructions tell me? The steering instructions below the rolling road tell you what correction is needed to maintain your course and arrive at the target waypoint. -
Page 133: Chapter 7: Using The Fishfinder
• Using waypoints to mark positions. • Fishfinder alarms (fish, depth or water termperature ). • Measure depth-below and distance-from-boat using a Variable Range Marker (VRM). Please refer to the C-Series installation manual for fishfinder calibration infor- Note: mation. 7.2 How does the Fishfinder work? The fishfinder application uses a Digital Sounder Module (DSM) to process sonar signals from a suitable transducer and provide a detailed underwater view. -
Page 134: What Can The Fishfinder Show Me
C-Series Display Reference Manual 7.3 What can the fishfinder show me? When you first view the fishfinder application, an image representing the echoes seen by the DSM is displayed. As time passes this image scrolls from right to left and becomes a record of the echoes seen. -
Page 135: How Do I Interpret The Bottom Structure
This can happen if the water is shallow, the bottom is hard, or gain is set high. The C-Series Fishfinder provides various features to help you interpret the fishfinder page 7... -
Page 136: How Are Targets Displayed
This is known as background noise or clutter and is controlled by the gain modes (gain, color gain and TVG). Raymarine recommends that you allow your system to automatically control the ideal sensitivity level based on depth and... -
Page 137: How Do I See A Live Image
Chapter 7: Using the Fishfinder water conditions. You can however adjust these settings manually if you prefer. For page 27 more details, please refer to How do I see a live image? A-SCOPE A-SCOPE MODE The standard fishfinder display shows a historical record of fishfinder echoes. If required, you can display a live image of the bottom structure and the fish directly below the transducer by using the A-Scope feature. - Page 138 C-Series Display Reference Manual To display the A-Scope image: 1. Press A-SCOPE and toggle the A-SCOPE to ON. The active window is split vertically, with the A-Scope image on the right hand side (including the bottom coverage value) and the standard fishfinder image on the left.
-
Page 139: How Can I Enhance What I See
Chapter 7: Using the Fishfinder 7.4 How can I enhance what I see? 7.1 How can I enhance what I see? You can enhance the image by applying the following options: You can enhance the image by applying the following options: •... -
Page 140: How Do I Zoom In On The Bottom
C-Series Display Reference Manual How do I zoom in on the bottom? ZOOM ZOOM FACTOR ZOOM RANGE ZOOM POSITION ZOOM START SPLIT x2 x3 20ft AUTO 0.0ft The fishfinder automatically keeps the bottom image in the lower half of the window. - Page 141 Chapter 7: Using the Fishfinder • xR - to adjust manually the range shown in the Zoom window. When using Ranged Zoom, the area shown in the zoom window does not change when the range changes. Press ZOOM RANGE and use the rotary control to adjust the range as required.
-
Page 142: How Do I Simplify The Bottom Image
7-10 C-Series Display Reference Manual How do I simplify the bottom image? BOTTOM LOCK B-LOCK RANGE BOTTOM SHIFT SPLIT 20ft When you are looking for fish that feed close to the bottom, you can use the Bottom Lock function to filter out and flatten the bottom structure and display the fish (or any other objects directly above the bottom) more clearly. - Page 143 Chapter 7: Using the Fishfinder 7-11 3. To adjust the range of the Bottom Lock image, press B-LOCK RANGE and then use the rotary control to adjust the range. 4. To re-position the Bottom Lock image to view more bottom details, press BOTTOM SHIFT and then use the rotary control to adjust the shift between the bottom of the window (0%) and the middle of the window (50%).
-
Page 144: How Can I Isolate Bottom Fish
7-12 C-Series Display Reference Manual How can I isolate bottom fish? DEPTH DIGIT WHITE LINE BOTTOM FILL SCROLL PAUSE RESUME You can separate the echoes from fish near the bottom and from the bottom itself by using the White Line and/or the Bottom Fill features accessed via the PRESENTATION... - Page 145 Chapter 7: Using the Fishfinder 7-13 To display/hide White Line and/or Bottom Fill: 1. Press PRESENTATION. 2. Press WHITE LINE or BOTTOM FILL to toggle the feature OFF or ON as required. 3. Press OK or CANCEL to return to the default display. White Line and Bottom Fill are selected for individual fishfinder windows.
-
Page 146: How Do I Change How The Image Scrolls
7-14 C-Series Display Reference Manual How do I change how the image scrolls? Adjusting the scroll speed You can adjust the speed at which the display scrolls , but the same section of the bottom is displayed regardless of scrolling speed. A faster speed displays more detail. -
Page 147: How Do I Change How The Depth Digit Is Displayed
Chapter 7: Using the Fishfinder 7-15 Pausing the scrolling image DEPTH DIGIT WHITE LINE BOTTOM FILL SCROLL PAUSE RESUME You can pause the display to see a ‘snapshot’ of the image. Scroll pause affects only the page 25 current fishfinder frequency. If you are in dual frequency mode (see ), you can pause one frequency while the other continues to scroll. -
Page 148: How Do I Mark A Position
7-16 C-Series Display Reference Manual 7.5 How do I mark a position? Marking a position enables you to return to that spot at a later date. A position is marked on the screen with a waypoint. When a waypoint is placed, its details are added to the Waypoint List and a vertical line labelled WPT (see illustration below) is displayed on screen. - Page 149 Chapter 7: Using the Fishfinder 7-17 2. Press WAYPOINT AT POSITION. The Edit Waypoint box is displayed. For details of Chapter 3: Working with how to specify the waypoint’s position, please refer to Waypoints, page 3...
-
Page 150: How Do I Determine Depths And Distances Of Targets
7-18 C-Series Display Reference Manual 7.6 How do I determine depths and distances of targets? The fishfinder provides various features to determine depths and distances: 200 kHz: Auto Gain: Auto High VRM marker indicating distance behind boat Depth line VRM marker... -
Page 151: Using Vrms
Chapter 7: Using the Fishfinder 7-19 Using VRMs RANGE XXXXX PRESENTATION DEPTH XXXXX You can use a Variable Range Marker (VRM) to determine the depth and distance- behind-boat of an object. These markers consist of a horizontal (depth) line and a vertical (distance-behind-boat) line;... -
Page 152: What Alarms Does My Fishfinder Have
7-20 C-Series Display Reference Manual 7.7 What alarms does my fishfinder have? In addition to the system alarms (see page 8 ), the following alarms can be set when you are connected to a DSM or when the simulator is on: •... -
Page 153: How Do I Set Up My Fishfinder
Operation and System Setup. Transducer Calibration The C-series display receives the image from a DSM which processes sonar signals from a transducer mounted in the water. If the transducer is equipped with a speed paddle wheel and temperature-sensing thermistor, the DSM calculates speed and temperature. - Page 154 Select Transducer 600W detected: When selecting a transducer, the DSM reports to the C-Series P65/66 whether it sees a 600W or 1kW transducer. The C-Series then allows you to select an appropriate transducer from the 600W or P319/B117/SS555 1kW list.
-
Page 155: Dsm Setup
Chapter 7: Using the Fishfinder 7-23 DSM Setup Certain conditions, such as a hard bottom or other vessels equipped with a Fishfinder, may affect the DSM. The Fishfinder Setup Menu provides the following set up options for your DSM: MENU ITEM OPTIONS (Default in bold) DSM Reset... -
Page 156: Controlling The Image
7-24 C-Series Display Reference Manual Controlling the image Once you have set up the transducer as described above, the DSM will locate the bottom and display a scrolling fishfinder image. The Fishfinder Display Setup Menu provides controls to change this image as follows:... -
Page 157: What Other Settings Affect The Fishfinder Image
Chapter 7: Using the Fishfinder 7-25 7.9 What other settings affect the fishfinder image? The system automatically adjusts the following settings in order to optimise the fishfinder image: • Operatiang frequency. • Gain modes (Gain, Color Gain, TVG) • Power setting. They should not ordinarily require adjustment. -
Page 158: What Gain Modes Are Available
AUTO The Fishfinder automatically adjusts the gain controls, based on depth and water conditions, and displays the sharpest possible image. Raymarine recommends that you retain this AUTO setting to achieve the the best results. In addition to the controls described in this section, the Fishfinder Setup options... -
Page 159: How Do I Adjust The Power Setting
Chapter 7: Using the Fishfinder 7-27 How do I manually adjust the gain modes? If necessary you can set the gain controls manually. The new values remain set even when you switch off the display and are applied to both the active window and any other fishfinder windows displaying that frequency. - Page 160 7-28 C-Series Display Reference Manual...
-
Page 161: Chapter 8: Maintenance & Troubleshooting
Chapter 8: Maintenance & Troubleshooting 8.1 Introduction This chapter provides information on maintaining and troubleshooting your Raymarine C-Series Display, and also information on how to get assistance from Raymarine. 8.2 What maintenance can I do? At regular intervals, carry out the following servicing procedures: •... -
Page 162: How Do I Clean The Display
A suitable micro-fibre cloth is supplied with your display and spray can be purchased from your local optician. 8.3 When do I reset a Display? You can reset the C-Series Display in one of three ways: • Factory reset. • Power-on reset. -
Page 163: How Can I Troubleshoot My Display
8.4 How can I troubleshoot my Display? All Raymarine products are, prior to packing and shipping, subjected to comprehensive test and quality assurance programs. However, if your C-Series Display unit should develop a fault, this section will help you to identify the most likely cause and show the corrective action required to restore normal operation. -
Page 164: What Are The Common Problems And How Do I Solve Them
Please visit the Customer Support area of our website at: www.raymarine.com As well as providing a comprehensive Frequently Asked Questions section and servicing information, the website also gives e-mail access to the Raymarine Technical Support Department and a details of the locations of Raymarine agents, worldwide. -
Page 165: How Can I Contact Raymarine In The Us
Chapter 8: Maintenance & Troubleshooting How can I contact Raymarine in the US? You can contact Raymarine in the US either using the Raymarine world wide web as detailed above or by calling one of the telephone numbers below. Who do I contact for accessories and parts? You can obtain many Raymarine accessories and parts directly from your authorized Raymarine dealer. -
Page 166: How Can I Contact Raymarine In Europe
If you wish to enquire about the repair status of your unit, contact the Repair Center at: 1-800-539-5539 How can I contact Raymarine in Europe? You can obtain Technical Support, service and accessories from your authorized Raymarine dealer, or by contacting:... -
Page 167: Appendix A: Specification
Appendix A: Specification Appendix A: Specification C70, C80 and C120 LCD Color Displays General Approvals CE - conforms to 1999/5/EC, EN6095:1997 FCC - conforms to Part 80 (47CFR) and Part 2 (47CFR) Size 253 x 175 x 110 mm (9.9 x 6.9 x 4.3 in.) excluding bracket 283 x 210 x 110 mm (11.1 x 8.2 x 4.3 in.) excluding bracket C120 356 x 264 x 114 mm (14.0 x 10.4 x 4.5 in.) excluding bracket... -
Page 168: General
C-Series Displays Installation Manual General Connectors 13 pin Radar scanner 4 pin DSM 3 pin SeaTalk 5 pin NMEA 5 pin SeaTalk / NMEA2000 3 pin Power Interfaces Pathfinder Radar scanner 1 x DSM receive 1 x SeaTalk, receive and transmit... -
Page 169: Chartplotter Features
Appendix A: Specification Radar Features Scanner Control Interference rejection, standby/transmit modes, pulse selection, Tune, Rain, FTC and Sea controls, with selection of manual or automatic control of gain, sea clutter and tune (Auto GST Magnetic Sensor NMEA (required for fast heading data, suitable for MARPA), or SeaTalk Waypoint Display Target waypoint displayed with User control of symbols and groups... -
Page 170: Fishfinder
C-Series Displays Installation Manual Chartplotter Features Navigation information Own boats position in lat/lon, XTE, TTG and SOG/COG selectable. Bearing and distance to waypoint. Bearing and distance to cursor and ETA. Variation Source Auto (SeaTalk/NMEA/Internal algorithm) or Manual Fishfinder Transducer Transom-mount, in-hull or thru-hull... -
Page 171: Appendix B: List Of Abbreviations
Appendix B: List of Abbreviations °C Degrees Centigrade °F Degrees Farenheit Amperes Auto Automatic CCFL Cold Cathode Fluorescent Lamp Course Deviation Indicator Course Over Ground Closest Point of Approach Direct Current Digital Selective Calling Digital Sounder Module Electronic Bearing Line Electromagnetic Compatibility Fast Time Constant Global Positioning System... - Page 172 C-Series Display Reference Manual Long Longitude Manual MARPA Mini Automatic Radar Plotting Aid Miles per hour Nautical Mile NMEA National Marine Electronics Association Route seconds Ships Heading Marker Statute Miles Speed Over Ground TCPA Time to Closest Point of Approach...
- Page 173 Index-1 Index change the course of a route 4-23 change the name of a route 4-26 Abbreviations B-1 follow route Acquiring MARPA targets 5-26 in reverse order 4-16 Alarms using Quick Route 4-15 set up menu 5-28 using the cursor 4-15 A-Scope 7-5 using the route list 4-15 safety 4-1...
- Page 174 Index-2 C-Series Display Reference Manual change the color of a route 4-26 change the course of a route 4-23 Local information 4-5 4-35 4-36 change the name of a route 4-26 Edit tracks 4-21 Managing waypoint list 3-9 change the color of a track 4-26...
- Page 175 Index Index-3 indirect echoes 5-3 Simulator mode 1-3 Interference 5-5 Software numbers multiple echoes 5-4 ST290 system 8-4 Rain clutter 5-5 Status bar sea clutter 5-4 radar 5-8 side lobes 5-3 Stop tracking 4-20 getting the best picture System overview 1-1 FTC 5-12 CDI 1-7 interference rejection 5-14...
- Page 176 Index-4 C-Series Display Reference Manual move waypoint between groups 3-11 rename group 3-12 manage waypoint list 3-9 navigation to using the waypoint list 3-5 navigation to waypoint using the cursor 3-5 on Fishfinder display 7-16 overview 3-1 placing at a known position 3-4...
- Page 177 1. Limited Product Warranty Raymarine warrants that all of its product, in the course of normal use, will be free from defects in material and workmanship for a period of 2 years (24 months) from date of sale to the original end user, subject to the limitations set forth in this warranty.
- Page 178 Subject to the limitations and other provisions set forth in this warranty, the product will be either repaired or replaced by Raymarine within a reasonable period of time and at no further cost to the customer. the determination of whether to repair or replace a product shall be at the sole discretion of Raymarine, and shall be the sole remedy of the customer under this warranty.
- Page 179 The Raymarine warranty terms and conditions as described herein do not affect the customers statutory rights and comply with EU Directive 1999/44/EC. Raymarine is the sole author of this policy and makes no further warranties, express or implied unless a separate, specific warranty has been written and provided to the customer. This warranty supersedes and replaces all previous warranties.
- Page 180 Limited Warranty Certificate Factory Service Centers United States of America UK, Europe, Middle East, Far East Raymarine Inc Raymarine Ltd 22 Cotton Road, Unit D, Anchorage Park, Portsmouth Nashua, NH03063-4219, USA PO3 5TD, England Telephone: +1 603 881 5200 Telephone: +44 (0) 23 9269 3611...