Sony DSX-GS80 Operating Instructions Manual
Fm/am bluetooth car audio
Hide thumbs
Also See for DSX-GS80:
- Operating instructions manual (109 pages) ,
- Service manual (67 pages) ,
- Operating instructions manual (41 pages)
Table of Contents
Advertisement
Available languages
Available languages
FM/AM
Bluetooth® Car Audio
To cancel the demonstration (DEMO) display, see
page 7.
To switch the FM/AM tuning step, see page 6.
For the connection/installation, see page 12.
Para cancelar la pantalla de demostración (DEMO),
consulte la página 8.
Para cambiar el paso de sintonización de FM/AM,
consulte la página 7.
Para la conexión/instalación, consulte la página 13.
DSX-GS80
5-006-640-52(1)
Operating Instructions
Manual de instrucciones
GB
ES
Advertisement
Table of Contents

Related Manuals for Sony DSX-GS80


Summary of Contents for Sony DSX-GS80
- Page 1 To switch the FM/AM tuning step, see page 6. For the connection/installation, see page 12. Para cancelar la pantalla de demostración (DEMO), consulte la página 8. Para cambiar el paso de sintonización de FM/AM, consulte la página 7. Para la conexión/instalación, consulte la página 13. DSX-GS80...
- Page 2 OFF until the display disappears each time you turn the ignition off. Disclaimer regarding services offered by third parties Services offered by third parties may be changed, suspended, or terminated without prior notice. Sony does not bear any responsibility in these sorts of situations.
-
Page 3: Important Notice
Microwaves emitting from a BLUETOOTH device may affect the operation of Caution electronic medical devices. Turn off this IN NO EVENT SHALL SONY BE LIABLE FOR unit and other BLUETOOTH devices in the ANY INCIDENTAL, INDIRECT OR following locations, as it may cause an CONSEQUENTIAL DAMAGES OR OTHER accident. -
Page 4: Main Unit
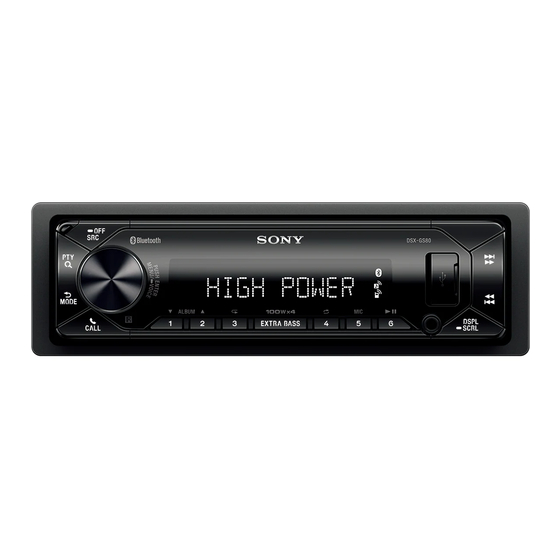
Guide to Parts and Controls Main Unit and Remote Commander Main unit Front panel removed (inner panel) If the unit is turned off and the display disappears, operation by the remote commander is not available. Control dial Adjusts the volume. PUSH ENTER Enters the selected item. -
Page 5: Rm-X231 Remote Commander
Enters the selected item. with the volume level. Press and hold for more than 2 seconds Press to change the EXTRA BASS setting: to establish or terminate the “Sony | [1], [2], [OFF]. Music Center” function. AUX input jack /... -
Page 6: Detaching The Front Panel
Switching the FM/AM Basic Operations Tuning Step Set the FM/AM tuning step of your country. Detaching the Front Panel This setting appears only while the source You can detach the front panel of this unit to is off and the clock is displayed. prevent theft. -
Page 7: Updating The Firmware
Canceling the Initializing the Unit Demonstration Mode Initializing the unit will erase the clock settings and all your settings stored in the You can cancel the demonstration display backup memory. which appears when the source is off and [INITIALIZE] appears only while the source the clock is displayed. -
Page 8: Additional Information
• You can connect to the following iPod If you have any questions or problems models. Update your iPod devices to the concerning your unit that are not covered in latest software before use. this manual, consult your nearest Sony dealer. Compatible iPhone/iPod models Compatible Bluetooth®... -
Page 9: Maintenance
Maintenance Specifications Replacing the lithium battery (CR2025) Radio section of the remote commander When the battery becomes weak, the range Tuning range: of the remote commander becomes shorter. 87.5 MHz – 108.0 MHz (at 50 kHz step) CAUTION 87.5 MHz – 108.0 MHz (at 100 kHz step) 87.5 MHz –... -
Page 10: Wireless Communication
General AAC (.m4a, .mp4) Bit rate: 8 kbps – 320 kbps Power requirements: 12 V DC car battery Sampling rate: 11.025 kHz – 48 kHz (negative ground (earth)) WAV (.wav) Rated current consumption: 10 A Bit depth: 16 bit Dimensions: Sampling rate: 44.1 kHz, 48 kHz Approx. - Page 11 Redistribution and use in source and binary Bluetooth SIG, Inc. and any use of such forms, with or without modification, are marks by Sony Corporation is under license. permitted provided that the following Other trademarks and trade names are conditions are met: those of their respective owners.
-
Page 12: Parts List For Installation
Parts List for Installation Connection/Installation Mounting sleeve (1) Release keys (2) Cautions • Run all ground (earth) leads to a common ground (earth) point. • Do not get the leads trapped under a screw, or caught in moving parts (e.g., seat ... - Page 13 Connection Subwoofer* Power amplifier* * Smartphone* , iPod/ iPhone* , USB device White White/black striped Front speaker* Gray Gray/black striped Green Green/black striped Rear speaker* Purple Purple/black striped Blue/white striped Orange/white striped Black Yellow For details, see “Making connections” (page 14). When connecting to the battery directly* Black Yellow...
-
Page 14: Making Connections
10 A, make the power *10 Use speakers with 50W RMS or higher power connection to the battery directly to avoid input capacity. Using Sony XB series full range short circuits. speakers is recommended. *11 When the amperage rating of the fuse used on ... -
Page 15: Connecting The Speakers
Memory hold connection Notes • When using a subwoofer with dual voice coil, or When the yellow power supply lead is using subwoofer(s) by connecting to the right and connected, power will always be supplied to left rear speaker leads, be sure to set [SPEAKER LOAD] in [GENERAL] to [2 OHM]. -
Page 16: Using The Wired Remote Control
Using the wired remote control Mounting the unit in the dashboard To enable the wired remote control, set [STRG CONTROL] in [STEERING] to • Before installing, make sure the catches on [PRESET]. both sides of the mounting sleeve are bent inwards 2 mm ( in). -
Page 17: Detaching And Attaching The Front Panel
Detaching and attaching the front You may not be able to install this unit in panel some makes of Japanese cars. In such a case, consult your Sony dealer. For details, see “Detaching the Front Panel” (page 6). TOYOTA ... - Page 18 EEE servicios prestados por otros (Espacio económico europeo) y Suiza. proveedores Los servicios prestados por otros proveedores están sujetos a cambios, anulaciones o interrupciones sin previo aviso. Sony no asume responsabilidad alguna en estas situaciones.
-
Page 19: Aviso Importante
Aviso importante BLUETOOTH • Las microondas que emite un dispositivo Precaución BLUETOOTH pueden afectar el EN NINGÚN CASO SONY PODRÁ SER funcionamiento de dispositivos médicos CONSIDERADO RESPONSABLE POR electrónicos. Apague tanto esta unidad CUALQUIER DAÑO CASUAL, INDIRECTO O como otros dispositivos BLUETOOTH en los CONSECUENTE, NI POR OTROS DAÑOS... -
Page 20: Unidad Principal Y Control Remoto
Guía para las partes y los controles Unidad principal y control remoto Unidad principal Panel frontal retirado (panel interno) Manténgalo presionado durante más de 2 segundos para apagar la unidad y la pantalla. Si se apaga la unidad y la pantalla desaparece, la operación mediante el control remoto no se encuentra disponible. - Page 21 DSPL (pantalla) (SEEK –/+) Cambia los elementos en pantalla. Sintoniza emisoras de radio en forma automática. Mantenga presionado para SCRL (desplazamiento) sintonizarlas en forma manual. Manténgalo apretado para desplazarse a / (anterior/siguiente) un elemento de la pantalla. / (retroceso rápido/avance ...
-
Page 22: Control Remoto Rm-X231
/// Selecciona un elemento de configuración, etc. ENTER Ingresa el elemento seleccionado. Mantenga presionado durante más de 2 segundos para establecer o terminar la función “Sony | Music Center”. / (anterior/siguiente) +/– (álbum +/–) VOL (volumen) +/–... -
Page 23: Extracción Del Panel Frontal
Cambio del paso de Operaciones básicas sintonización FM/AM Ajuste el paso de sintonización FM/AM de Extracción del panel frontal su país. Este ajuste aparece disponible Es posible extraer el panel frontal de la solamente mientras la fuente esté apagada y se muestre el reloj. unidad para evitar que la roben. -
Page 24: Actualizar El Firmware
Seleccione el nombre de su modelo Inicio de la unidad que se muestra en la pantalla del dispositivo BLUETOOTH*. Al inicializar la unidad, se borrarán los Cuando se realiza el emparejamiento, ajustes y toda su configuración guardada en permanece encendido. la memoria de la copia de seguridad. -
Page 25: Acerca Del Ipod
Si desea realizar alguna consulta o utilizarlo. solucionar algún problema relativo a la Modelos de iPhone e iPod compatibles unidad que no se trate en este manual, póngase en contacto con el distribuidor Modelo Sony más cercano. Bluetooth® compatible iPhone XR ... -
Page 26: Mantenimiento
Mantenimiento Especificaciones Sustitución de la pila de litio (CR2025) Sección de radio del control remoto El alcance del control remoto disminuye a Rango de sintonización: medida que se agota la pila. 87,5 MHz – 108,0 MHz (en incrementos de PRECAUCIÓN 50 kHz) 87,5 MHz –... - Page 27 Generales AAC (.m4a, .mp4) Velocidad de transferencia: 8 kbps – Requisitos de alimentación: batería de 320 kbps automóvil de cc 12 V (masa negativa) Velocidad de muestreo: 11,025 kHz – Tasa de consumo actual: 10 A 48 kHz Dimensiones: WAV (.wav) Aprox.
-
Page 28: Derechos De Autor
Bluetooth® son marcas comerciales sin la autorización previa por escrito. registradas y son propiedad de Bluetooth SIG, Inc., y Sony Corporation posee licencia ESTE SOFTWARE ES PROVISTO POR LOS para utilizar cualquiera de dichas marcas. DUEÑOS Y CONTRIBUIDORES DEL Otras marcas registradas y nombres COPYRIGHT “COMO ES”... -
Page 29: Instalación
Lista de piezas para la Conexión/Instalación instalación Casquillo de montaje (1) Llaves de liberación (2) Advertencias • Conecte todos los cables hacia un punto a tierra en común. • No deje que los cables queden atrapados debajo de un tornillo o que se enganchen en piezas móviles (por ejemplo, sillas de ... - Page 30 Conexión Altavoz potenciador de graves* Amplificador de potencia* * Teléfono inteligente* iPod/iPhone* dispositivo USB Blanco Blanco/negro a rayas Altavoz frontal* Gris Gris/negro a rayas Verde Altavoz Verde/negro a rayas posterior* Púrpura Púrpura/negro a rayas Rojo Azul/blanco a rayas Anaranjado/blanco a rayas Negro Amarillo Para obtener más...
-
Page 31: Hacer Conexiones
Si el grado de amperaje del fusible utilizado completa de la serie Sony XB. de su coche es 10 A, realice la conexión de *11 Si el grado de amperaje del fusible utilizado de alimentación directamente en la batería... - Page 32 • Durante el funcionamiento a máxima potencia, el Nota sistema lo recorrerá una corriente de más de 15 A Utilice un altavoz potenciador de graves con una Por tanto, asegúrese de que los cables que se impedancia de 2 Ω (o de 4 Ω a 8 Ω) que cuente con conectarán a los terminales + cc 12 V y GND de las capacidades adecuadas para el manejo de la esta unidad tienen, al menos, un calibre de 14...
-
Page 33: Instalación Del Micrófono
Instalación del micrófono Instalación Debe instalar el micrófono para capturar su voz durante las llamadas con manos libres Extracción del anillo . embellecedor y el casquillo de montaje Antes de instalar la unidad, quite el anillo embellecedor y el casquillo de montaje ... - Page 34 estén doblados En dicho caso, consulte con su distribuidor hacia adentro 2 mm Sony. • Para automóviles japoneses, consulte “Montar la unidad en un automóvil TOYOTA japonés” (página 18).
- Page 35 Si el fusible se quema, verifique la conexión eléctrica y reemplace el fusible. Si el fusible se quema nuevamente después de reemplazarlo, puede haber un mal funcionamiento interno. En dicho caso, consulte con su distribuidor Sony más cercano.
-
Page 36: Glosario De Términos
Glosario de términos A2DP: Perfil de distribución de audio avanzado AAC: Codificación de audio avanzada ACC: Control de crucero adaptativo ALBUM: Álbum AM: Modulación de amplitud AMP REMOTE IN: Entrada para amplificador opcional AOA: Accesorio de protocolo abierto de Android AUTO OFF: Apagado automático AUX: Auxiliar AVRCP: Perfil de control remoto de audio y... -
Page 40: Support Site
Para obtener más información, visite el siguiente sitio and refer to your unit name as shown below. web y busque el nombre de su unidad tal y como se indica a continuación. DSX-GS80(E) https://rd1.sony.net/help/ev/dsx-gs80/h_zz/ ©2019 Sony Corporation Printed in Thailand https://www.sony.net/...