
Summary of Contents for Agilent Technologies SureScan G4900DA
- Page 1 Agilent G4900DA SureScan Microarray Scanner System Microarray Scan Control Software 9.1 User Guide For Research Use Only. Not for use in diagnostic procedures. Revision B0, September 2019...
- Page 2 Notices Warranty Safety Notices © Agilent Technologies, Inc. 2011-2013, 2015, 2019 The material contained in this document is No part of this manual may be reproduced in any provided “as is,” and is subject to being changed, CAUTIO N form or by any means (including electronic without notice, in future editions.
- Page 3 In This Guide… This user guide contains instructions to get started with, use, troubleshoot, and maintain your SureScan Microarray Scanner System. The system is comprised of the SureScan microarray scanner, computer workstation, and control and analysis programs. Introduction This chapter describes the microarray scanner and preparation for its operation. Getting Started In this chapter, learn how to operate the SureScan scanner safely and learn how to set up and then scan slides with the Agilent Microarray Scan Control program.
-
Page 4: Table Of Contents
Content Contents Introduction A Powerful Tool for Microarray Analysis System Description Hardware and software features 10 Parts list 10 Computer system requirements 11 Scanner physical description 11 Site preparation 12 Safety guidelines 12 Principles of Operation Slide positioning 14 Laser excitation 14 Scanning 14 Fluorescence detection 14 Programs Installed on the Computer Workstation... - Page 5 To apply a selection to multiple slides 30 To add a slide to the scan queue 30 To add all slides to the queue 30 To move a slide in the queue 31 To remove a slide from the scan queue 31 To remove all slides from the scan queue 31 To open the scanner door 31 To close the scanner door...
- Page 6 To set the laser saver delay 46 To set the location of the Feature Extraction program 46 To select to run Feature Extraction after scanning 47 Mapping Scan Protocols to Designs To map a scan protocol to a slide design 48 Maintaining and Troubleshooting Your System Maintaining Your System Scheduled software maintenance 50...
- Page 7 Self Test dialog box 83 Settings dialog box – General Settings 84 Settings dialog box – Design To Protocol Mapping 85 About Adding Slides Performing Feature Extraction on Scanned Images SureScan Scanner Specifications Slide Specifications Scan dimensions 91 Glass specifications 91 Barcode and barcode label specifications 91 Regulatory Information SureScan System User Guide...
-
Page 8: Introduction
SureScan Microarray Scanner System User Guide Introduction A Powerful Tool for Microarray Analysis System Description Principles of Operation Programs Installed on the Computer Workstation This chapter provides a general introduction to the SureScan Microarray Scanner System. -
Page 9: A Powerful Tool For Microarray Analysis
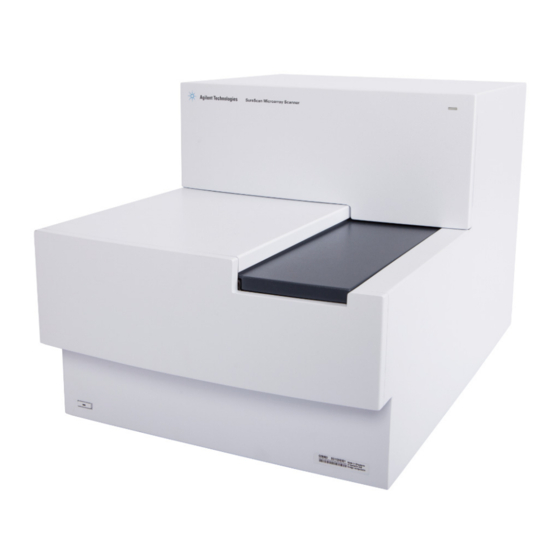
A Powerful Tool for Microarray Analysis The SureScan scanner is part of the SureScan system solution from Agilent Technologies. The scanner is a sophisticated laser-induced fluorescence scanner designed to read microarrays printed on standard 1 in 3 in slides. -
Page 10: System Description
System Description In this section you find listings of hardware and software features, parts, and computer requirements. A physical description of the SureScan scanner and information on site preparation and safety are also provided. Hardware and software features The SureScan scanner provides the following features: •... -
Page 11: Computer System Requirements
Computer system requirements The SureScan Microarray Scanner System comes with a computer that meets or exceeds the following configuration. Agilent Technologies supports only the computer provided with the system. Software • Windows 7 64-bit Professional or Windows 10 64-bit Pro operating system Hardware •... -
Page 12: Site Preparation
Scanner rear view Laser cooling Main cooling air inlet air outlet Laser cooling air outlet Main cooling air inlet Power supply LAN connector air outlet Power fuse Power plug Figure 3 SureScan scanner, rear view Site preparation Make sure that the environment meets the “SureScan Scanner Specifications”... - Page 13 The SureScan scanner is sensitive to condensing humidity conditions. Follow precautions CAU T I ON “Tips to prevent problems” on page 51 stated in product documentation. See page 89 Chapter 5 and the relative humidity specifications on of Chapter 6. SureScan System User Guide...
-
Page 14: Principles Of Operation
Principles of Operation This section describes the operating features of the SureScan scanner. Slide positioning The SureScan scanner holds up to 24 1 in 3 in slides in a nonremovable cassette. During scanning, the slides are sequentially transported into scanning position, scanned, and then returned to the cassette. -
Page 15: Programs Installed On The Computer Workstation
Programs Installed on the Computer Workstation The computer that is included with your SureScan Microarray Scanner System has the following software programs preinstalled. Agilent Microarray Scan Control program – used to set up and operate the scanner. Agilent Feature Extraction program – automatically performs feature extraction using scanned image files created by the scanner. -
Page 16: Getting Started
SureScan Microarray Scanner System User Guide Getting Started Operating the Scanner Step 1. Turn on the SureScan scanner and start the Scan Control program Step 2. Insert slides into slide holders Step 3. Load the slide holders into the cassette Step 4. -
Page 17: Operating The Scanner
Operating the Scanner The following steps explain how to operate the scanner. For more information on how to use the Scan Control program, see Chapter 3, “Using the Scan Control Program,”. Step 1. Turn on the SureScan scanner and start the Scan Control program To learn how to set up the lasers to turn off automatically when not in use, see NOT E... - Page 18 For more information on the Scan Control program window, see “Scan Control Program Window Reference” on page 66. Figure 5 Agilent Microarray Scan Control program window – ready to add slides The status of the scanner is indicated at the lower right corner of the Scan Control window, in the status bar.
-
Page 19: Step 2. Insert Slides Into Slide Holders
You cannot start scanning until both lasers are warmed up, at least one slide is NOT E in the queue, and the scanner status is Ready. Step 2. Insert slides into slide holders Fingerprints cause errors in the fluorescence detection. For accurate readings, NOT E touch only the edges of the slide and always use gloves when handling slides. - Page 20 c Carefully place the end of the slide without the barcode label onto the slide ledge. See Figure d Gently lower the slide into the slide holder. See Figure e Close the plastic slide cover, pushing on the tab end until you hear it “click”. This moves the slide into position in the holder.
-
Page 21: Step 3. Load The Slide Holders Into The Cassette
Figure 10 Slide orientation Step 3. Load the slide holders into the cassette When the slides are properly inserted in the slide holders, you can load the slide holders into the cassette. The cassette and slide holders are designed to ensure that the slide holders are inserted correctly. - Page 22 1 In the Scan Control program window, click Open Door to open the scanner door. The correct way to open the scanner door is using the Open Door button in the CAU T I ON Scan Control program. Do not attempt to open the door manually. 2 Pick up the slide holder using the finger hold.
-
Page 23: Step 4. Set Or Change Protocol Scan Settings
• For slides that have a scan protocol mapped to their design, the scan protocol is assigned in the Slot Table, and the slot State changes to Ready for queue. For slides that do not have a scan protocol mapped to their design, the scan protocol remains empty and the slot State remains “Present”. -
Page 24: Step 6. Scan Your Slides
• Click the State cell and select Add to queue last to add the slide to the bottom of the scan queue. As each slide is added to the queue, its State indicates that it is in the queue and the order in which the slide is scanned. -
Page 25: About Scan Protocols
About Scan Protocols A scan protocol is a collection of scan and image settings that, when selected, is applied to the slide as it is scanned. Agilent supplies eight preloaded protocols for your selection and use with Agilent high density (HD) microarrays, Agilent G3 microarrays, and non-Agilent microarrays. -
Page 26: Offline Mode
Offline Mode If no instrument is available, the Scan Control program runs in “offline mode”. In this mode, you can create, import, and export scan protocols and scan regions. You can also open log files, display recent errors, set general settings, and map scan protocols to design IDs. SureScan System User Guide... -
Page 27: Turning Off The Surescan Scanner
Turning Off the SureScan Scanner 1 In the Scan Control program window, make sure that the scanner is not scanning, ejecting, or loading a slide. 2 Click Open Door to open the scanner door. 3 Remove the slide holders from the scanner cassette. 4 Remove the slides from the slide holders. -
Page 28: Using The Scan Control Program
SureScan Microarray Scanner System User Guide Using the Scan Control Program Using the Slot Table To change a Slide ID To set or change the scan protocol To change the output folder for a scan To apply a selection to multiple slides To add a slide to the scan queue To add all slides to the queue To move a slide in the queue... -
Page 29: Using The Slot Table
Using the Slot Table The slot table provides a display of the cassette and its contents. Once you load slides into the cassette and close the door, the Scan Control software reads the barcode for each slide and shows it as the Slide ID in the slot table. The numbers to the left of the table correspond to the slots in the scanner cassette. -
Page 30: To Change The Output Folder For A Scan
To change the output folder for a scan The output folder is where the scanned image files for a slide are saved. By default, the output folder is D:\ScanData. 1 In the slot table, click the Output Folder cell for a slide. 2 Click the browse icon. -
Page 31: To Move A Slide In The Queue
All slides in the slot table with a State of Ready for queue are added to the queue, in the order they appear in the slot table. To move a slide in the queue 1 In the slot table, click the State cell for the slide you want to move. 2 Click again to show selections for the slide. -
Page 32: To Close The Scanner Door
To close the scanner door • In the Scan Control main window, click Close Door. You must close the door before you can start a scan. After the scan begins, you NOT E can open the door and add or remove slides. You must use the Scan Control program to close the scanner door. -
Page 33: Changing Slide Scan Settings
Changing Slide Scan Settings When you select a slide in the slot table of the Scan Control main window, the scan settings for that slide are shown in the Settings Pane on the right side of the window. See “Scan Control Program Window Reference”... -
Page 34: To Add A Description For The Slide
4 When you are finished changing the settings, add the slides to the queue. See “To add a slide to the scan queue” on page 30 or “To add all slides to the queue” on page 30. To add a description for the slide You can only change the slide scan description for a slide when it is not in the NOT E scan queue. -
Page 35: Using Scan Control Tools
SureScan Microarray Scanner System User Guide Using Scan Control Tools Creating and Changing Scan Protocols Creating and Changing Scan Regions Adding a Barcode Turning on Lasers Manually Troubleshooting Tools Setting up Scanner Defaults Mapping Scan Protocols to Designs The Tools menu in the Scan Control program provides general settings and functions that help with troubleshooting. -
Page 36: Creating And Changing Scan Protocols
Creating and Changing Scan Protocols The Scan Control program comes with a default set of protocols that are designed to work with typical Agilent microarray slide designs. See “About Scan Protocols” on page 25. To create a scan protocol You can create a protocol from any existing protocol by saving the existing protocol with a new name. -
Page 37: To Export A Scan Protocol
To export a scan protocol You can export one or more protocols to a file on your hard disk, as a backup, or to import on another SureScan Microarray Scanner System. 1 Click Tools > Scan Protocol Editor. The Scan Protocol Editor dialog box opens. 2 Click Export. -
Page 38: To Remove A Scan Protocol
To remove a scan protocol You cannot remove any of the default protocols or any protocols that are NOT E currently assigned to a slide in the slot table. 1 Click Tools > Scan Protocol Editor. The Scan Protocol Editor dialog box opens. 2 In the Scan Protocol list, select a protocol to remove. -
Page 39: Creating And Changing Scan Regions
Creating and Changing Scan Regions The scan region determines the area of the slide that is scanned. The larger the region, the longer the scan time. If you use non-Agilent slides, you can create your own scan region or change a scan region, up to the maximum scan region of 71 mm x 21.6 mm. -
Page 40: To Export A Scan Region
4 Click Save to save the changes for the selected scan region. To export a scan region 1 In the Scan Control program menu bar, click Tools > Scan Region Editor. The Scan Region Editor opens. 2 Click Export. The Export Scan Region dialog box opens. 3 Click to select the scan region you want to export. -
Page 41: To Remove A Scan Region
To remove a scan region You cannot remove any of the default scan regions or any scan region that is NOT E currently used in a protocol. 1 Click Tools > Scan Region Editor. The Scan Region Editor dialog box opens. 2 In the Scan Region list, select a scan region to remove. -
Page 42: Adding A Barcode
Adding a Barcode Barcodes are the means by which microarray slides are identified, both physically and within the Scan Control program. In addition, the barcode is saved in the metadata of the TIFF image, and is displayed in Feature Extraction reports. By default, the scanner reads the barcode of a slide and displays it as the Slide NOT E ID in the Scan Control program Scan Table. -
Page 43: Turning On Lasers Manually
Turning on Lasers Manually The lasers are turned on automatically when you start the Scan Control program, or when you add slides to the queue. They turn off automatically, based on the Laser Saver Delay settings. See “To set the laser saver delay” on page 46. -
Page 44: Troubleshooting Tools
Troubleshooting Tools To help with troubleshooting, you can display recent errors, or open log files that were generated for the scanner. You can also create a file that contains a “snapshot” of the current state of the instrument. The troubleshooting tools described in this section are typically used when you NOT E are working with an Agilent technical support specialist. -
Page 45: To Run A Self Test
The PMT calibration warning is set when the PMT gain changes by more than 20% from the previous calibration value. The laser calibration warnings are set when the lasers cannot achieve their specified power within the warm-up period. If this problem occurs, the system sets the warning, and recalibrates the lasers at 80% of their specified power. -
Page 46: Setting Up Scanner Defaults
Setting up Scanner Defaults To set the default scan data folder This location is the default output folder where the image files generated by the scanner are deposited. This file is shown by default as the Output Folder in the slot table. You can change the output folder manually for a scan before it is added to the queue. -
Page 47: To Select To Run Feature Extraction After Scanning
2 Click Browse and browse to the folder where the Feature Extraction program is installed, select FENoWindows.exe, and then click OK. By default, this location is C:\Program Files (x86)\Agilent\MicroArray\FeatureExtraction\ FeNoWindows.exe. 3 Click Save. To select to run Feature Extraction after scanning You can select to run the Feature Extraction program automatically at the end of a scan. -
Page 48: Mapping Scan Protocols To Designs
Mapping Scan Protocols to Designs The first time you scan a microarray of a given design, the Scan Control program assigns, or “maps” the selected protocol to that design. After that, any time the Scan Control program recognizes a slide with the same design, the Scan Control program automatically fills in that protocol for the slide in the slot table. -
Page 49: Maintaining And Troubleshooting Your System
SureScan Microarray Scanner System User Guide Maintaining and Troubleshooting Your System Maintaining Your System Scheduled software maintenance Scheduled hardware maintenance Tips to prevent problems Troubleshooting Your System Technical Support Frequently Asked Questions (FAQs) Hardware Troubleshooting Software Troubleshooting System error messages Updating the Scanner Firmware and Scan Control Program To check if an update is available To update the Scan Control program and firmware... -
Page 50: Maintaining Your System
Maintaining Your System Use proper care and maintenance to keep your SureScan Microarray Scanner System running trouble-free. When in doubt about the use or care of the system, contact your local Agilent sales and support center to answer your questions. Scheduled software maintenance Perform these tasks to help maintain the performance of your computer workstation and operating system:... -
Page 51: Tips To Prevent Problems
Tips to prevent problems Follow these tips to help you maintain the SureScan Microarray Scanner System and its performance. Tips to avoid data loss • Avoid running software programs that cause high CPU workload, that can affect the acquisition of data during scanning. Tips to avoid damage to the scanner •... -
Page 52: Troubleshooting Your System
Troubleshooting Your System The scanner was designed for low maintenance and high ease of use. If you cannot resolve a problem with the system, read this chapter. If the problem still exists, contact your local Agilent sales and support center. Technical Support Technical support is available for the SureScan Microarray Scanner System. -
Page 53: Frequently Asked Questions (Faqs)
Scanner information Model #: Serial #: Installation Date: Software Version#: Software Update Version#/Date: Software Update Version#/Date: Find the version information for scanner software 1 Click Help > About in the menu bar to find version information. 2 To close the program, click OK. Frequently Asked Questions (FAQs) The following are frequently asked questions (FAQs) that can help you operate and maintain the SureScan Microarray Scanner System and troubleshoot issues that occur. -
Page 54: Hardware Troubleshooting
Checking and replacing scanner fuses The scanner has two fuses for the power supply, on the rear of the scanner. The power supply fuses are directly above the power cord plug. The fuses are ordered directly from Agilent Technologies. SureScan System User Guide... -
Page 55: Software Troubleshooting
Always disconnect the power cord before checking or replacing the fuses. WA RNI NG Checking and replacing the power supply fuses If you cannot turn on the scanner, even though the power outlet is active when tested, check, and replace the fuses if needed. 1 Disconnect the power cord. -
Page 56: File Locations
File locations The SureScan Microarray Scanner System uses the following folders: Scan Control program files (installation folder) C:\Program Files (x86)\Agilent\ScanControl Log files C:\ProgramData\Agilent\MicroarrayScanner\Logs Scanned image files (default – otherwise as set in Scan Control Settings) D:\ScanData Scanned image files (in case of failure to find a network storage location) If the Default Scan Data Folder set in Tools >... - Page 57 Where scanner error messages can appear Error messages appear in the following places: • Error messages appear in the Status Log in the Scan Control program main window. If the error can result in compromised data, it also appears in the Scan Log. •...
- Page 58 Table 3 Error messages in popup dialog boxes (continued) Error message Description and suggested action Find recent errors failed: {*} Close the Scan Control program and restart it. If the problem continues, reinstall the Scan Control program. Get 'About' information failed: {*} Close the Scan Control program and restart it.
- Page 59 The following table shows error messages that appear in the Status Log or Scan Log. When an error occurs, to display additional information, click Tools > Show Recent Errors. Table 4 Error message in logs Error message Description and suggested action {*} State Machine unknown error Low-level error.
- Page 60 Table 4 Error message in logs (continued) Error message Description and suggested action Green PMT calibration completed Indicates PMT calibration completed successfully, but some of the values it with warnings calculated are not good. Hardware error detected in Low-level error. Contact Agilent Technical support. subsystem '{*}':Instrument operation halted Hardware warning detected in...
- Page 61 3 If step 2 does not solve the problem, do the following: a Close the Scan Control program. a Restart the computer workstation. b Turn off the scanner, and then back on. c Restart the Scan Control program. 4 If step 3 does not solve the problem, contact your local Agilent sales and support center. SureScan System User Guide...
-
Page 62: Using The Diagnostic Display
Using the Diagnostic Display The scanner diagnostic display is used for advanced troubleshooting tasks. This display is located on the front of the instrument, behind the upper front cover. To open the cover, grasp the finger holds on the sides of the cover, and pull forward. You see the diagnostic display and a 4-way control switch. -
Page 63: Updating The Scanner Firmware And Scan Control Program
To update the Scan Control program and firmware 1 From the Scan Control main window, click Help > Scanner Home Page. The Agilent Technologies Genomics – High Resolution Scanner Overview web page opens. 2 In the web page, click Download Software. -
Page 64: To Verify The Software Installation
The SureScan Microarray Scanner System workstation includes an installation qualification tool (IQT). Use this program after updating your software to verify that the update installed correctly. 1 Click Start > All Programs > Agilent Technologies > Installation Qualification Tool. Figure 16 Agilent Installation Qualification Tool dialog box 2 Mark the check box next to Agilent Microarray Scan Control. -
Page 65: Reference
SureScan Microarray Scanner System User Guide Reference Scan Control Program Window Reference Scan Control Program Dialog Box Reference About Adding Slides Performing Feature Extraction on Scanned Images SureScan Scanner Specifications Slide Specifications Regulatory Information This chapter includes descriptions of the Microarray Scan Control program windows and dialog boxes. -
Page 66: Scan Control Program Window Reference
Scan Control Program Window Reference This section describes the main window of the Microarray Scan Control program and its contents. Scan Control main window Menu bar Settings pane Slot status indicators Slot table Function buttons Logs Image processing Status bar status Figure 17 Agilent Microarray Scan Control main window The Microarray Scan Control window appears when you start the Microarray Scan Control... -
Page 67: Tools Menu
Table 5 Scan Control window features Feature Description Settings pane Display settings for selected slide. For slides not in the queue, you can change settings from here. Slot status indicators Indicates the status of the slot. Matches the slot indicator lights on the cassette. -
Page 68: Help Menu
Description Users Guide* Opens this guide in Adobe Reader. Scanner Home Page Opens the Agilent Technologies website for the SureScan Microarray Scanner System in your internet browser. Online support Opens the Agilent Technologies Technical Support web page, where you can find support information for your scanner. -
Page 69: Slot Table
Slot table Figure 20 Scan Control program slot table The slot table is a virtual representation of the contents of your scanner cassette. It is used to set up, start/stop, and monitor the progress of scans. Slot Status Numbers to the left of the slot table are identical to the slot status indicator lights on the cassette. Indicator The color of the number changes to indicate the status of the slot and scan, as described in Table 8... - Page 70 Table 8 Slot states and indicators (continued) Slot status indicator State Meaning Solid blue In queue x Slide is in the scan queue, in position x, where x indicates the order in which the slides are scanned. Blinks green Scanning (x%) Slide is in the process of scanning, where x% indicates the percent of completion for the scan.
-
Page 71: Function Buttons
Output Folder Displays the folder where image files created by the scanner are saved. By default, this location is D:\ScanData. You can change the default output folder in Tools > Settings. You can change the output folder for a slide before it is added to the queue. The Browse button lets you select a folder to store the data from each scan. -
Page 72: Settings Pane
Settings pane Figure 21 Scan Control – settings pane The settings pane lets you change individual settings for a selected slide. To change settings, the slide must not be in the scan queue. For more information on the settings available in this table, “Scan Protocol Editor dialog box”... -
Page 73: Log Tabs
Log tabs The software documents instrument and scan status in log files that are saved in the C:\ ProgramData\Agilent\MicroArrayScanner\Logs folder. These logs are also displayed in the Log tabs at the bottom of the Scan Control program window. Status Log tab Figure 22 Status Log tab Displays information about the status of the instrument. -
Page 74: Scan Control Program Dialog Box Reference
Figure 24 Installation Qualification Tool dialog box Purpose: Verifies that the Scan Control program was installed correctly and generates an Installation Qualification report. To open: In the Windows Start menu, click All Programs > Agilent Technologies > Installation Qualification Tool. Show OK files When selected, the qualification report includes a list of all files verified as OK. -
Page 75: Export Scan Protocol Dialog Box
Export Scan Protocol dialog box Figure 25 Export Scan Protocol dialog box Purpose: Lets you select available scan protocols to export. To open: In the Scan Protocol Editor dialog box, click Export. Export When one or more scan protocols are selected, this command opens the Save As dialog box, where you select a location and file name for the exported protocols file. -
Page 76: Export Scan Region Dialog Box
Export Scan Region dialog box Figure 26 Export Scan Region dialog box Purpose: Displays available scan regions that you can select to export. To open: In the Scan Regions Editor dialog box, click Export. Export When one or more scan regions are selected, this command opens the Save As dialog box, where you select a location and file name for the exported scan regions file. -
Page 77: Scan Protocol Editor Dialog Box
Barcode The barcode you enter using an external barcode reader or your keyboard. After the barcode is entered and the slide is loaded into slot 1 of the scanner, this button is used to assign the barcode to the slide in slot 1. Close Used to close the dialog box. - Page 78 Locked When a protocol is locked, it cannot be changed. Scan Settings Dye channel Determines whether only red (for example, Cy-5 dye), only green (for example, Cy-3 dye), or both dye channel information is gathered. The selection has no effect on the scan time, but selecting only one dye channel does reduce file size up to a factor of 2.
- Page 79 Table 11 Storage space and scan time (continued) Resolution Storage Space, Storage Space, Scan Time, Mb, 16-bit Mb, 20-bit min. 5-micron single pass 10-micron single pass 2-micron double pass 1300 1600 3-micron double pass 5-micron double pass 2-micron high-sensitivity 1300 1600 3-micron high-sensitivity 5-micron high-sensitivity...
- Page 80 Image Settings Transform Some analysis programs require data from one-color images rotated 90 degrees. If you select Image Flip/Rotate, the image is transformed as shown in Figure Figure 29 Image with Flip/Rotate option set Split When you select Yes, the color file is split into two color files. The split files now have the names of FileName_green and FileName_red, where FileName is the name that was automatically assigned to the file before it was split.
- Page 81 The Scan Control program automatically assigns the Scan Number. The program compares the file name of a new scan with file names in the selected data folder. If Field1_Field2_Field3 is unique, the scan number is set to S01. If a match is found, the scan number is increased until the file name is unique. Example US4510PP02_251485023883_S03.tif •...
-
Page 82: Scan Region Editor Dialog Box
Scan Region Editor dialog box Figure 30 Scan Region Editor dialog box Purpose: Lets you adjust or define the area of the slide that is scanned. To open: In the Scan Control program menu bar, click Tools > Scan Region Editor. General Agilent A protocol provided by Agilent. -
Page 83: Self Test Dialog Box
Height Height of the scan region measured from the end of the Y-axis measurement in the upper left corner. Chip Package A chip package describes the maximum size of the scan region for slides of a designated type. This read-only area displays the default scan region for the selected chip package. There are two types of chip packages;... -
Page 84: Settings Dialog Box - General Settings
Start/Stop Starts or stops the self-test. Show Last If more than one self test was run without closing this dialog box, this command opens your Results internet browser with the results. Close Closes the Self Test dialog box and reinitializes the scanner. Settings dialog box –... -
Page 85: Settings Dialog Box - Design To Protocol Mapping
Feature Extraction Location of The path to the FENoWindows.exe program file. By default, this location is Feature C:\Program Files (x86)\Agilent\MicroArray\FeatureExtraction\FeNoWindows.exe. Extraction Run Feature When selected, slides are feature extracted automatically after they are scanned. To run Feature Extraction Extraction automatically, the design files for all images must already be present in the Feature when scan is Extraction database. - Page 86 Scan Protocol The scan protocol that is assigned to the Design ID. This scan protocol is automatically assigned in the Slot Table whenever the scanner recognizes a slide with the associated Design ID. Description An area where you can type information about the mapped scan protocol. SureScan System User Guide...
-
Page 87: About Adding Slides
About Adding Slides You can add slides to the scanner even when it is scanning. Use the following guidelines when adding slides to the scanner. • You can add slides (in slide holders) to the cassette even when scanning is in process. If a slide is actively loading or unloading, you cannot open the door. -
Page 88: Performing Feature Extraction On Scanned Images
Performing Feature Extraction on Scanned Images The Feature Extraction program is preinstalled on your scanner workstation. NOT E The Agilent CytoGenomics program is not included with the SureScan Microarray Scanner System. There are a number of ways you can do feature extraction on the scanned image files created by your scanner: •... -
Page 89: Surescan Scanner Specifications
SureScan Scanner Specifications The scanner operates within the following specifications: Approximate Height: 42 cm (16.5 in) dimensions Width: 43 cm (17 in) Depth: 67 cm (26 in) Weight 56.8 kg (125 lbs) Power input 100 – 240 Vac, 50 - 60 Hz, 250-VA max. Fuses Two power supply fuses: T4A, 250 VAC (part# 2110-1491) Temperature... - Page 90 Scan time Table 13 Scan Time for Single and Double Pass Scans for Agilent HD Scan Region 61 x 21.6 Resolution Scan Time, min. 2-micron single pass 3-micron single pass 5-micron single pass 10-micron single pass 2-micron double pass 3-micron double pass 5-micron double pass 2-micron high-sensitivity 3-micron high-sensitivity...
-
Page 91: Slide Specifications
Slide Specifications Scan dimensions The scan region for a standard Agilent microarray is specified in Figure 34. All dimensions are in millimeters and the reference point is the lower right side of the glass. Figure 34 Default scan region for G4900DA scanner Glass specifications The scanner uses slide holders to move the microarrays in and out of the cassette. - Page 92 Figure 35 Agilent slide barcode orientation vs. microarray surface Barcode specifications for non-Agilent slides • The barcode label maximum thickness is 0.2 mm. Make sure that there are no bubbles in the label. Do not add labels on top of old labels or replace labels that are beginning to peel off. •...
- Page 93 • Code 128: Non-Agilent barcodes with 12 digits must not start with 2 • CODABAR: Maximum of eight digits; minimum line thickness = 6 mils • Code 39: Maximum of eight digits; minimum line thickness = 6 mils • Code 93: Maximum of eight digits; minimum line thickness = 6 mils •...
-
Page 94: Regulatory Information
This device is designed to accommodate recycling at the end of its useful life. Please dispose of this device in accordance with local regulations. Contact Agilent Technologies for more information on recycling and disposal. Electromagnetic interference The scanner is intended for use with shielded cables only. - Page 95 CAN/CSA-. C22.2 Safety Requirements for Electrical Equipment for Measurement, No. 61010-1 - 04 Control, and Laboratory Use, Part 1: General Requirements UL Std No. 61010-1 (2nd Safety Requirements for Electrical Equipment for Measurement, Edition) Control, and Laboratory Use: Part 1: General Requirements IEC 61010-1:2001 Safety Requirements for Electrical Equipment for Measurement, Control, and Laboratory Use,...
- Page 96 No part of this manual may be reproduced in any form or by any means (including electronic storage and retrieval or translation into a foreign language) without prior agreement and written consent from Agilent Technologies, Inc. as governed by United States and international copyright laws. Revision B0, September 2019...