Table of Contents
Advertisement
Available languages
Available languages
Quick Links
Advertisement
Chapters
Table of Contents

Related Manuals for Clarion PX-4226A-A


Summary of Contents for Clarion PX-4226A-A
- Page 1 Display Audio System PETUNJUK PENGGUNAAN...
-
Page 2: Table Of Contents
Contents 1. TINDAKAN PENCEGAHAN ................. 4 Menyambungkan perangkat memori USB/MTP ........14 2. PERINGATAN SAAT PENANGANAN ............4 Menonton/Mendengarkan trek dengan perangkat memori USB ..14 3. PANEL OPERASI .................... 6 Memutuskan sambungan perangkat memori USB/MTP ......14 Fungsi-fungsi Tombol ..................6 9. - Page 3 Contents Beralih ke Trek Sebelumnya/Berikutnya ............ 20 Memutuskan koneksi telepon secara manual ........... 29 Maju Cepat/Mundur Cepat ................20 Menghapus Perangkat Bluetooth ..............29 Sambung Cepat ....................20 18. PENELUSURAN MASALAH ..............30 14. OPERASI TELEPON Bluetooth® ............21 19. TAMPILAN KESALAHAN ................33 Pengenalan akan Teknologi Bluetooth®...
-
Page 4: Tindakan Pencegahan
1. TINDAKAN PENCEGAHAN 2. PERINGATAN SAAT PENANGANAN PERHATIAN Panel Operasi Untuk masa layanan yang lebih lama, pastikan Anda membaca tindakan pencegahan berikut ini. Untuk keamanan Anda, pengemudi sebaiknya Sebagai pengemudi, Anda sepenuhnya bertang- Panel Operasi akan beroperasi dengan benar tidak menonton VTR, dll., atau mengoperasi- gung jawab terhadap keselamatan mengemudi. - Page 5 Gunakan kain lembut dan kering, dan bersihkan dan LGPL versi 2.1. Untuk detail lengkap, harap dengan lembut kotorannya. Untuk kotoran mem- kunjungi https://opensource.clarion.com.my/. bandel, bubuhkan detergen netral yang dilarutkan Detail lengkap untuk semua program sumber ter- dalam air ke kain yang lembut, bersihkan kotoran- buka yang dilisensi, yang disertakan dalam produk nya dengan lembut, lalu seka dengan kain kering.
-
Page 6: Panel Operasi
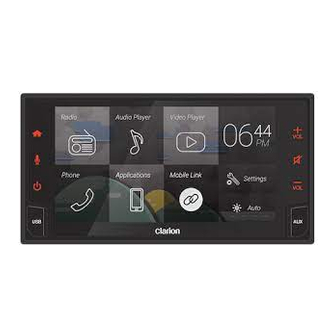
3. PANEL OPERASI [IR Sensor] Mikrofon MUTE] HOME] Layar Sentuh PWR ] [USB Port] Input AUX Fungsi-fungsi Tombol Sensor IR Port USB (Front) Layar Sentuh Untuk kontrol jarak jauh Pemasukan perangkat penyimpanan massal Tampilan layar sentuh resistif USB/MTP/iPod/iPhone/Android. MUTE ] Diam / nyalakan audio. -
Page 7: Fungsi Tombol Kendali Jarak Jauh Roda Kemudi
4. Fungsi Tombol Kendali Jarak Jauh Roda Kemudi Radio USB1/ USB2 Telepon Modus /iPod/ iPhone/ Papan tombol Buku telepon Riwayat Panggilan Panggilan Sedang Audio BT Panggilan Masuk Keluar Menelepon Tombol yang Dipanggil/ Terlewatkan/ Terakhir SOURCE Mengubah Modus Sumber Audio yang valid Tidak ada fungsi (Radio Audio USB1... -
Page 8: Pengoperasian Dasar
5. PENGOPERASIAN DASAR 3) Tombol audio USB / iPhone / iPod / audio Menyalakan dan mematikan daya 2. Tekan tombol [ ], [HOME] atau [VOICE] agar- Bluetooth / Aux tampilan kembali ke tampilan sebelumnya. Catatan: 4) Tombol modus Video / Miracast •... -
Page 9: Keamanan Rem Tangan
6. PENGOPERASIAN MODUS RADIO Keamanan Rem Tangan Video pada unit hanya dapat ditampilkan saat rem tangan diaktifkan (saat mobil diparkir). Audio dalam 13) Tab RDS Mendengarkan Radio video masih dapat diputar, namun layar notifikasi 1. Tekan tombol di Layar Beranda untuk memilih 14) Tab Radio AM akan ditampilkan sebagai pengganti tampilan video. -
Page 10: Teks Rds
1. Tekan tab [Prasetel] untuk memilih daftar sal- Catatan: Memanggil kembali memori yang telah • Pencarian Manual memungkinkan pemilihan gelombang uran Prasetel. Tampilan kontrol tab akan berubah ditetapkan secara manual dengan frekuensi apa pun tanpa meman- menurut pilihan. dang siaran. 2. -
Page 11: Pengoperasian Rds
7. PENGOPERASIAN RDS • PS : Layanan Program • Mematikan TA • EON : Jaringan Lain Yang Ditingkatkan 1. Tekan tombol [RDS] untuk memilih Tab RDS. Kontrol tab akan berubah menurut pilihan. • TP : Program Lalu Lintas 2. Dalam modus siaga TA, tekan “Traffic Annouce- * Penyelaan RDS tidak berfungsi dalam peneri- ment (TA)”. -
Page 12: Pty (Tipe Program)
PTY (Tipe Program) Item PTY Musik Jazz Jazz Fungsi ini membuat Anda dapat mendengarkan si- aran dari tipe program yang dipilih meskipun unit BAHASA DAFTAR ISI Country Country berada dalam modus fungsi yang lain selain radio. INDONESIA Musik Nasional Musik nasional Berita Berita * Beberapa negara tidak memiliki siaran PTY. -
Page 13: Fungsi Frekuensi Alternatif (Af)
8. PENGOPERASIAN MODUS USB Fungsi Frekuensi Alternatif (AF) Fungsi AF beralih ke frekuensi yang lain pada jarin- gan yang sama untuk mempertahankan penerimaan • Hubungi produsen perangkat memori USB anda yang optimal. Sistem ini dapat memutar file audio (MP3/WMA/ untuk mengetahui informasi apakah perangkat 1. -
Page 14: Menyambungkan Perangkat Memori Usb/Mtp
Menyambungkan perangkat memori USB/MTP PERHATIAN • Untuk pengemudian yang aman, jangan memasukkan per- angkat memori USB/MTP secara langsung ke dalam port USB. • Selalu buat cadangan data yang penting dan simpanlah di komputer Anda. Memutuskan sambungan perangkat memori USB/MTP 1. Lepas perangkat memori USB/ MTP dari slot USB selama pe- mutaran atau pembacaan. -
Page 15: Operasi Video Usb
9. OPERASI VIDEO USB Menampilkan layar modus video Pemutaran Putar/Jeda 1. Tekan tombol buntuk menghentikan sesaat selama pemutaran. 2. Tekan tombol lagi untuk kembali ke pemu- taran. Beralih ke Video Berikutnya/Sebelumnya 1. Tekan tombol selama pemutaran untuk memutar video sebelumnya/berikutnya. Pengoperasian Maju Cepat/Mundur Cepat 1. -
Page 16: Pengoperasian Audio Usb/Mtp
10. PENGOPERASIAN AUDIO USB/MTP • Ulang Semua Memutar File Audio pada perangkat memori Trek yang ada dalam daftar putar saat ini akan dipu- USB/MTP tar secara berulang kali. Pemutaran Putar/Jeda 1. Tekan tombol untuk menghentikan sesaat se- • Pengulangan Mati lama pemutaran. -
Page 17: Memilih Trek Pada Tampilan Album
2. Pilih artis dari daftar artis untuk beralih ke tampilan Memilih Trek pada tampilan lagu Memilih Trek pada tampilan album Fungsi ini memungkinkan Anda untuk memilih trek album. dari tampilan album. 3. Tekan dan tahan bar gulir, geser ke atas atau ke 1. -
Page 18: Operasi Ipod/Iphone
11. OPERASI iPod/iPhone Bagian ini menjelaskan tentang pengoperasian ke- • Ulang Trek Memilih Modus iPod tika tersambung ke iPod/iPhone Apple melalui slot Jika iPod sudah tersambung Memiliki tindakan yang sama seperti status ULANG USB. 1. Tekan tombol [iPhone/iPod] di layar Seleksi SATU TREK di iPod. -
Page 19: Memilih Lagu Dari Menu Ipod
12. PENGOPERASIAN Miracast Memilih Lagu dari Menu iPod Lagu Genre Komposer Memilih Modus Miracast Buku audio* Tekan tombol untuk memilih modus Miracast Podcast* dari sumber Video. Radio iTunes** * Ketersediaan tergantung pada iPod ** Ketersediaan tergantung pada Wilayah Catatan: 1. Dalam stasiun Radio Live iTunes, semua tombol akan di- nonaktifkan kecuali tombol Play/Pause. -
Page 20: Operasi Pemutar Audio Bluetooth
13. OPERASI PEMUTAR AUDIO Bluetooth® Beberapa telepon seluler dengan Bluetooth memi- Mengendalikan Pemutar Audio Bluetooth Sambung Cepat liki fitur audio, dan beberapa pemutar audio porta- Catatan: bel mendukung fitur Bluetooth. Dalam pedoman ini, • Kadang-kadang, tergantung pada lingkungannya, suara perangkat tersebut akan disebut sebagai “Pemutar yang diputar dapat terpecah, atau mungkin menghasilkan audio Bluetooth”. -
Page 21: Operasi Telepon Bluetooth
14. OPERASI TELEPON Bluetooth® Pengenalan akan Teknologi Bluetooth® 2. Tekan salah satu tab untuk memilih kategori Layar papan tombol Teknologi nirkabel Bluetooth® merupakan teknologi setelan yang spesifik. radio yang menyambungkan perangkat, seperti 3. Tekan tombol [HOME] untuk keluar dari Setelan telepon seluler dan headset, tanpa kabel atau tali dan kembali untuk mengakses Layar Beranda. -
Page 22: Buku Telepon
• Membuat Panggilan Menggunakan fungsi 2. Abjad akan berubah sesuai urutan. Lepaskan bar Tab log panggilan Panggil Ulang gulir saat Anda mencapai abjad yang Anda in- Sistem akan menghafalkan data panggilan terekam untuk memanggil kembali nomor ginkan. yang Dipanggil/Diterima/Terlewatkan ke dalam 1. -
Page 23: Tab Sinkronisasi
Tab sinkronisasi Percakapan telepon Percakapan telepon bergabung dengan 2 1. Tekan tab [Sinkronisasi] untuk secara manual 1. Tekan tombol untuk berbicara menggunakan nomor berbeda melakukan sinkronisasi buku telepon atau log telepon seluler dan membatalkan fungsi bebas 1. Tekan tombol untuk berbicara menggunakan panggilan. -
Page 24: Pengoperasian Aux
15. PENGOPERASIAN AUX 16. APLIKASI Menginisialisasi Aplikasi Catatan: • Aplikasi yang kompatibel harus diinstal di perangkat sebe- lum menyambung ke unit. Catatan:: • Aplikasi didukung oleh SmartDeviceLink™. • Saat Aplikasi tersambung, semua sambungan berikut ini akan dinonaktifkan: • Aplikasi hanya kompatibel dengan iPhone Apple dan perangkat Android. -
Page 25: Pengoperasian Setelan
17. PENGOPERASIAN SETELAN Memilih Setelan Penyesuaian Balance/Fader • Menyesuaikan Fader 1. Tekan tombol di Layar Beranda. Tampilan 1. Kisaran penyesuaian untuk Fader adalah R12 akan berubah menurut pilihan. Tekan tombol [Balance] di menu tab untuk memilih hingga F12. tab Balance/Fader. Tampilan akan berubah menurut 2. -
Page 26: Ekualiser Kustom
2. Sesuai urutan naik, nada prasetel yang tersedia • Serangkaian setelan yang terdiri dari 13 gelombang 4. Tekan tombol [Reset] untuk mereset Kecerahan frekuensi tersedia untuk disesuaikan khusus. Jangkauan adalah: dan Kontras ke setelan default. default untuk setiap gelombang adalah 0. Setiap gelom- bang memiliki kisaran yang dapat disesuaikan dari -12 Flat Rock... -
Page 27: Setelan Tanggal
3) Penyesuaian menit. 2. Geser ke atas atau ke bawah di kolom Hari untuk Setelan Umum 4) Reset memilih tanggal. 5) AM/PM 3. Geser ke atas atau ke bawah di kolom Bulan un- tuk memilih bulan 1. Tekan tombol “Menetapkan Waktu” untuk mema- 4. -
Page 28: Tentang
• Wallpaper Panduan Pengguna Fungsi otomatis unduh buku telepon 1. Tekan “Wallpaper” untuk mengubah wallpaper. 1. Tekan tombol di menu Setelan. Pindai kode 1. Fitur Otomatis Unduh Buku Telepon memung- QR dengan telepon anda untuk mengunduh pan- kinkan unit secara otomatis mengunduh buku 2. -
Page 29: Menyambungkan Telepon Secara Manual
2. Nyalakan fungsi Bluetooth pada telepon seluler Memutuskan koneksi telepon secara manual dan setel ke modus yang dapat ditemukan sebe- 1. Tekan tombol [Putus] untuk memutuskan sam- lum melanjutkan. bungan perangkat yang tersambung. Tampilan akan berubah menurut pilihan. 3. Sebuah daftar berisi perangkat yang dapat dite- mukan akan tersedia. -
Page 30: Penelusuran Masalah
18. PENELUSURAN MASALAH • Umum Masalah Penyebab Tindakan Daya tidak menyala. (Tidak ada suara yang dihasilkan.) Sekering unit rusak. Ganti dengan sekering baru yang memiliki ampere yang sama. Jika sekring rusak lagi, konsultasikan ke toko Anda membeli. Kabel tidak tepat. Konsultasikan ke pusat pelayanan yang terdekat. - Page 31 Sambungkan HFP dari perangkat, jika diperbolehkan; jika tidak, coba putuskan sambungan perangkat dan sambungkan kembali. Sambungan tidak stabil. Proses pengupas masih berlangsung. Pastikan Handsfree (HFP) dan Audio (A2DP) terhubung dengan memeriksa Pengaturan Bluetooth (lihat “Pengaturan Bluetooth”). Silakan merujuk ke daftar IOP: http://clarion.com.my/iop-compatibility...
- Page 32 Matikan dan nyalakan smartphone lalu sambungkan kembali unit kepala. Luncurkan aplikasi di smartphone, dan pastikan aplikasi secara aktif berop- erasi di smartphone. Respon operasi multi jari (Misalnya: gerakan Waktu respons lambat dari smartphone. Silakan lihat daftar IOP: http://clarion.com.my/iop-compatibility cubit ke zoom) tidak bagus.
-
Page 33: Tampilan Kesalahan
19. TAMPILAN KESALAHAN Tampilan Kesalahan Penyebab Tindakan KESALAHAN PERANGKAT Perangkat USB tersambung tidak didukung. Jika perangkat USB menjadi beku, putuskan sambungan, dan sambungkan lagi. Sambungkan perangkat USB yang benar. Kesalahan terjadi saat mengontrol perangkat USB. Putuskan sambungan perangkat USB dan sambungkan lagi. Perangkat disambungkan lewat Hub USB. -
Page 34: Spesifikasi
Touch 6th Gen Versi OS Android yang didukung OS Android 5 ke atas Untuk detail lebih lanjut tentang kompatibilitas ponsel cerdas, silakan kunjungi: http://clarion.com.my/iop-compatibility Deklarasi kesesuaian Kami menyatakan bahwa model ini PE-4230A-A berikut ketentuan Directive 1999/5/EC & 2011/65/EU dengan... - Page 35 Contents 1. PRECAUTIONS ....................37 Connecting a USB memory/MTP device .............47 2. CAUTIONS ON HANDLING .................37 Watching/Listening to a track with USB memory device ......47 3. OPERATION PANEL ..................39 Unplug the USB memory/MTP device ............47 Functions of Buttons ..................39 9. USB VIDEO OPERATIONS .................48 4.
- Page 36 Contents Switch to Previous/Next Track ................53 Manually disconnecting a phone ..............62 Fast Forward/Backward ...................53 Deleting a Bluetooth Device ................62 Quick Connect ....................53 18. TROUBLESHOOTING ..................63 14. Bluetooth® TELEPHONE OPERATIONS ..........54 19. ERROR DISPLAY ....................66 Introduction to Bluetooth® Technology ............54 20. SPECIFICATIONS ...................67 Select Phone Mode ...................54 Voice Dialer ......................54 Keypad screen ....................54...
-
Page 37: Precautions
1. PRECAUTIONS 2. CAUTIONS ON HANDLING CAUTION Operation Panel Please observe the following cautions. The units touch screen panel is designed to op- As the driver, you are responsible for your safety If the unit requires to be removed or reinstalled, erate properly in the temperature range of 0˚... - Page 38 For tougher stains, use a neutral base detergent, and LGPL version 2.1. For full details, please visit which has been diluted in water. Apply it to a soft https://opensource.clarion.com.my/. cloth and wipe the dirt off gently, and then wipe Full details for all open source licensed programs again with a dry cloth.
-
Page 39: Operation Panel
3. OPERATION PANEL [IR Sensor] Microphone MUTE] HOME] Touch Screen PWR ] [USB Port] AUX Input Functions of Buttons IR Sensor USB Port (Front) Touch Screen For IR remote control USB mass storage device/MTP/iPod/iPhone/An- Capacitive touch screen display. droid device insertion. MUTE ] Mute/ unmute audio. -
Page 40: Functions Of Steering Wheel Remote Control Buttons
4. Functions of Steering Wheel Remote Control Buttons Radio USB1/ USB2 Phone Mode /iPod/ iPhone/ Keypad Phonebook History Incoming Call Outgoing Call Call In Pro- BT Audio Dialled/ gress Button Missed/ Recent SOURCE Change valid Audio Source Mode No function (Radio Audio USB1 Audio USB2... -
Page 41: Basic Operations
5. BASIC OPERATIONS 4) Video / Miracast mode button Turning on/off the power 2. Press the [ ], [HOME] or [VOICE] button for the display to return to previous display. 5) Mobile Link button (Currently not available) Note: • Be careful about using this unit for a long time without 6) Applications button running the engine. -
Page 42: Parking Brake Safety
6. RADIO MODE OPERATIONS Parking Brake Safety The video at the unit can only be displayed when the parking brake is enabled (when the car is parked). 14) AM Radio tab Listening to the Radio The audio portion of the video can still be played, 1. -
Page 43: Rds Text
RDS Text Storing preset memory 1. Press the button to display RDS text for cur- Preset memory function can store up to 20 stations: rent station. 20 stations for FM and AM. 2. Press the [Cancel] button to close the RDS text Notes: message box. -
Page 44: Rds Operations
7. RDS OPERATIONS • TP : Traffic Programme 2. During TA standby mode, press the “Traffic An- noucement (TA)”. The “TA” indicator in the dis- * RDS interrupt does not function during AM radio play goes off and TA standby mode is cancelled. reception. -
Page 45: Volume Setting Of Ta, Emergency Broadcast, And Pty
• Turning on PTY PTY Item Jazz Music Jazz 1. Press the [RDS] button to select the RDS Tab. ENGLISH CONTENTS Country Country The tab controls will change accordingly. 2. Press the “Programme Type (PTY)”, PTY stand- News News National Music National music by mode is turned on. -
Page 46: Af (Alternate Frequency) Function
8. USB MODE OPERATION AF (Alternate Frequency) Function The AF function switches to a different frequency on the same network in order to maintain optimum • This unit does not support connections to a com- reception. This system can play audio files (MP3/WMA/AAC/ puter. -
Page 47: Connecting A Usb Memory/Mtp Device
Connecting a USB memory/MTP device CAUTION • For safety driving purpose, avoid inserting the USB mem- ory/MTP device directly into the USB port. • Always backup and save important data on your com- puter. Unplug the USB memory/MTP device 1. Remove the USB memory/MTP device from the USB slot during playback or reading. -
Page 48: Usb Video Operations
9. USB VIDEO OPERATIONS Showing video mode screen Play/Pause Playback 1. Press the button to pause during playback. 2. Press the button again to resume playback. Switch to Next/Previous Video 1. Press the button during playback to play previous/next video. Fast Forward/Fast Backward Operation 1. -
Page 49: Usb/Mtp Audio Operations
10. USB/MTP AUDIO OPERATIONS • All Repeat Playing Audio Files in USB memory/ The tracks in current playlist will be played repeat- MTP device edly. Play/Pause Playback 1. Press the button to pause during playback. • Repeat Off Disengage the unit from repeat play. 2. -
Page 50: Selecting A Track On The Album View
Selecting a Track on the album view 3. Press and hold the scroll bar, slide up or down to Selecting a Track on the songs view This function allows you to select tracks from album view other list from current view. view. -
Page 51: Ipod/Iphone Operations
11. iPod/iPhone OPERATIONS This section describes operations when connected • Track Repeat Select iPod Mode to an Apple iPod/iPhone via the USB slot. When iPod is already connected Has the same behaviour as the ONE TRACK RE- 1. Press the [iPhone/iPod] button on the Audio PEAT status of iPod. -
Page 52: Selecting A Song From Ipod Menu
* The supported devices above were tested with the re- Artists spective versions listed in the table. Other versions of the same devices may not work properly. Albums * For further details on device compatibility, please visit: Songs http://clarion.com.my/iop-compatibility Genres... -
Page 53: Bluetooth® Audio Player Operations
13. Bluetooth® AUDIO PLAYER OPERATIONS Some Bluetooth mobile phones have audio features, Controlling the Bluetooth Audio Player Quick Connect and some portable audio players support the Blue- Note: tooth feature. These devices will be called as “Blue- • Occasionally, depending on the environment, playback tooth audio players”... -
Page 54: Bluetooth® Telephone Operations
14. Bluetooth® TELEPHONE OPERATIONS Introduction to Bluetooth® Technology Keypad screen Bluetooth® wireless technology is a radio technol- ogy that connects devices, such as mobile phones and headsets, without wires or cords over a short distance of approximately 10 meters (approximately 33 feet). -
Page 55: Phonebook
Phonebook Call log tab You can use the Phonebook data obtained from the The system will memorize the Dialed/Received/ device to make a call from this unit. Missed calls record data in the memory. The data can be used to make a call from this unit. •... -
Page 56: Sync Tab
15. AUX OPERATIONS Sync tab Call conversation 1. Press the [Sync] tab to manually sync the phone- 1. Press the button to talk by using the mobile book or call log. phone and cancelling the hands-free function (Private Mode). To return to the hands-free mode, Press the button. -
Page 57: Applications
16. APPLICATIONS Initializing Applications Notes: 3. Re-enable the car navigation application. • The compatible applications need to be installed on the Go to Applications at the Home Screen. • smartphone device before connecting to the unit. Notes: • For safety purposes, please do not operate the smart- •... -
Page 58: Settings Operations
17. SETTINGS OPERATIONS Select Settings Balance/Fader Adjustment • Adjusting the Fader 1. Press the button on the Home Screen. The 1. The adjustment range for Fader is R12 to F12. display will change accordingly. Press the [Balance] button in the tab menu to se- 2. -
Page 59: Custom Equalizer
2. The ascending order of the available preset tones • This operation is not available while driving. Clock Adjustment • A series of 13 frequency bands are available for custom- ization. The default gain for each band is 0. Each band has Flat Rock Classic... -
Page 60: Date Settings
1. Press “Set Time” button to enter to clock settings 4. Slide upwards or downwards at the Year column General Settings display to select the Year 2. Slide upwards or downwards at the Hours col- 5. Press [Set] button to save current date settings. umn to select the hour. -
Page 61: About
• System Reset Bluetooth Settings Bluetooth Device Manager 1. Press “System Reset” in the General Settings 1. Press the [Bluetooth] tab in the settings menu to 1. Press the [Handsfree] button in the tab menu menu. select Bluetooth Settings. The display will change to select Handsfree. -
Page 62: Manually Connecting A Phone
For classic phone: Deleting a Bluetooth Device Enter the defined PIN code when prompt (“0000” 1. Select a desired device and press the but- by default). ton to delete the paired device. The display will change accordingly. 5. Once pairing is successful, the phone will be con- 2. -
Page 63: Troubleshooting
18. TROUBLESHOOTING • General Problem Cause Measure Power does not turn on. (No sound is produced.) Fuse is blown. Replace with a fuse of the same amperage. If the fuse blows again, consult your store of purchase. Incorrect wiring. Consult your nearest service centre. Nothing happens when buttons are pressed. - Page 64 The connection is not stable. The paring process is still in progress. Make sure Handsfree (HFP) and Audio (A2DP) are connected by checking the Bluetooth Settings (refer to “Bluetooth Settings”). Please refer to the IOP list: http://clarion.com.my/iop-compatibility...
- Page 65 Launch the application on the smartphone, and make sure the application is actively running on the smartphone. The response of multi finger operation Slow response time from the smartphone. Please refer to the IOP list: (Eg: Pinch-to-zoom gesture) is not good. http://clarion.com.my/iop-compatibility...
-
Page 66: Error Display
19. ERROR DISPLAY Error Display Cause Measure DEVICE ERROR The connected USB device is not supported. If the USB device is frozen, disconnect it, and reconnect it again. Connect a proper USB device. An error occurred when controlling the USB device. Disconnect the USB device, and reconnect it again. -
Page 67: Specifications
Touch 6th Gen Supported Android OS versions Android OS 5 and above For further details on smartphone compatibility, please visit: http://clarion.com.my/iop-compatibility Declaration of conformity We declare that this model PE-4230A-A is following the provision of Directive 1999/5/EC&2011/65/EU with the essential requirements and the other relevant regula-... - Page 68 280-9555-00 Printed in Malaysia...