Table of Contents
Advertisement
Advertisement
Table of Contents

Related Manuals for Whirlpool Duet W10110850A


Summary of Contents for Whirlpool Duet W10110850A
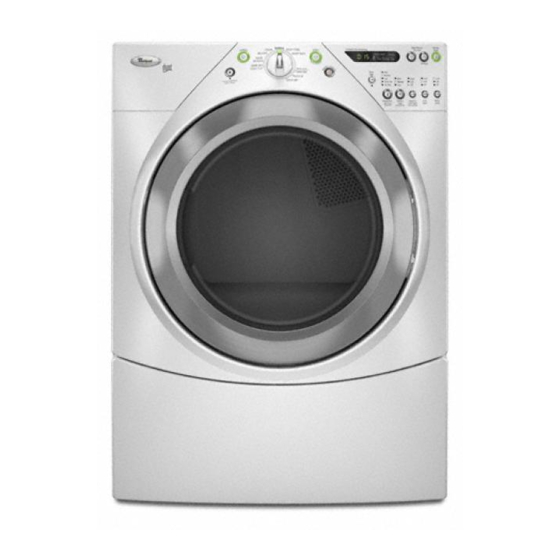
- Page 1 ® ® ELECTRONIC ELECTRIC DRYER Use & Care Guide For questions about features, operation/performance, parts, accessories or service, call: 1-800-253-1301 or visit our website at... www.whirlpool.com Table of Contents ... 2 W10110850A...
-
Page 2: Table Of Contents
DRYER SAFETY...3 INSTALLATION INSTRUCTIONS ...4 Tools and Parts ...4 Options ...4 Location Requirements ...5 Electrical Requirements ...7 Electrical Connection ...9 Venting Requirements...14 Plan Vent System ...15 Install Vent System...16 Install Leveling Legs ...16 Connect Vent...17 Level Dryer ...17 Complete Installation ...17 TABLE OF CONTENTS DRYER USE ...18 Starting Your Dryer...18... -
Page 3: Dryer Safety
Your safety and the safety of others are very important. We have provided many important safety messages in this manual and on your appliance. Always read and obey all safety messages. This is the safety alert symbol. This symbol alerts you to potential hazards that can kill or hurt you and others. All safety messages will follow the safety alert symbol and either the word “DANGER”... -
Page 4: Installation Instructions
INSTALLATION INSTRUCTIONS Tools and Parts Gather the required tools and parts before starting installation. Read and follow the instructions provided with any tools listed here. Flat-blade screwdriver Vent clamps #2 Phillips screwdriver Caulking gun and compound (for installing Adjustable wrench that new exhaust vent) opens to 1"... -
Page 5: Location Requirements
Stack Kit ® Are you planning to stack your DUET so, you will need to purchase a Stack Kit. To order, call the dealer from whom you purchased your dryer or refer to the “Assistance or Service” section of this manual. Ask for Part Number 8541503. - Page 6 Dryer Dimensions 38" (96.52 cm) *31½" (80 cm) (68.6 cm) *Most installations require a minimum 5" (12.7 cm) clearance behind the dryer for the exhaust vent with elbow. See “Venting Requirements.” Installation spacing for recessed area or closet installation The following spacing dimensions are recommended for this dryer.
-
Page 7: Electrical Requirements
Recommended installation spacing for recessed or closet installation, with stacked washer and dryer The dimensions shown are for the recommended spacing. 48 in. (310 cm 3"* (7.6 cm) 3"* (7.6 cm) 24 in. (155 cm *Required spacing 6"* (15.2 cm) 76"... - Page 8 If using a power supply cord: Use a UL listed power supply cord kit marked for use with clothes dryers. The kit should contain: A UL listed 30-amp power supply cord, rated 120/240 volt minimum. The cord should be type SRD or SRDT and be at least 4 ft (1.22 m) long.
-
Page 9: Electrical Connection
Power Supply Cord WARNING Fire Hazard Use a new UL listed 30 amp power supply cord. Use a UL listed strain relief. Disconnect power before making electrical connections. Connect neutral wire (white or center wire) to center terminal (silver). Ground wire (green or bare wire) must be connected to green ground connector. - Page 10 Put power supply cord through the strain relief. Be sure that the wire insulation on the power supply cord is inside the strain relief. The strain relief should have a tight fit with the dryer cabinet and be in a horizontal position. Do not further tighten strain relief screws at this point.
- Page 11 2. Remove neutral ground wire from external ground conductor screw. Connect neutral ground wire and the neutral wire (white or center wire) of power supply cord under center, silver-colored terminal block screw. Tighten screw. A. External ground conductor screw - Dotted line shows position of NEUTRAL ground wire before being moved to center silver-colored terminal block screw.
- Page 12 3. Connect ground wire (green or bare) of direct wire cable to external ground conductor screw. Tighten screw. A. External ground conductor screw B. Ground wire (green or bare) of power supply cable C. ¾" (1.9 cm) UL listed strain relief D.
- Page 13 When connecting to the terminal block, place the hooked end of the wire under the screw of the terminal block (hook facing right), squeeze hooked end together and tighten screw, as shown. 1. Loosen or remove center silver-colored terminal block screw. 2.
-
Page 14: Venting Requirements
10.2 cm 4" (10.2 cm) heavy metal exhaust vent DURASAFE™ vent products can be purchased from your dealer or by calling Whirlpool Parts and Accessories. For more information, see the “Assistance or Service” section of this manual. Rigid metal vent For best drying performance, rigid metal vents are recommended. -
Page 15: Plan Vent System
Choose your exhaust installation type Recommended exhaust installations Typical installations vent the dryer from the rear of the dryer. Other installations are possible. A. Dryer E. Clamps B. Elbow F. Rigid metal or flexible metal vent C. Wall G. Vent length necessary to connect elbows D. -
Page 16: Install Vent System
Special provisions for mobile home installations The exhaust vent must be securely fastened to a noncombustible portion of the mobile home structure and must not terminate beneath the mobile home. Terminate the exhaust vent outside. Determine vent path Select the route that will provide the straightest and most direct path outdoors. -
Page 17: Connect Vent
2. Firmly grasp the body of the dryer (not the console panel). Gently lay the dryer on the cardboard. See illustration. 3. Examine the leveling legs. Find the diamond marking. 4. Screw the legs into the leg holes by hand. Use a wrench to finish turning the legs until the diamond marking is no longer visible. -
Page 18: Dryer Use
WARNING Explosion Hazard Keep flammable materials and vapors, such as gasoline, away from dryer. Do not dry anything that has ever had anything flammable on it (even after washing). Failure to follow these instructions can result in death, explosion, or fire. WARNING: To reduce the risk of fire, electric shock, or injury to persons, read the IMPORTANT SAFETY INSTRUCTIONS before operating this appliance. -
Page 19: Stopping Your Dryer
Press and hold START button until dryer starts (about 1 second). Once an Automatic cycle has started, the WRINKLE SHIELD™ feature and cycle signals can be adjusted. Press the PAUSE/CANCEL key twice to stop the dryer and clear the settings, allowing you to select another cycle and Dryness Level. -
Page 20: Status Lights
Remove the load from the dryer as soon as tumbling stops to reduce wrinkling. This is especially important for permanent press, knits and synthetic fabrics. Avoid drying heavy work clothes with lighter fabrics. This could cause overdrying of lighter fabrics, leading to increased shrinking or wrinkling. -
Page 21: Additional Features
Damp Dry Use this cycle to dry items to a damp level using Low heat. Damp dry items such as jeans (to avoid stiffness) or cotton clothing (to make ironing easier). The temperature setting on this cycle cannot be adjusted. Items will have different levels of dampness. At the end of this cycle, clothes will be damp. -
Page 22: Changing Cycles, Options And Modifiers
For the Casual Cycle, the WRINKLE SHIELD™ feature is preset to “ON.” The other cycles will retain the WRINKLE SHIELD™ feature setting. (For example, if you select the WRINKLE SHIELD™ feature in the Normal cycle, the WRINKLE SHIELD™ feature will be on the next time you select the Normal cycle.) NOTE: If you do not select the WRINKLE SHIELD™... -
Page 23: Drying Rack
Drying Rack Option The drying rack is useful for drying items you would not necessarily want to tumble dry or that you would normally line dry (for example, sweaters). If your model does not have a drying rack, you may be able to purchase one for your model. -
Page 24: Cleaning The Dryer Interior
IMPORTANT: Do not run the dryer with the lint screen loose, damaged, blocked, or missing. Doing so can cause overheating and damage to both the dryer and fabrics. If lint falls off the screen into the dryer during removal, check the exhaust hood and remove the lint. -
Page 25: Troubleshooting
First try the solutions suggested here and possibly avoid the cost of a service call... Dryer Operation Dryer will not run Has a household fuse blown, or has a circuit breaker tripped? There may be 2 household fuses or circuit breakers for the dryer. - Page 26 WARNING Explosion Hazard Keep flammable materials and vapors, such as gasoline, away from dryer. Place dryer at least 18 inches (46 cm) above the floor for a garage installation. Failure to do so can result in death, explosion, or fire. Is the dryer located in a room with temperature below 45ºF (7ºC)? Proper operation of dryer cycles requires temperatures above...
-
Page 27: Assistance Or Service
Whirlpool designated service technicians are trained to fulfill the product warranty and provide after-warranty service, anywhere in the United States. To locate the Whirlpool designated service company in your area, ® appliance. To locate FSP you can also look in your telephone directory Yellow Pages. -
Page 28: Warranty
If you need service, first see the “Troubleshooting” section of the Use & Care Guide. After checking “Troubleshooting,” additional help can be found by checking the “Assistance or Service” section or by calling Whirlpool. In the U.S.A., call 1-800-253-1301. In Canada, call 1-800-807-6777.