Table of Contents
Advertisement
Available languages
Available languages
Operator's Manual
2-Cycle
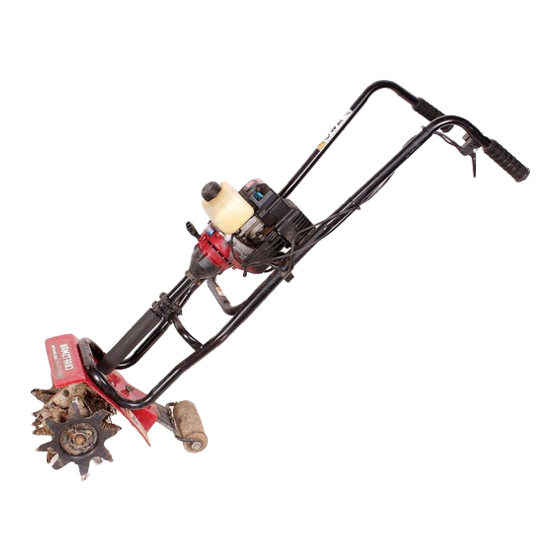
MINI-TILLER & CULTIVATOR
Model No. 316.292620
with
CAUTION: Before using
this product, read this
manual and follow all
safety rules and operating
instructions.
Sears, Roebuck and Co., Hoffman Estates, IL 60179, U.S.A.
Visit our website: www.sears.com/craftsman
P/N 769-02194A
• SAFETY
• ASSEMBLY
• OPERATION
• MAINTENANCE
• PARTS LIST
• ESPAÑOL, p. 19
(1/06)
Advertisement
Chapters
Table of Contents

Related Manuals for Craftsman Craftsman 316.29262


Summary of Contents for Craftsman Craftsman 316.29262
- Page 1 Operator’s Manual 2-Cycle MINI-TILLER & CULTIVATOR Model No. 316.292620 with CAUTION: Before using this product, read this manual and follow all safety rules and operating instructions. Sears, Roebuck and Co., Hoffman Estates, IL 60179, U.S.A. Visit our website: www.sears.com/craftsman P/N 769-02194A •...
-
Page 2: Table Of Contents
Starting/Stopping Instructions ....10 Full Two-Year Warranty on Craftsman Mini-Tiller and Cultivator For two (2) years from the date of purchase, if this Craftsman Equipment is maintained, lubricated, and tuned up according to the instructions to the operator’s manual, Sears will repair or replace free of charge any parts found to be... -
Page 3: Rules For Safe Operation
RULES FOR SAFE OPERATION The purpose of safety symbols is to attract your attention to possible dangers. The safety symbols, and their explanations, deserve your careful attention and understanding. The safety warnings do not by themselves eliminate any danger. The instructions or warnings they give are not substitutes for proper accident prevention measures. - Page 4 • Always stop the engine and allow it to cool before filling the fuel tank. Never remove the cap of the fuel tank, or add fuel, when the engine is hot. Never operate the unit without the fuel cap securely in place. Loosen the fuel tank cap slowly to relieve any pressure in the tank.
- Page 5 RULES FOR SAFE OPERATION SAFETY AND INTERNATIONAL SYMBOLS This operator's manual describes safety and international symbols and pictographs that may appear on this product. Read the operator's manual for complete safety, assembly, operating and maintenance and repair information. SYMBOL MEANING •...
-
Page 6: Know Your Unit
KNOW YOUR UNIT Application • Cultivating sod and light to medium soil • Cultivating in garden areas, around trees, etc. STOP/OFF (O) START/ON (I) Handgrip Throttle Control Handlebar Throttle Cable and Switch Wires On/Off Stop Control Fuel Cap Choke Lever Primer Bulb Starter Rope Grip Handlebar... -
Page 7: Assembly Instructions
ASSEMBLING THE UNIT Before operating, position the unit’s handlebars. NOTE: You may also need to reposition the wheel height before using the cultivator. Refer to the Adjusting Tine Depth section. Begin by carefully unpacking the contents and making sure that nothing is damaged. - Page 8 ADJUSTING TINE DEPTH Tine adjustment will vary depending on the type of soil being cultivated and how it will be used. Generally, adjusting the tines to break the soil 4 to 6 inches is recommended for most gardens. Adjust the tines as follows: 1.
-
Page 9: Oil And Fuel Information
UNLEADED GAS NOTE: Dispose of the old fuel/oil mix in accordance to FILLING THE FUEL TANK Make sure the cultivator is in a horizontal position when filling or adding fuel to the tank (Fig. 6). FUEL MIXTURE TABLE 2 CYCLE OIL 1 GALLON US 3.2 FL. -
Page 10: Starting/Stopping Instructions
STARTING/STOPPING INSTRUCTIONS WARNING: area. Carbon monoxide exhaust fumes can be lethal in a confined area. WARNING: starting position when pulling the starter rope (Fig. 10). To avoid serious injury, the operator and unit must be in a stable position while starting. STARTING INSTRUCTIONS 1. -
Page 11: Operating Instructions
Do not wear short pants, sandals or operate barefoot. 1. Move the cultivator to the work area prior to starting the engine. Transport the cultivator by pushing it on its wheels or by carrying it by the transport grip. -
Page 12: Maintenance And Repair Instructions
1. Put the On/Off Stop Control in the STOP (O) position and disconnect the spark plug boot from the plug. NOTE: It may be necessary to lay the cultivator back in a horizontal position on a flat level surface with the handles touching the ground. - Page 13 MAINTENANCE AND REPAIR INSTRUCTIONS AIR FILTER MAINTENANCE Removing the Air Filter/Muffler Cover WARNING: always turn the unit off and allow it to cool before you clean or service it. 1. Place the choke lever in Position 2. NOTE: The choke lever must be in Position 2 (Fig. 13) to remove the air filter/ muffler cover.
- Page 14 MAINTENANCE AND REPAIR INSTRUCTIONS WARNING: is not tightened securely, it could fall off causing damage to the unit and possible serious personal injury. Spark Arrestor Hood Screw Spark Arrestor Tabs Screen Fig. 16 CARBURETOR ADJUSTMENTS The engine’s idle speed adjuster is adjustable through the air filter/muffler cover (Fig 17).
-
Page 15: Cleaning And Storage
MAINTENANCE AND REPAIR INSTRUCTIONS WARNING: electrodes. Grit in the engine could damage the cylinder. 4. Install a correctly-gapped spark plug in the cylinder head. Turn the 5/8 in. socket clockwise until snug. If using a torque wrench torque to: 110-120 in.•lb. (12.3-13.5 N•m) Do not over tighten. -
Page 16: Troubleshooting Chart
Old fuel Improper carburetor adjustment Fouled spark plug Plugged spark arrestor Cultivator tines bound with debris UNIT OCCASIONALLY HESITATES AT HIGH SPEEDS C A U SE Spark plug gap is too small/close For repairs beyond the minor adjustments listed above, contact your nearest Sears Parts &... -
Page 17: Specifications
Starter ... Incredi-Pull™ Starting Auto Rewind Muffler ... Baffled with Guard Throttle... Spring Return Fuel Tank Capacity ... 14 ounces (415 ml) CULTIVATOR* Drive Shaft Tube ... Steel Tube Throttle Control ... Finger-Tip Trigger Cultivating Path Width (Maximum) ... 9 inches (22.86 cm) Cultivating Depth (Maximum) ... -
Page 18: Epa Warranty Information
EPA Emission Control Warranty Statement California / Your Warranty Rights and Obligations The California Air Resources Board, The Environmental Protection Agency and Sears, Roebuck & Co., are pleased to explain the emission control system warranty on your 2005 and later small off-road engine. New small off-road engines must be designed, built and equipped to meet stringent anti-smog standards. -
Page 19: Garantía
INDICE DE CONTENIDOS Garantía ....... . . 19 Llamadas a apoyo al cliente ....19 Normas para una operación segura . -
Page 20: Normas Para Una Operación Segura
NORMAS PARA UNA OPERACION SEGURA Los símbolos de seguridad se utilizan para llamar su atención sobre posibles peligros. Los símbolos de seguridad y sus explicaciones merecen toda su atención y comprensión. Los símbolos de seguridad no eliminan ningún peligro por sí mismos. Las instrucciones o advertencias que ofrecen no substituyen las medidas adecuadas de prevención de accidentes. - Page 21 NORMAS PARA UNA OPERACION SEGURA • Mezcle y cargue el combustible en un área exterior bien ventilada donde no haya chispas ni llamas. Quite lentamente la tapa del combustible sólo después de apagar el motor. No fume mientras carga o mezcla el combustible.
- Page 22 NORMAS PARA UNA OPERACION SEGURA SIMBOLOS DE SEGURIDAD DE INTERCACIONALES Este manual del operador describe los símbolos y figuras de seguridad e internacionales que pueden aparecer en este producto. Lea el manual del operador para obtener información completa acerca de la seguridad, ensamble, operación y mantenimiento y reparación. SIMBOLO SIGNIFICADO •...
-
Page 23: Conozca Su Unidad
Aplicacion Use esta unidad para cultivar tierra herbosa y tierra negra ligera a mediana. También se utiliza para cultivar áreas de jardines, alrededor de árboles, etc. Cable del regulador Control de encendido y Tapón del apagado combustible Mango de la cuerda de arranque Mango del tubo del eje... -
Page 24: Instrucciones De Ensamble
INSTRUCCIONES DE ENSAMBLE ENSAMBLE DE LA UNIDAD Su cultivador para jardines ha sido completamente ensamblado. El manubrio deberá colocarse en la posición adecuada antes de la operación. NOTA: Antes de su operación, es posible que deba cambiar la posición de la altura de la rueda. Lea Ajuste de la Profundidad de las Púas. - Page 25 INSTRUCCIONES DE ENSAMBLE AJUSTE DE LA PROFUNDIDAD El ajuste de las púas podrá variar de acuerdo al tipo de tierra que cultiva y el modo en que será usado. En general, se recomienda ajustar las púas para abrir la tierra de 4 a 6 pulgadas para la mayoría de los jardines. Ajuste las púas de este modo: 1.
-
Page 26: Información Del Aceite Y Del Combustible
INFORMACION DEL ACEITE Y DEL COMBUSTIBLE INSTRUCCIONES PARA MEZCLAR EL ACEITE Y EL COMBUSTIBLE El combustible viejo o mal mezclado son los motivos principales del mal funcionamiento de la unidad. Asegúrese de usar combustible nuevo, limpio y sin plomo. Siga las instrucciones en detalle para mezclar correctamente el aceite y el combustible. -
Page 27: Instrucciones De Arranque Y Apagado
INSTRUCCIONES DE ARRANQUE Y APAGADO ADVERTENCIA: exterior bien ventilada. Los gases de escape de monóxido de carbono pueden ser letales en un área cerrada. ADVERTENCIA: accidentales. Colóquese en posición de inicio cuando tire de la cuerda de arranque (Fig. 10). El operador y la unidad deben estar en una posición estable al arrancar la unidad para evitar graves lesiones personales. -
Page 28: Instrucciones De Operación
INSTRUCCIONES DE OPERACION CONSEJOS PARA LA OPERACION ADVERTENCIA: adecuada para reducir el riesgo de lesiones cuando opere esta unidad. No use ropa holgada ni alhajas. Use protección ocular y auditiva. Use pantalones largos y gruesos, botas y guantes. No use pantalones cortos, sandalias ni trabaje descalzo. -
Page 29: Instrucciones De Mantenimiento Y Reparación
INSTRUCCIONES DE MANTENIMIENTO Y REPARACION NOTA: Algunos procedimientos de mantenimiento pueden requerir el uso de herramientas o habilidades especiales. Si no está seguro acerca de estos procedimientos, lleve su unidad a un establecimiento de reparación, persona o distribuidor de servicio autorizado de Sears que arregle motores para uso fuera de la carretera. - Page 30 INSTRUCCIONES DE MANTENIMIENTO Y REPARACION MANTENIMIENTO DEL FILTRO DE AIRE ADVERTENCIA: lesiones personales, apague siempre su recortador y espere que se enfríe antes de limpiarlo o realizar todo tipo de mantenimiento. Remoción de la cubierta del silenciador / filtro de aire 1.
- Page 31 INSTRUCCIONES DE MANTENIMIENTO Y REPARACION ADVERTENCIA: del deflector de emisiones no se aprieta fijamente se puede caer y causarle daño a la unidad y posibles lesiones personales graves. Capó del parachispas Ranuras Tornillo Pantalla del parachispas Lengüetas Fig. 16 AJUSTE DEL CARBURADOR La velocidad lenta del motor puede ser ajustada por la cubierta del silenciador / filtro de aire (Fig.
-
Page 32: Limpieza Y Almacenamiento
INSTRUCCIONES DE MANTENIMIENTO Y REPARACION CAMBIO DE LA BUJIA DE ENCENDIDO Use una bujía de encendido Champion RDJ7Y (o similar). La separación correcta es de 0.020 pulgadas (0.5 mm). Retire la bujía luego de cada 50 horas de operación e inspeccione su estado. 1. -
Page 33: Cuadro De Solución De Problemas
RESOLUCION DE PROBLEMAS EL MOTOR NO ARRANCA C A U S A El tanque de combustible está vacío La bombilla de cebado no fue oprimida lo suficiente El motor está inundado El combustible es viejo o está mal mezclado La bujía de encendido está arruinada Parachispas obstruido La temperatura exterior es por debajo de 4º... -
Page 34: Especificaciones
MOTOR* Tipo de motor... Enfriado por aire, de 2 ciclos Desplazamiento ... 31.5 cm R.P.M. de velocidad mínima ... 2.600 - 3.600 r.p.m. R.P.M. de operación ... 7.800+ r.p.m. Tipo de embrague ... Centrífugo Tipo de encendido ... Electrónico Control de encendido y apagado ...Interruptor oscilante Separación de la bujía de encendido... - Page 35 NOTES...
-
Page 36: Parts List
Item Part No. Description 753-04511 Air Cleaner Assembly (includes 2 & 39) 791-180350B Air Cleaner Filter 791-180351 Carburetor Mounting Screw Assembly 791-180226 Wavey Washer 753-05338 Choke Lever Assembly 753-05339 Choke Plate Assembly (includes 5) 753-04333 Carburetor Assembly (includes 8 & 19) 791-610675 Carburetor Gasket 791-181860... - Page 37 Gearbox Assembly 753-04074 Inner Tine (right side) 753-04073 Outer Tine (right side) 753-04072 Inner Tine (left side) 753-04071 Outer Tine (left side) 753-04070 Click Pin 791-180288 Sleeve Retainer Bolt 791-182405 Switch 791-182672 Bracket PARTS LIST CULTIVATOR AND BOOM PARTS 2-CYCLE GAS...
-
Page 38: Epa Garantía
Declaración de Garantía de Control de Emisiones de la EPA / California Sus Derechos y Obligaciones de la Garantía La Junta de Recursos del Aire de California, la Agencia de Protección Ambiental y Sears se complacen en explicar la garantía del sistema de control de emisiones para su pequeño motor para uso fuera de la carretera del 2005 y posterior. Los nuevos motores pequeños para uso fuera de la carretera tienen que diseñarse, construirse y equiparse para cumplir las normas contra smog más estrictas. -
Page 39: Repair Protection Agreement
Repair Protection Agreements Congratulations on making a smart purchase. Your new ® Craftsman product is designed and manufactured for years of dependable operation. But like all products, it may require repair from time to time. That’s when having a Repair Protection Agreement can save you money and aggravation. - Page 40 Get it fixed, at your home or ours! For repair—in your home—of all major brand appliances, lawn and garden equipment, or heating and cooling systems, no matter who made it, no matter who sold it! For the replacement parts, accessories and owner’s manuals that you need to do-it-yourself.