Advertisement
Quick Links
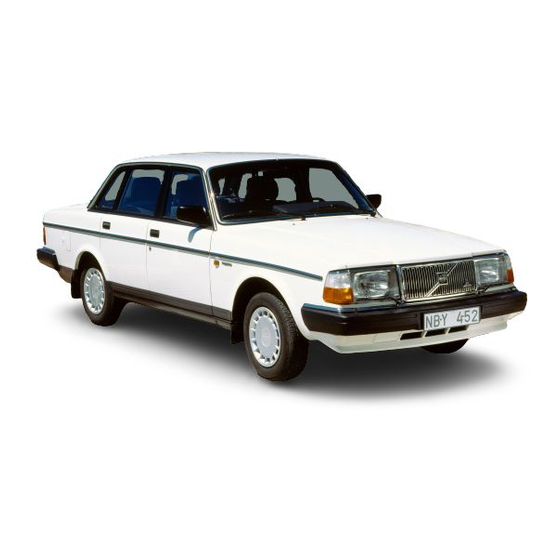
1992 Volvo 240
ESSENTIAL INFORMATION
Please take the time to fill out the forms on this page. When completed, these forms will provide
information essential to the proper servicing and ordering of parts for your Volvo.
Owner:
Name
Address
City, State Zip
Code
Tel. No.
Notice:
Your Volvo is designed to meet all applicable safety and emission standards, as evidenced by the
certification labels attached to the door opening sheet metal and on the left wheel housing in the engine
compartment. For further information regarding these regulations, please contact your dealer.
Vehicle Information (see "Label information" section)
Vehicle License Number
Vehicle Identification Number
(VIN)
Service Designation Number
Engine Designation
file:///K|/ownersdocs/1992/1992_240/92240_001.htm (1 of 6)12/30/2006 9:31:21 AM
240 Owner's Manual
VOLVO 240
Owner's Manual
U.S.A. & Canada 1992
VOLVO
Advertisement

Related Manuals for Volvo 1992 Volvo 240


Summary of Contents for Volvo 1992 Volvo 240
- Page 1 Tel. No. Notice: Your Volvo is designed to meet all applicable safety and emission standards, as evidenced by the certification labels attached to the door opening sheet metal and on the left wheel housing in the engine compartment. For further information regarding these regulations, please contact your dealer.
- Page 2 All information, illustrations and specifications contained in this manual are based on the latest product information available at the time of publication. Volvo reserves the right to make model changes at any time, or to change specifications or design, without notice and without incurring obligation.
- Page 3 Despite our strongest recommendation, and your best intentions, not wearing a seatbelt is like believing "it'll never happen to me!" Volvo urges you and all adult occupants of your car to wear seatbelts and ensure that children are properly restrained, using an infant or booster seat determined by age, weight and height.
- Page 4 "It's a good thing I was wearing my seatbelt." pg. 4 General Information Do not export your Volvo to another country before investigating that country's applicable safety and exhaust emission requirements. In some cases it may be difficult or impossible to comply with these requirements.
- Page 5 The double-sided tape on the back of the tag can be used to secure it safely. In the event the original keys are lost, duplicates may be ordered from your Volvo dealer. file:///K|/ownersdocs/1992/1992_240/92240_001.htm (5 of 6)12/30/2006 9:31:21 AM...
- Page 6 1992 Volvo 240 Number Tag pg. 6 Contents Top of Page file:///K|/ownersdocs/1992/1992_240/92240_001.htm (6 of 6)12/30/2006 9:31:21 AM...
- Page 7 1992 Volvo 240 pg. 7 Before you drive: Page Instruments and controls Instruments 11, 12 Warning lights Clock, oil pressure gauge, voltmeter Ignition switch, turn signals Rear fog light, lighting Windshield wipers, washer nozzles Cruise control Washer fluid reservoir Rear window demister, hazard warning flasher...
- Page 8 1992 Volvo 240 pg. 9 Instruments and controls (cont.) See page 1 Air louver 2 Turn signals, cruise control 3 Headlights, parking lights 4 Instrument panel rheostat 5 Rear fog light 6 Horn 7 Instrument panel 8 Starting (ignition) switch/steering wheel lock 9 Wiper/washer, tailgate window wiper/washer (wagon) file:///K|/ownersdocs/1992/1992_240/92240_007.htm (2 of 7)12/30/2006 9:31:22 AM...
- Page 9 1992 Volvo 240 10 Space for optional equipment 11 Clock 12 Air louver 13 Hood release handle 14 Fuse box 15 Cigarette lighter 16 Rear window demister 17 Hazard warning flashers 18 Heated door mirrors (certain models only) 19 Air conditioning...
- Page 10 1992 Volvo 240 B Direction indicator (green) C Speedometer In kilometer and miles per hour (U.S. models) In kilometers per hour (Canadian models) D Odometer Total reading in miles (U.S. models) Total reading in kilometers (Canadian models) E Temperature gauge The gauge pointer should remain inside the black range during normal operation.
- Page 11 If the light comes on while driving, the oil pressure is too low. Stop the car and then stop the engine immediately and check the engine oil level. If the light stays on after restart, have the car towed to the nearest authorized Volvo dealer.
- Page 12 Canadian models are equipped with this warning light: Warning! If the fluid level is below the MIN mark in either section of the reservoir, DO NOT DRIVE. Tow the car to a Volvo dealer, have the brake system checked and any leakage repaired.
- Page 13 If the warning lamp lights up there is a malfunction of the ABS system (the standard braking system will however function) and the vehicle should be driven to a Volvo dealer for inspection. The Anti-lock Braking System (ABS) helps to improve vehicle control (stopping and steering) during sever braking conditions by limiting brake lock-up.
- Page 14 1992 Volvo 240 pg. 13 Oil pressure gauge, Voltmeter To reset the hands, push the reset knob and turn. Oil pressure gauge The oil pressure gauge indicates the pressure of the oil in the lubricating system of the engine. The pressure is dependent on the speed of the engine, the oil temperature and the viscosity of the oil.
- Page 15 1992 Volvo 240 The voltmeter indicates the voltage in the electrical system and thereby also the state of the battery. While the car is being driven the pointer should be within the black field. Should the pointer point to the upper or lower red field when driving, this may indicate some fault in the electrical system.
- Page 16 1992 Volvo 240 The steering wheel lock may be under tension when the car is parked. Turn the steering wheel slightly to free the ignition key. A chime will sound if the starting key is in the ignition lock and the front door on the driver's side is open.
- Page 17 1992 Volvo 240 The rear fog light is considerably brighter than the normal tail lights and should be used only when atmospheric conditions, such as fog, rain, snow, smoke or dust reduce the daytime or nighttime visibility of other vehicles to less than 500 ft. (152 meters). (The headlights must be switched on.) The fog light is located in the section of the tail light closest to the center of the vehicle.
- Page 18 1992 Volvo 240 Switch from upper to lower beams, and vice versa, by moving the turn signal switch lever on the left side for the steering column towards the steering wheel. The parking lights can be used without switching on the starting (ignition) key.
- Page 19 1992 Volvo 240 1 Intermittent wiper With switch in this position, the wipers will make a stroke approx. every seventh second. 2. "Single stroke" position Switch returns automatically when released. 3 Wipers, low speed 4 Wipers, high speed 5 Windshield wiper/washer The wiper will make 2-3 complete stroking cycles after the lever is released.
- Page 20 1992 Volvo 240 The fluid spray may be adjusted by carefully inserting a needle into the metal nozzle and rotating nozzle to desired position. pg. 17 Cruise Control The cruise control switches are located on the turn signal switch lever.
- Page 21 1992 Volvo 240 Operating brake pedal or clutch pedal (where applicable) This will automatically disengage the cruise control. Previously selected cruise speed is retained in the memory and by momentarily setting the switch to RESUME position that speed will be re-engaged.
- Page 22 1992 Volvo 240 The washer fluid reservoir for the windshield and tailgate washer (wagon) is located in the engine compartment and holds approx. 0.8 US gals = 3.2 liters. During the wintertime, the reservoir should be filled with anti-freeze washer fluid specified in section titled "Cold Weather Driving".
- Page 23 1992 Volvo 240 Note: Regulations regarding to the use of the hazard warning flasher may vary from state to state. file:///K|/ownersdocs/1992/1992_240/92240_013.htm (10 of 10)12/30/2006 9:31:23 AM Contents Top of Page...
- Page 24 1992 Volvo 240 pg. 19 Heated door mirrors, Parking brake, Seat heaters (certain models) Press the heated door mirrors switch to demist the mirrors. The orange light will light up. Press the switch again to turn off the heating. Turn off the heating as soon as the mirrors are free of ice to reduce the load on the electrical system.
- Page 25 1992 Volvo 240 Heating on front seats equipped with electrically-heated backrests and seat cushions is activated by switches on the parking brake console. The heating is thermostatically controlled and switches on at 60° F (15°C) and off at approx. 95°F (35°C).
- Page 26 1992 Volvo 240 To remove the ash trays depress the center spring and remove. pg. 21 Electrically-operated windows Electrically-operated windows (standard on certain models) The electrically-operated windows are controlled by switches set in the door arm rests. All the windows can be controlled from the driver's arm rest as shown in the above illustration.
- Page 27 1992 Volvo 240 Cut-out switch for rear-door electrically-operated windows If the car is equipped with rear-door power windows, this function can be disabled by a switch located on the driver's door armrest. This switch is position 90° in relation to the other switches.
- Page 28 1992 Volvo 240 1 TEMP Left = cool Right = warm FLOOR Out = no air to floor In = full flow of air to front and rear floor Defrost Out = low volume air flow to defroster In = full flow REC (recirculation) To be used only on cars equipped with air conditioning.
- Page 29 1992 Volvo 240 1 TEMP WARM 3 DEF depressed 5 FAN 3 (or 4) 6 All louvers closed. Always keep front external inlet grille (in front of the windshield) clear of obstructions (snow, ice, etc.). Maximum defroster action For maximum defroster capacity at very low ambient temperatures, use the recirculation control (button depressed).
- Page 30 If your car is equipped with an air conditioner, the system contains CFC-12, a type of Freon®. CFC-12 is a gas which effects the ozone layer of the earth's atmosphere. Let your Volvo dealer check your air conditioning system regularly for leakage.
- Page 31 1992 Volvo 240 Contents Top of Page file:///K|/ownersdocs/1992/1992_240/92240_019.htm (8 of 8)12/30/2006 9:31:24 AM...
- Page 32 1992 Volvo 240 pg. 25 Audio System The following pages describes the use of your TD-613 tuner deck. On/off (turn) Volume (turn) Balance left/right (push-turn) Fader front/rear (pull-turn) 2. Bass control 3. Treble control 4. Waveband selector 5. Frequency tuning 6.
- Page 33 1992 Volvo 240 The radio features anti-theft circuitry. If the set is removed from the vehicle or if the batter power is disconnected, a special code must be entered to enable operation of the set. Refer to the radio code card supplied with your vehicle or ask your dealer for the correct code.
- Page 34 1992 Volvo 240 Turn the button clockwise to switch on and to increase volume. The desired waveband is set by pressing the button. The frequency and waveband is shown on the display. NOTE! There are two FM wavebands and one AM waveband.
- Page 35 1992 Volvo 240 Press the left side of the button to tune down and the right side to tune up. Release the button when the desired frequency is displayed. pg. 28 Radio (cont.) This function works on the U (FM) and M (AM) wavebands and has 8 memories in autostore mode on each waveband.
- Page 36 1992 Volvo 240 selected waveband is automatically stored in the autostore memory. The lowest frequency station will now be heard. If there are no audible stations "---" will be displayed. 2 Press the "AUT" button once again if you wish to listen to another memorized autostored station. For each press a new station is set.
- Page 37 1992 Volvo 240 1 Tune in to desired frequency. 2 Depress a preset button. The audio cuts out. Keep the button depressed until the audio comes on (approx. 2 sec.) 3 The frequency is now stored on this preset button.
- Page 38 1992 Volvo 240 Push in the knob and turn it to the left or right to adjust left/right speaker balance. The "detent" indicates the "equalized" left/right balance position. Pull out the knob and turn it to the left or right to adjust front/rear speaker balance.
- Page 39 1992 Volvo 240 Adjust the bass by moving the control up or down. The "detent" indicates "equalized" bass. Adjust the treble by moving the control up or down. The "detent" indicates "equalized" treble. file:///K|/ownersdocs/1992/1992_240/92240_025.htm (8 of 9)12/30/2006 9:31:24 AM Bass control...
- Page 40 1992 Volvo 240 Contents Top of Page file:///K|/ownersdocs/1992/1992_240/92240_025.htm (9 of 9)12/30/2006 9:31:24 AM...
- Page 41 1992 Volvo 240 pg. 31 Cassette deck The cassette is inserted with the roll of tape to the right-hand side. When the cassette is inserted, the radio is automatically disengaged. Push the cassette gently into place. The cassette will start to play automatically.
- Page 42 1992 Volvo 240 Depress both buttons to play the other side for the tape. The arrows in the display indicate the direction of the tape. Press either of these buttons (see arrows for direction) for fast winding. Depress fully to lock the button.
- Page 43 1992 Volvo 240 If the button is pressed the tape will stop and the cassette will be ejected. The radio will be automatically engaged. pg. 33 General Information The FM waves do not follow the earth's surface, nor do they bounce off the atmosphere. For this reason their range is limited.
- Page 44 1992 Volvo 240 Because of the limited range of the FM senders and the fact that these waves are very reflective this problem usually occurs with FM reception. If the sender is blocked by buildings or mountains distortion can result.
- Page 45 1992 Volvo 240 pg. 34 Cross modulation, FM - reasons for distortion AM - reasons for distortion If you listen to a weak station in the vicinity of a stronger one, both stations may be received simultaneously. FM is affected by the electrical systems of nearby vehicles, especially those without suppression. The distortion increases if the station is weak or poorly set.
- Page 46 Reception conditions are not always optimum and this is, of course, beyond our control. However, we have endeavored to make the Volvo Audio System of a quality so that you can enjoy the best possible reception no matter what the reception conditions may be.
- Page 47 Tapes should not be exposed to direct sunlight or extreme temperatures. Keep tapes away from oil, grease and other contaminants. For optimal tape deck performance Volvo does not recommend the use of C-120 tapes. Take up slack using a pen or a pencil before inserting cassette in cassette slot.
- Page 48 1992 Volvo 240 M(AM) 6.5µV L 30µV Cassette deck 4-track, 2-channel stereo Tape speed: 4.76 cm/sec. Pinch-off file:///K|/ownersdocs/1992/1992_240/92240_031.htm (8 of 8)12/30/2006 9:31:25 AM Contents Top of Page...
- Page 49 37 Occupant safety VOLVO CONCERN FOR SAFETY Safety is the cornerstone of Volvo. Our concern dates back to 1927 when the first Volvos rolled off the production line. Three-point seatbelts, safety cages, and crumple zones were designed into Volvo cars long before it was fashionable or required by government regulations.
- Page 50 You can also obtain other information about motor vehicle safety from the Hotline. pg. 38 Child safety Volvo recommends the proper use of restraint systems for all occupants, including children. Remember that regardless of age and size, a child should always be properly restrained in a car. Restraint systems for children are designed to be secured in the vehicle by lap belts or the lap portion of a lap-shoulder belt.
- Page 51 A specially designed and tested safety cushion for this purpose can be obtained from your Volvo dealer. If necessary, an optional auxiliary third seat is available for use in the luggage compartment of station wagon models.
- Page 52 1992 Volvo 240 WARNING! Child Restraint Anchorages are designed to withstand only those loads imposed by correctly fitted Child Restraints. Under no circumstances are they to be used for adult seat belts or harnesses. The anchorages are not able to withstand excessive forces on them in the event of a collision if full harness seat belts or adult seat belts are installed to them.
- Page 53 1992 Volvo 240 To buckle: Pull the belt out from the retractor far enough to insert the latch into the buckle until a distinct snapping sound is heard. The belt should not be twisted or turned. Note: The lap belt should sit low and tight under abdomen.
- Page 54 1992 Volvo 240 1 Attach the seat belt. Pull rapidly on the strap. WARNING! Check other traffic before performing this check. Brake firmly from approximately 30 mph (50km/h) or turn in a tight circle while pulling on the belt. In all the above checks you should not be able to pull the belt out.
- Page 55 The systems is designed to supplement the protection provided by the three-point seat belt system. The interior of an SRS-equipped Volvo looks very much the same as any other. The only indications of the system's presence are the "SRS" embossed on the steering wheel pad, and the knee bolster beneath the steering column.
- Page 56 When installing any optional equipment make sure that the SRS system is not damaged. Do not attempt to service any component of the SRS yourself. Attempting to do so may result in serious personal injury. If a problem arises, take your car to the nearest authorized Volvo Dealer for inspection as soon as possible.
- Page 57 WARNING! If the SRS warning light stays on after the engine has started or if it comes on while you are driving, drive the car to the nearest authorized Volvo Dealer for inspection as soon as possible. ATTENTION! SRS VEHICLE! THIS CAR IS EQUIPPED WITH A SUPPLEMENTAL RESTRAINT SYSTEM.
- Page 58 1992 Volvo 240 Should you have any questions about the SRS system, please contact your authorized Volvo Dealer or the Consumer Affairs Department. file:///K|/ownersdocs/1992/1992_240/92240_037.htm (10 of 10)12/30/2006 9:31:26 AM Contents Top of Page...
- Page 59 1992 Volvo 240 pg. 44 Doors and locks, Child safety locks Both front doors can be unlocked by using the starting (ignition) key. Turning the key ¼ turn counter- clock wise (right door : clockwise) lifts the lock buttons on the window ledge and the door can be opened by pulling the handle.
- Page 60 1992 Volvo 240 The buttons are located on the rear door jambs. A The lock functions normally B The door cannot be opened from the inside. WARNING: In the event of an accident, the rear seat passengers cannot open the doors from the inside with the buttons in position B.
- Page 61 1992 Volvo 240 The trunk lock can also be disconnected from the central locking system (only 4-doors) by turning the key counterclockwise as shown below. The trunk is now always locked. This option can be used if for example, you lend your car to somebody. If you give only the service key to the driver it will not be possible to open the trunk.
- Page 62 1992 Volvo 240 Pull the release handle (located under the left side of the dash). Lift the hood slightly, insert a hand under the center line of the hood and depress the safety catch handle. WARNING! Check that the hood locks properly when closing.
- Page 63 1992 Volvo 240 WARNING! When braking rapidly the load could be displaced and cause injury to occupants. Sharp edges on the load should be covered for protection. It is essential that the "load" be secured safely. Use belts locked around the folded down armrest (see illustration).
- Page 64 1992 Volvo 240 A Adjustment up/down B Adjustment sideways A Adjustment up/down B Adjustment sideways Avoid using ice scrapers made of metal as they can easily scratch the mirror surface. WARNING! The mirrors should always be adjusted before driving. Objects seen in the wide angle right side mirror are closer than they appear to be.
- Page 65 1992 Volvo 240 1. Light always on. 2. Light always off. 3. Light is on when either of the front or rear doors are opened. The wagon model has a slightly different kind of interior lamp housing. On certain models a time delay device illuminates the interior light for approx. 15 seconds after closing the driver's door.
- Page 66 1992 Volvo 240 The fuel tank cap is located behind the door on the right rear fender. Open cap slowly during hot weather. When filling, position the cap in the special bracket on the door. After filling the tank, install the cap and turn until a "click"...
- Page 67 1992 Volvo 240 pg. 49 Rear seat (wagon) Depress either lever located at the front bottom edge of the rear seat cushion (right or left side). Tilt the seat towards the front seat. Note: It may be necessary to move front seats forward or raise the seat backs slightly to allow rear seat to fold down.
- Page 68 1992 Volvo 240 Warning: When returning the rear seat to its normal position, make sure the latches are securely locked and the seat belts are easily accessible for use. The seat cushion can be easily removed to provide a slightly larger cargo storage area. To remove, lift the seat cushion out of the hinges.
- Page 69 1992 Volvo 240 To open from the outside: Depress the release button located under the tailgate handle. To open from the inside: Pull out the T-handle located at the bottom of the tailgate. A The lid cannot be opened from the inside.
- Page 70 The spare wheel and jack are stored under the hatch to the left in the cargo compartment. Loosen the two clips ¼ turn and lift off the hatch. WARNING! Unless the station wagon is equipped with a cargo compartment seat (Volvo accessory), occupants should not ride in this section of the car.
- Page 71 1992 Volvo 240 Six eyelets are provided in cargo compartment for anchoring cargo. Two eyelets are accessible when the seat back is folded forward. WARNING! Luggage or other cargo should not be stowed higher than the seat backs. All items should be secure in place.
- Page 72 1992 Volvo 240 Driver seat height There are two levers, each with three positions, for adjusting the height of the seat (front and/or back of cushion). This allows adjustment of the seat cushion angle for added comfort. After adjusting the seat check that it is securely latched.
- Page 73 1992 Volvo 240 Contents Top of Page file:///K|/ownersdocs/1992/1992_240/92240_049.htm (7 of 7)12/30/2006 9:31:27 AM...
- Page 74 1992 Volvo 240 pg. 53 Operating the car: Page Break-in period Driving economy, shift indicator light Starting the engine Manual transmission Automatic transmission Emergency towing, towing information Trailer hauling Automatic transmission, brake system Three way catalytic converter pg. 54 Break-in period...
- Page 75 1992 Volvo 240 600 – 1,200 miles (1,000 – 2,000 km) 1st gear 25 mph (40 km/h) 2nd gear 40 mph (65 km/in) 3rd gear 60 mph (100 km/h) 4th gear 80 mph (130 km/h) 5th gear 90 mph (150 km/h) Avoid driving at low speed in high gear.
- Page 76 (manual transmission models only) The Volvo shift indicator light (S.I.L.) is a device designed to help you get even better gas mileage from you Volvo car. Studies have shown that the best fuel economy is obtained by shifting gears at low engine rpm and high relative engine load.
- Page 77 1992 Volvo 240 Note: Remove foot completely from the clutch pedal after each gear change when programming the control unit. pg. 56 Starting the engine To start the engine: 1 Enter the car and check that the seat is adjusted properly. Make sure the brake (and clutch) pedal can be depressed completely.
- Page 78 1992 Volvo 240 Depress the clutch pedal fully when changing gears. Remove the foot from the clutch pedal after every gear shift. See "Shift indicator light" section for more information on economical use of the manual transmission. Recommended minimum and maximum speeds for each gear are listed in the specification section.
- Page 79 1992 Volvo 240 Shift positions P park D drive R reverse 2 intermediate N neutral 1 low The gear selector can be moved freely between D and 2. Selections of other positions are obtained by depressing the selector knob prior to moving the selector.
- Page 80 1992 Volvo 240 for relatively slow highway driving. for city driving. when driving on mountain roads where precise speed control is desirable. for passing. 1 Low position If position 1 is selected when driving at high speeds, 2 is engaged first and 1 when the speed has dropped to approx.
- Page 81 1992 Volvo 240 pg. 59 Automatic transmission (cont.) Disengaging 4th gear The transmission will engage 4th gear automatically after upshifting through first, second and third gears unless disengagement button on the side of the gear knob is pushed. When the button is pushed to disengage 4th gear, the transmission operates as a 3-speed unit. If the button is pushed while 4th gear is engaged, then a downshift to 3rd gear will occur.
- Page 82 1992 Volvo 240 Automatic down-shift to a lower gear is achieved by depressing the accelerator pedal fully and briskly. An up-shift will be achieved when approaching the top speed for a particular gear or by releasing the throttle pedal slightly.
- Page 83 1992 Volvo 240 Precautionary steps to observe when towing Please check with state and local authorities before attempting this type of towing as vehicles being towed are subject to regulations regarding maximum towing speed, length and type of towing device, lighting, etc.
- Page 84 When preparing for trailer hauling, observe the following: Use a trailer hitch which meets Federal Safety Standards for rear end collisions (FMVSS 301-75). For trailer weights exceeding 2,000 lbs (908 kgs) use only a trailer hitch offered as a Genuine Volvo Accessory.
- Page 85 "Heating and Ventilation". The recirculation button must not be depressed. Roof rack Permanent and removable roof racks are available from Volvo Accessories. Observe the following points when in use. Avoid point loads. Distribute the load evenly. Place the heavy cargo at bottom of load.
- Page 86 When driving with heavy trailers, it is recommended that an additional oil cooler be installed. This applies especially when driving under sever conditions e.g. mountain driving or prolonged driving at high speeds without breaks. The additional oil cooler is available as a genuine Volvo accessory. Regarding oil change, see section titled "Transmission oil".
- Page 87 If the fluid level is below the MIN mark in either section of the reservoir: DO NOT DRIVE. Tow the car to a Volvo dealer, have the brake system checked and any leakage repaired. Severe strain on the brake system The brakes will be subject to severe strain when driving in mountains or hilly areas.
- Page 88 1992 Volvo 240 your vehicle if you detect engine misfire, noticeable loss of power or other unusual operating conditions , such as engine overheating or backfiring. A properly-tuned engine will help in avoiding malfunctions that could damage the Catalytic Converter.
- Page 89 1992 Volvo 240 pg. 65 Service and maintenance: Page Maintenance services Service requirements Engine B230F Fuel requirements Engine fluids Engine oil, Oil/oil filter change interval Cooling system Servicing Transmission oil Rear axle, power steering, brake fluid Lubrication Coolant Alternator, jump starting...
- Page 90 67 Maintenance service Maintenance inspection intervals Volvo advises you to follow the inspection program at 10,000 mile or 16,000 km intervals which is outlined in the "Warranties and Maintenance Records Manual". This maintenance program contains inspections and services necessary for the proper functioning of your car over the next inspection interval.
- Page 91 1992 Volvo 240 (16,000 km). The extended maintenance service intervals make it even more advisable to follow this program. Inspection and service should also be performed any time a malfunction is observed or suspected. It is recommended that receipts for vehicle emission services be retained in the even that questions arise concerning maintenance.
- Page 92 1992 Volvo 240 Timing Belt Air Cleaner Filter Spark Plugs Manual Transmission Oil Automatic Transmission Oil Rear Axle Oil 1) See section "Engine Oil" for detailed information. 2) For services beyond 60,000 miles (96,000 km), consult your Maintenance Records booklet.
- Page 93 1992 Volvo 240 pg. 70 Servicing Engine The following items should be checked weekly by the owner. (This only takes a few moments.) Engine oil level Brake fluid Radiator coolant level Tire pressures (including spare) Operation of all lights Horns...
- Page 94 1992 Volvo 240 1 Data plate 2 Oil filler cap, engine 3 Oil dipstick, engine 4 Brake fluid reservoir 5 Washer fluid reservoir 6 Expansion tank, coolant 7 Power steering reservoir 8 Battery file:///K|/ownersdocs/1992/1992_240/92240_065.htm (6 of 6)12/30/2006 9:31:30 AM Contents...
- Page 95 To meet seasonal air quality restrictions, some states require the use of "oxygenated" fuel in certain areas. Volvo allows the use of the following "oxygenated fuels; however, the octane ratings listed on this page must still be met. Alcohol Fuels containing up to 10% ethanol by volume may be used.
- Page 96 Volvo dealer. If you change the engine oil and filter yourself, your Volvo dealer can assist you in disposing of the used oil. Engine oil can be harmful to your skin – gloves should be worn when performing this work.
- Page 97 1992 Volvo 240 PROTECT THE ENVIRONMENT It is illegal to pollute drains, water courses and soil. Use authorized waste collection facilities, including approved recycling centers and garages providing facilities for disposal of used oil and used oil filters. If in doubt, contact your local authority for advice on disposal.
- Page 98 1992 Volvo 240 Coolant Maintain fluid level between MAX and MIN marks on expansion tank. Mixture of 50 percent Volvo Original coolant/antifreeze or similar and 50 percent water should be used. See "Coolant" section. Brake fluid Without removing the cap, check that the level is above the MIN mark. Brake fluid DOT 4 or 4+. See "Brake fluid"...
- Page 99 Do not use oils with other viscosity ratings. The use of incorrect viscosity oil can shorten engine life. Volvo recommends the used of energy-conserving oils. Look for the API label. Synthetic or semisynthetic oils may be used if their specifications comply with the oil quality requirements.
- Page 100 Note: SAE 15W/40 must not be used at low ambient temperatures; see viscosity chart. Volvo recommends the use of oils with the American Petroleum Institute (API) label. This label certifies that the oil conforms to the applicable standards and specifications of the API.
- Page 101 1992 Volvo 240 Fill coolant through the expansion tank. The heater controls should be fully open when draining and filling. Add coolant until the level is up to the MAX mark or slightly above. Start engine and run until hot. Check the cooling system connections for tightness. Also re-check the coolant level.
- Page 102 1992 Volvo 240 Torque manifold nuts A loose manifold could alter air/fuel ratio and cause an increase in emission and/or poor driveability. Valves The valve clearance should be checked every 30,000 miles (48,000 km). Exhaust Gas Recirculation (EGR) This system operates by returning some of the exhaust gases to the engine to be recombusted: since this lowers the combustion temperature the amount of nitrogen oxides released into the atmosphere is reduced.
- Page 103 1992 Volvo 240 pg. 77 Servicing Engine Fuel System The fuel injection system is all-electronic and is microprocessor controlled. It can continually compensate for variations in engine load, speed and temperature to give the best economy and power. The most unique feature of the system is the air mass meter which measures the mass of the inducted air instead of the volume.
- Page 104 The filter cannot be cleaned and should always be replaced with a new one. Checking and adjusting idle speed Your Volvo is equipped with an electronically controlled idle speed system that requires no periodic checking or adjustment. Lambda-sond™ (oxygen sensor) system This is an emission control system designed to reduce emissions and improve fuel economy.
- Page 105 1992 Volvo 240 and continuous operation at its working temperature. This type of Lambda-sond™ does not require periodic replacement. Catalytic Converter This is a supplementary device in the exhaust system, designed to reduce exhaust emissions. This device is mainly a container with a ceramic material insert, designed to let exhaust gases pass through channels in the insert.
- Page 106 1992 Volvo 240 The PCV nipple in the intake manifold should be cleaned after 60,000 miles (96,000 km). pg. 81 Servicing (cont.) Engine Evaporative Emissions Vehicles intended for the North American market are equipped with a fuel vapor evaporative control system, which prevents gasoline fumes from being released into the atmosphere.
- Page 107 1992 Volvo 240 CAUTION: Do not use silicone-based lubricants, which can have adverse effects on electrical components. WARNING! The ignition system operates at very high voltages. Special safety precautions must be followed to prevent injury: Always turn the ignition off when: connecting engine test and diagnostic equipment to the vehicle (timing light, tach-dwell tester, ignition oscilloscope, etc.)
- Page 108 1992 Volvo 240 pg. 82 Manual transmission Manual transmission with overdrive, M47 II Capacity: 1.6 US qts = 1.5 liters. Fluid type: Automatic Transmission Fluid Type F The oil level should be up to the level/filler plug. When replacing transmission oil, drain the oil immediately after driving, while it is still hot, by removing the drain plug.
- Page 109 1992 Volvo 240 Automatic transmission Capacity: 7.8 US qts (7.4 liters) Fluid type: Automatic Transmission Fluid type Dexron II D. Replace: every 20,000 miles (32,000 km). A Cold transmission : fluid temperature = + 105 °F (+ 40 °C) .
- Page 110 1992 Volvo 240 WARNING! The oil may be very hot! Do not use rags which can leave lint on the dipstick. The transmission is topped up via the dipstick tube. The space between the MIN and MAX marks on the dipstick corresponds to 0.5 US qts (0.5 liter). Do not fill the transmission with too much fluid, since this can result in fluid being ejected from the transmission.
- Page 111 1992 Volvo 240 Power steering fluid Capacity: 0.8 US qts = 0.75 1iters Fluid type: ATF type F only Replace: no fluid change required. The dipstick is attached to the cap. Fluid level should be between MIN and MAX marks. Add fluid when the level is at the ADD mark.
- Page 112 85 Body Lubrication Chassis maintenance To simplify maintenance, your Volvo has been equipped with ball joints, steering rods and propeller shafts that do not require regular lubrication. Points that normally require lubricating have been packed with very durable grease at the factory and then carefully sealed, eliminating the need for subsequent lubrication.
- Page 113 1992 Volvo 240 Door hinges (lower) and door stop A grease B oil No. Lubricating point Lubricant 1 Trunk lid lock keyhole Low temperature grease 2 Trunk lid hinges Oil 3 Door lock keyhole outer sliding surfaces Oil 4 Sunroof wind deflector Oil...
- Page 114 If you change the coolant yourself, you should ensure that the used coolant is disposed of in a manner which does not pose an environmental hazard. Allow your Volvo dealer to help you in disposing of the used coolant in an environmentally safe way.
- Page 115 1992 Volvo 240 Note: Do not add water only. Water by itself reduces the rust protective and anti-freeze qualities of the coolant and has a lower boiling point. It can also cause damage to the cooling system if it should freeze.
- Page 116 1992 Volvo 240 5 If any electrical welding work is performed on the vehicle, the ground lead and all the connecting cables of the alternator must be disconnected and the welder wires placed as near the welding point as possible.
- Page 117 1992 Volvo 240 WARNING! To prevent possible explosion, never expose battery to open flame or electric spark. Do not smoke near battery. Batteries generate hydrogen gas which is flammable and explosive. Battery fluid contains sulfuric acid which can cause serious injury.
- Page 118 1992 Volvo 240 pg. 88 Replacing bulbs Replacing bulbs The replacement of bulbs in the various lighting units is shown on the following pages. Make sure when installing bulbs, that the guide pin on the socket fits into its corresponding recess.
- Page 119 1992 Volvo 240 Front light bulbs Loosen the Phillips screws and remove the lens. The bulbs can now be removed by pressing them inwards and turning them slightly counterclockwise. When re-installing lens, check that the gasket is in position. Bulbs Power Socket CP(W) 1 Front position 24/2.2(21/5) BaY15d¹)
- Page 120 1992 Volvo 240 1 Unscrew and remove tail lamp inside cover. Note that inside cover is hooked at the upper edge. Lift the lower end out/up and unhook upper edge. 2 Turn bulb holder approx 3/8" (1 cm) counterclockwise and remove it.
- Page 121 Loosen the clip and move panel aside (see illustration). The procedure for changing a bulb is basically the same as for other models. When re-installing, hold the bulb holder with the word "Volvo" turned towards the center of the car. Power...
- Page 122 1992 Volvo 240 Bulbs CP W 1 Rear fog light (Driver side only) 2 Back-up light 3 Rear turn signal 4 Brake light/tail 32/3 21/5 light License plate light, sedan model Slide the bulb housing backwards until it is released from the front edge. Pull out the lamp housing and replace the bulb.
- Page 123 1992 Volvo 240 License plate light, wagon model Insert a screwdriver through the opening in the housing and depress the catch tab. Pull out the housing assembly. Bulbs Power Socket License plate light, 5 W S 8.5 - 8 wagon...
- Page 124 1992 Volvo 240 Press in reflector catch to release reflector assembly. Swing out reflector and replace bulb. Snap reflector in and check that bulb lights when brake pedal is depressed. Align the light assembly catches with the holes in the lamp housing and press it into place.
- Page 125 Bulb Power Socket Trunk light 15 W S 8.5 - 8 Instrument and heater control lighting Due to the location of these bulbs their replacement should be carried out by a Volvo dealer. pg. 93 Fuses file:///K|/ownersdocs/1992/1992_240/92240_088.htm (8 of 10)12/30/2006 9:31:34 AM...
- Page 126 The fuse box is positioned in front of the left front door pillar. When replacing fuses, check that the correct amperage is used. Never use fuses of higher amperage, unless specified by your Volvo dealer. If one fuse repeatedly fails, take the car to your Volvo dealer for fault-tracing.
- Page 127 1992 Volvo 240 13 Heated front seats, Daytime running lights - relay (Canada) 16 A 14 Rear fog lights 8 A 15 Parking lights (left side), License plate light 8 A 16 Parking lights (right side), Instruments and control panel lights, Shift indicator light 8 A ABS-equipped vehicles: this system is protected by a separate 10A fuse located under the seat on the passenger's side.
- Page 128 Vehicle Loading The tires on your Volvo will perform to specifications at all normal loads when inflated as recommended on the tire information label located on the rear facing side of the right front door. This label lists both tire and vehicle design limits.
- Page 129 Sufficient clearances between chains and brakes, suspension and body components must be maintained. Your Volvo dealer can provide Volvo accessory tire chains that can be installed on all Volvo original tires and wheels.
- Page 130 Recommended tire pressures (see decal) should be maintained irrespective of which position on the car the Special Spare tire is used on. In the event of damage to this tire a new one can be purchased from your Volvo dealer. file:///K|/ownersdocs/1992/1992_240/92240_094.htm (3 of 10)12/30/2006 9:31:35 AM...
- Page 131 Roadholding, etc., might be affected with the "Special Spare'' in use. Do not exceed 50 mph (80 km/h). WARNING! Special wheel rims Only special wheel rims, tested and approved by Volvo, are suitable for use with the factory-installed air dam. Any other wheel rims may not permit sufficient air circulation for brake cooling. pg. 96 Wheel changing Changing a wheel Spare wheel, jack and tool kit are stowed in the trunk compartment.
- Page 132 1992 Volvo 240 NOTE: The jack in your car comes in two versions. If your car is equipped with the alternate version (see illustration), the crank handle can be folded out by pressing the nob on the handle downward. To attach the jack, refer to the illustration on the following page.
- Page 133 1992 Volvo 240 Clean the contact surfaces on the wheel and hub. Lift the wheel and place it on the hub. Make sure that you align the wheel with the guide stud on the wheel hub prior to installation. Install the wheel nuts clockwise and tighten lightly.
- Page 134 1992 Volvo 240 WARNING! The jack's hook must engage the pin in the jack attachment (A). The car's weight must not rest on the jack's hook (B). Never crawl under a car supported by a jack. Use the jack intended for the car when replacing a wheel.
- Page 135 1992 Volvo 240 Washing The car should be washed at regular intervals since dirt, dust, insects and tar spots adhere to the paint and may cause damage. When washing the car, do not expose it to direct sunlight. Use lukewarm water to soften the dirt before you wash with a sponge, and plenty of water, to avoid scratching.
- Page 136 The plastic in the upholstery can be washed with soapy water or a mild detergent. Leather upholstery can be cleaned with a soft cloth and mild soap solution. For more difficult spots, consult your Volvo dealer. On no account must gasoline, naphtha or similar cleaning agents be used on the plastic or upholstery since these can cause damage.
- Page 137 Spots on textile mats can be removed with a mild detergent. Anti-rust treatment Your Volvo has been rust protected at the factory. On external surfaces a heavy coat of wear resistant material has been used, while on the internal surfaces a lighter rust inhibitor is used.
- Page 138 Minor scratches can be repaired by using Volvo touch-up paint. Note: When ordering touch-up paint from your Volvo dealer, use the paint code indicated on the service label. The label is located on the wheel housing in the engine compartment.
- Page 139 1992 Volvo 240 2 Thoroughly mix the primer and apply it with a small brush. When the primer surface is dry, the paint can be applied using a brush. Mix the paint thoroughly, apply several thin paint coats and let dry after each application.
- Page 140 1992 Volvo 240 Primer – spray can Paint – spray can Masking tape Note: When touching-up the car, it should be clean and dry. The surface temperature should be above 60 ° F (+15 ° C). When large surfaces have to be repainted, suitably mask the surrounding area with masking tape and paper.
- Page 141 103 Long distance trips, Cold weather Prior to a long distance trip Have your car checked at a Volvo dealer. Preventive maintenance will help to ensure a trouble-free trip. The main items to check are listed below: 1 Brakes, front wheel alignment and steering gear.
- Page 142 Engine cooling system Volvo original coolant/anti-freeze coolant should be used all year round. The cooling system should always contain water plus anti-freeze and rust inhibitor, even during the summer. Experience has also shown that extremely weak anti-freeze solutions (10-25 percent) are ineffective for rust protection.
- Page 143 This is particularly important during the winter because the windshield frequently becomes dirty and is often splashed with water which freezes rapidly. This may necessitate the frequent use of the windshield washer and wipers. Your Volvo dealer can supply you with suitable anti-freeze for this purpose. Suitable mixtures of anti-freeze and water are: Down to +14 °...
- Page 144 104 Service diagnosis The diagnoses outlined below are intended to serve only as a guide to locate and temporarily correct minor faults. Causes of unsatisfactory performance should be investigated and corrected by your Volvo dealer. Condition: Starter fails to operate (or operates very slowly) Possible cause Weak battery or dead cell.
- Page 145 1992 Volvo 240 Possible cause Intake system leaking. No fuel reaching engine. No spark Spark plugs, high tension leads or distributor cap wet or defective. Condition: Erratic idle (misfiring) Possible cause Intake system leaking. Spark plugs, high tension leads or distributor cap worn (defective) Worn spark plugs.
- Page 146 1992 Volvo 240 Check wire terminals at: fuel pump, fuse No. 5 and 7, coil, distributor, ignition Defective wires. switch and relays. Intake system Check vacuum hose connections at manifold and auxiliary air valve. leaking. Fuel filter clogged. Clean fuel tank filter and replace fuel line filter.
- Page 147 5 Federal Motor Vehicle Safety Standards (FMVSS) specifications (USA) and Ministry of Transport (CMVSS) Standards (Canada) Your Volvo is designed to meet all applicable safety standards. Evidence of this can be verified from the certification label on the rear facing side of the driver's front door.
- Page 148 1992 Volvo 240 For further information regarding these regulations, please consult your Volvo dealer. Contents Top of Page file:///K|/ownersdocs/1992/1992_240/92240_104.htm (5 of 5)12/30/2006 9:31:37 AM...
- Page 149 1992 Volvo 240 pg. 109 Specifications Dimensions and weights Cargo space Engine Cooling system Fuel system Ignition system Power transmission Front suspension Capacities Electrical system pg. 110 Specifications (cont.) Dimensions and weights Length Width Height, curb weight Wheelbase Ground clearance (full load)
- Page 150 1992 Volvo 240 Max. trailer weight (trailer equipped with service brakes) Trailers without brakes Max. hitch load Cargo Space Length with rear seat up Length with rear seat down Length with seat cushion removed Maximum width Height Volume with rear seat up...
- Page 151 1992 Volvo 240 Engine B230F (2.3 liters; 141 cu. in.) Liquid-cooled, gasoline, 4-cylinder in-line engine. Cast-iron cylinder block with cylinders bored directly in block. Aluminum-alloy cylinder head with single overhead camshaft and separate intake and outlet channels. Engine lubrication is provided by a gear pump driven from the crankshaft. Full-flow type oil filter.
- Page 152 1992 Volvo 240 Coolant: Volvo Original coolant/antifreeze Fuel system The engine is equipped with an electronic fuel injection system. Ignition System Firing order 1-3-4-2 Ignition setting (12 ° B.T.D.C. at 750 rpm) Spark plugs Bosch WR7DC (or equivalent) Spark plug gap 0.028-0.032" (0.7-0.8 mm) Tightening torque 15-22 ft.
- Page 153 1992 Volvo 240 Rear axle ratio 3.31:1 mph km/h 1st gear 5.4 8.7 2nd gear 10.0 16.2 3rd gear 15.8 25.5 4th gear 21.7 34.9 5th gear 26.4 42.5 Reverse 5.9 9.5 Front suspension McPherson type spring and strut suspension. Shock absorbers housed in strut casing. Rack and pinion steering.
- Page 154 1992 Volvo 240 pg. 114 Specifications (cont.) Capacities 15.8 US Fuel tank gals Cooling system - manual transmission 9.9 US qts - automatic transmission 9.7 US qts - expansion tank 0.7 US qts separately Engine: 4.0 US qts - oil and filter change 3.5 US qts...
- Page 155 Turn Signals, rear Brake light/tail light High-mounted brake light Back-up Lights Rear fog lights The following bulbs may be obtained from your nearest Volvo dealer: Rear Ash Tray Light License Plate Light, Sedan License Plate Light, Wagon Interior Light Glove box Light...
- Page 156 * always observe posted speed limits. Vehicle Loading The tires on your Volvo will perform to specifications at all normal loads when inflated as recommended on the tire information label located on the rear facing side of the right front door. This label lists both tire and vehicle design limits.
- Page 157 116 Volvo Service Manuals Service Manuals for your Volvo are available for purchase. These are the same used by competent Volvo technicians. Major sections within the binder system include: 0 - General Information; 1 - Service and Maintenance;...
- Page 158 Note! *The above pertains to USA only. pg. 117 Road assistance Your new Volvo comes with a three year road assistance program known as ON-CALL. Additional information, features, and benefits are described in a separate information package in your glove compartment.
- Page 159 Incorrectly installed optional equipment, e.g. car telephones, modular telephones or alarm systems left in or used in close proximity to the car, can cause faults in the car's electronic control systems. Consult your Volvo dealer before installing any such accessories. Back cover Oil level between dipstick marks.
- Page 160 1992 Volvo 240 Never operate engine in closed unventilated areas. Changing a wheel, see pages 96, 97 a bulb, see pages 88-92 a fuse, see page 93 WARNING! The cooling fan may start or continue to operate (for up to 6 minutes) after the engine has been switched off.