
Related Manuals for Jensen VX3016


Summary of Contents for Jensen VX3016
- Page 1 VX3016 7.0" Single DIN Multimedia Receiver AM-FM / DVD / Pandora / Bluetooth / iPhone® - iPod®/ Screen Mirroring / USB / AV In / Rear Camera In Operation Manual...
- Page 2 Thank you for choosing a Jensen product. We hope you will find the instructions in this owner’s manual clear and easy to follow. If you take a few minutes to look through it, you’ll learn how to use all the features of your new Jensen VX3016 Mobile Multimedia Receiver for maximum enjoyment.
-
Page 3: Fcc Radiation Exposure Statement
FCC Statement NOTE: This equipment has been tested and found to comply with the limits for a Class B digital device, pursuant to Part 15 of the FCC Rules. These limits are designed to provide reasonable protection against harmful interference in a residential installation. -
Page 4: Safety Precautions
Safety Precautions Please contact your nearest dealer if one of the following symptoms is experienced: P l e a s e r e a d t h r o u g h t h e s e o p e r a t i n g instructions so you will know how to operate your model properly. - Page 5 Please read the instruction manual for this product before using. The documentation provided will allow the user to fully enjoy all the features of your new Jensen VX3016 Mobile Multimedia Receiver. Please read all of the instructions before beginning the installation and save this manual for future reference. We recommend having your Jensen VX3016 installed by a reputable installation shop.
-
Page 6: Rear Camera
• Rotary Encoder Audio Control (Volume Control) • USB Fast Charge: 2.1 Amp • LCD Screen Dimmer Circuit - Dims Screen at Night Automatically REAR CAMERA The VX3016 is “Camera Ready.” Before accessing any camera features, you must purchase and install a rear video camera. -
Page 7: Front Panel Controls And Indicators
FRONT PANEL CONTROLS AND INDICATORS VX3016 Controls and Indicators Notice: The graphic in this manual is for reference only, and may be different from the actual unit. Reference to actual unit is suggested. - Page 8 1.) DISC SLOT: Accepts DVD/CD/MP3 discs. If the unit is turned on, playback begins when a disc is inserted. 2.) EJECT [ ] Button: Press this button to eject a DVD/CD/MP3 disc. Disc play is stopped, the disc is ejected and the unit will change to radio operation. If the disc is not removed from the unit and the button is pressed again, the disc will be re-loaded.
-
Page 9: Fast Forward
Remote Control Function Description 1. SOURCE (SRC) Button: Press this button to switch between and select available sources. 2. EJECT Button ( ): Press this button to eject a DVD/CD/MP3 disc. Disc play is stopped, the disc is ejected and the unit will change to radio operation. If the disc is not removed from the unit and the button is pressed again, the disc will be re-loaded. -
Page 10: Fast Reverse
12. NEXT (l) Button: Press this button to skip to the next chapter, track or song during playback of a disc. Press this button while in Radio mode to search available radio station by increasing tuning frequency. 13. PLAY / PAUSE ( ) Button: Press this button to pause the playback of a disc. -
Page 11: Turning The Unit On/Off
VX3016 Main Source Menu 2. Touch the desired source icon on one of the two main menu screens. Source Menu 1 of 2: Radio, Disc, Pandora, USB, Bluetooth and Screen Mirroring. -
Page 12: Volume Adjustment
Mute Press the rotary control on the front panel or press the [MUTE] button on the remote control to mute the volume from the unit. Press again to un-mute. Volume Adjustment To increase or decrease the volume level, turn the rotary control on the front panel. -
Page 13: Equalizer Controls
Equalizer Controls Equalizer (EQ): Adjustments made after entering of the audio/video sources (Disc, Radio, USB, AV IN 1, IN 2) Touch the Equalizer (EQ) icon to view the Equalizer Control Screen to make adjustments to the audio Balance and Fader levels. Touch the return icon to return to the current source. -
Page 14: General Settings
General Settings 1. Touch [ General ], if necessary. 2. Touch to highlight a setting to display/select an option. General settings Options Description USA/Asia/Japan/Europe/Eur LW/ Radio region Select one that matches your location. Oirt Local Select Local to receive only stations with extremely Radio range strong signal. -
Page 15: Video Settings
Video Settings 1. Touch [Video]. 2. Touch an option repeatedly to select. Video settings Options Description Full Aspect Ratio Adjust aspect ratio. Normal Picture Adjustment Brightness, Contrast and Saturation adjustments. 3. Touch the back arrow icon ("<") to exit and return to the previous screen. Time Settings 1. -
Page 16: Language Settings
Language Settings 1. Touch [ Language ]. 2. Touch an option repeatedly to select. Language settings Description Select on-screen display language. DVD audio Select DVD audio language. Options available depending on DVD disc. DVD subtitle Select DVD subtitle language. Options available depending on DVD disc. Disc menu Select DVD menu language. - Page 17 Load factory Restore to default settings. Version Info The Version menu is used to identify the model, hardware and software versions. 3. Touch the back arrow icon ("<") to exit and return to the previous screen. Adjust Source Volumes (Relative Level) You can set different relative volumes for different sources.
- Page 18 AM-FM RADIO CONTROLS Select Radio as Playing Source Open the SOURCE MENU and touch [Radio]. Selecting a Radio Band Press th BAND button on the remote control or touch the BAND icon on the user interface to select one radio band among FM1, FM2, FM3, AM1 and AM2. Tuning AM-FM Stations Seek Tuning Press the [...
-
Page 19: Recalling A Station
AutoStore (AS) Touch AUTOSTORE to search radio stations and store the 6 strongest stations in the current band automatically. Recalling a Station 1. Select a band. 2. Touch an on-screen preset button to select the corresponding stored station. Local / Distance When the Local function is on, only radio stations with a strong local radio signal are played. -
Page 20: Playback Of Audio Files
PLAYBACK OF AUDIO FILES Compatible Audio Discs Types This system will play the following types of discs: • DVD - DVDs that contain audio and/or video. • Audio discs - Audio CD's that contain audio files. • MP3 discs - A disc that contains audio, video and image files (for example, a CD-R with downloaded MP3 files. -
Page 21: Controlling Playback
Controlling Playback To access the on-screen controls, touch the screen anywhere except for the upper left corner and touch again to cancel display. Connecting a USB Device 1. Open the USB door. 2. Connect a USB device into the USB connector. Play starts automatically. NOTES: If there are audio files supported on the USB stick, the system will enter the audio files menu automatically. -
Page 22: Repeat Playback
Video Files 1. Touch Video icon [ ] to display all available video folders. 2. Touch a folder, then touch the desired file. 3. Touch the file again to start play. Picture Files 1. Touch Picture icon [ ] to display all available picture folders. 2. - Page 23 Select Audio Mode When playing DVD's, the user can select an audio mode (R/L/Stereo). 1. During playback, touch the bottom half of the screen to display menu on the screen. 2. Touch the More icon [ ] to display the 2nd menu. 3.
- Page 24 For VCD 1. Disc type. 2. Return to the main menu. 3. VCD Track information. “1/16” indicates that this VCD has 16 tracks and the track playing back now is the first title. 4. Time display. 02:35 < Title: 1/16 VCD Information Display Elapsed Time 1.
-
Page 25: General Disc Information
General Disc Information Disc Properties Symbol 12cm Disc Properties Max Play Time Single side single layer (DVD-5) (MPEG 2 Method) Single side double layer (DVD-9) 133 minutes Double side single layer (DVD-10) 242 minutes Double side double layer (DVD-18) 266 minutes 484 minutes Single side single layer (VCD) (MPEG 1 Method) - Page 26 EQUALIZER CONTROLS Adjusting Equalizer Controls The Equalizer adjustment screen allows the user to easily adjust the audio tone controls to suite individual listener preferences. Source Tone Memory Each source adjusts the EQ independently. This allows you to set the EQ to suite individual source preferences.
- Page 27 Adjusting the Fader and Balance The user can adjust front/rear fader settings, L/R balance settings, and subwoofer levels here. 1. Enter the EQ setup mode. 2. Touch the [ ] icon in the EQ interface menu. Balance - This feature is used to balance the audio output levels between the left and right side of the vehicle.
-
Page 28: Ipod® / Iphone® Controls
USB connector) NOTE: For audio connectivity, the iPod® / iPhone® must be connected to the VX3016 using the iPod® / iPhone® adapter cable that came with the iPod / iPhone device (also available separately). Be sure your iPod® / iPhone®... -
Page 29: Pausing Playback
pause playback. ) Next - Touch this icon to play the next track. List - Touch this icon to access the list of audio files contained on the iPod®. Touch a folder icon and the contents of the folder will be displayed. Touch a desired track icon twice and the track will begin playing. -
Page 30: Pandora® Radio Operation
1. Launch the Pandora app on the iPhone®, iPod® or Android device and login to your Pandora account. 2. For Apple devices, connect the USB cable to the VX3016, then select Pandora from the Main Source Menu. 3. For Android devices, connect your smartphone via Bluetooth to the VX3016, then select Pandora from the Main Source Menu. - Page 31 SRC Icon - Touch this icon to return to the Main Menu Screen. Pandora - Displays the current source. Time Display - This indicator displays the time as entered by the user in the Settings Menu. Pandora Radio Information Display - Displays the Pandora station, artist, song, and album information.
- Page 32 Bookmark Sub Menu To Stop Pandora Radio Exit the Pandora app on your smartphone. Pandora Error Messages Message Displayed Cause Corrective Action BookMark Track Error Software Error The track could not be bookmarked, please try again in a moment. BookMark Artist Error Software Error The song could not be bookmarked, please try...
-
Page 33: Bluetooth Operation
• Before using Bluetooth functions, you must pair your mobile phone to the VX3016 unit (see “Pairing the Bluetooth system with your mobile phone and unit”). To ensure the best reception for pairing and re-connection, please make sure the mobile phone battery is fully charged before you begin. -
Page 34: Pairing Bluetooth Devices
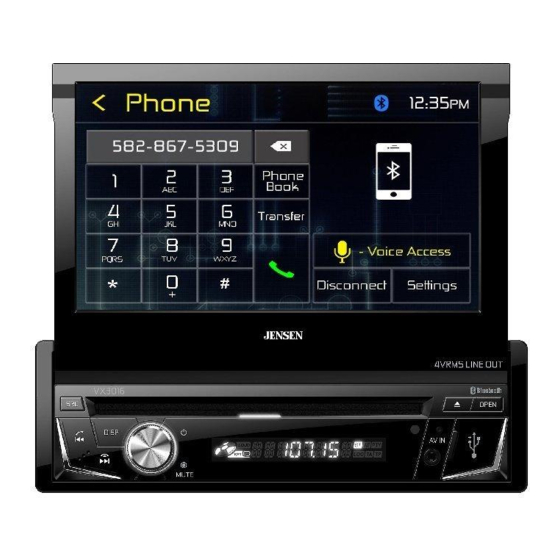
1. Turn ON the Bluetooth function on the device/mobile phone. 2. Search for Bluetooth devices using your mobile phone. 3. Select the Bluetooth device ID “VX3016” in the pairing list. 4. Enter default password “5309”. NOTES: • The operational range between this unit and a Bluetooth device is approximately 5 meters. - Page 35 Making a Call Select Bluetooth function in the home menu. Press "Option". Go to > "Phone Synch". Press "Synch" to import the mobile phone contacts. If you have many contacts, this may take up to 3-4 minutes initially. Up to 1000 contacts can be imported. 3.
-
Page 36: Bluetooth Music Function
PTT (Push to Talk) Function The VX3016 has a PTT button to allow you to access Siri or Google Voice through the head unit when connected via Bluetooth. You mobile phone must support Siri or Google Voice in order for this feature to be supported on the head unit. - Page 37 Android smartphones will require an app that must be downloaded from Google Play Store. Search for "Jensen Screen Mirroring" in the search bar. Note: In order to connect your smartphone to your VX3016, you will need an HDMI/MHL adapter for your particular brand of smartphone. In some cases,...
- Page 38 Plus® / iPhone 6® / iPhone 6 Plus® / iPhone 5® / iPhone 5S® / iPhone 5C® Note: In order to connect your smartphone to your VX3016, you will need the "Apple Lightning Digital AV Adapter" (HDMI adapter). No app or software is needed for Apple devices.
-
Page 39: Connecting Your Smartphone
HDMI/MHL adapters. Connect your smartphone to the HDMI/MHL adapter. Connect one end of the HDMI cable to the HDMI/MHL adapter. Connect the remaining end of the HDMI cable to the Jensen multimedia head unit HDMI input (Rear chassis panel). Consult your smartphone documentation for instructions on how to access HDMI/MHL on your device. - Page 40 Mirror Mode (One -Way Control - Apple / Android) Mirror Mode does not need any app support. Simply connecting the DMH25J to the VX3016 and establishing a WiFi connection is all that is needed. Mirror Mode w/ Touch Screen Control (Two-Way Control - Android Only) Mirror Mode w/ Touch Screen Control will require an app to be downloaded from Google Play Store.
- Page 41 AV In 1 / AV In 2 AV In 1 AV In 1 is used for playback of audio/video from an external device connected to the unit through a 3.5mm connector located on the front panel. AV In 2 AV-In 2 is used for playback of audio/video from an external device connected through RCA connectors located on the back of the unit.
-
Page 42: Swc Ready
SWC Ready The built-in SWC interface is compatible with PAC steering wheel control modules. The PAC SWI-RC is recommended. A third-party SWC adapter must be used in order for the VX3016 to be compatible with any steering wheel controls. Note: Not all OE steering wheel functions may be supported by the VX3016. -
Page 43: Rear Camera Operation
REAR CAMERA OPERATION This unit is “Camera Ready.” Before accessing any camera features, you must install a rear video camera (Sold separately). When the rear camera is installed, a rear view image of what is behind the vehicle will appear "on screen" when the vehicle is placed in reverse gear. When shifting out of reverse gear, the screen will display the previously selected source. -
Page 44: Troubleshooting
Troubleshooting Problem Cause Corrective action General Unit fuse blown. Install new fuse with correct rating. Unit cannot power on Car battery fuse blown. Install new fuse with correct rating. Illegal operation Reset the unit. Battery depleted. Change the battery. Remote control does not work Battery installed incorrectly. -
Page 45: Error Messages
Troubleshooting (Continued) Problem Cause Corrective action Disc playback Eject current disc and insert new Cannot insert disc A disc is inside the unit already. one. Disc is warped or scratched. Use disc in good condition. Disc is dirty or wet. Clean disc with soft cloth. -
Page 46: Specifications
SPECIFICATIONS DVD/CD Player Compatible Disc Media: DVD + R / RW (Single and Dual Layer) and CD-R / RW Compatible Media Formats: CD-DA, MP3, WMA, VCD, SVCD, Xvid, AVI, MPEG 1/2 Signal to Noise Ratio: >96dBA Dynamic Range: >95dB Frequency Response: 20Hz to 20kHz, -3dB Channel Separation: >... -
Page 47: Cea Power Ratings
General AV (Audio) Input Impedance: 10kOhm Power Supply: 11 to 16VDC, Negative Ground Power Antenna / Amp Remote (Blue): 500mA Max (Current Limited Protection) Operating Temperature: 0C ~ 65C / 32F ~ 149F Fuse: 15 Amp, ATO Type Chassis Dimensions: 7” x 7” x 4” (178mm x 178mm x 50mm) CEA Power Ratings Power Output: 13 Watts RMS x 4 Channels Into 4- Ohms @ <... -
Page 48: Care And Maintenance
Care and Maintenance 1. Use only a clean silicone cloth and neutral detergent to clean the front panel or monitor. A rough cloth and non-neutral detergent (such as alcohol) may result in scratching or discoloration. 2. Do not get water or cleaning fluids on the unit. 3. - Page 49 Dual Electronics Corporation Heathrow, FL 32746 Technical Assistance: 888-921-4088 www.jensenmobile.com © 2017 VX3016 Common Replacement Parts Installation Guide Wire Harness (Pwr/Spk/Line Out/ Bluetooth Microphone 30313990 Trim Ring 30413940 Remote Control 30714230 Hardware Kit 30513940 30113940 1.0 DIN Mounting Sleeve Operation manuals and other material online at: www.jensenmobile.com...