Table of Contents
Advertisement
Available languages
Available languages
Advertisement
Chapters
Table of Contents

Related Manuals for Universal Remote Control Universl Remote


Summary of Contents for Universal Remote Control Universl Remote
- Page 2 The information in this manual may be subject to change without prior notice. GAMER™ is a registered trademark of Universal Remote Control, Inc. All other brand or product names are trademarks or registered trademarks of their respective companies or organizations.
-
Page 3: Table Of Contents
Table of Contents Getting Started Controls Game Consoles & up to 6 Components …...3 Activate Component Buttons ……...3 The Media Function …………...3 Special Features SimpleSound …………………...4 MacroPower ……………………...4 Learning Capability ...4 Battery Installation ...5 GAMER Location of Controls…………...6 Light Button ………………...7 Setting Up ...8 SECTION 1: Pre-Programmed Code Method...8 SECTION 2: Auto Search Method...12... - Page 4 Erasing Commands - Overview ...2 7 SECTION 1: Erasing a Single Learned Command... 2 7 SECTION 2: Erasing All Learned Commands from one component.. 29 SECTION 3: Erasing SimpleSound Commands ………...30 SECTION 4: Erasing MacroPower Commands... 31 SECTION 5: Re-setting GAMER to Original Factory Defaults... 32 Pre-Programmed Code Tables ...
-
Page 5: Getting Started
Getting Started Control Game Consoles and up to 6 Components The GAMER is designed to control game consoles and up to 6 different audio/video components. It is pre-programmed to operate your Xbox 360, Playstation and Media Center PC right out of the box! The GAMER also has an extensive library of codes to operate virtually all brands of Audio, TV, DVD, Cable and Satellite components –... -
Page 6: Special Features
Special Features In addition, the GAMER also offers the following special features that can offer you time-saving conveniences: Learning Capability The GAMER has a Learning Capability that enables it to actually ‘learn’ functions from other remotes. SimpleSound SimpleSound Volume Control is a dynamic feature that gives you total volume control over all the components in your system, even those that do not have their own built-in volume control, such as TiVo, DVD and VCR. -
Page 7: Battery Installation
Battery Installation Insert the two AA batteries that are included in the package into the battery compartment located in the back of your remote. Just press the tab and lift off the cover. Please be sure to insert the batteries correctly as you see in the diagram. -
Page 8: Gamer Location Of Controls
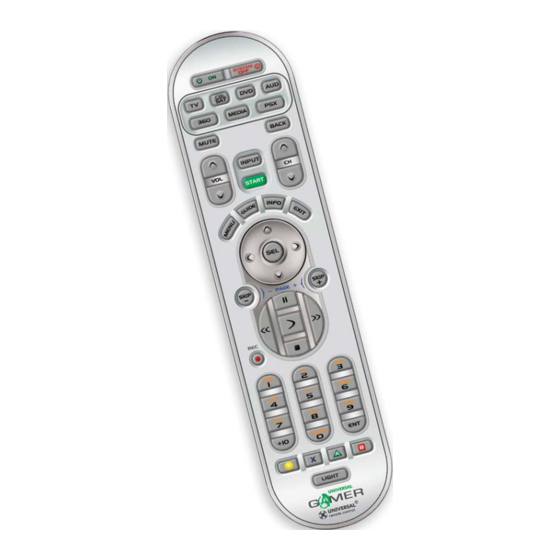
GAMER Location of Controls... -
Page 9: Light Button
LIGHT BUTTON Press the LIGHT button to backlight all the buttons. To turn off the backlight, press the LIGHT button again, or just wait ten seconds and the backlight will automatically shut itself off. -
Page 10: Setting Up
Setting Up Your GAMER There are three ways you can program your remote to work with your A/V Components: • The Pre-Programmed Code Method (page 8) • The Auto-Search Method (page 12) • The Learning Method (page 14) The Pre-Programmed Code Method allows you to set up all the buttons at once, so it’s the fastest and easiest of the three methods. - Page 11 STEP 2: Once you have located the 3-digit codes for each of the components that you want to operate from your GAMER, write them ALL down on a piece of paper. It’s important that you write down all the codes because only one code is going to work for you. STEP 3: Now, turn on the component you want to program using your old remote…...
- Page 12 IMPORTANT: You now have 20 seconds to perform the next step while you are in set-up mode. If you don’t press a button within 20 seconds, the LED light will turn off and exit the setup mode and you will need to start over. STEP 5: Point the remote toward the component, in this example the TV, and punch in the 3-digit-code that you wrote down for that specific component.
- Page 13 STEP 6: After you’ve entered the code number and the component has turned off, press the POWER button on your remote to turn the component back on. Now it’s time to test the VOLUME and CHANNEL buttons (or PLAY and STOP buttons for VCR and DVD) to make sure they all work. For example, maybe your Sony TV turned off with code number 147, but the volume controls did not work properly.
-
Page 14: Section 2: Auto Search Method
SECTION 2: Auto-Search Method The Auto-Search Method is a way you can scan through all the codes in the table to find the right code for your component. STEP 1: Using your old remote, turn on the component you want to program with the GAMER... - Page 15 STEP 4: Press the ON button on the GAMER to turn the component back on. Now you can test the VOLUME and CHANNEL buttons (or PLAY and STOP buttons for VCR and DVD) to make sure they all work. If any of the buttons do not work properly, you need to find a new code.
-
Page 16: Section 3: Learning Method
SECTION 3: The Learning Method This method allows you to ‘teach’ your GAMER the commands from your old remote. STEP 1: Line up the GAMER to your old remote head-to-head as you see here. Make sure the heads are one to two inches apart. STEP 2: On the GAMER remote, press down on both the component button you wish to teach (such as TV, VCR,etc.) and the ENTER (ENT) button at the same time for 3 seconds until the component... - Page 17 IMPORTANT: If you don’t press a button within 20 seconds, the LED light will turn off and exit the set-up mode and you will need to start over. STEP 3: Press any button on the GAMER that you want to teach a command to.
- Page 18 STEP 5: Once you have completed teaching the GAMER all the buttons, press and hold the component button and ENTER (ENT) buttons together to save the learned functions. The LED light will blink three times to confirm the programming. Now test all the learned buttons to make sure they learned correctly.
- Page 19 If the Learning Method does not work, here are a few suggestions: • If you have a Plasma TV, move to another room • Avoid programming under fluorescent light or direct sunlight • Put new batteries in your old remote •...
- Page 20 SECTION 4: SimpleSound™ Volume Control SimpleSound gives you total volume control over ALL the compo- nents in your system, even those that do not have built-in volume control, such as TIVO, DVD and VCR. SimpleSound saves you the hassle and inconvenience of constantly switching between component modes just to control volume.
- Page 21 IMPORTANT: If you don’t press a button within 20 seconds, the LED light will turn off and exit the set-up mode and you will need to start over. STEP 2: Press the VOLUME UP button and then press either the TV or AUDIO button that you want to use for volume.
- Page 22 Note: SimpleSound is what is called a ‘Punch Through’ feature and is not limited to volume control. It can also be applied to other groups of buttons. If you find yourself switching to a particular device frequently to use a group of controls, consider using Punch Through for another group, as listed here.
-
Page 23: Section 2: Macropower
MacroPower Imagine turning on all your components such as TV, DVD player and surround sound receiver by pressing a single button on your GAMER! What would normally take three remotes and three button pushes, the GAMER can accomplish with the press of one button. We call that MacroPower. - Page 24 STEP 3: Once you’ve entered all the Power On commands, press the CHANNEL UP button to save your MacroPower commands and the component button LED light will blink three times to confirm the programming. SUGGESTION: Most of the components have the same signal to turn the power On and Off.
- Page 25 MEDIA Function: Programming a 5th Component After you’ve finished customizing the GAMER’s basic programming for game consoles (Xbox 360 and/or PSX Playstation) and four primary audio/video components, and you did not use MEDIA, you can take advantage of the MEDIA function to program a 5th audio/video component, such as TiVo or iPod docks.
- Page 26 STEP 4: Press the component button you want to set-up in the MEDIA component button. STEP 5: Point the GAMER at the component you want to program and enter the 3-digit set-up code listed in the Code Tables. Once you enter the correct code number, the component will turn off.
- Page 27 Finding a Device Button’s Set-up Code Number If you used the Auto-Search Method to program a component, you may not actually know what the correct code number is. Here is a way for you to identify what that code number is, so you can make a note in the back of this Manual for future reference.
- Page 28 STEP 2: Press the INFO button and count the number of times the component LED light blinks. This number indicates the first digit of the code. Now it will pause for one second and blink again to indicate the number of the second digit. And again, it will pause and blink to indicate the number of the third digit.
-
Page 29: Erasing Commands - Overview
Erasing Commands – Overview You can erase a single learned command, all learned commands in each component mode, SimpleSound programming, MacroPower commands, or re-set the remote to original factory default settings, if desired. SECTION 1: Erasing a Single Learned Command STEP 1: To erase a single command, press and hold both the component button and the ENTER (ENT) button together for about 3 seconds until the component LED light turns on. - Page 30 STEP 2: Now, press and hold the button you want to erase for 3 seconds. The component LED light will blink twice to confirm the erasure. STEP 3: Repeat Step 2 to erase any other buttons in the selected component’s mode. STEP 4: To exit, press and hold both the component button and the ENTER (ENT) button until the component LED light blinks three times.
-
Page 31: Section 2: Erasing All Learned Commands From One Component
SECTION 2: Erasing All Learned Commands from One Component Mode This function allows you to erase all the learned commands from one component. For example, if you want to erase all learned commands on the TV component button because you bought a new TV, the process is very simple. -
Page 32: Section 3: Erasing Simplesound Commands
SECTION 3: Erasing SimpleSound Commands STEP 1: Press and hold the component button you want to erase volume control from, such as DVD or VCR and the SELECT (SEL) button at the same time for about three seconds until the component LED light turns on. -
Page 33: Section 4: Erasing Macropower Commands
SECTION 4: Erasing MacroPower Commands STEP 1: For erasing MacroPower commands on the POWER ON or SYSTEM OFF button, press and hold either the POWER ON or SYSTEM OFF button and the MUTE button simultaneously for 3 seconds until the component LED light turns on. IMPORTANT: If you don’t press a button within 20 seconds, the LED light will turn off and exit the set-up mode and you will need to start over. - Page 34 SECTION 5: Re-setting the Remote to Original Factory Default Settings If you want to start with a clean slate with the GAMER, you can re-set your remote to the original factory default settings. Press and hold both the 360 and RECORD buttons for about five seconds until the PSX component LED light blinks five times.
-
Page 35: Pre-Programmed Code Tables
Pre-Programmed Code Tables The GAMER’s Pre-Programmed code library is classified by component category (360, Media, PSX, TV, DVD, etc.). Some component categories actually include other types of components. For example, the MEDIA category includes Lighting Controls, iPod Docks and Custom Installation Products. (Reference the legend below.) Within each category, the code numbers are listed in rows by brand (Sony, Panasonic, B &... - Page 36 360 (XBOX) CODE TABLE/COMMAND LOCATIONS BRAND XBOX BUTTON NAME SYSTEM OFF VOL+ VOL- MUTE INPUT START BACK MENU GUIDE INFO EXIT DOWN LEFT RIGHT PAGE+/SKIP+ PAGE-/SKIP- PLAY STOP PAUSE 1/TUNER 2/CD 3/DVD CODE NUMBERS 001 002 COMMAND XBOX ON/OFF VOL+ VOL- MUTE CH/PG+...
- Page 37 360 COMMAND LOCATIONS BUTTON NAME 4/VCR 5/TV 6/CABLE 7/SAT 8/AUX 9/TAPE 0/PHONO Y/PIP ON-OFF X/PIP SWAP A/PIP MOVE B/PIP FREEZE Light COMMAND 4 GHI 5 JKL 6 MNO 7 PQRS 8 TUV 9 WXYZ 100(*) ENTER Y/GUIDE B/LIVE TV...
- Page 38 PSX (PlayStation) CODE TABLE/COMMAND LOCATIONS BRAND PLAYSTATION BUTTON NAME SYSTEM OFF VOL+ VOL- MUTE INPUT START BACK MENU GUIDE INFO EXIT DOWN LEFT RIGHT PAGE+/SKIP+ PAGE-/SKIP- PLAY STOP PAUSE 1/TUNER 2/CD 3/DVD CODE NUMBERS COMMAND POWER/RESET POWER/RESET SLOW I> SLOW <I SUBTITLE START OPEN/CLOSE...
-
Page 39: Psx
PSX (PlayStation) COMMAND LOCATIONS BUTTON NAME 4/VCR 5/TV 6/CABLE 7/SAT 8/AUX 9/TAPE 0/PHONO Y/PIP ON-OFF X/PIP SWAP A/PIP MOVE B/PIP FREEZE Light COMMAND SELECT... - Page 40 MEDIA CODE TABLES BRAND MEDIA CENTER PC APPLE/iPod DELL DWIN FAROUDJA GATEWAY HAUPPAUGE HUNTERDOUGLAS KEYSPAN NILES RUSSOUND SIMA SONY TOSHIBA MEDIA-LIGHTING CONTROLS BRAND LITE-TOUCH LUTRON X-10 XANTECH CODE NUMBERS 001 002 412 401 001 002 080 253 001 002 294 295 001 002 160 187 001 002...
- Page 41 MEDIA COMMAND LOCATIONS BUTTON NAME SYSTEM OFF VOL+ VOL- MUTE INPUT START BACK MENU GUIDE INFO EXIT DOWN LEFT RIGHT PAGE+/SKIP+ PAGE-/SKIP- PLAY STOP PAUSE 1/TUNER 2/CD 3/DVD 4/VCR 5/TV 6/CABLE 7/SAT COMMAND POWER POWER VOL + VOL - MUTE CH/PG + CH/PG - SUBTITLE...
-
Page 42: Media
MEDIA COMMAND LOCATIONS BUTTON NAME 08/AUX 9/TAPE /PHONO Y/PIP ON-OFF X/PIP SWAP A/PIP MOVE B/PIP FREEZE Light MEDIA-COMMAND LOCATIONS (LIGHT) BUTTON NAME SYSTEM OFF VOL+ VOL- MUTE INPUT START BACK MENU GUIDE INFO EXIT DOWN LEFT RIGHT PAGE+/SKIP+ PAGE-/SKIP- COMMAND 8 TUV 9 WXYZ CLEAR... - Page 43 MEDIA COMMAND LOCATIONS MEDIA-COMMAND LOCATIONS (LIGHT) BUTTON NAME PLAY STOP PAUSE 1/TUNER 2/CD 3/DVD 4/VCR 5/TV 6/CABLE 7/SAT 8/AUX 9/TAPE 0/PHONO Y/PIP ON-OFF X/PIP SWAP A/PIP MOVE B/PIP FREEZE Light COMMAND...
-
Page 44: Code Tables
TV CODE TABLES BRAND ABEX ADMIRAL ADVENT ADVENTURA AKAI A MARK AMPRO AMSTRAD ANAM APEX DIGITAL AUDIOVOX BARCO BELCOR BELL&HOWELL BLAUPUNKT BROKSONIC BROCKWOOD CAIRN CANDLE CAPEHART CELEBRITY CENTURION CETRONIC CITIZEN CLASSIC CLP CLASSIC COLORTYME CONCIERGE CONCERTO CONTEC CORNEA CORONADO CRAIG CODE TABLES 072 081 161 160 197 146 248... - Page 45 TV CODE TABLES BRAND CROWN CURTIS MATHES DAEWOO DAYTRON DELL DIMENSIA DREAMVISION DUKANE DUMONT DURABRAND DWIN DYNASTY DYNATECH EIKI ELECTROBAND ELECTROHOME ELEKTRA EMERSON ENVISION FISHER FUJITSU FUNAI FUTURETECH GATEWAY GIBRALTER GOLDSTAR HALL MARK HITACHI CODE TABLES 043 143 197 101 004 143 004 016 043 044 076 103 114 125 127 143 004 143 319 320 321...
- Page 46 TV CODE TABLES BRAND NFINITY INFOCUS INTEQ INSIGNIA JANEIL JCPENNEY JENSEN KAWASHO KENWOOD KLOSS KLOSS NOVABEAM KURAZAI LODGENET LOEWE LOGIK LUXMAN MAGNAVOX MAJESTIC MARANTZ IMATSUI MAXENT MEGATRON MEMOREX METZ CODE TABLES 230 330 333 073 157 183 004 024 197 008 009 030 065 101 143 160 038 034 070 083 145 199 210 240 241 116 070 197 197 070...
- Page 47 TV CODE TABLES BRAND MIDLAND MINERVA MINUTZ MITSUBISHI MONTGOMERY WARD NET TV NIKEI NIKKO NUVISION ONKING ONWA OPTIMUS OPTONICA OPTOMA ORION PANASONIC PHILCO PHILIPS PILOT PIONEER PORTLAND PROSCAN PROTON PULSAR QUASAR RADIO SHACK REALISTIC ROCTEC RUNCO SAMPO CODE TABLES 161 073 157 183 109 124 024 004 028 040 042 146 191 161 072 197 004 062 101...
- Page 48 TV CODE TABLES BRAND SAMSUNG SAMSUX SANSUI SANYO SCEPTRE SCOTCH SCOTT SEARS SELECO SHARP SHOGUN SIEMENS SIGNATURE SIMPSON SOLE SONY SOUNDESIGN SPECTRICON SUPRA SUPRE MACY SUPREME SYLVANIA SYNTAX OLEVIA TANDY TATUNG TECHNICS TECHWOOD TEKNIKA TELEFUNKEN TELERENT TERA CODE TABLES 050 089 101 105 004 127 143 160 228 229 258 166 007 020 053 057 082 187 116 197 028 043 004 048 143...
- Page 49 TV CODE TABLES BRAND TOSHIBA TOTEVISION UNIVERSAL VICTOR VIDEO CONCEPTS VIDIKRON VIDTECH VIEWSONIC VIKING WARDS WESTINGHOUSE YAMAHA YORK YUPITERU ZENITH ZONDA CODE TABLES 015 138 030 007 040 062 101 325 008 009 174 184 188 192 004 008 009 019 028 060 061 063 064 072 074 143 164 034 076 280 197 004...
- Page 50 TV COMMAND LOCATIONS BUTTON NAME SYSTEM OFF VOL+ VOL- MUTE INPUT START BACK MENU GUIDE INFO EXIT DOWN LEFT RIGHT PAGE+/SKIP+ PAGE-/SKIP- PLAY STOP PAUSE 1/TUNER 2/CD 3/DVD 4/VCR 5/TV 6/CABLE 7/SAT COMMAND VOL+ VOL- MUTE TV/VCR FAVORITES LAST MENU GUIDE INFO EXIT...
- Page 51 TV COMMAND LOCATIONS BUTTON NAME 8/AUX 9/TAPE 0/PHONO Y/PIP ON-OFF X/PIP SWAP A/PIP MOVE B/PIP FREEZE Light COMMAND ENTER PIP/POP PIP SWAP PIP MOVE PIP FREEZE...
- Page 52 SAT/CABLE CODE TABLES BRAND CABLE BOXES ADELPHIA ADVANCED NEWHOUSE ALTRIO AMERICAST ARMSTONG AT&T BROADBAND ATLANTIC BROADBAND BELL SOUTH BLUE RIDGE BRESNAN BRIGHT HOUSE BUCKEYE COMM CABLEVISION CHARTER COGECO COMCAST COMSAT COX DIGITAL EAGLE EASTERN GEMINI GENERAL INSTRUMENT GOLDEN CHANNEL HAMLIN HITACHI INSIGHT JERROLD...
- Page 53 SAT/CABLE CODE TABLES BRAND MOVIE TIME MOXI NCTC PACE PANASONIC PARAGON PHILIPS PIONEER PULSAR REGAL REGENCY RODGERS SAMSUNG SCIENTIFIC ATLANTA SEREN SERVICE ELECTRIC SHAW SIGECOM SONY SPRUCER STARCOM STARGATE SUSQUEHANNA TIME WARNER TOCOM TOSHIBA UNITED CABLE VIDEOTRON VIEWSTAR WIDE OPEN WEST CODE NUMBERS 015 028 038 071 031 037 053...
- Page 54 SAT/CABLE CODE TABLES BRAND ZENITH SAT RECEIVERS BRAND CABLEVISION DIRECTV DISH NETWORK ECHOSTAR EXPRESSVU GENERAL ELECTRIC GENERAL INSTRUMENT HITACHI HUGHES MAGNAVOX MEMOREX MITSUBISHI MOTOROLA NEXT LEVEL PANASONIC PAYSAT PHILIPS PROSCAN RADIOSHACK SAMSUNG SONY STAR CHOICE TOSHIBA UNIDEN CODE NUMBERS 052 060 093 100 CODE NUMBERS 122 167 122 167...
- Page 55 SAT/CABLE CODE TABLES SAT RECEIVERS BRAND VOOM ZENITH DVR RECEIVERS BRAND DISH NETWORK ECHOSTAR HUGHES HUMAX PHILIPS REPLAY NETWORKS SONY TIVO CODE NUMBERS CODE NUMBERS 122 167 122 167 122 167 201 209 205 206 201 209...
- Page 56 SAT/CABLE COMMAND LOCATIONS BUTTON NAME CABLE BOXES SYSTEM OFF VOL+ VOL- MUTE INPUT START BACK MENU GUIDE INFO EXIT DOWN LEFT RIGHT PAGE+/SKIP+ PAGE-/SKIP- PLAY STOP PAUSE 1/TUNER 2/CD 3/DVD 4/VCR 5/TV 6/CABLE 7/SAT 8/AUX 9/TAPE 0/PHONO Y/PIP ON-OFF X/PIP SWAP A/PIP MOVE B/PIP FREEZE Light...
- Page 57 SAT/RECEIVER COMMAND LOCATIONS BUTTON NAME SATELLITE RECEIVERS SYSTEM OFF VOL+ VOL- MUTE INPUT START BACK MENU GUIDE INFO EXIT DOWN LEFT RIGHT PAGE+/SKIP+ PAGE-/SKIP- PLAY STOP PAUSE 1/TUNER 2/CD 3/DVD 4/VCR 5/TV 6/CABLE 7/SAT COMMAND VOL+ VOL- MUTE INPUT LAST MENU GUIDE INFO...
- Page 58 SAT/CABLE COMMAND LOCATIONS BUTTON NAME DVD PLAYERS 8/AUX 9/TAPE 0/PHONO Y/PIP ON-OFF X/PIP SWAP A/PIP MOVE B/PIP FREEZE Light COMMAND *, (-) ENTER PIP/REPLAY SWAP/ADVANCE POSITION/SLOW RECOVER/LIVE TV...
- Page 59 DVD CODE TABLES BRAND DVD PLAYERS AIWA ALPINE APEX DIGITAL BROKSONIC CINEVISION DENON DURABRAND DVD 2000 EMERSON FISHER FUNAI GOLDSTAR GO VIDEO HARMAN KARDON HITACHI INTEGRA KENWOOD KRELL LEXICON MAGNAVOX MARANTZ MERIDIAN MICROSOFT MITSUBISHI MYRYAD NAKAMICHI ONKYO OPTIMUS CODE NUMBERS 087 111 115 007 080 173 091 143...
- Page 60 DVD CODE TABLES BRAND ORION PANASONIC PHILIPS PHILIPS-MAGNAVOX PIONEER POLAROID POLK AUDIO PROCEED PROSCAN SAMSUNG SANSUI SANYO SEARS SENSORY SCIENCE SHARP SONY SYLVANIA SYMPHONIC TATUNG TEAC TECHNICS TECHWOOD THOMPSON TOSHIBA VENTURER X-BOX YAMAHA ZENITH CODE NUMBERS 021 042 138 139 144 150 066 083 095 105 166 035 066 023 092 099 107 108 131...
- Page 61 DVD CODE TABLES DVD Recorders BRAND GO VIDEO PANASONIC SENSORY SCIENCE SONY TOSHIBA DVD-TV/DVD Combos BRAND AIWA FUNAI SAMSUNG SYLVANIA SYMPHONIC TOSHIBA DVD-TV/DVD/VCR Combos BRAND MAGNAVOX PANASONIC SYLVANIA TOSHIBA DVD-DVD/VCR Combos BRAND GO VIDEO PANASONIC PHILIPS 105 (VCR Functions for VCR 067) SAMSUNG 137 159 SANSUI...
- Page 62 DVD CODE TABLES DVD-DVD/VCR Combos BRAND SONY TOSHIBA ZENITH VCRs BRAND AIWA AKAI AMPRO ANAM AUDIO DYNAMICS BROKSONIC CANON CAPEHART CRAIG CURTIS MATHES DAEWOO DAYTRON DYNATECH ELECTROHOME EMERSON FISHER FUNAI GO VIDEO GOLDSTAR HARMAN KARDON HITACHI INSTANTREPLAY CODE NUMBERS 145 191 091 (VCR Functions for VCR101) CODE NUMBERS 534 661...
- Page 63 DVD CODE TABLES VCRs BRAND JCPENNEY JENSEN KENWOOD LLOYD MAGIN MAGNAVOX MARANTZ MARTA MATSUI MEMOREX MINOLTA MITSUBISHI MULTITECH NORDMENDE OPTONICA ORION PANASONIC PENTAX PHILCO PHILIPS PILOT PIONEER PORTLAND PULSAR QUARTZ CODE NUMBERS 512 513 515 540 566 601 548 543 630 650 555 560 512 531 550 652 666 514 548 534 547 601 606 614 513 520 512 623 534 503 509 517 606...
- Page 64 DVD CODE TABLES VCR Combos BRAND QUASAR RADIO SHACK REALISTIC RICO RUNCO SALORA SAMSUNG SANSUI SANYO SCOTT SEARS SHARP SHINTOM SIGNATURE SONY SOUNDESIGN SYLVANIA SYMPHONIC TANDY TATUNG TEAC TECHNICS TEKNIKA THOMAS TOSHIBA TOTEVISION UNITECH CODE NUMBERS 566 645 575 607 609 644 647 658 541 645 513 520 640 534 540 503 508 510 514 531 534 540 553 554 601 602 604 613 615 612 620 532 540 566 607...
- Page 65 DVD CODE TABLES VCRs BRAND VECTOR RESEARCH VICTOR VIDEO CONCEPTS VIDEOSONIC WARDS YAMAHA ZENITH VCR TV/VCR Combos BRAND DAEWOO EMERSON FUNAI GOLDSTAR HITACHI JCPENNEY LLOYD MAGNAVOX MEMOREX PANASONIC PHILIPS RADIO SHACK SEARS SONY SYLVANIA SYMPHONIC THOMAS ZENITH CODE NUMBERS 512 534 546 503 513 517 524 531 534 540 553 554 631 512 534 539 543 572 580 556 548 601 534 558...
- Page 66 DVD COMMAND LOCATIONS BUTTON NAME SYSTEM OFF VOL+ VOL- MUTE INPUT START BACK MENU GUIDE INFO EXIT DOWN LEFT RIGHT PAGE+/SKIP+ PAGE-/SKIP- PLAY STOP PAUSE 1/TUNER 2/CD 3/DVD 4/VCR 5/TV 6/CABLE 7/SAT COMMAND VOL+ VOL- MUTE INPUT / DVD ZOOM / VCR OP/CL /HDD MENU SETUP...
- Page 67 DVD/VCR COMMAND LOCATIONS BUTTON NAME 8/AUX 9/TAPE 0/PHONO Y/PIP ON-OFF X/PIP SWAP A/PIP MOVE B/PIP FREEZE Light DVD COMMAND LOCATIONS (VCR) BUTTON NAME SYSTEM OFF VOL+ VOL- MUTE INPUT START BACK MENU GUIDE INFO EXIT DOWN LEFT RIGHT PAGE+/SKIP+ COMMAND ENTER COMMAND VOL+...
-
Page 68: Dvd/Vcr
DVD/VCR COMMAND LOCATIONS BUTTON NAME PAGE-/SKIP- PLAY STOP PAUSE 1/TUNER 2/CD 3/DVD 4/VCR 5/TV 6/CABLE 7/SAT 8/AUX 9/TAPE 0/PHONO Y/PIP ON-OFF X/PIP SWAP A/PIP MOVE B/PIP FREEZE Light COMMAND PLAY STOP PAUSE ENTER... -
Page 69: Audio
AUDIO CODE TABLES BRAND ADCOM AIWA AKAI ANGSTROM ANTHEM ARCAM ATLANTIC TECHNOLOGY AUDIO FILE AUDIO MATRIX AUDIO TECHNICA B & K BOSE BOSTON ACOUSTICS CARVER CINEMA SOUND CITATION CLARION DELPHI DENON ELAN ENLIGHTENED AUDIO ESCIENT FISHER FLEXTRONICS FOSGATE AUDIONICS GOLDSTAR HARMAN KARDON HITACHI INTEGRA... - Page 70 AUDIO CODE TABLES BRAND CODE NUMBERS JENSEN 163 191 114 279 291 KENWOOD 026 066 145 192 182 005 280 374 KOSS KRELL 150 072 376 384 KYOCERA LEXICON 120 235 236 237 357 360 LINN 124 377 LUXMAN 137 139 052 165 115 004 009 MAGNAVOX 086 164 152 208 MARANTZ...
- Page 71 AUDIO CODE TABLES BRAND CODE NUMBERS ROTEL RUSSOUND SAMSUNG SANSUI SANYO SCOTT SHARP SHERWOOD SONY SOUNDESIGN SUNFIRE TEAC TECHNICS THETA DIGITAL TOSHIBA XM STELLITE RADIO YAMAHA ZENITH SATELLILTE RADIOS BRAND DELPHI POLKAUDIO SONY XM STELLITE RADIO 074 083 085 379 391 392 040 048 110 119 065 228 047 059 019 091...
- Page 72 AUDIO COMMAND LOCATIONS BUTTON NAME SYSTEM OFF VOL+ VOL- MUTE INPUT START BACK MENU GUIDE INFO EXIT DOWN LEFT RIGHT PAGE+/SKIP+ PAGE-/SKIP- PLAY STOP PAUSE 1/TUNER 2/CD 3/DVD 4/VCR 5/TV 6/CABLE 7/SAT COMMAND VOL+ VOL- MUTE PRESET+ PRESET+ BAND(FM/AM) MULTI CH MENU DISPLAY EXIT/RETURN...
- Page 73 AUDIO COMMAND LOCATIONS BUTTON NAME 8/AUX 9/TAPE 0/PHONO Y/PIP ON-OFF X/PIP SWAP A/PIP MOVE B/PIP FREEZE Light COMMAND TAPE PHONO...
-
Page 74: Frequently Asked Questions
Replace the batteries with new Alkaline batteries. Who can I call for more answers? The Universal Remote Control technical support and customer service staff are ready to answer any questions you might have. E-mail us at techsupport@universalremote.com or Call us at 1-914-835-4484 Monday –... -
Page 75: Warranty
UNIVERSAL REMOTE CONTROL, INC. warrants this product against defects in material or workmanship for a period of one (1) year and as set forth below. Universal Remote Control will, at its sole option, repair the product using new or comparable rebuilt parts, or exchange the product for a comparable new or rebuilt product. - Page 77 La información en este manual está protegida por derechos de autor. Ninguna parte de este manual puede ser copiada o reproducida en forma alguna sin el consen- timiento previo por escrito de Universal Remote Control, Inc. Universal Remote Control, Inc. no será responsable por errores/omisiones operativas, técnicas o edito- riales hechas en este manual.
- Page 78 Contenido Cómo Comenzar Control de Consolas de Juego y hasta 6 Componentes ...76 Botones para Activar Componentes ……...76 La Función de Medios …………...76 Características Especiales SimpleSound …………………...77 MacroPower ……………………...77 Capacidad de Aprendizaje ...77 Instalación de Baterías ...78 Ubicación de Controles GAME……...79 Botón de Luz ………………...80 Configuración ...8 1 SECCIÓN 1: Método de Códigos Preprogramados...8 1...
-
Page 79: Section 2: Macropower Tm
Cómo Borrar los Comandos – Reseña General ...100 SECCIÓN 1: Cómo Borrar un Solo Comando Aprendido...100 SECCIÓN 2: Cómo Borrar Todos los Comandos Aprendidos de un Componente...102 SECCIÓN 3: Cómo Borrar los Comandos SimpleSound ……...103 SECCIÓN 4: Cómo Borrar los Comandos MacroPower ...104 SECCIÓN 5: Cómo Reponer GAMER a los Valores por Defecto Originales de Fábrica ...105... -
Page 80: Cómo Comenzar
Cómo Comenzar Control de Consolas de Juego y hasta 6 Componentes El GAMER está diseñado para controlar consolas de juego y hasta 6 componentes de audio y video diferentes. ¡Ha sido programado para operar su XBox 360, Play Station y Centro de Medios PC des de el momento que se le saca de la caja! El GAMER tiene también una amplia biblioteca de códigos para operar prácticamente todas las marcas de componentes de Audio, TV, DVD, Cable y... -
Page 81: Características Especiales
Características Especiales Además, el GAMER también ofrece las siguientes características especiales que pueden ofrecerle ventajas de ahorro de tiempo: Capacidad de Aprendizaje El GAMER tiene una Capacidad de Aprendizaje que le permite realmente ‘aprender’ funciones de otros controles remotos. SimpleSound El Control de Volumen SimpleSound es una característica dinámica que le da total control del volumen sobre todos los componentes en su sistema, hasta aquellos que no tienen su propio control de... -
Page 82: Instalación De Baterías
Instalación de las Baterías Inserte las dos baterías AA que están incluidas en el paquete dentro del compartimento para baterías situado en la parte posterior de su control remoto. Basta presionar la aleta y levantar la cubierta. Por favor, asegúrese de insertar las baterías correctamente como lo ve en el diagrama. -
Page 83: Ubicación De Controles Game
Ubicación de Controles GAMER Botón Encender Botones del Sistema de Juego Botón FLECHA ARRIBA Botón DE FLECHA ABAJO BOTÓN DE LUZ Botón SYSTEM OFF [Apagar Sistema] Botones de COMPONENTES Botones del Funciones del Juego Botones de Funciones... -
Page 84: Botón De Luz
Botón de LUZ Oprima el botón de LUZ para iluminar por atrás todos los botones. Par apagar la iluminación posterior, oprima el botón de LUZ nuevamente, o espere 10 segundos y la iluminación posterior se apagará automáticamente. BOTÓN DE LUZ... -
Page 85: Sección 1: Método De Códigos Preprogramados
Configuración Especial de su GAMER Hay tres maneras en las que puede programar su control remoto para trabajar con sus componentes A/V: • El Método de Códigos Preprogramados (página 81) • El Método de Búsqueda Automática (página 85) • El Método de Aprendizaje (página 87) El Método de Códigos Preprogramados le permite configurar todos los botones a la vez, por lo que es el más rápido y fácil de los tres métodos. - Page 86 PASO 2: Una vez que haya localizado los códigos de 3 dígitos para cada uno de los componentes que desea operar desde su GAMER, escríbalos TODOS en un pedazo de papel. Es importante que escriba todos los códigos porque sólo un código va a funcionar para usted. PASO 3: Ahora, encienda el componente que desea programar usando su control remoto antiguo…...
- Page 87 IMPORTANTE: Ahora tiene 20 segundos para ejecutar el sigu- iente paso mientras está en la modalidad de configuración. Si no presiona un botón dentro de 20 segundos, la luz LED se apagará y se saldrá de la modalidad de configuración y será necesario comenzar de nuevo.
- Page 88 PASO 6: Después que haya ingresado el número de código y el componente se haya apagado, oprima el botón POWER [Energía] en su control remoto para encender nuevamente el componente. Ahora es el momento de probar los botones de VOLUME [Volumen] y CHANNEL [Canal] (o los botones PLAY [Reproducir] y STOP [Detener] para VCR y DVD) para asegurarse que todos funcionan.
-
Page 89: Sección 2: Método De Búsqueda Automática
SECCIÓN 2: Método de Búsqueda Automática Preprogramada El Método de Búsqueda Automática es una manera de escanear a través de todos los códigos en la tabla para encontrar el código correcto para su componente. PASO 1: Usando su control remoto antiguo, encienda el componente que desea Programar con el GAMER... - Page 90 PASO 4: Oprima el botón ON [ENCENDER] en el GAMER para volver a encender el componente. Ahora puede probar los botones de VOLUME [Volumen] y CHANNEL [Canal] (o los botones de PLAY [Reproducir] y STOP [Detener] para VCR y DVD) para asegurarse que todos funcionan.
-
Page 91: Sección 3: Método De Aprendizaje
SECCIÓN 3: El Método de Aprendizaje Este método le permite ‘enseñar’ los comandos de su antiguo control remoto a su GAMER. PASO 1: Alinee el GAMER con su antiguo control remoto cabeza a cabeza como lo ve aquí. Asegúrese que las cabezas estén separadas entre una y dos pulgadas. - Page 92 IMPORTANTE: Si no oprime un botón dentro de 20 segundos, la luz LED se apagará y se saldrá de la modalidad de configuración y será necesario comenzar de nuevo PASO 3: Oprima cualquier botón en el GAMER al que desea enseñar un comando.
- Page 93 PASO 5: Una vez que haya terminado de enseñar al GAMER todos los botones, oprima y sostenga el botón del Componente y del botón ENTER (ENT) a la vez para guardar las funciones aprendidas. La luz LED destellará tres veces para confirmar la programación. Ahora, pruebe todos los botones enseñados para asegurar que hayan aprendido correctamente.
- Page 94 Si el Método de Aprendizaje no funciona, siga las siguientes sugerencias: • Si tiene un TV de Plasma, pase a otra habitación • Evite programar bajo luz fluorescente o luz solar directa • Ponga baterías nuevas en su control remoto antiguo •...
-
Page 95: Configuración Avanzada
Configuración Avanzada SECCIÓN 1: Control de Volumen SimpleSound™ y Otros ‘Punch Throughs’ SimpleSound le proporciona control total de volumen sobre TODOS los componentes de su sistema, aun sobre aquellos que no tienen control de volumen incorporado, tales como TIVO, DVD y VCR. SimpleSound lo libra de las molestias e inconveniencias de estar cambiando constantemente entre modalidades de componentes sólo para controlar el volumen. - Page 96 IMPORTANTE: Si no oprime un botón dentro de 20 segundos, la luz LED se apagará y se saldrá de la modalidad de configuración y será necesario comenzar de nuevo. PASO 2: Oprima el botón VOLUME UP [Subir Volumen] y luego oprima ya sea el botón TV o AUDIO que desea usar para volumen.
- Page 97 Nota: SimpleSound es lo que se llama una característica ‘Punch Through’ y no está limitada a control de volumen. También puede aplicarse a otros grupos de botones. Si se encuentra usted en la situación de estar cambiando con frecuencia a un dispositivo particular para usar un grupo de controles, considere el uso de ‘Punch Through’...
-
Page 98: Sección 2: Macropower Tm
SECCIÓN 1: MacroPower ¡Imagínese encendiendo todos sus componentes tales como TV, reproductor DVD y receptor de sonido circundante oprimiendo un solo botón en su GAMER! Lo que normalmente tomaría tres controles remotos y tres presiones de botones, el GAMER puede lograr con la presión de un botón. - Page 99 Botón ON [Encender] Botones del Sistema de Juego PASO 3: Una vez que haya ingresado todos los comandos de Power On [Encender Energía], oprima el botón CHANNEL UP [Subir Canal] para guardar sus comandos MacroPower y la luz LED del botón del componente destellará...
- Page 100 SECCIÓN 1: Función de MEDIOS: Programación de un 5 to. Componente Después que haya terminado adecuando a sus necesidades la programación básica del GAMER para consolas de juego (XBox 360 y/o Play Station PSX) y cuatro componentes primarios de audio y video, y si no usó...
- Page 101 PASO 4: Oprima el botón del componente que desea configurar en Medios y el componente. PASO 5: Dirija el GAMER al componente que desee programar e ingrese el código de configuración de 3 dígitos listado en las Tablas de Códigos. Una vez que ha ingresado el número de código correcto, el componente se apagará.
-
Page 102: Cómo Encontrar El Número De Código De
Cómo encontrar el Número de Código de Configuración del Botón de un Dispositivo Si usó el Método de Búsqueda Automática para programar un componente, puede no conocer realmente cuál es el número correcto de código. La siguiente es una forma de identificar ese número de código, para que pueda hacer una nota en el reverso de este Manual para referencia futura. - Page 103 PASO 2: Oprima el botón INFO [Información] y cuente el número de veces que destella la luz LED del Componente. Este número indica el primer dígito del código. Ahora hará una pausa de un segundo y nuevamente destellará indicando el número del segundo dígito. Luego hará...
-
Page 104: Cómo Borrar Los Comandos - Reseña General
Cómo Borrar Comandos – Reseña General Se puede borrar un solo comando enseñado, todos los comandos enseñados en cada modalidad de componente, programación SimpleSound, comandos MacroPower, o reponer el control remoto a los valores originales por defecto establecidos en la fábrica, si se desea. - Page 105 PASO 2: Ahora, oprima y sostenga el botón que desea borrar por 3 segundos. La luz LED del componente destellará dos veces para confirmar que ha sido borrado. PASO 3: Repita el Paso 2 para borrar cualquier otro botón en la modalidad de componentes seleccionados.
- Page 106 Cómo Borrar todos los Comandos SECCIÓN 2: Enseñados de una Modalidad de Componente Esta función le permite borrar todos los comandos enseñados desde un componente. Por ejemplo, si desea borrar todos los comandos enseñados en el botón del componente TV porque compró un TV nuevo, el proceso es muy simple.
- Page 107 SECCIÓN 3: Cómo Borrar Comandos de Sonido SimpleSound PASO 1: Oprima y sostenga el botón del Componente del que desea borrar el control de volumen, tal como DVD o VCR y el botón SELECCIONAR (SEL) a la vez durante tres segundos hasta que la luz LED del Componente se encienda.
-
Page 108: Sección 4: Cómo Borrar Los Comandos Macropower
SECCIÓN 4: Cómo Borrar Comandos MacroPower PASO 1: Para borrar comandos MacroPower en el botón POWER ON [Encender Energía] o en el SYSTEM OFF [Apagar Sistema], oprima y sostenga ya sea el botón POWER ON o el SYSTEM OFF y el botón MUTE [Silencio] simultáneamente por 3 segundos hasta que la luz LED del componente se encienda. -
Page 109: Defecto Originales De Fábrica
SECCIÓN 5: Reposición del Control Remoto a los Valores Originales Valores por Defecto de Fábrica Si desea comenzar con valores nuevos con el GAMER, puede reponer su control remoto a los valores por defecto originales de fábrica. Oprima y sostenga tanto el botón 360 y RECORD [Grabar] durante unos cinco segundos hasta que la luz LED del componente PSX destelle cinco veces. -
Page 110: Tablas De Códigos Preprogramados
Tablas de Códigos Preprogramados La biblioteca de códigos preprogramados del GAMER se clasifica por la categoría del componente (360, Media, PSX, TV, DVD, etc.). Algunas categorías de componente realmente incluyen otros tipos de componentes. Por ejemplo, la categoría MEDIOS incluye Controles de Iluminación, Dispositivos iPod y Productos Especiales de Instalación. -
Page 111: Preguntas Más Frecuentes
Preguntas Más Frequentes ¿Si las baterías se desgastan, perderé mis valores? No. El GAMER almacena todos sus valores en una memoria FLAS no volátil. Puede retirar las baterías durante varios meses, reemplazarlas a su conveniencia y el GAMER seguirá recordando sus valores. ¿Qué... -
Page 112: Garantía
Universal Remote Control. Esta garantía no cubre los siguientes puntos: • Unidades compradas de distribuidores o compañías no autorizadas.