Table of Contents
Advertisement
Advertisement
Table of Contents

Related Manuals for Universal Remote Control OCE-0085A


Summary of Contents for Universal Remote Control OCE-0085A
- Page 2 Universal Remote Control, Inc. Entertainment Made Simple is a registered trade- ® mark of Universal Remote Control, Inc. All other brand or product names are trademarks or regis- tered trademarks of their respective owners. The Pioneer in Control Technology...
-
Page 3: Table Of Contents
Table of Contents Getting Started - Overview • Control up to 7 Components ...5 • Activating Component Buttons ...5 • Learning Capability ...5 • AUX Function...6 • Light Button...6 • Battery Installation...6 • Low Battery Warning...6 • Couch Mode ...6 Special Advanced Features •... - Page 4 Programming Special Advanced Features • MacroPower On/Off ...21-22 • “My Favorites” – Favorite Channels...23-24 • SimpleSound Volume Control...25-26 • Channel Control “Punch Through” ...27 • Transport Control “Punch Through” ...28 • OSD (On-Screen Display) Control “Punch Through” ...29 Erasing Commands - Overview...30 •...
-
Page 5: Getting Started - Overview
Getting Started - Overview Control up to 7 Components The WR7 remote control is designed to control up to seven different Audio/Video components and operate virtually all brands of AUDIO, TV, DVD, VCR/DVR, CD, SAT/CABLE and AUX (Light, Music Server, etc.) components. Activating Component Buttons Once you have programmed the WR7 for all of your components, all you need... -
Page 6: Aux Function
AUX Function The AUX (Auxillary) button is designed to operate a 7th audio/video component that you may have in your system… such as a TIVO, a second VCR or DVD, or an addi- tional audio component. Light Button The WR7 features a fully backlit keypad for ease of use in low light or darkened viewing conditions. -
Page 7: Special Advanced Features
Special Advanced Features The WR7 also offers the following special advanced features that can offer you many time-saving conveniences: MacroPower & Other Macro ™ Buttons MacroPower is a unique feature that enables you to turn all your components ON or OFF, all at the same time, simply with the press of one button. -
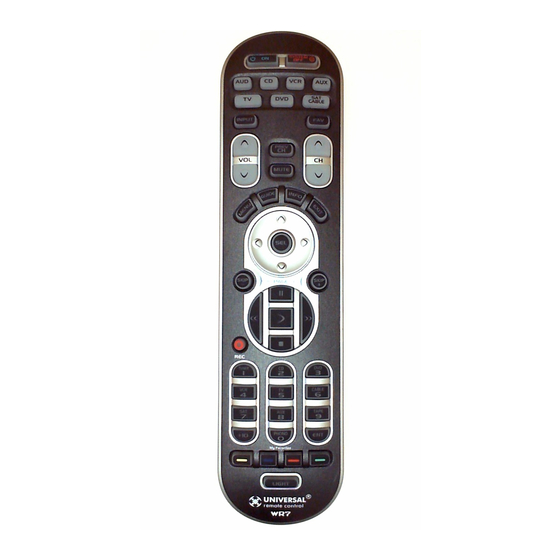
Page 8: Keypad Layout & Button Functions
Keypad Layout & Button Functions Allows you to turn the selected component on and off. AUD, CD, VCR, AUX, TV, DVD,SAT/CABLE Used to select the com- ponent you want to operate and signals remote control activity. INPUT Selects the video source from avail- able components. -
Page 9: Programming Wr7 Using Pre-Programmed Codes
Programming WR7 using Pre-Programmed Codes There are three ways you can program your WR7 using the component brand codes that are pre-programmed into the remote. • Quick Set-Up Method • Three-Digit Code Entry Method • Auto--Search Method The Quick Set-Up Method is a unique new fea- ture that enables the fastest and easiest set-up by using one-digit codes for up to 10 major brands for each component. - Page 10 STEP 3: Release the component button to save the code. The component LED light will blink three times to confirm that the code has been stored. Repeat the above steps for other components. COMPONENT BUTTONS NUMBER Page 10...
-
Page 11: Three-Digit Code Entry Method
Three-Digit Code Entry Method STEP 1: Find the 3-digit code numbers assigned to your brand from the lists in the back of this manual. The codes are listed by component category (i.e., TV, VCR, DVD, etc.), then by brand name. For instance, if you would like to locate a code for a Sony television, first locate the TV category and then look for the Sony brand. - Page 12 IMPORTANT: You have 30 seconds to perform the next step while you are in pro- gramming mode. If you do not press a but- ton within 30 seconds, the component LED light will turn off. The remote will exit the programming mode and you will have to start over.
- Page 13 STEP 7: Once you’ve entered a correct code, you must save it. Press the com- ponent button you just programmed (in this case TV) one more time to save the code number. The component LED light will blink three times to confirm that the code was success- fully stored.
-
Page 14: Auto-Search Method
Auto-Search Method The Auto-Search Method is a way you can scan through all of the codes in the table to find the right code for your component. Manually or using your old remote, STEP 1: turn on the component you want to pro- gram—for example, to program your TV, turn on your TV set. -
Page 15: Auto-Search Method
STEP 3: Point the WR7 remote control toward the component and press the UP [ arrow (or DOWN [ ] arrow) button once. Each time the UP or DOWN arrow button is pressed, the code will count up (or down) one code number and send a Power OFF signal. -
Page 16: Programming Wr7 Using The Learning Method
Programming WR7 using the Learning Method STEP 1: Line up the WR7 to the remote control you want to “learn” from, head--to--head as shown below. Start with both remotes’ IR windows touch- ing (or nearly touching). STEP 2: On the WR7, press the Component button that you want to program (in this case the button that says TV) and the ENTER [ENT] button at the same time. - Page 17 STEP 4: Press and hold the [MUTE] button on the other remote until the component but- ton LED on the WR7 blinks twice. Now you can continue learning all other buttons from your old remote by pressing the next button on the WR7 and repeating this step.
- Page 18 Here are some additional facts regarding the Learning process: • Learned functions override any existing pre- programmed functions on the remote control • Learned functions are automatically erased when a new function is learned on the same button • Learned functions are retained even after a different set-up code number is programmed into the remote control •...
-
Page 19: Aux Function: Programming A 7Th Component
AUX Function: Programming a 7th Component After you’ve finished programming the WR7 for six primary components and you did not use AUX, you can take advantage of the AUX function to program a 7th component, such as a second TV, DVD, or any other audio/video component that you may have in your system. - Page 20 STEP 2: Press the [INFO] button and count the number of times the Component LED light blinks. This number indicates the first digit of the code. Next it will pause for about one sec- ond and begin blinking again to indicate the number of the second digit.
-
Page 21: Programming Special Advanced Features
Programming Special Advanced Features Programming Multi-Commands to Macro Buttons The WR7 has 13 Macro buttons (ON, SYS- TEM OFF, 7 Component buttons, and 4 “My Favorites” buttons) that are designed to store up to 20 commands in each button. Pressing any one of the Macro buttons will send out the series of commands that are stored in that particular button. -
Page 22: Channels
IMPORTANT: You have 30 seconds to per- form the next step while you are in programming mode. If you do not press a button within 30 sec- onds, the component LED light will turn off. The remote will exit the programming mode and you will have to start over. - Page 23 Programming “My Favorites” - Favorite Channel Buttons In Cable mode, the four [MY FAVORITES] buttons are also designed to serve as dedi- cated Favorite Channel buttons. Each button will access one of your favorite channels with just one button press. Here’s how to program Favorite Channels: STEP 1: Press the [CABLE/SAT] button to select the Cable/SAT mode.
- Page 24 STEP 3: Using the Number Pad, punch in the Channel number of the Favorite Channel that you want to store in the Macro button. The CABLE/SAT component LED light will blink once for each button pressed. STEP 4: Press the CHANNEL UP [CH button to store the commands entered.
-
Page 25: Simplesound Total System Volume Control
SimpleSound Total System ™ Volume Control SimpleSound is one of the most exciting fea- tures of the WR7. It gives you total volume control over ALL the components in your sys- tem, even those that do not have built--in vol- ume control, such as TIVO, DVD and VCR. - Page 26 STEP 2: Press the VOLUME UP [VOL ] but- ton and then press either the TV or AUDIO com- ponent button that you want to use for volume. The Component LED light will blink three times to confirm that it is saved. This sets up three but- tons (Volume Up, Volume Down and MUTE) as a group for that component.
-
Page 27: Channel Control "Punch Through
Channel Control “Punch Through” This “punch through” enables you to program the WR7 so that either the Cable or TV Channel Controls (CHANNEL UP, DOWN, LAST, CHANNEL NUMBERS 0-9, +10 and ENTER) will also operate in other component modes on the remote control. STEP 1: Press and hold the component but- ton you want to add channel control to, such as [DVD] or [VCR], and the SELECT [SEL] button at... -
Page 28: Transport Control "Punch Through
Transport Control “Punch Through” This “punch through” enables you to program the WR7 so that VCR or DVD Transport Controls (PLAY, STOP, FF, REW, PAUSE, SKIP and RECORD) will also operate in other component modes on the remote control. STEP 1: Press and hold the component but- ton you want to add Transport Control to, such as [CABLE/SAT] or [TV], and the SELECT [SEL] button at the same time for two seconds until... -
Page 29: Osd (On-Screen Display) Control "Punch Through
OSD (On-Screen Display) Control “Punch Through” This “punch through” enables you to program the WR7 so that CBL or DVD OSD Controls (MENU, GUIDE, INFO, EXIT, SEL and 4 Cursor Controls) will also operate in other component modes on the remote control. STEP 1: Press and hold the component but- ton you want to add OSD Control to, such as [TV] or [VCR], and the SELECT [SEL] button at... -
Page 30: Erasing Commands - Overview
Erasing Commands - Overview You can erase a single learned command, all learned commands in each component mode, SimpleSound programming, MacroPower com- mands, or re--set the remote to original factory default settings. Erasing a Single Learned Command from One Component STEP 1: Press the component button where the learned command is stored and the [ENTER] button at the same time for two seconds until the... -
Page 31: Erasing All Learned Commands From One Component
Erasing All Learned Commands from One Component This function allows you to erase all the learned commands from one component. For example, if you want to erase all learned commands on the TV component button because you bought a new TV, the process is very simple. -
Page 32: Erasing Macropower & Other Macro Commands
Erasing MacroPower & Other Macro Commands STEP 1: To erase MacroPower commands on the POWER [ON] or [SYSTEM OFF] but- ton, press and hold either the POWER [ON] or [SYSTEM OFF] button and the [MUTE] button simultaneously for two seconds until the current status component LED turns on. -
Page 33: Erasing Simplesound & Other "Punch Through" Commands
Erasing SimpleSound & Other “Punch Through” Commands STEP 1: Press and hold the Component button you want to erase volume control from, such as DVD or VCR and the SELECT [SEL] button at the same time for two sec- onds until the Component LED light turns on. STEP 2: Press the VOLUME UP [VOL button and the same component button from Step 1. -
Page 34: Factory Reset
Factory Reset You can reset your WR7 remote to the origi- nal factory default settings. Press and hold both the [TV] and RECORD [REC] buttons for about five seconds until the [CABLE/SAT] component LED light blinks five times. All programming and set-up codes that you have entered into the remote will be erased and the WR7 will return to the original factory default settings. -
Page 35: Pre-Programmed Code Tables
Pre-Programmed Code Tables The WR7 Pre-Programmed code library is classi- fied by category (Audio, CD, VCR/DVR, etc.). Within each category, the code numbers are list- ed in rows by brand (Sony, Panasonic, B & K, etc.). Some brands have more than one three- digit code. -
Page 36: Audio
Brand Code Numbers ADCOM 082 092 225 161 269 355 AIWA 170 018 104 202 203 213 211 188 AKAI 125 126 127 281 282 ANGSTROM ANTHEM 335 337 ARCAM 141 418 ATLANTIC TECHNOLOGY 342 AUDIO FILE AUDIO MATRIX 167 AUDIO TECHNICA 134 B &... - Page 37 Brand Code Numbers ADCOM 062 042 AIWA 089 170 187 AKAI 231 232 ARCAM AUDIO ACCESS 119 147 AUDIO EASE AUDIO TECHNICA 046 CALIFORNIA AUDIO 147 008 CARVER 185 041 050 107 130 134 135 138 139 203 204 167 CREEK DENON 002 123...
-
Page 38: Vcr/Dvr
VCR/DVR Brand Code Numbers VCRs AIWA AKAI AMPRO ANAM AUDIO DYNAMICS 012 043 BROKSONIC CANON CRAIG 003 135 CURTIS MATHES 145 DAEWOO 010 112 012 043 DYNATECH 034 053 ELECTROHOME EMERSON 006 145 034 101 129 131 FISHER 003 010 008 FUNAI 145 072 147 144 GOLDSTAR... -
Page 39: Aux
Brand Code Numbers PC & iPod Controls APPLE 401 412 476 BOSE GRIFFIN IPORT KENSINGTON SONACE TEN TECHNOLOGY 401 MEDIA PC Controls DELL 001 262 GATEWAY 001 262 HAUPPAUGE 294 295 001(Default) 262 KEYSPAN SONY 001 262 TOSHIBA 001 262 WINBOOK 001 262 GAMING SYSTEM Controls... - Page 40 Brand Code Numbers ABEX ADMIRAL 072 251 333 160 ADVENT ADVENTURA AKAI 197 146 248 473 474 475 A MARK 112 143 AMPRO 167 073 AMSTRAD ANAM 043 054 056 080 112 197 363 112 058 APEX DIGITAL 006 591 AQUAVISION 573 574 ASTAR...
- Page 41 Brand Code Numbers NIKKO 116 197 NIKO NORCENT NUVISION 351 567 OLEVIA 432 363 ONKING ONWA OPTIMUS OPTONICA 019 251 OPTOMA 265 270 249 ORION PANASONIC 034 056 080 164 208 524 PHILCO 197 003 059 060 064 164 363 024 056 063 PHILIPS 164 005 093 038 197 003 363 059 127 206 333 431...
-
Page 42: Dvd
Brand Code Numbers AIWA AKAI ALPINE APEX DIGITAL 087 282 115 BROKSONIC CINEVISION COBY CYBERHOME DENON 138 080 173 DURABRAND DVD 2000 EMERSON 091 143 FISHER FUNAI GO VIDEO 137 091 220 221 265 GOLDSTAR HARMAN KARDON 084 140 HITACHI INITIAL INSIGNIA INTEGRA... -
Page 43: Cable/Sat
CABLE/SAT Brand Code Numbers CABLE BOXES 004 042 053 315 254 255 259 ADELPHIA 001 074 ADVANCED NEWHOUSE 001 ALTRIO AMERICAST AMINO 256 257 260 261 ARMSTONG AT&T BROADBAND 074 035 ATLANTIC BROADBAND 001 074 BELL SOUTH BLUE RIDGE 001 074 BRESNAN BRIGHT HOUSE 001 110 BUCKEYE COMM 074... -
Page 44: Faqs
Replace the batteries with new Alkaline batteries. Who can I contact for more answers? The Universal Remote Control technical support and customer service staff are ready to answer any questions you might have. E-Mail us at techsupport@universalremote.com Visit our website www.universalremote.com... -
Page 45: Warranty
(1) year and as set forth below. Universal Remote Control will, at its sole option, repair the product using new or comparable rebuilt parts, or exchange the product for a comparable new or rebuilt product. - Page 46 MEMO Page 46...
- Page 47 MEMO Page 47...
- Page 48 MEMO Page 48...
- Page 49 MEMO Page 49...
- Page 50 MEMO Page 50...
- Page 51 MEMO Page 51...
- Page 52 The Pioneer in Control Technology 500 Mamaroneck Avenue, Harrison, NY 10528 Phone: (914) 835-4484 Fax: (914) 835-4532 www.universalremote.com OCE-0085A Rev 02...