Table of Contents
Advertisement
Advertisement
Table of Contents

Related Manuals for Universal Remote Control Unifier URC-100


Summary of Contents for Universal Remote Control Unifier URC-100
- Page 1 Owner’s Manual...
-
Page 2: Thank You
MADE IN THIS MANUAL. The information in this manual may be subject to change without prior notice. Unifier is a registered trademark of Universal Remote Control, Inc. Power of Simple is a trademark of Universal Remote Control, Inc. DoubleTap learning is a trademark of Universal Remote Control, Inc. All other brand or product names are trademarks or registered trademarks of their respective companies or organizations. -
Page 3: Table Of Contents
Table of Contents Getting Started... 2 Button Layout ... 3 Basic Operation ... 4 Basic Setup... 5 Pre-Programmed Method... 5 Learning Method ... 8 Volume Control Punch Through ... 11 Advanced Setup ... 13 Own Two VCR’s? Set Aux to be VCR2 ... 13 Editing Device Names ... -
Page 4: Getting Started
Getting Started Congratulations! You’ve purchased one of the most advanced and easy to setup remote controls ever made. The Unifier’s built-in library includes thousands of different brands and models of remote controls. In most systems, all you have to do to setup the Unifier is enter which brands and models you own. -
Page 5: Button Layout
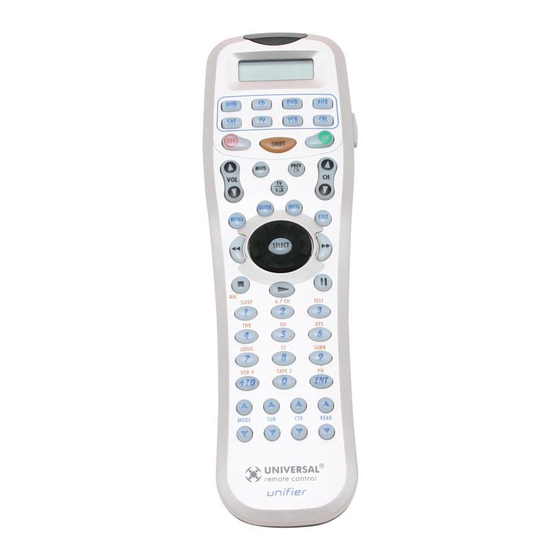
U R C - 1 0 0 Button Layout LIGHT Button DISPLAY DEVICE Buttons SHIFT Button FUNCTION Buttons... -
Page 6: Basic Operation
Selecting a New DEVICE Changes All Button Commands Instantly The Unifier can operate eight different devices even though it is only one remote control. Let’s try it now! Press the CABLE DEVICE button. The top of the screen changes to CABLE. Now all of the buttons of the Unifier operate a Cable box. -
Page 7: Basic Setup
Basic Setup You can start setting up your Unifier using either the Pre-Programmed Method or the Learning Method. However, all the buttons of the Unifier are setup at once with the Pre-Programmed Method, so it is usually faster than the one-button-at-a-time Learning Method. Pre-Programmed Method Power on the A/V component you wish to setup, so that you can test codes by sending power off commands. - Page 8 T h e U n i f i e r Choose the name of the device you’d like to setup. Use the cursor LEFT or RIGHT buttons to change the flashing name. For Example: I wanted to setup the TV Device button first, so I pressed the cursor LEFT or RIGHT until “TV”...
- Page 9 Note: If your component fails to turn off after you have entered all the code numbers listed for your brand, you can scan through the other brands in the table by alternately pressing the Channel Up(or Down) and Power Off buttons (there is a chance that your component was actually manufactured by another brand).
-
Page 10: Learning Method
Learning Method The Unifier can learn commands from your old remote controls one-button-at-a-time by following these simple steps: Line-up the Unifier with your old remote control, head-to-head, one or two inches apart. Press and hold both the desired DEVICE button and the SELECT button for approximately three seconds. - Page 11 Press any button you want to teach a command to. Once you press a button, the top of the display will change from “LEARN” to “READY”. READY SHIFT Functions: You can teach a second additional command to a button by pressing the SHIFT button, then pressing the button you want to teach.
- Page 12 Press and hold the same button on your old remote control once again. The Unifier’s unique DoubleTap learning technology ensures compatibility with the widest variety of remote controls ever! Once you have taught the button twice, the display will change to either “GOOD” or “FAILED”. If the “GOOD”...
-
Page 13: Volume Control Punch Through
Volume Control Punch Through In most home entertainment systems, the sound volume is only controlled by one device. In some systems, it is the TV speakers that make the sound, so you would use the TV device on the Unifier to raise and lower the volume. - Page 14 The Unifier displays SET in the display. Press the SHIFT button. The Unifier displays PUNCH in the display. PUNCH Press the Volume Up button. The display confirms by displaying “VOL”. This sets up the group of three buttons (Volume Up, Volume Down and Mute) in one action! Press the Device button for the device that has the Volume control commands you want (i.e.,TV for...
-
Page 15: Advanced Setup
Advanced Setup After you’ve finished all your basic setup, you can choose to make operation easier by customizing the Unifier just the way you want, using the Advanced Setup features described in this section. Own Two VCR’s? Set Aux to be VCR2 Any device button can be setup for ANY type of component (for example, you can make the AUX device button operate a second VCR). - Page 16 In this step you choose the name of the device you’d like to setup. Use the cursor LEFT or RIGHT buttons to change the flashing name. For Example: I want to setup AUX as my second VCR, so I press the cursor LEFT or RIGHT until AUX appears in the display.
-
Page 17: Editing Device Names
Editing Device Names The Unifier can display your own custom names for each of the eight device buttons. For example, you can rename AUX to “LIGHTS” or SAT to “DISH”, etc. Press and hold both the device button you want to rename and the ENT button for about three seconds. - Page 18 Change the character by using any of the number keys. Each press of the same number button selects the next character of that number’s group, as shown below. A,B,C,1 J,K,L,4 S,T,U,7 Once the character you want appears, move to the next space by pressing the RIGHT cursor button.
-
Page 19: Macro Button Setup
Macro Button Setup Imagine turning on your TV, your DVD player and your surround sound receiver by pressing a single button on your Unifier! What would normally take three remotes and three button pushes, the Unifier can accomplish with the press of one button. We call that a “Macro”. - Page 20 Navigate to the device that has a button you want in your macro using the DEVICE buttons. Then press the button with the command you want. Whenever a button is pressed, another Macro step is counted and displayed on the screen. Don’t worry about the number of steps.
- Page 21 Overview of Erasing You can erase an individual button with a learned command, a macro or a favorite channel. You can erase an entire Device’s learned command or macro buttons. You can also erase ALL your learned commands on all devices or all your macros or favorite channels everywhere.
- Page 22 Erasing All Learned Commands in One Device Press and hold both the Device button where the command is stored and the SELECT button for three seconds. Note: You have 30 seconds for each step, otherwise the Unifier will time out automatically. The Unifier display changes to: LEARN Press and hold both the DEVICE button you’d like to...
- Page 23 Erasing All Learned Commands in ALL Devices Press and hold both the POWER ON and the STOP button for ten seconds. After the display flashes ERASE ten times you can release the buttons. The display will flash CLEAR and the Unifier will return to normal operating mode.
-
Page 24: Erasing Settings
Erasing All Settings Should you wish to make a clean start, you can reset the Unifier to its factory default settings by pressing and holding both the POWER OFF button and the STOP button for ten seconds. Continue to hold both buttons as the display flashes ERASE nine times, then CLEAR. -
Page 25: The Optional Expander
U R C - 1 0 0 The Optional Expander You can use the Unifier as you would your other remote controls. It transmits very powerful line-of-sight output using infrared light commands (invisible to the naked eye). When you point the Unifier at the components, expect the range to be between 30 and 50 feet. - Page 26 The Unifier sends radio signal to the Expander, which is a radio receiver. The Expander converts radio signals to standard infrared commands and sends them out via a built-in front blaster to components in the same cabinet space. T h e U n i f i e r Self-adhesive “flashers”...
-
Page 27: Pre-Programmed Code Tables
Pre-Programmed Code Tables The Unifier’s Pre-Programmed code library is classified by category (TV, VCR, AUX, etc.). Each category actually includes many types of components. For example, the SAT category includes satellite receivers and digital video recorders like TiVo and Replay. Within each category, the code numbers are listed in rows by brand (Sony, Panasonic, B &... - Page 28 AUDIO - Amps, Preamps and Receivers BRAND ADCOM 082 092 225 161 269 355 356 366 AIWA 170 018 104 202 203 213 211 188 AKAI 138 189 125 126 127 128 258 281 282 038 AMEND ANGSTROM ANTHEM 335 336 337 338 339 ARCAM ATLANTIC TECHNOLOGY 342 AUDIO ACCESS...
- Page 29 AUDIO (continued) - Amps, Preamps and Receivers BRAND KOSS KRELL 150 072 376 KYOCERA LEXICON 120 235 236 237 357 358 359 360 361 362 363 364 LINN 124 377 LUXMAN 137 139 052 165 115 004 009 076 056 MAGNAVOX 086 164 152 208 MARANTZ...
- Page 30 AUDIO COMMAND LOCATIONS COMMAND Power/Off Power/On Vol+ Vol- Mute Preset+ Preset- SCAN BAND,FM/AM MODE DISPLAY CLEAR DOWN SELECT LEFT RIGHT Enter Mode+ Sub+ Center+ Rear+ Mode- Sub- Center- Rear- TUNER Input CD Input DVD Input AUX Input Video 3 Input Video 2 Input Video 1 Input TAPE Input...
- Page 31 AUDIO COMMAND LOCATIONS COMMAND 5/6/7 CH TEST DOLBY DIGITAL LOGIC 7 STEREO SURR TAPE2 Input Video 4 Input PHONO Input BASS+ TREBLE+ SURR+ DELAY+ BASS- TREBLE- SURR- DELAY- CD - CD Players and Changers BRAND ADCOM 062 042 AIWA 059 065 088 089 105 122 170 187 AKAI 085 195 202 231 232...
- Page 32 CD (continued) - CD Players and Changers BRAND 004 022 136 163 213 214 242 243 KENWOOD 185 007 023 055 071 072 142 137 254 KOSS KRELL KYOCERA LOTTE LUXMAN 011 028 070 076 249 252 MAGNAVOX 044 107 MARANTZ 027 041 044 051 077 107 209 246 MCINTOSH...
- Page 33 CD (continued) - CD Players and Changers BRAND VECTOR RESEARCH 080 VICTOR 004 022 114 124 WARDS 185 033 YAMAHA 024 046 054 186 183 245 YORX CD COMMAND LOCATIONS COMMAND Power/Off Power/On Track+ Track- EJECT RANDOM EDIT PROGRAM DISPLAY CLEAR DOWN SELECT...
- Page 34 DVD - DVD Players and Changers BRAND AIWA ALPINE APEX DIGITAL 087 111 115 DENON 007 080 FUNAI 026 027 GOVIDEO HARMAN KARDON 084 140 HITACHI INTEGRA KENWOOD KRELL LEXICON 091 057 074 MAGNAVOX 066 096 MARANTZ 083 095 MERIDIAN MITSUBISHI MYRYAD 102 134...
- Page 35 DVD (continued) - Laser Disc Players BRAND OPTIMUS 049 013 PANASONIC PHILIPS PIONEER 106 117 121 RADIO SHACK REALISTIC RUNCO SANYO SHARP 152 013 SONY 053 110 TECHNICS THETA DIGITAL 032 TOSHIBA 152 106 YAMAHA 043 129 DVD COMMAND LOCATIONS COMMAND Power/Off Power/On...
- Page 36 DVD COMMAND LOCATIONS COMMAND TIME MEMO AUDIO STEP+ STEP- TOP MENU SETUP SEARCH SLOW- SLOW+ ANGLE SUB ON/OFF SUBTITLE PICTURE SURR ZOOM BRAND AIWA 015 071 100 114 CARVER 006 008 027 024 036 DENON 105 227 229 FISHER GOLDSTAR HARMAN KARDON 233 106 116 239 240 KENWOOD...
- Page 37 AUX (continued) - Lighting & Custom Products BRAND AIWA ARCHER AURORA MULTIMEDIA 220 AUTON CELADON CRESTRON 213 214 215 216 217 218 DRAPER SCREEN 204 DREAMVISION DWIN 080 253 EVERQUEST EXTRON FAROUDJA FUJI HUNTERDOUGLAS 219 JERROLD KENWOOD LITE-TOUCH 208 257 LUTRON 158 159 077 MAKITA...
- Page 38 AUX COMMAND LOCATIONS COMMAND Enter (B)FF (B)PLAY (B)PLAY BACK DECK A (B)REW (B)STOP (B)REC DECK B (A)REC (A)PLAY BACK DIRECTION A DIRECTION B SAT - Satellite Receivers BRAND ALPHASTAR AMPLICA BIRDVIEW 129 113 051 126 CABLEVISION / VOOM 148 CAPETRONICS CHANNEL MASTER 013 014 015 018 036 055 CHAPARRAL 008 009 012 077...
- Page 39 SAT (continued) - Satellite Receivers BRAND KATHREIN LEGEND LUTRON LUXOR 144 062 MACOM 059 010 063 064 065 MAGNAVOX MARANTZ 152 153 MEMOREX 057 136 MITSUBISHI 068 154 MOTOROLA NEXT LEVEL NEXTWAVE 028 124 125 NORSAT 069 070 PACE PANASONIC 142 160 PANSAT PAYSAT...
- Page 40 SAT COMMAND LOCATIONS COMMAND Power/Off Power/On Vol+ Vol- Mute PREV CH INPUT/ANT Menu Guide Info Exit Down Select Left Right STOP PLAY PAUSE Enter SEARCH FETCH VIDEO ALT AUDIO PROGRAM HELP INTERACTIVE RECORD TV - Televisions, Projectors, Monitors BRAND ADMIRAL 072 081 161 160 ADVENT AKAI...
- Page 41 TV (continued) - Televisions, Projectors, Monitors BRAND AMPRO 167 073 157 183 AMSTRAD ANAM 043 054 056 080 112 131 197 004 112 058 AUDIOVOX BARCO BLAUPUNKT BROKSONIC CAIRN CANDLE 197 002 003 004 CAPEHART CETRONIC CITIZEN 197 002 003 004 043 101 103 143 CLASSIC CONCERTO CONTEC...
- Page 42 TV (continued) - Televisions, Projectors, Monitors BRAND MARANTZ 197 164 184 MATSUI MEMOREX 007 072 004 METZ 197 004 024 028 042 MINERVA MITSUBISHI 109 124 024 004 028 040 042 146 191 197 004 062 101 015 025 132 130 134 197 040 016 024 056 019 236 237 NIKEI ONKING ONWA...
- Page 43 TV (continued) - Televisions, Projectors, Monitors BRAND VIDEO CONCEPTS 146 VIDIKRON 174 184 188 192 VIDTECH WARDS 004 008 009 019 028 060 061 063 064 072 074 143 164 034 WESTING HOUSE 076 YAMAHA 197 004 YORK YUPITERU ZENITH 073 072 095 103 157 183 ZONDA TV COMMAND LOCATIONS...
- Page 44 TV COMMAND LOCATIONS COMMAND AUTO CH RESET DELETE SLEEP ASPECT RGB Input COMPONENT MODE WIDE/SIZE S-VIDEO Input VIDEO1 Input VIDEO2 Input VCR - Video Cassette Recorders BRAND AIWA 034 161 AKAI 016 146 043 046 124 125 142 AMPRO ANAM AUDIO DYNAMICS 012 023 039 043 BROOKSONIC...
- Page 45 VCR (continued) - Video Cassette Recorders BRAND MATSUI 027 030 MEMOREX 101 003 010 014 031 034 053 072 102 134 139 045 046 059 MINOLTA 013 020 MITSUBISHI 059 061 151 013 020 045 046 051 142 049 168 034 040 MULTITECH 024 034...
- Page 46 VCR (continued) - Video Cassette Recorders BRAND YAMAHA 012 034 039 043 ZENITH 072 080 056 048 101 034 058 VCR COMMAND LOCATIONS COMMAND Power/Off Power/On PREV CH VCR/TV Menu GUIDE DISPLAY CANCEL DOWN SELECT LEFT RIGHT Stop Play Pause SLOW SLOW+ TRK+...
- Page 47 VCR COMMAND LOCATIONS COMMAND INDEX DELETE TAPE SPEED CBL - Cable TV Tuner/Descrambler BRAND 004 103 003 039 042 046 053 AMERICAST ANTRONIX ARCHER 005 007 014 BELL SOUTH CENTURION CENTURY CITIZEN COMBANO 080 081 COMSAT COMTRONICS COX DIGITAL CABLE 074 DIGICABLE EAGLE 020 030 040...
- Page 48 CBL (continued) - Cable TV Tuner/Descrambler BRAND SCIENTIFIC ATLANTA 003 011 041 042 043 045 046 SIGNAL SIGNATURE SL MARX SONY 096 108 SPRUCER 047 078 STARCOM 002 004 008 009 STARGATE 008 030 097 104 TADIRAN TIMELESS TIME WARNER TOCOM 039 040 056 TOSHIBA...
- Page 49 CABLE COMMAND LOCATIONS COMMAND Enter/MUSIC DAY+ PAGE+ HELP LOCK / PPV DAY- PAGE- SETTING RECORD BUTTON LOCATION 0 / TAPE 2 +10 / VCR 4 ENTER / PH MODE+ SUB+ CENTER+ REAR+ MODE- SUB- CENTER- REAR- Press SHIFT first, then press STOP/REC. Press SHIFT first, then press 1/SLEEP button.
-
Page 50: Frequently Asked Questions
U R C - 1 0 0 Frequently Asked Questions Why does the display change whenever you press the buttons at the top of the remote? The Unifier is actually eight remote controls in one. The LCD display shows you which of your components it is currently set to control. - Page 51 Unifier would still remember your settings. Who can I call for more answers? The Universal Remote Control technical support and customer service staff are ready to answer any questions you might have.
-
Page 52: Specifications/Warranty
U R C - 1 0 0 Warranty The URC-100 is covered against any manufacturers defects or workmanship for a period of one year from the date of purchase if purchased from an authorized Universal Remote Control dealer. Units purchased from online auction sites or other unauthorized resellers have no warranty. - Page 53 OCE-0023A Rev. 04...