Table of Contents
Advertisement
Quick Links
Advertisement
Table of Contents

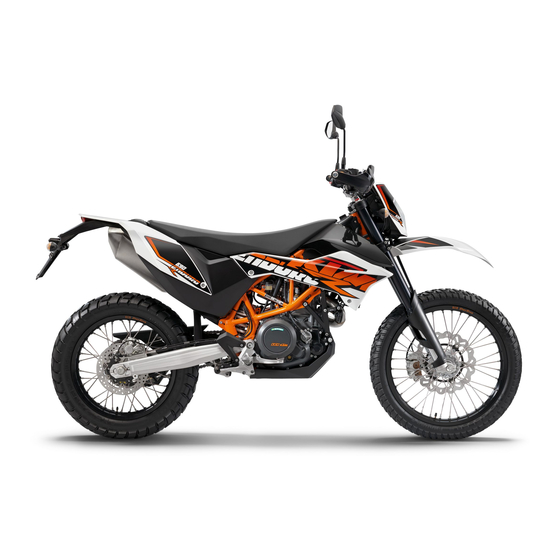
Summary of Contents for KTM 690 Enduro R 2017
- Page 1 SETUP INSTRUCTIONS 2017 690 Enduro R Art. no. 3213598en...
- Page 3 KTM accepts no liability for delivery options, devi- ations from illustrations and descriptions, misprints, and other errors.
-
Page 4: Means Of Representation
MEANS OF REPRESENTATION Symbols used The meaning of specific symbols is described below. Indicates an expected reaction (e.g. of a work step or a function). Indicates an unexpected reaction (e.g. of a work step or a function). Indicates a page reference (more information is provided on the specified page). Indicates information with more details or tips. - Page 5 SETUP Unpacking and setting up the vehicle – Remove the straps and box. S01530-10 – Remove the adhesive tape in the upper area of the motorcycle. S01531-10 – Roll down the film at the sides. Info To avoid damaging the motorcycle during unpacking, leave the other films on the vehicle until you have finished work on the vehicle.
- Page 6 SETUP – Position the handlebar. – Position the handlebar clamps. Mount the four screws and tighten evenly. Guideline Screw, handlebar clamp 20 Nm (14.8 lbf ft) The markings of the handlebar scale are located centrally between the han- dlebar clamps. Markings face backwards.
- Page 7 SETUP – Recharge the battery. ( p. 7) – Plug in connector on the starter relay. S00801-10 – Remove the rear fairing. ( p. 11) – Four markings are found on the underside of the rear fairing. At these location, drill holes to the specified diameter in three stages.
- Page 8 SETUP – Prepare the vehicle according to the specifications in the KTM Dealer.net for han- dover to the customer. – Set the kilometers or miles. ( p. 14)
-
Page 9: Recharging The Battery
WORK Removing the seat – Pull on strap and raise the rear of the seat at the same time. – Pull back the seat and lift it off. B01948-10 Mounting the seat M00648-10 – Hook slot of the seat onto screw , press the rear downward and at the same time push it forward. - Page 10 WORK Preparatory work – Switch off the ignition by turning the ignition key to position OFF – Remove the seat. ( p. 7) – Remove the battery. ( p. 8) Main work – Connect the battery charger to the battery. Switch on the battery charger. Battery charger (58429074000) You can also use the battery charger to test rest potential and start potential of the battery, and to test the alternator.
- Page 11 WORK – Disconnect negative cable from the battery. – Take off positive terminal cover S00622-10 – Disconnect ABS connection cable and positive cable from the battery. S00620-10 – Remove screws – Pull retaining bracket of the battery forward and remove it. –...
- Page 12 WORK – Position the engine electronics control unit – Mount battery cover S00624-10 Finishing work – Mount the seat. ( p. 7) – Set the clock. ( p. 14) Opening the filler cap Danger Fire hazard Fuel is highly flammable. The fuel in the fuel tank expands when warm and can escape if overfilled. –...
-
Page 13: Closing Filler Cap
WORK Closing filler cap – Put the filler cap back on and turn the ignition key 90° clockwise. – Remove the ignition key and fold down the cover. 601771-01 Removing rear fairing Preparatory work – Remove the seat. ( p. 7) Main work –... - Page 14 WORK – Mount and tighten screws – Tighten the screws of the grab handles. Guideline Screw, grab handle 10 Nm (7.4 lbf ft) – Mount the seat. ( p. 7) S01536-10 3.10 Mounting rear footrest bracket Info The operations are the same for the left and right sides. –...
- Page 15 WORK 3.13 Refueling Danger Fire hazard Fuel is highly flammable. The fuel in the fuel tank expands when warm and can escape if overfilled. – Do not refuel the vehicle in the vicinity of open flames or lit cigarettes. – Switch off the engine for refueling. –...
-
Page 16: Setting The Clock
WORK 3.14 Setting the clock Condition The motorcycle is stationary. – Switch on the ignition by turning the ignition key to position ON – Press the MODE button repeatedly until the ODO mode is active. – Keep the MODE button and the SET button pressed simultaneously. The time display begins to flash. -
Page 17: Technical Data
TECHNICAL DATA Chassis tightening torques – Screw, chain guard EJOT 2 Nm (1.5 lbf ft) – Screw, combination instrument EJOT 1 Nm (0.7 lbf ft) – Screw, license plate holder, bottom EJOT 3 Nm (2.2 lbf ft) – Screw, side cover on spoiler EJOT 1 Nm (0.7 lbf ft) –... - Page 18 TECHNICAL DATA – Screw, voltage regulator 8 Nm (5.9 lbf ft) – Screw, wheel speed sensor 6 Nm (4.4 lbf ft) Nut, rear sprocket screw 35 Nm (25.8 lbf ft) Loctite ® 2701™ – Remaining nuts, chassis 25 Nm (18.4 lbf ft) –...
- Page 19 SUBSTANCES Super unleaded (ROZ 95/RON 95/PON 91) Standard/classification – DIN EN 228 (ROZ 95/RON 95/PON 91) Guideline – Only use unleaded super fuel that matches or is equivalent to the specified fuel grade. – Fuel with an ethanol content of up to 10 % (E10 fuel) is safe to use. Info Do not use fuel containing methanol (e.
- Page 20 *3213598en* 3213598en 10/2016 KTM Sportmotorcycle GmbH 5230 Mattighofen/Austria Photo: Mitterbauer/KTM http://www.ktm.com...


