Table of Contents
Advertisement
Advertisement
Table of Contents

Related Manuals for Rational LM1 Series


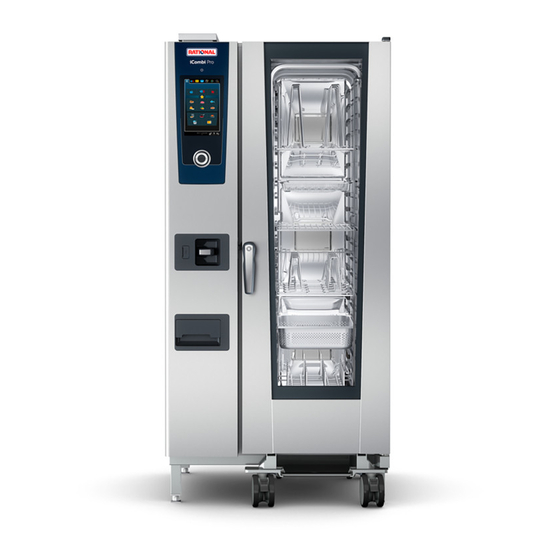
Summary of Contents for Rational LM1 Series
- Page 1 ® iCombi ® iCombi Classic ® CombiMaster Plus Original installation manual...
- Page 2 Unit handover Dealer: Installer: Specify for all queries: Unit type: Unit no.: Set to gas type: Your unit was checked by: 2 / 92 80.06.070_iCombi Pro-iCombi Classic_IM_V01_en-GB...
-
Page 3: Table Of Contents
Table of contents 1 Introduction ......................... 6 Information on this manual ...................... 6 Target group .......................... 6 Copyrights ............................. 7 Conformity ............................ 7 Liability and warranty provisions.................... 7 Identification of the unit ...................... 8 2 Safety........................... 10 Warning symbols........................ 10 General safety instructions .................... 10 Safety instructions for gas appliances ................ 11 Intended use.......................... - Page 4 6 Electrical connection .................... 43 Regulations for electrical connection ................. 43 Open the electrical compartment.................. 45 Connecting electric units to the mains................ 48 Voltage supply (USA and Canada only) ................ 49 Conduit connection (USA and Canada only).............. 51 6.5.1 Carry out conduit connection .................. 51 Connecting gas units to the mains ..................
- Page 5 14 Decommissioning..................... 86 14.1 Notes on decommissioning.................... 86 14.2 Disposal ............................ 86 15 Accessories ........................ 87 16 Conversion tables..................... 88 80.06.070_iCombi Pro-iCombi Classic_IM_V01_en-GB 5 / 92...
-
Page 6: Introduction
1 | Introduction Introduction Information on this manual This document is a preliminary version of the installation manual. Please note the relevant version and date. This document is part of the unit. Read the manual prior to installation. The manual is there to ensure that you use the unit safely and install it properly. The illustrations in this manual are examples only and may differ from the unit. -
Page 7: Copyrights
1 | Introduction In order to prevent accidents or damage, the manufacturer recommends that technicians attend training and safety instructions. Copyrights Forwarding product-specific information to third parties is prohibited. We re- serve the right to make technical developments and changes in the interest of progress. -
Page 8: Identification Of The Unit
1 | Introduction Damage to glass, light bulbs and seal materials Identification of the unit Type plate Unit range Model number Connection voltage Frequency Output Permissible water pressure range Serial number Unit sizes Unit size type plate Unit size LMxxxA… 6 x 2/3 GN LMxxxB…... - Page 9 1 | Introduction Tabletop units Standalone units 6-2/3 6-1/1 6-2/1 10-1/1 10-2/1 20-1/1 20-2/1 iCombi Classic Gas units CombiMa ster Plus 80.06.070_iCombi Pro-iCombi Classic_IM_V01_en-GB 9 / 92...
-
Page 10: Safety
2 | Safety Safety Warning symbols DANGER Type and source of danger Non-compliance will lead to very serious injury or death. Preventative measures WARNING Type and source of danger Non-compliance can lead to serious injury or death. Preventative measures CAUTION Type and source of danger Non-compliance can lead to minor or moderate injuries. -
Page 11: Safety Instructions For Gas Appliances
2 | Safety Do not expose the unit to weather conditions such as rain. Only connect the unit in accordance with the installation manual and the information on the type plate. Switch the unit off before disconnecting the mains power or connecting to the mains. After use, only transport the unit at ambient temperat- ures above 0°C [32°F]. -
Page 12: Intended Use
2 | Safety Risk of explosion from leaking gas. Risk of explosion from leaking gas. Watch out for the smell of gas. Avoid any damage to the gas line. If you smell gas: 1. Close the main gas supply. 2. Do not touch any electrical controls. 3. -
Page 13: Product Description
3 | Product description Product description Unit description Unit size 6-2/3 GN The installations connections are on the rear of the unit: Equipotential bonding Water connection Electrical connection Wastewater connection Safety overflow for waste water Network connection connection Unit size 6-1/1 up to 10-2/1 GN The installation connections are on the rear of the unit: Network connection Gas units only: Gas connection... -
Page 14: Technical Data
3 | Product description Unit size 20-1/1 and 20-2/1 GN The installation connections are on the underside of the unit and go up to the rear of the unit: Water connection Cable conduit for electrical con- nection Equipotential bonding Wastewater connection Safety overflow for waste water Network connection connection... -
Page 15: Unit Dimensions
3 | Product description 3.2.1 Unit dimensions Unit size 6-2/3 GN Width Width Depth Depth Height Height (mm) x (inch) (mm) y (inch) (mm) z (inch) 6-2/3 25 3/4 21 7/8 22 3/8 Depth overall Depth overall Height overall Height overall dimension dimension dimension... -
Page 16: Unit Weight
3 | Product description Depth overall Depth overall Height overall Height overall dimension dimension dimension dimension (mm) (inch) (mm) (inch) 6-1/1 841.5 33 1/8 31 5/8 6-2/1 1041.5 31 5/8 10-1/1 841.5 33 1/8 1064 41 7/8 10-2/1 1041.5 1064 41 7/8 Unit size 20-1/1, 20-2/1 GN Width... -
Page 17: Thermal Load
3 | Product description iCombi Pro Gas units 6-1/1 10-1/1 6-2/1 10-2/1 20-1/1 20-2/1 Weight without pack- aging (kg) Weight without pack- aging (lbs) iCombi Classic Electric units 6-2/3 6-1/1 10-1/1 6-2/1 10-2/1 20-1/1 20-2/1 Weight without packaging (kg) Weight without packaging (lbs) iCombi Classic Gas units 6-1/1... - Page 18 3 | Product description iCombi Classic Gas units 6-1/1 10-1/1 6-2/1 10-2/1 20-1/1 20-2/1 Thermal load latent (kJ/ 2050 3450 3450 6350 6850 10900 Thermal load sensible 2450 4450 4450 7750 8850 14000 (kJ/h) We reserve the right to make technical developments/modifications. 18 / 92 80.06.070_iCombi Pro-iCombi Classic_IM_V01_en-GB...
-
Page 19: Transport
4 | Transport Transport CAUTION Risk of crushing due to the weight of the unit Hands and fingers can be crushed. Use appropriate protective clothing during transport. Use carrying aids such as carrying straps supplied by the manufacturer. At least 3 persons are required for transportation. CAUTION Risk of tipping during transport Risk of crushing if the unit tips onto persons. -
Page 20: Transport With Pallet
4 | Transport NOTICE Unit size 6-2/3 GN: Damage to the appliance if lifted incorrectly During transportation, make sure that the air filter box and the USB connection remains intact. Transport with pallet CAUTION Inclinations when transporting with a transport aid Risk of crushing and injury during transport with a transport aid over inclinations or uneven floors. - Page 21 4 | Transport NOTICE Transporting with a transport aid without protection Transport the unit as far as you can on the pallet. Do not transport the unit without protection with a transport aid or a similar transport tool. For protection, you can use a wooden pallet. Required door width with transport pallet Unit size 6-2/3...
-
Page 22: Transporting Without A Shipping Pallet With A Pallet Jack
4 | Transport 1. Transport the unit to its place of installation with the transport pallet. Dur- ing transport, watch out for protruding parts on the underside of the unit. >> The unit is standing on its intended installation surface and is ready for in- stallation. -
Page 23: Transporting Standalone Units Without A Pallet With A Pallet Jack
4 | Transport 5. Slide the gasket back into its slot in the base frame. >> The unit is standing on its intended installation surface and is ready for in- stallation. 4.3.2 Transporting standalone units without a pallet with a pallet jack The packaging material is removed. -
Page 24: Transporting With Carrying Straps
4 | Transport Transporting with carrying straps Only transport the unit size 6-1/1 up to 10-2/1 GN with carrying straps. CAUTION Risk of crushing and injury if unit is incorrectly lifted with carrying straps Hands, fingers or feet could be crushed. Observe the maximum load indicated on the carrying straps. - Page 25 4 | Transport 4. Lift the unit with the carrying straps. Note the minimum required number of persons for lifting and transporting the unit according to the unit weight. 5. Transport the unit with the carrying straps and place it on its intended in- stallation surface.
-
Page 26: Placement
5 | Placement Placement CAUTION Risk of crushing when positioning the unit Fingers, hands and feet could be crushed beneath the unit. Wear appropriate protective clothing when positioning the unit. Only lift the unit at the intended lifting points. NOTICE Unit damage from frost Ambient temperatures below freezing (frost) may damage the unit. -
Page 27: Minimum Clearance To Unit
5 | Placement Minimum clearance to unit 5.1.1 Distance to walls Minimum clearance on all sides Place the unit in consideration of the minimum clearance to the wall. The clear- ances depend on the unit size, as shown in the following table. Unit size 6-2/3 6-1/1... - Page 28 5 | Placement If this clearance on the left side of the unit is not possible, place the unit so that the unit can be pulled out from the installation recess for maintenance work. Distance on the left unit side x (mm) x (inch) Recommended clearance on right side of the unit...
-
Page 29: Distance To Heat Sources
5 | Placement 5.1.2 Distance to heat sources NOTICE Minimum clearance not adhered to Place the unit with the minimum clearance to heat sources or open fire required to prevent any damage to the unit or malfunctions. NOTICE High ambient temperature next to the installation site (left side of the unit) If the temperatures at the installation site on the left side of the unit exceed 80°C [176°F], the heating system will be switched off by the automatic emergency shutdown. -
Page 30: Clearance To Ceiling
5 | Placement Please note: The heat shield for unit sizes 6-1/1 GN to 20-2/1 GN is not suit- able for the Combi-Duo and the UltraVent. 5.1.3 Clearance to ceiling Electric units Position the electric unit with a minimum clearance between the unit's ventila- tion pipe and the grease filters of the exhaust hood/ventilation ceiling. -
Page 31: Installation Of Tabletop Units
5 | Placement Minimum clearance ceiling x [mm] x [inch] Condensation breaker If steam from the ventilation pipe cannot be directed into an exhaust hood or a ventilating ceiling, there must be a minimum clearance to the ceiling above the unit. -
Page 32: Unit Size 6-2/3 Gn Set Up On Base Frame
5 | Placement WARNING Height-adjustment with unit feet or levelling frame Risk of burning during operation when loading on rack rails above 1600 mm [63 inch]. Affix the safety label enclosed to the unit. Inform the end user about the hazard of elevated rack rails. NOTICE Dirty unit due to broken sealing strip A sealing strip is affixed to the underside of the unit to seal it at the... -
Page 33: Align The Base Frame Horizontally And Fasten
5 | Placement 1. Lift the unit onto the stand, e.g. using carrying straps. 2. Position the unit with the spring pins. 3. Screw the unit to the stand with 2 screws. The diagram indicates the posi- tion of the screws in the stand. The screws are attached with the nuts wel- ded in the unit. - Page 34 5 | Placement The mounting kit including the special label, screws and dowels is not included in the delivery of the unit and can be ordered separately from the manufac- turer under article number 8700.0317. Adhere to the clearances of the foot locks for the relevant unit sizes: 6-1/1 - 10-1/1 6-2/1 - 10-2/1 x [mm]...
-
Page 35: Installation Of Standalone Units
5 | Placement 3. Secure the grub screw to the castors with a hexagon socket wrench. Attach the mobile base frame NOTICE Damage to electrical or gas lines due to shifting Also secure the unit against shifting to the rear wall with a chain or rope (chain is not included in the delivery). - Page 36 5 | Placement 1. Loosen the screws that connect the transport pallet to the transport aid. Place the transport aids screwed together on the right next to the shipping pallet. 2. Remove the foam rubber pieces next to the unit feet of the transport pal- let.
- Page 37 5 | Placement 3. Loosen the screws with nut on the split transport pallet. 4. Open the cabinet door. 5. Pull the unit downwards by the cooking chamber door. Remove the part of the pallet under the electrical compartment. 6. Place the unit with the rear unit feet on the installation surface. 80.06.070_iCombi Pro-iCombi Classic_IM_V01_en-GB 37 / 92...
- Page 38 5 | Placement 7. Gently lift the unit from the cooking chamber door and pull the pallet un- der the unit. 8. Place the unit on the installation surface using the front unit feet. Aligning the standalone unit The unit is positioned and is standing at its intended installation surface. 1.
-
Page 39: Securing The Standalone Unit
5 | Placement 5.3.2 Securing the standalone unit CAUTION Shifting the unit to the installation position. Risk of crushing if the unit is shifted. Gas units can damage gas lines. Secure the unit with the fixing kit. Secure the standalone unit against slipping with the mounting kit. The mounting kit including the special label, screws and dowels is not included in the delivery of the unit and can be ordered separately from the manufacturer under article number 8700.0317. -
Page 40: Aligning The Mobile Oven Rack
5 | Placement 2. Insert the standalone unit into the foot locks. 5.3.3 Aligning the mobile oven rack WARNING Maximum approach angle of entry ramp is exceeded Risk of burning due to hot liquid and food if the approach angle is too steep. - Page 41 5 | Placement 2. Check that the mobile oven rack can be pushed straight into the unit. If this is not the case, use an entry ramp or transfer aid. Entry ramp and rolling aid If the floor is uneven, use an entry ramp to compensate the unevenness. If there is a gully grid in front of the standalone unit, position a rolling aid near the entry area of the mobile oven rack.
-
Page 42: Notes On Extractor Hood
5 | Placement Notes on extractor hood DANGER Toxic exhaust fumes Risk of asphyxiation from unauthorised concentration of hazardous flue gas. Ensure that the ventilation options in the installation area are adequate. Perform a flue gas analysis prior to commissioning the unit. On-site ventilation When installing an exhaust device, observe the following: VDI Directive 2052, NFPA 96 and local construction authority regulations... -
Page 43: Electrical Connection
6 | Electrical connection Electrical connection DANGER High voltages when connecting to the mains power Danger to life due to high voltage. Disconnect from the power supply. Make sure the unit is disconnected from the power. DANGER Electric shock from incorrect connection There is a danger to life if the wires are incorrectly connected. - Page 44 6 | Electrical connection Wire colour Wire function Yellow/green Protective conductor Blue Neutral conductor (neutral wire) Brown, grey or black Phase L1, L2, L3 Residual current circuit breaker All units are generally equipped with a protective conductor terminal. In ac- cordance with national standards and regulations, an RCD (residual current device) must be incorporated in the installation of the unit.
-
Page 45: Open The Electrical Compartment
6 | Electrical connection Before you disconnect the power cable from the mains or reconnect it to the mains, make sure that the unit is switched off to prevent the condensa- tion hood from running. Notes for units with the Uninterrupted Power Supply (UPS) option With the UPS option, electronic components can be connected to a stable voltage supply. - Page 46 6 | Electrical connection 2. Lift up the left side panel from below and pull the side panel downwards away from the unit. >> The electrical compartment is open. Unit size 6-1/1 GN up to 10-2/1 GN 1. Lever out the grating underneath the control panel with a screwdriver. 46 / 92 80.06.070_iCombi Pro-iCombi Classic_IM_V01_en-GB...
- Page 47 6 | Electrical connection 2. Unscrew the blind rivet nuts in the bottom left corner. 3. Loosen two screws in the recess of the unit's side panel. 4. Pull the left side panel downwards away from the unit. 5. Remove the side panel. >>...
-
Page 48: Connecting Electric Units To The Mains
6 | Electrical connection Unit size 20-1/1 GN, 20-2/1 GN 1. Loosen two screws on the underside of the side panel. 2. Lift up the left side panel from below and pull the side panel downwards away from the unit. >>... -
Page 49: Voltage Supply (Usa And Canada Only)
6 | Electrical connection A dedicated supply line is available for the unit. Units are delivered without mains cables. Unit size 6-2/3 GN: The unit is supplied with a mains cable. The connection point for the power cable is on the main contactor in the electrical compartment behind the removable left side panel. - Page 50 6 | Electrical connection 2. Set the voltage at the switch according to the power supply. In the basic position, the switch is in position 2: Position Voltage (V) 208 / 440 1. Close the electrical compartment. 2. Connect the unit to the power supply. 3.
-
Page 51: Conduit Connection (Usa And Canada Only)
6 | Electrical connection Conduit connection (USA and Canada only) The conduit connection for installing tabletop units is not included with the unit and must be ordered separately. The conduit connection is required for units with the following voltage variants. Refer to the following table for diameters of conduit connection kits: Voltage vari- 6-1/1... - Page 52 6 | Electrical connection 3. Feed the wires through the connecting pipe. 4. Connect the wires to the main protection switch. 5. Mount the gaskets and the lock nut over the cable to the pipe adapter. 52 / 92 80.06.070_iCombi Pro-iCombi Classic_IM_V01_en-GB...
-
Page 53: Connecting Gas Units To The Mains
6 | Electrical connection 6. Close the left side panel. >> The installation of the conduit connection is completed on the unit side. Connecting gas units to the mains NOTICE Incorrect polarity in electrical connection Note polarity of electrical connection. An error message will appear if polarity is incorrect. -
Page 54: Connecting The Equipotential Bonding
6 | Electrical connection Unit size 6-2/3 GN 1. Insert the left side panel underneath the unit frame upwards. 2. Press the side panel upwards. 3. Tighten 2 screws on the underside of the side panel and 1 screw on the rear side. -
Page 55: Power Ratings Of Different Voltage Types
6 | Electrical connection Unit size 6-1/1 GN up to 10-2/1 GN Unit size 20-1/1 GN, 20-2/1 GN Power ratings of different voltage types Maximum connection voltage Maximum permissible tolerance for input voltage: -15% to +10%. The unit can be used with frequencies of 50 Hz and 60 Hz without making any technical modifications. - Page 56 6 | Electrical connection Current Power (kW) Fuse (A) RCD type consump- tion (A) 6-2/3 (1 NAC 240 V) 50/60 6-1/1 E (1 NAC 240 V) 50/60 48.8 11.7 Current Power (kW) Fuse (A) RCD type consump- tion (A) 6-2/3 (2 AC 208 V) 30/35 6-1/1 E (2 AC 208 V) 10.8...
- Page 57 6 | Electrical connection Current Power (kW) Fuse (A) RCD type consump- tion (A) 20-1/1 E (3 AC 208 V) 103.3 37.2 20-2/1 E (3 AC 208 V) 188.5 67.9 Current Power (kW) Fuse (A) RCD type consump- tion (A) 6-2/3 (3 AC 220 V) 50/60 14.4...
- Page 58 6 | Electrical connection Current Power (kW) Fuse (A) RCD type consump- tion (A) 20-2/1 E (3 AC 400 V) 50/60 67.9 Current Power (kW) Fuse (A) RCD type consump- tion (A) 6-1/1 E (3 AC 415 V) 50/60 10.8 6-2/1 E (3 AC 415 V) 50/60 33.7...
- Page 59 6 | Electrical connection Current Power (kW) Fuse (A) RCD type consump- tion (A) 6-1/1 E (3 AC 480 V) 10.8 6-2/1 E (3 AC 480 V) 22.4 10-1/1 E (3 AC 480 V) 18.9 10-2/1 E (3 AC 480 V) 37.4 20-1/1 E (3 AC 480 V) 37.2...
- Page 60 6 | Electrical connection Current Power (kW) Fuse (A) RCD type consump- tion (A) 6-1/1 G (1 NAC 120 V) 0.61 10-1/1 G (1 NAC 120 V) 0.91 20-1/1 G (1 NAC 120 V) 10.8 Current Power (kW) Fuse (A) RCD type consump- tion (A)
- Page 61 6 | Electrical connection Current Power (kW) Fuse (A) RCD type consump- tion (A) 6-2/1 G (2 AC 208 V) 10-1/1 G (2 AC 208 V) 10-2/1 G (2 AC 208 V) 20-1/1 G (2 AC 208 V) 20-2/1 G (2 AC 208 V) 10.6 Current Power (kW) Fuse (A)
-
Page 62: Network Connection
7 | Network connection Network connection *this section does not apply to the USA and Canada. Notes on network connection The network connection allows you to connect the unit to your network, in or- der to connect the unit to ConnectedCooking. Ethernet connection (Local Area Network) iCombi Pro: Units are equipped with an Ethernet connection as standard. -
Page 63: Water Connection
8 | Water connection Water connection Regulations for water connection NOTICE Malfunction due to minimum conductivity not being met Make sure that the minimum conductivity of the water is 50 μS/cm [32 ppm TDS]. The unit complies with all current regulations (SVGW, KIWA, WRAS). Adhere to the country standards and regulations for a connection to the drink- ing water supply, such as for hygiene requirements. -
Page 64: Connecting Water Inlet
8 | Water connection An approved double check valve or another non-return valve that is just as ef- fective must be mounted directly on the water tap at the connection point. Connecting water inlet The water inlet connection is on the rear or underside of the unit. Unit size 6-2/3 GN Unit size GN up to 6-1/1 GN10-2/1 Unit size 20-1/1 GN, 20-2/1 GN... -
Page 65: Notes On Water Treatment
8 | Water connection Notes on water treatment If the water quality is inappropriate for the unit, then water treatment is re- quired. Please note the following: Treated water with hardness below 5°dH may be aggressive and corrosive, and can shorten the lifespan of the device. Do not use treated water with hardness below 5°dH. - Page 66 8 | Water connection CombiMaster Plus without Care Water softening is recommended for treating water if severe calcification occurs (without chloride contamination). Use a slightly acidic decarbonisation ion exchanger (H ). Sodium ion ex- changers (as are commonly found in dishwashers) are not recommended. Phosphate metering is not recommended due to its negative effects on the water system.
-
Page 67: Wastewater Connection
9 | Wastewater connection Wastewater connection Regulations for waste water connection General notes for all units NOTICE The drain pipe does not meet requirements Use a drain pipe with a high temperature resistance, which corresponds at least to a type PP pipe. Do not use a hose. NOTICE Incorrect installation of drain pipe Do not stick or weld the drain pipe to the unit drain. -
Page 68: Connect Waste Water Drain
9 | Wastewater connection Requirements for the unit size 6-1/1 GN to 20-2/1 GN NOTICE Unit overflowing through external siphon The unit is already equipped with an integrated siphon. A second external siphon without aeration of the drain will cause the unit to overflow. No external siphon may be connected to the waste water connection without upstream aeration. -
Page 69: Additional Aeration Of The Drain (Optional)
9 | Wastewater connection Unit size 6-1/1 GN up to 10-2/1 GN The average height of the waste water connection for tabletop units is around 50 mm [1.57 inches]. Unit size 20-1/1 GN, 20-2/1 GN The average height of the waste water connection is 70 mm [2.76 inches]. Additional aeration of the drain (optional) NOTICE Unit overflowing through external siphon... -
Page 70: Gas Connection For Gas Units
10 | Gas connection for gas units Gas connection for gas units This section only applies to gas units. DANGER Fire due to incorrect gas connection Danger to life due to fire from an incorrect gas connection. Follow local regulations of the gas supply company. Check the type of gas available and the dynamic connection pressure against the values specified on the unit. - Page 71 10 | Gas connection for gas units Requirements for gas type and gas pressure Check that the factory gas setting on the unit corresponds to the actual local gas supply conditions. The gas type and the dynamic connection pressure set on the unit must cor- respond to those stated on the type plate.
-
Page 72: Connecting The Unit To The Gas Supply
10 | Gas connection for gas units 10.2 Connecting the unit to the gas supply The width of the gas pipe must be at least ¾ inch in accordance with local provisions. A connection with an internal thread is provided to connect the gas line. An additional Teflon tape to seal in the thread is available. - Page 73 10 | Gas connection for gas units Natural gas L G25 6-1/1 6-2/1 10-1/1 10-2/1 20-1/1 20-2/1 Required connection 20-30 20-30 20-30 20-30 20-30 20-30 flow pressure (mbar) Wobbe index (MJ/ 37.38 37.38 37.38 37.38 37.38 37.38 m³) Wi Wobbe index (MJ/ 41.52 41.52 41.52...
- Page 74 10 | Gas connection for gas units 6-1/1 6-2/1 10-1/1 10-2/1 20-1/1 20-2/1 Wobbe index (MJ/ 74.75 74.75 74.75 74.75 74.75 74.75 m³) Wi Wobbe index (MJ/ 81.19 81.19 81.19 81.19 81.19 81.19 m³) Ws Max. Consumption 1.01 2.18 1.71 3.11 3.26 6.21...
- Page 75 10 | Gas connection for gas units Liquid Gas Japan 6-1/1 6-2/1 10-1/ 10-2/ 20-1/ 20-2/ Required connection flow 25-57. 25-57. 25-57. 25-57. 25-57. 25-57. pressure (mbar) Wobbe index (MJ/m³) Wi 74.75 74.75 74.75 74.75 74.75 74.75 Wobbe index (MJ/m³) Ws 81.19 81.19 81.19...
-
Page 76: Exhaust Gas Connection On Gas Units
11 | Exhaust gas connection on gas units Exhaust gas connection on gas units This section only applies to gas units. DANGER Toxic exhaust fumes Risk of asphyxiation from unauthorised concentration of hazardous flue gas. Ensure that the ventilation options in the installation area are adequate. Perform a flue gas analysis prior to commissioning the unit. -
Page 77: Exhaust Gas Connection Type A3 And B23
11 | Exhaust gas connection on gas units Constant ventilation Combustion air supply is assured via two ventilation openings to the outside, each with 150 cm [9153561.62 in³] free cross section (one near the ceiling, the other near the floor). Technical room ventilation systems Kitchens in which gas units with a total nominal heat load of more than 50 kW are installed must be ventilated and ventilated with HVAC systems. -
Page 78: Type B13 Exhaust Gas Connection
11 | Exhaust gas connection on gas units Requirements for unit size 6-2/1 GN up to 20-2/1 GN Type B23 exhaust air connection for these unit sizes corresponds to a room air-dependent gas furnace with fans in front of burners without flow guards and total rated load in installation space greater than 14 kW. -
Page 79: Type B13Bs Exhaust Gas Connection
11 | Exhaust gas connection on gas units A clearance of 400 mm [15.75 inches] must be kept between the flue pipes of the unit and the grease filters of the exhaust hood/ventilation ceiling in order to prevent a risk of fire in the fat filter. Please note that for flue gas connection type B13 there must be a vertical upflow section. -
Page 80: Flow Guards For B13 And B13Bs
11 | Exhaust gas connection on gas units Contact the local master chimney sweep or an authorised authority for assist- ance in calculating the intake and exhaust air required. 11.5 Flow guards for B13 and B13BS Flow guards are not included with the unit, but can be ordered using the fol- lowing article numbers: Flow guard 6-1/1... - Page 81 11 | Exhaust gas connection on gas units Notes on the exhaust gas system NOTICE Temperature-resistant exhaust gas pipes for high exhaust gas temperatures The exhaust gas pipes must be temperature-resistant to 400°C [752°F]. Due to high exhaust gas temperatures, do not use exhaust pipes made of aluminium or of any materials that are not temperature-resistant up to 400°C [752°F].
-
Page 82: Initial Start-Up
12 | Initial start-up Initial start-up WARNING Risk of scalding from hot steam Hot steam is emitted during operation and when cleaning the unit. You could scald yourself on the hot steam when opening the cooking cabinet door. Open the cooking cabinet door carefully and leave the cooking cabinet door ajar for a few seconds so that the steam can escape upwards. -
Page 83: Perform The Self-Test
12 | Initial start-up After installing the unit, affix the sticker indicating the maximum rack height at a height of 1600 mm [63 inches] to the unit. The sticker is provided in the starter kit. 12.2 Perform the self-test DANGER Changed CO / CO values after the self-test Risk of poisoning due to excessive exhaust gas values. - Page 84 12 | Initial start-up >> For unit sizes 20-1/1 GN and 20-2/1 GN, there are 3 GN containers in the mobile oven rack, one in front of each fan wheel. Start self-test 1. Close the cooking cabinet door. 2. Start the selftest. >>...
-
Page 85: Maintenance
13 | Maintenance Maintenance 13.1 Maintenance notice Notes for gas appliances In accordance with the specified standards, gas components must undergo annual maintenance. If maintenance and repair works have been performed on gas appliances, please note the following: – Check that the compensation tube is positioned correctly. –... -
Page 86: Decommissioning
14 | Decommissioning Decommissioning 14.1 Notes on decommissioning Note the following information on decommissioning the unit: Make sure the unit is cooled to below 40°C [104°F]. Ensure that the steam generator is pumped dry. Make sure the cleaning box is pumped. Switch off the gas inlet. -
Page 87: Accessories
15 | Accessories Accessories A detailed overview with article numbers can be found in the accessories cata- logue. Accessories Description Base frames UG I – IV Different base frames, with or without support rails for storage of accessories and partially closed. For varying installation options, the base frames can be extended with castors or fixable feet. -
Page 88: Conversion Tables
16 | Conversion tables Conversion tables Water hardness °dH °f °e mmol/l gr/gal mval/ 1 °dH (Germany) 1.79 1.25 17.9 0.1783 1.044 0.357 1 °f (France) 0.56 0.70 10.0 0.584 1 °e (GB) 1.43 14.32 0.14 0.84 0.286 1 ppm (USA) 0.056 0.07 0.01... - Page 89 16 | Conversion tables mbar inch/wc 0.3675 10.0350 0.441 12.0420 0.5145 14.0490 0.588 16.0560 0.6615 18.0630 0.735 20.0700 0.8085 22.0770 0.882 24.0840 0.9555 26.0910 1.029 28.0980 1.1025 30.1050 1.176 32.1120 1.2495 34.1190 1.323 36.1260 1.3965 38.1330 1.47 40.1400 2.94 80.2800 4.41 120.4200 5.88...
- Page 92 RATIONAL AG Siegfried-Meister-Straße 1 86899 Landsberg am Lech, Germany Tel. +49 (0)8191 3270 Fax +49 (0)8191 21735 info@rational-online.com rational-online.com...