Table of Contents

Related Manuals for LevelOne FCS-5044


Summary of Contents for LevelOne FCS-5044
- Page 1 Questo manuale d’istruzione è fornito da trovaprezzi.it. Scopri tutte le offerte per LevelOne FCS-5044 o cerca il tuo prodotto tra le migliori offerte di Videosorveglianza Network Camera User’s Manual User’s manual Version 0.2 1/63...
-
Page 2: Table Of Contents
Network Camera User’s Manual Table of Contents Overview ....................... 3 Package Contents ....................4 Connections ......................5 Hardware description ..................5 Hardware Installation .................... 6 Install the IP Finder program ................8 Bonjour program ..................14 C2.mylevel1.com(Free DDNS service) ............15 Initial Access to the Network Camera .............. -
Page 3: Overview
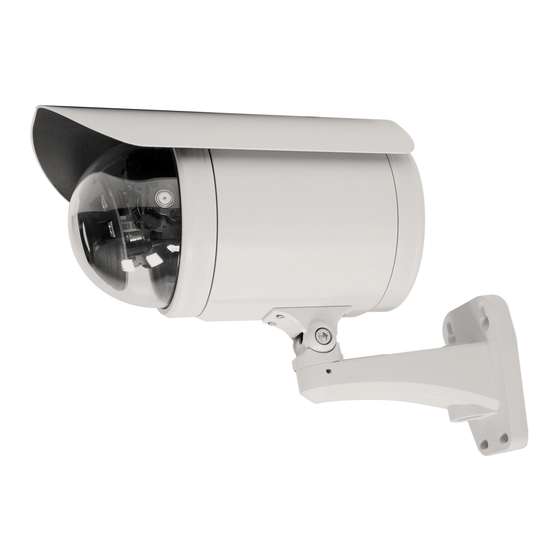
Network Camera User’s Manual H.264 Pan/Tilt Night Vision IP Camera Overview Law in your country may prohibit the use of surveillance devices. The Network Camera is not only a high-performance web-ready camera but also can be part of a flexible surveillance system. -
Page 4: Package Contents
Network Camera User’s Manual Package Contents If any of the above items are missing, please contact your dealer immediately. Network Camera (Wired or PoE) Software CD Power adapter Quick installation guide Wrench/Screws/Wall Mount Bracket RJ45 Female/General DI Block/ Moisture Absorber Note: Using a power supply with a different voltage than the one included with the Network Camera will cause damage and void the warranty for this product. -
Page 5: Connections
Network Camera User’s Manual Connections Hardware description Plan view panel Inner View 5/63... -
Page 6: Hardware Installation
Network Camera User’s Manual Hardware Installation 1. Attach the Network Camera with the included stand 2. Place the Camera fix it onto ceiling or wall Use screws to fix the Network Camera onto the ceiling or wall. 3. Power over Ethernet (PoE) ... - Page 7 Network Camera User’s Manual Using a non-PoE switch Use a PoE power injector (optional) to connect between the Network Camera and a non-PoE switch 4.General I/O Terminal Block This Network Camera provides a general I/O terminal block which is used to connect external input devices.
-
Page 8: Install The Ip Finder Program
Network Camera User’s Manual Install the IP Finder program When you installed your Network camera on your LAN environment, you may install ―IP Finder‖ to discover Network camera’s IP address. The Administrator must place the product software CD into the CD-ROM drive of the PC running in Microsoft Windows. An auto-run program will pop up (If the program is not on auto-run, go to the root directory of the software CD and click on ―autorun.exe‖). - Page 9 Network Camera User’s Manual “Cam Finder” is used to search the IP address of Network Cameras or Video servers on a LAN. After searching, Video Servers or Network Cameras will be located by the Cam Finder. 9/63...
- Page 10 Network Camera User’s Manual Search Camera Click search Camera button, The program will search for all family network devices on the same LAN. After searching, the main installer window will pop up. Click on the MAC and model name which matches the product label on your device to connect to the Network Camera via Internet Explorer.
- Page 11 Network Camera User’s Manual Setup Camera Auto Install Wizard will be started and that it can auto guide through the installation process. Press the “Next” button execute next process. For more information, please refer to the Network section on page 33. 11/63...
- Page 12 Network Camera User’s Manual 12/63...
- Page 13 Network Camera User’s Manual 13/63...
-
Page 14: Bonjour Program
Network Camera User’s Manual Bonjour program Safari browser supports Bonjour search program the will search for all family network devices on the same LAN. 14/63... -
Page 15: C2.Mylevel1.Com(Free Ddns Service)
Network Camera User’s Manual C2.mylevel1.com(Free DDNS service) When you want to connect the network camera over Internet, you can use the service ― ‖. The ―ip-discovery.com‖ is a free DDNS server for C2.mylevel1.com this camera. Make sure that the router must start UPnP and DHCP server functions. -
Page 16: Initial Access To The Network Camera
Network Camera User’s Manual Initial Access to the Network Camera For the initial access to the Network Camera in Windows, the web browser may prompt for permission to install a new plug-in for the Network Camera. This plug-in has been registered for certificate and is used to display the video in the browser. Users may click on to proceed. - Page 17 Network Camera User’s Manual Camera view: On the top of image shows the connecting type of the Network Camera and the current date/time. View capabilities: Click this button to capture and save still images. The captured images will be displayed in pop-up window. Right-click the image and choose Save Picture As to save it in JPEG format.
- Page 18 Network Camera User’s Manual Click on this button to adjust the Function ―2-way audio‖ to be Enable/Disable. Enable this function, request insert an external speaker. The server can play sound from the client and receive sound from the environment and send to client. Click on this button to adjust the Microphone volume.
- Page 19 Network Camera User’s Manual Pan/Tilt & connection control buttons: 1. “Video Stream” User can choose stream1 or stream2 & picture. 2. “The direction buttons are” ―Left‖, ―Right‖, ―Up‖, ―Down‖, ―Cross Angles‖, and ―Home‖. Camera returns to center when click ―Home‖ button 3.
-
Page 20: Playback
Network Camera User’s Manual Playback Playback function: Support the image playback through SD Card、NAS device, capable of further choice ―Trigger type‖、―Stream‖、―Date/Time‖. Use the playback function through NAS device must set up the path of NAS device from ―Server page‖. Click this button to switch to full screen mode. Press the ―Esc‖ key to switch back to normal mode. -
Page 21: Client Setting
Network Camera User’s Manual Client Setting 1. “Protocol setting” Setting camera of protocol. “UDP” Select use UDP protocol connect camera. “TCP” Select use TCP protocol connect camera. “HTTP” Select use HTTP protocol connect camera. “Recording options” Users can record live video as they are watching by clicking start MP4 Recording on the main page. - Page 22 Network Camera User’s Manual display. The downside with this protocol is that the real-time effect is worse than that with the UDP protocol. The TCP guarantees the complete delivery of streaming data and thus provides better video quality. However, the real-time effect is not as good as that of the UDP protocol. If no special need is required, UDP protocol is recommended.
-
Page 23: Definitions In Configuration
Network Camera User’s Manual Definitions in Configuration Please note that only the Administrator can access the system configuration. Two types of user interfaces are available: [Advanced Mode] for professional users and [Basic Mode] for entry-level users. Those functions that are displayed only in Advanced Mode are marked with Advanced Mode . - Page 24 Network Camera User’s Manual 1. “General Setting” (1) “Host name” The text displays the title on the top of the main page (2) “LED indicator” If you do not want others to know that the network camera is operating, you can select this option to turn off the LED indicators.
-
Page 25: Security
Network Camera User’s Manual Security Security setting ―root‖, which is permanent and can not be deleted. The administrator account name is If you want to add more accounts in the Manage User column, please set a password for the ―root‖ account first. 1. - Page 26 Network Camera User’s Manual (B) Select the privilege level for the new user account. Click Finish to enable the setting. (2) “Delete a user” Select an existing user name. Click Finish to enable the setting. (3) “Update a existing user” Select an existing user name.
-
Page 27: Network
Network Camera User’s Manual Network Any changes made on this page will restart the system in order to validate the changes. Make sure every field is entered correctly before clicking on “finish” Network Setting 27/63... - Page 28 Network Camera User’s Manual “LAN” & “PPPoE” The default type is LAN. Select PPPoE if using ADSL 1. LAN The default status is Get IP address automatically. This could be tedious to perform software installation whenever the Network Camera starts. Therefore, once the network is set, especially for the IP address should be entered correctly.
-
Page 29: Ddns
Network Camera User’s Manual RTSP stream access names setting Advanced Mode The RTSP streaming currently supports video only, audio only, and audio/video. To use the audio/video stream, type the URL as―rtsp://61.30.125.43/liveN.sdp‖. DDNS DDNS setting “3rd party DDNS” This is enable 3 party DDNS. - Page 30 Network Camera User’s Manual server or notify the User of the new IP address. Note: when this field is input as ―User name‖, the following field must be input as ―Password‖. “Password” Please input the password or key to get the DDNS service. “Save”...
-
Page 31: Access List
Network Camera User’s Manual Access list General Settings “ ” Filter type : Provided to Allow or Deny mode. “ ” Always allow the IP address to access this device You can check this item and add the Administrator’s IP address in this field to make sure the Administrator can always connect to the device. - Page 32 Network Camera User’s Manual “Network” This rule allows the user to assign a network address and corresponding subnet mask to the Allow/Deny List. The IP address is written in the CIDR format. For example “Range” This rule allows the user to assign a range of IP addresses to the Allow/Deny List.
-
Page 33: Video
Network Camera User’s Manual Video General Setting 1. “Color mode” Select use color or monochrome video display. 2. “Environment” The orientation of video (1) “indoor” This option is usually selected when the Network Camera is placed in indoor environments. (2) “outdoor” This option is usually selected when the Network Camera is placed in outdoor environments. - Page 34 Network Camera User’s Manual local utility. Change the frequency setting to eliminate uncomfortable flash image when the light source is only fluorescent light. 4. “Video orientation” The orientation of video (1) “Flip” Vertically rotate the video. (2) “Mirror” Horizontally rotates the video. 5.
- Page 35 Network Camera User’s Manual 2. White Balance In the bottom of White Balance, there are 5 modes for practice: ATW, AWC, Indoor, Outdoor and Manual modes. Set the Red Gain and Blue Gain are active. 3. Image Adjustment Brightness The brightness can make the image brighter or darker. The neutral value is 0. Saturation The saturation can change white content in the image.
- Page 36 Network Camera User’s Manual Reference Strength is lower, the motion blur of image is alleviated. 5. Edge Enhancement Check the box Enable to enable this function. There are 4 slide bars for adjustment. The Edge Sensitivity represents how textures are detected as edges. The higher Noise Sensitivity value makes noises to be filtered out, and avoid to amplify noises.
- Page 37 Network Camera User’s Manual means no correction, and 100 (%) means the lum. of corners are equal to the lum. of the center. 7.Wide Dynamic Range Enable Wide Dynamic Range auto in different level to improve the exposure when both bright and dark areas simultaneously in the field of view of the camera. The default is off.
-
Page 38: Roi(Region Of Interest)
Network Camera User’s Manual ROI(Region of Interest) Note: Stream Select the streaming source. This option is only applied to H.264. The function is that there are multiple regions (also called window) (up to 7 regions) on the encoding frame plane being selected for setting the quant value and frame-updating interval of the window. -
Page 39: Defog
Network Camera User’s Manual Defog Defog setting Defog function allows visibility improvement through better image quality for foggy and smoggy circumstances. 39/63... -
Page 40: Video Record
Network Camera User’s Manual Video record NOTE: Before setting up this page, please set up the Network Storage on the Servers setting(add Server) page first. Record setting Click Add to open the recording setting window. Record name Enter a server name. Schedule mode (1) “Always”... - Page 41 Network Camera User’s Manual Schedule information Enter the “Start time” and “Stop time” for day mode. Note that the time format is [hh:mm] and is expressed in 24-hour clock time. (2)“Sun”/“Mon”/“Tue”/“Wed”/“Thu”/“Fri”/“Sat” Select the days of the week to perform the application. (3) ―Start day‖...
-
Page 42: Stream
Network Camera User’s Manual Stream Audio codec setting (1) “Mute” Select this option to disable audio transmission from the Network Camera to all clients. (2) “Audio codec type” There are two choices of audio codec types ”AMR”、 “AAC” ”G.711”. available: (3) “Bit rate”... - Page 43 Network Camera User’s Manual Video codec setting (1) “Select Stream” The Network Camera supports “Stream 1”and “Stream 2”. (2) “Codec type” The Network Camera supports three kind of video compression mode: “H.264” or “MPEG4‖ or “MJPEG”. User can choose one of these compression modes based on requirement or application (3) “Video size”...
-
Page 44: Camera Control
Network Camera User’s Manual Camera control 44/63... - Page 45 Network Camera User’s Manual Camera control “Left” The pan and tilt functions can be controlled with these buttons. The button “Right” “Up” “Down” controls the camera to the left; the , and buttons control the camera accordingly. (1) “UL” “UR” “LL”...
- Page 46 Network Camera User’s Manual --“Set default value as auto pan range” Restore auto pan range to original default’s auto pan range by clicking on this button. --“Set the auto pan range manually” Click on the button will set the auto pan range of the Network Camera.
-
Page 47: Application
Network Camera User’s Manual Application NOTE: Before setting up this page, please set up the Network Storage on the Servers setting(add Server) page first. 47/63... - Page 48 Network Camera User’s Manual Application setting Click Add to open the Application setting window. (2)Schedule name Enter a server name. (3)Schedule mode (a) “Always” E very day application. (b) “Week day” Week day application. (c) “Selected date” Selected day application. Schedule information Enter the “Start time”...
- Page 49 Network Camera User’s Manual Motion windows setting The Object size and Sensitivity can be adjusted in Motion Setup window. Sensitivity determines if a pixel will be taken as ―moving‖ according to its Y value difference between previous and current frame, and Object size stands for the percentage of moving pixels over all pixels within the motion window.
-
Page 50: Servers
Network Camera User’s Manual Servers Server setting Click the Add Server button on Event Settings page to open the Server Setting page. On this page, you can specify where the notification messages are sent when a trigger is activated. A total of 5 server settings can be configured. Server name: Enter a name for the server setting. - Page 51 Network Camera User’s Manual either one or all of them. (1)“Email” Select to send the media files via email when a trigger is activated. -- “Email security mode” : If your SMTP server requires a secure connection (SSL or TLS), check This server requires a secure connection (SSL or TLS). --“Server address”...
-
Page 52: Storage
Network Camera User’s Manual Storage NAS server setting Advanced Mode (1) ―NAS Host name‖ Choose and input the NAS Host name of this camera. (2) ―Workgroup‖ Input the name of Workgroup. You can see the NAS Host name you input in the same workgroup with your PC. Then you can connect to this device and download the files easily from SD card which is inserted to this camera. -
Page 53: Syslog
Network Camera User’s Manual Syslog You can configure the Network Camera to send the system log file to a remote server as a log backup. Before utilizing this feature, it is suggested that the user install a log-recording tool to receive system log messages from the Network Camera. -
Page 54: Status And Parameters
Network Camera User’s Manual Status and Parameters “Upnp port forwarding” User can find a lot of information about the system such as “Traversing NAT” “Public IP” , and so on. User also can get the number of current viewer of the Network Camera here. 54/63... -
Page 55: Maintenance
Network Camera User’s Manual Maintenance Firmware version 1. “Reboot system” The “Reboot” button will reboot the Network Camera. It’s useful while the Network Camera got problem. 2. “Restore system” Click on ―Restore‖ button on the configuration page to restore the factory default settings. Restore all settings to factory default except settings in ―Network type ‖... - Page 56 Network Camera User’s Manual 4. “Export/Import file” Advanced Mode Export setting backup file: Click to export all parameters for the device and user-defined scripts. Upload setting backup file: Click Browse… to upload a setting backup file. Please note that the model and firmware version of the device should be the same as the setting backup file.
-
Page 57: Appendix
Network Camera User’s Manual Appendix A. Troubleshooting & Frequently Asked Questions Q1: Status led does not light up. A1: First, make sure that 「 Configuration>System>Turn off the LED indicator」 is disabled. If it is, check the item, and the led should light up. Second, if red led does not light up, please check that the power adapter in the package is plugged correctly. - Page 58 Network Camera User’s Manual camera 5. Check status, we can see the ports had been successfully opened! camera 6.Type IP address:8081at browser. Then you can see through Internet. (2) By Setting Port Forwarding Manually 1. Select a router. Set the port forwarding as following. PS.
- Page 59 Network Camera User’s Manual 443 is HTTPS port. camera 2.Go to Network page. Disable UPnP port forwarding function. camera 3. Type IP address at browser. Then you can see through Internet. Note: The firewall software at PC may block the transfer of network camera. Please remove or stop the kind software.
- Page 60 Network Camera User’s Manual Infrared led does not light up? A7 Check 「 Configuration>Audio and Video>Infrared LED Control 」 is “Auto” or “Manual》Turn on”. Q8 The network camera cannot focus accurately. (1) The lens is dirty or dust is attached. Clean the lens with lens cleaner. And then adjust the camera focus manually.
- Page 61 Network Camera User’s Manual a dynamic address, it may have changed since you last checked it. • Network congestion may prevent the web page appearing quickly. Wait for a while. The IP address and Subnet Mask of the PC and Network Camera must be in the same class of the private IP address on the LAN.
-
Page 62: Technical Specifications
Network Camera User’s Manual B. Technical specifications - System - Camera specification Type 1/2.8 Sony CMOS sensor IMX236, RAM: 4G bit DDRⅢ Resolution: 1920x1080 ROM: 16MB Flash ROM - Infrared Led - Lens High power IR Leds, 30~40 M visible 10X optical zoom lens, auto iris, auto focus Auto/Manual mode f = 4.9~ 49mm, F1.8~3.0... - Page 63 Network Camera User’s Manual Notification of Compliance Appendix C Europe - EU Declaration of Conformity For complete DoC please visit http://global.level1.com/downloads.php?action=init GPL License Agreement GPL may be included in this product, to view the GPL license agreement goes to http://download.level1.com/level1/gpl/GPL.pdf For GNU General Public License (GPL) related information, please visit http://global.level1.com/downloads.php?action=init 63/63...