Table of Contents
Advertisement
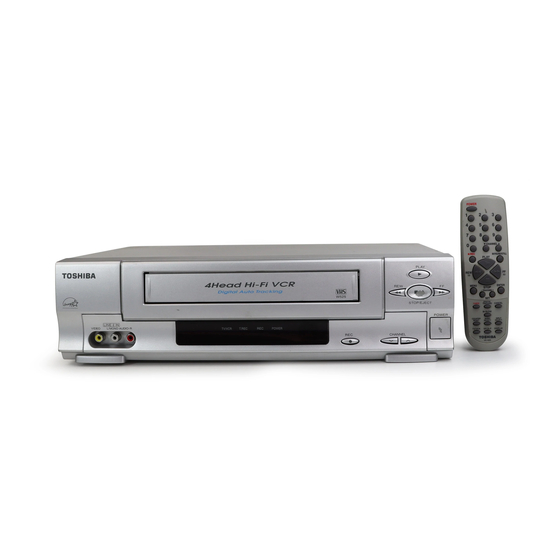
OWNER'S MANUAL
4 HEAD Hi-Fi STEREO VIDEO CASSETTE RECORDER
W525
If you purchase a universal remote control from your local retailer, please contact the
remote manufacturer for the required programming code.
When shipped from the factory, the TV/CATV menu option is set to the "CATV" (Cable
Television) mode.
If not using CATV (Cable TV), set this menu option to the "TV" mode.
Before operating the unit, please read this manual thoroughly.
ATTENTION
TV/CATV MODE SELECTION
1
Advertisement
Table of Contents

Related Manuals for Toshiba W525


Summary of Contents for Toshiba W525
- Page 1 OWNER’S MANUAL 4 HEAD Hi-Fi STEREO VIDEO CASSETTE RECORDER W525 If you purchase a universal remote control from your local retailer, please contact the remote manufacturer for the required programming code. When shipped from the factory, the TV/CATV menu option is set to the "CATV" (Cable Television) mode.
-
Page 2: Important Safeguards
CAUTION RISK OF ELECTRIC SHOCK DO NOT OPEN CAUTION: TO REDUCE THE RISK OF ELECTRIC SHOCK, DO NOT REMOVE COVER (OR BACK). NO USER- SERVICEABLE PARTS INSIDE. REFER SERVICING TO QUALIFIED SERVICE PERSONNEL. WARNING: TO PREVENT FIRE OR SHOCK HAZARD, DO NOT EXPOSE THIS APPLIANCE TO RAIN OR MOISTURE. - Page 3 IMPORTANT SAFEGUARDS 8. ACCESSORIES Do not place this unit on an unstable cart, stand, tripod, bracket, or table. The unit may fall, causing serious injury, and serious damage to the unit. 8A. An appliance and cart combination should be moved with care.
- Page 4 IMPORTANT SAFEGUARDS 18. SERVICING Do not attempt to service this unit yourself as opening or removing covers may expose you to dangerous voltage or other hazards. Refer all servicing to qualified service personnel. For example : a.When the power-supply cord or plug is damaged.
-
Page 5: Precautions
PRECAUTIONS MOISTURE CONDENSATION DO NOT OPERATE THIS VCR FOR AT LEAST TWO OR THREE HOURS WHEN MOISTURE IN THE AIR CONDENSES ON THE VCR. WHAT IS MOISTURE CONDENSATION? When a cold liquid is poured into a glass, for example, water vapor in the air will condense on the surface of the glass. -
Page 6: Features
PRECAUTIONS BATTERY CAUTIONS Follow these precautions when using batteries in this device: • Use only the size and type of batteries specified. • Be sure to follow the correct polarity when installing the batteries as indicated in the battery compartment. Reversed batteries may cause damage to the device. -
Page 7: Table Of Contents
FEATURES (Continued...) Automatic Repeat Play System - When the AUTO REPEAT option is turned on, this VCR will automatically play back the same cassette tape repeatedly. (more on pg 18) On-Screen 3 Language Display - This TV can display the on screen language in English, Spanish or French. (more on pg 15) Slow Motion - This VCR provides slow motion which of- fers steady, noise free playback at 1/10 normal speed. -
Page 8: Location Of Controls
LOCATION OF CONTROLS FRONT LINE 2 IN VIDEO L/MONO • AUDIO • R REMOTE CONTROL POWER CHANNEL PAUSE/STILL PLAY MENU ENTER STOP – TRACKING DIGITAL TIMER CANCEL TRACKING SLOW COUNTER AUDIO INPUT RESET SELECT SELECT TV/VCR SP/SLP DISPLAY TV/VCR T.REC POWER 13 12 11 10 1. - Page 9 LOCATION OF CONTROLS REAR 15. Direct Channel Selection buttons (0-9) - Allows direct access to any channel. 16. STOP button - Press to stop the tape. 17. MENU button - Press to display the on-screen menu function. 18. TRACKING SET + / – buttons - During playback, they are used to adjust tracking manually.
-
Page 10: Basic Connections
BASIC CONNECTIONS If you are using an antenna system, follow the instructions. If you are a cable (CATV) subscriber, skip ahead to page 12 for the proper connections. ANTENNA TO VCR CONNECTION The VCR must be connected "between" the antenna and the TV. First, disconnect the antenna from the TV and connect it to the VCR. -
Page 11: Vcr To Tv Connection
BASIC CONNECTIONS VCR TO TV CONNECTION After you have connected the antenna to the VCR, you must connect the VCR to the TV. Below are 3 common methods of connecting your VCR to a TV. Find the type of TV you are using and follow the connection diagram. -
Page 12: Catv (Cable Tv) Connections
CATV (CABLE TV) CONNECTIONS Many cable companies offer services permitting reception of extra channels including pay or subscription channels. This VCR has an extended tuning range and can be tuned to most cable channels without using a cable company supplied converter box, except for those channels which are intentionally scrambled. If you subscribe to a special channel which is scrambled, you must have a descrambler box for proper reception. - Page 13 CATV (CABLE TV) CONNECTIONS IMPORTANT: Make sure the TV/CATV menu option is set to the "CATV" mode. This VCR cannot receive scrambled programs since it does not contain a descrambler. In order to receive scrambled programs, your existing descrambler must be used. Descrambler boxes are available from cable companies. Consult your local cable company for more information concerning connection to their descrambler equipment.
-
Page 14: Audio/Video Connections
AUDIO/VIDEO CONNECTIONS If your TV has AUDIO IN and VIDEO IN jacks, you can connect your VCR to them to receive a higher quality picture and sound. If you have a stereo, you can connect a stereo amplifier to enjoy powerful sound. AUDIO/VIDEO CONNECTION To VIDEO OUT To AUDIO (L) OUT... -
Page 15: Setting The Video Channel
SETTING THE VIDEO CHANNEL To view playback of a recorded tape, or to watch a program selected by the VCR's channel selector, the TV must be set to channel 3 or 4 (video channel). When a TV is connected with the 75 ohm coaxial cable only. -
Page 16: Setting The Channels
SETTING THE CHANNELS This VCR is equipped with a channel memory feature which allows channels to skip up or down to the next channel set into memory, skipping over unwanted channels. Before selecting channels, they must be programmed into the VCR’s memory. -
Page 17: Loading And Unloading
LOADING AND UNLOADING Use only video cassette tapes marked LOADING Push the center of the tape until it is automatically retracted. AUTOMATIC POWER ON The VCR will turn on automatically and the POWER indicator will light. AUTOMATIC PLAY When loading a cassette tape without the erase preven- tion tab, playback will start immediately. -
Page 18: Special Playback
SPECIAL PLAYBACK TO VISUALLY SEARCH FOR DESIRED POINTS When either the FF or REW button is pressed in the PLAYBACK mode, the speed search picture will appear. When pressed twice, the search picture will increase speed. Speed search time depends upon the speed used (SP, LP or SLP) during recording. -
Page 19: To Stop Recording
RECORDING A TV PROGRAM Press the SP/SLP selector button to select the desired tape speed SP or SLP. The counter and SP or SLP will appear on the screen for about 4 seconds. Press the direct channel selection buttons or the CHANNEL button to select the channel to be recorded. -
Page 20: One-Touch Timer Recording (Otr)
ONE-TOUCH TIMER RECORDING ( OTR ) The One-touch Timer Recording feature provides a simple and convenient way to make a timed recording. EXAMPLE: One-touch Timer Recording for 30 minutes. CHECK BEFORE YOU BEGIN • Turn ON the TV and set to the video channel 3 or 4. •... -
Page 21: On-Screen Function Display
SETTING THE TIMER RECORDING TO CORRECT THE SETTINGS While setting, press the ENTER button to flash the item to correct, then re-enter the setting with the TRACKING SET + or – button. When finished, press the ENTER button. NOTES: • The VCR cannot be used while the T.REC indicator is lit. -
Page 22: Stereo Recording And Playback
STEREO RECORDING AND PLAYBACK RECORDING STEREO BROADCASTS The VHS Hi-Fi audio system permits high fidelity recording of MTS STEREO TV broadcasts. When an MTS STEREO broadcast is received, the STEREO will appear on the screen and the program can be viewed or recorded in stereo (refer to pages 18 and 19 for recording procedures). -
Page 23: Duplicating A Video Tape
DUPLICATING A VIDEO TAPE If you connect the VCR to another VCR or camcorder, you can duplicate a previously recorded tape. Make all connections before turning on the power. Load a blank cassette tape with the erase prevention tab intact into the recording VCR. Load a previously recorded tape into the playback VCR or CAMCORDER. -
Page 24: Before Requesting Service
BEFORE REQUESTING SERVICE Make sure by first checking the following points. SYMPTOM POWER The AC power cord is not connected. No power. Although the power is on, it Cassette is not inserted. does not operate. TV BROADCAST RECEPTION Antenna connection is not correct. Antenna cable is disconnected. -
Page 25: Specifications
BEFORE REQUESTING SERVICE SYMPTOM REMOTE CONTROL It is not aimed at the remote sensor. Distance too far or too much light in the room. There is an obstacle in the path of Remote control does not work. the beam. The batteries are weak. The +, –... -
Page 26: Warranty
LIMITED WARRANTY TOSHIBA VIDEO CASSETTE RECORDER Toshiba America Consumer Products, Inc. ("TACP") and Toshiba Hawaii Inc. ("THI") make the following limited warranties. These limited warranties extend to the original consumer purchaser or any person receiving this VCR as a gift from the original consumer purchaser and to no other purchaser or transferee. - Page 27 Canadian consumers are requested to complete the special Canadian "Warranty Registration Form" enclosed, and forward this completed form with a copy of bill of sale to TOSHIBA OF CANADA to "Register and Validate" their warranty. Products must be purchased from an Authorized Canadian Dealer. Products purchased in the U.S.A. and used in Canada are not covered by these warranties.
- Page 28 4F22901A U Printed in Thailand 02/06...