
Related Manuals for PRESONUS Quantum Series


Summary of Contents for PRESONUS Quantum Series
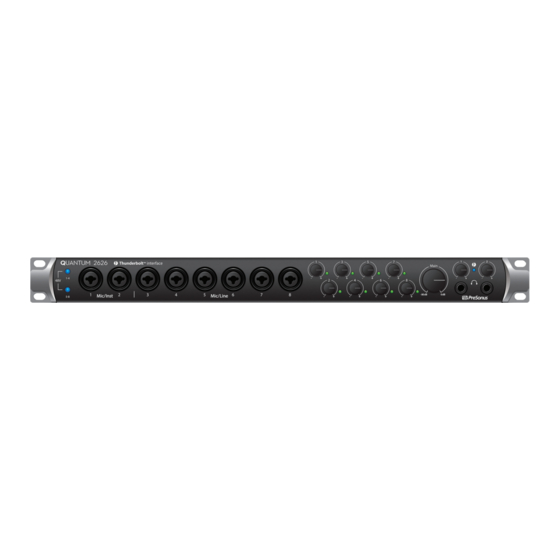
- Page 1 Quantum 2626 Quantum 26x26 Thunderbolt 3 Audio Interface ™ Owner’s Manual ® English www.presonus.com...
-
Page 2: Table Of Contents
Table of Contents Studio One Artist Quick Start — 13 Overview — 1 Installation and Authorization — 13 Introduction — 1 Setting Up Studio One — 14 Companion Products — 2 5.2.1 Configuring Audio Devices — 15 Studio One Artist Features — 2 5.2.2 Configuring MIDI Devices —... -
Page 3: Overview
Library Reference Manual Overview Introduction Thank you for purchasing a PreSonus Quantum 2626 Thunderbolt 3 Audio Interface. PreSonus Audio Electronics has designed the Quantum 2626 series interface utilizing high-grade components to ensure optimum performance that will last a lifetime. Loaded with high-headroom, Class A XMAX™... -
Page 4: Companion Products
Library Reference Manual Companion Products Thanks for choosing PreSonus! As a solutions company, we believe the best way to take care of our customers (that’s you) is to ensure that you have the best possible experience from the beginning of your signal chain to the end. To achieve this goal, we’ve prioritized seamless integration throughout every design phase of these... -
Page 5: What Is In The Box
PreSonus Health Safety and Compliance Guide Power User Tip: All companion software and drivers for your Quantum 2626 interface interface are available for download from your My PreSonus user account. Simply visit http://my.presonus.com and register your Quantum 2626 interface to receive downloads... -
Page 6: Hookup
Front Panel Connections and Controls About XMAX Preamps and Combo Jacks. Your Quantum 2626 interface is equipped with 8 PreSonus XMAX microphone preamplifiers for use with all types of microphones. The XMAX design provides a Class A input buffer, followed by a dual-servo gain stage. -
Page 7: Back Panel Connections
Hookup StudioLive™ Software Back Panel Connections Library Reference Manual Headphones. Your Quantum 2626 interface provides two headphone outputs, each with its own level control. Both headphone outputs share a stream with the Main Outputs. Sync light. This light is the clock source / sync indicator. It lets you know if you unit is receiving word clock correctly. - Page 8 Hookup StudioLive™ Software Back Panel Connections Library Reference Manual Word Clock In and Out. These BNC connections allow Quantum 2626 to receive and transmit word clock to and from other digital audio devices. Power User Tip: In UC Surface, when using the BNC Clock input, you will need to set “BNC” as the Clock Source and set the sample rate to correspond to that of the external device.
-
Page 9: Quantum Hookup Diagram
Hookup StudioLive™ Software Quantum Hookup Diagram Library Reference Manual Quantum Hookup Diagram See www.presonus.com for the latest system requirements. DigiMax-series preamps or other compatible hardware... -
Page 10: Connecting To A Computer
1. Launch Ableton Live. 2. Go to Options | Preferences | Audio. 3. Choose Driver Type: ASIO | Audio Device: ASIO PreSonus Quantum 2626 Go to Input Config: Enable and select the desired Input channels. 4. Go to Output Config: Enable and select the desired Output channels. -
Page 11: Using A Quantum 2626 Interface With Popular Audio Applications
2. Go to Devices | Device Setup. 3. Select “VST Audio System” from the Devices column in the Device Setup. 4. Select PreSonus Quantum 2626 from the ASIO Driver dropdown list. 5. Click “Switch” to begin using the Quantum 2626 driver. -
Page 12: Uc Surface Control Software
UC Surface Control Software StudioLive™ Software Using a Quantum 2626 Interface with Popular Audio Applications Library Reference Manual UC Surface Control Software UC Surface is a powerful control software for your Quantum 2626 interface. These control functions are completely integrated inside Studio One. UC Surface allows users of other popular DAW applications to access these functions. -
Page 13: Uc Surface Launch Window
UC Surface Control Software StudioLive™ Software UC Surface Launch Window Library Reference Manual UC Surface Launch Window Sample Rate. Changes the sample rate. You can set the sample rate to 44.1, 48, 88.2, 96, 176.4, or 192 kHz. A higher sample rate will increase the fidelity of the recording but will increase the file size and the amount of system resources necessary to process the audio. - Page 14 UC Surface Control Software StudioLive™ Software Library Reference Manual The Quantum RTA provides several customization features that allow you to view the RTA in the way that is most useful for your application. Height. This provides a more or less granular display for the RTA. Range.
-
Page 15: Studio One Artist Quick Start
Studio One’s exclusive Cue Mix feature for PreSonus interfaces. Power User Tip: As a valued PreSonus customer, you are eligible for a discount upgrade to Studio One Professional. For more details on the Studio One upgrade program for PreSonus customers, please visit http://studioone.presonus.com/. -
Page 16: Setting Up Studio One
“Install. ” The content will automatically begin to download and install from your My PreSonus user account. Power User Tip: You may be prompted to enter your My PreSonus user account information. Clicking “Remember Credentials” will allow you to have immediate access to any content you purchase from the PreSonus Marketplace. -
Page 17: Configuring Audio Devices
1. In the middle of the Start page, you will see the Setup area. Studio One Artist automatically scans your system for all available drivers and selects a driver. By default, it will choose a PreSonus driver if one is available. 2. If you do not see your device listed on the Start page when you launch Studio One, click on the Configure Audio Devices link in the Setup area to open the Options window. - Page 18 Make sure you have connected the MIDI Out of your external MIDI controller to a MIDI In on your PreSonus audio interface (if available) or other MIDI interface. If you are using a USB MIDI controller, connect it to your computer and power it on.
- Page 19 Studio One Artist Quick Start StudioLive™ Software Setting Up Studio One Library Reference Manual 3. From the menu on the left, select your MIDI controller from the list of manufacturers and models. If you do not see your MIDI controller listed, select New Keyboard.
- Page 20 Studio One Artist Quick Start StudioLive™ Software Setting Up Studio One Library Reference Manual 1. In the External Devices window, click the Add button. 2. Select your device in the menu on the left. If your device is not listed, select New Instrument.
-
Page 21: Creating A New Song
Studio One Artist Quick Start StudioLive™ Software Creating a New Song Library Reference Manual Creating a New Song Now that you’ve configured your audio and MIDI devices, let’s create a new Song. We’ll start by setting up your default audio I/O. 1. - Page 22 Library Reference Manual 2. Click on the Audio I/O Setup tab. 3. From the Inputs tab, you can enable any or all of the inputs on your PreSonus Quantum audio interface that you’d like to have available. We recommend that you create a mono input for each of the inputs on your interface. If you plan on recording in stereo, you should also create a few stereo inputs.
-
Page 23: Creating Audio And Midi Tracks
Studio One Artist Quick Start StudioLive™ Software Creating a New Song Library Reference Manual Studio One allows you to create monitor mixes right from the console. To enable this function, you must designate at least one output pair to be a Cue Mix output. Click on the Cue Mix box next to any output pair you’d like to use as a monitor mix output to enable this feature. -
Page 24: Recording An Audio Track
Studio One Artist Quick Start StudioLive™ Software Creating a New Song Library Reference Manual Recording an Audio Track 5.3.3 1. To begin recording, create an audio track from the Add Tracks window, set its input to Input 1 on your Quantum 2626 interface, and connect a microphone to the same input. - Page 25 Studio One Artist Quick Start StudioLive™ Software Creating a New Song Library Reference Manual Drag-and-drop virtual instruments. To add a virtual instrument to you session, open the browser and click on the Instrument button. Select the instrument or one of its patches from the instrument browser and drag it into the Arrange view.
-
Page 26: Monitor Mixing In Studio One
Studio One Artist Quick Start StudioLive™ Software Monitor Mixing in Studio One Library Reference Manual Monitor Mixing in Studio One You can set up monitor mixes with your Quantum 2626 interface using Studio One’s unique Cue Mix feature. This feature takes over the monitor mix control software for your Quantum 2626 interface and provides level and pan control from within Studio One. -
Page 27: Punching In
Studio One Artist Quick Start StudioLive™ Software Monitor Mixing in Studio One Library Reference Manual 1. Activate Button. To completely remove any channel from a Cue Mix, simply deactivate the Cue Mix object for that channel. In most instances, you will leave this enabled. 2. - Page 28 Studio One Artist Quick Start StudioLive™ Software Monitor Mixing in Studio One Library Reference Manual 3. After you have recorded your audio, set the punch in and out points in the timeline. 4. Enable the Autopunch button the left of the Metronome settings in the transport.
-
Page 29: Technical Information
Technical Information StudioLive™ Software Specifications Library Reference Manual Technical Information Specifications Microphone Preamp (XLR Balanced) Type XLR Female (via Combo), Balanced Remote Maximum Input level +10 dBu (Balanced, min. gain) Gain Control Range 60 dB Frequency Response 20 Hz to 20 kHz (+/- 0.15 dB, unity gain, 48 kHz) Dynamic Range >... -
Page 30: Specifications
Technical Information StudioLive™ Software Specifications Library Reference Manual Headphone Outputs Type ¼” TRS Female, Stereo, Unbalanced, x2 Maximum Output Level 175 mW/channel (56Ω load) Frequency Response 20 Hz to 20 kHz (±0.5 dB, 48 kHz) Dynamic Range > 110 dB (A-wtd) Total Harmonic Distortion <... - Page 31 © 2020 PreSonus Audio Electronics, Inc. All Rights Reserved. DigiMax, PreSonus, StudioLive, and XMAX are trademarks or registered trademarks of PreSonus Audio Electronics, Inc. Capture, Impact, Mixverb, Presence, RedLightDist, SampleOne, Studio One, and Tricomp are trademarks or registered trademarks of PreSonus Software Ltd. Mac and Mac OS are registered trademarks of Apple, Inc., in the U.S.
- Page 32 Quantum 2626 Quantum 26x26 Thunderbolt 3 Audio Interface ™ Owner’s Manual 18011 Grand Bay Ct. • Baton Rouge, ® Louisiana 70809 USA• 1-225-216-7887 Part# 70-12000146-A www.presonus.com...