Chapters
Table of Contents

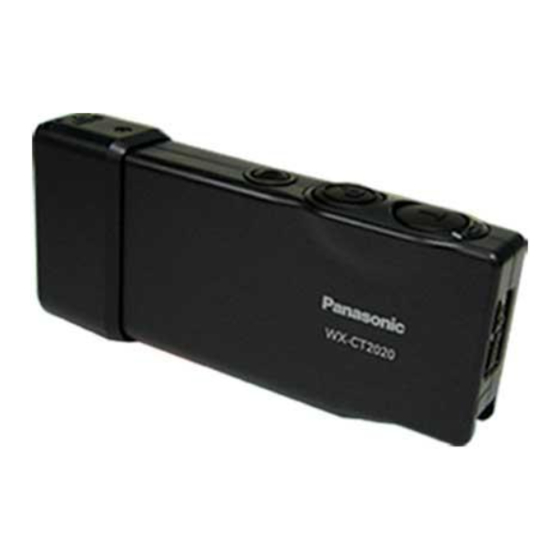
Related Manuals for Panasonic WX-CT2020


Summary of Contents for Panasonic WX-CT2020
- Page 1 Order Taker Unit Operating Instructions WX-CT2020 Model No. Before attempting to connect or operate this product, please read these instructions carefully and save this manual for future use.
- Page 2 Some studies have suggested that some biological effects might occur, but such findings have not been confirmed by addi- tional research. WX-CT2020 has been tested and found to comply with FCC radiation exposure limits set forth for an uncontrolled equipment and meets the FCC radio frequency (RF) Exposure Guidelines in Supplement C to OET65.
-
Page 3: Table Of Contents
STANDARD ACCESSORIES ........................13 OPTIONAL ACCESSORIES ........................13 INTRODUCTION Panasonic WX-CT2020 Order Taker Unit is designed for the use in Panasonic Wireless Communication System. Using with WX-C1027A Headset (option), you can communicate by voice with other store personnel and the customer. FEATURES •... -
Page 4: Names & Functions
NAMES & FUNCTIONS WX-CT2020 o !0... - Page 5 q Battery Lock [EJECT] i Power Button When removing the battery, slide out the lock. Pressing this button for one second will turn the order When loading a new battery, insert the battery until the taker unit on or off. lock clicks.
-
Page 6: Battery Loading & Replacement
BATTERY LOADING & WHEN DISCONNECTING THE REPLACEMENT HEADSET PLUG Notes: When disconnecting the headset plug from this product, • Refer to the operating instructions included with the pull the plug straight, holding the resin-molded part. battery and battery charger. • Prepare a fully charged battery. Pull the plug straight, holding this part. -
Page 7: Setup Procedures
G Channel Group Selection SETUP PROCEDURES You can select a channel group by setting the channel selector, which is the rotary switch inside the switch pocket. Caution: Setup of this product should only be performed by qualified service personnel or system installers. 1. - Page 8 SW#2: OFF SW#3: OFF SW#4: OFF SW#5: OFF SW#6: This switch selects the mode of Tone Squelch method. ON: The audio is output detecting the Tone Squelch signal from the Center Module. OFF: The audio is output in disregard of the Tone Squelch signal from the Center Module.
-
Page 9: G Operation Mode Setup
G Operation Mode Setup While holding down the buttons T and P simultaneously, hold down the power button for two seconds to turn on the order taker unit. The order taker unit enters the setup mode where the indicators and buttons have different functions than in normal oper- ation. - Page 10 1. Press the power button to turn off the order taker unit. Hold down the power button for two seconds. 2. While holding down the buttons T and P simultaneously, Power on. hold down the power button for two seconds to turn on the order taker unit.
-
Page 11: Operating Procedures
G Communications with Other Store OPERATING PROCEDURES Personnel (PAGE) Store personnel wearing the headset can communicate G Communications with Customers with each other without being heard by customers. (TALK) Any store personnel wearing the headset can communicate <When the Page Lock mode is preset> bidirectionally with any customer who is at the menu board. -
Page 12: Troubleshooting
TROUBLESHOOTING Phenomenon Possible Cause What to do The power indicator blinks in red. A wrong channel is selected. Select any of channels 1 through 8. (The channel selector is set to the If no remedy exists, consult your dealer wrong position. Refer to p. 7.) for repairs. -
Page 13: Specifications
SPECIFICATIONS Operating Frequency: UHF/FM Type of Radio Wave: Required Power Supply: Rechargeable Ni-MH Battery, 3.6 V DC Control Function: Power (On/Off) Volume (Up/Down) Talk Page Channel Selection (A/B) Channel Group Selection (1-8) DIP Switch Setup (8 bit) Dimensions: 139 mm (W) x 63 mm (H) x 26 mm (D) {5-1/2 in. - Page 14 VERSION FRANÇAISE (FRENCH VERSION) RSS-210 Le fonctionnement est soumis aux deux conditions suiv- antes: (1) cet appareil ne doit provoquer d'interférence et (2) cet appareil doit pouvoir accepter toute interférence reçue, y compris les interférences qui pourraient provoquer un fonctionnement indésirable de l'appareil. Le numéro de série de cet appareil se trouve dans le Risque d'explosion si la batterie n'est pas placée correcte- logement de batterie.
-
Page 15: Introduction
ACCESSOIRES OPTIONNELS ........................25 INTRODUCTION Le preneur de commande WX-CT2020 Panasonic est conçu pour être utilisé avec le système de communication à liaison radio Panasonic. En utilisant le casque d'écoute WX-C1027A (option), il est possible de communiquer en mode vocal avec les autres personnes du personnel de magasin et le client. -
Page 16: Nomenclature Et Fonctions
NOMENCLATURE ET FONCTIONS WX-CT2020 o !0... - Page 17 q Verrouillage de batterie [EJECT] i Bouton d'alimentation Faire coulisser le verrouillage pour retirer la batterie. Une pression du bouton pendant une seconde permet Lors du chargement d'une batterie neuve, introduire la de mettre le preneur de commande en fonction ou de batterie jusqu'à...
-
Page 18: Chargement Et Remplacement De La Batterie
CHARGEMENT ET AU MOMENT DE DÉBRANCHER REMPLACEMENT DE LA LA FICHE DU CASQUE BATTERIE D'ECOUTE Remarques: Pour débrancher la fiche de raccordement du casque • Se référer aux directives d'utilisation qui accompagnent d'écoute de cet appareil, la dégager tout droit en saisissant la batterie et le chargeur de batterie. -
Page 19: Procédures De Configuration
G Sélection de groupe de canal PROCÉDURES DE CONFIGURATION Il est possible de sélectionner un groupe de canal en réglant le sélecteur de canaux qui est un sélecteur rotatif Attention: La configuration de ce produit doit être placé à l'intérieur de la poche. exécutée par un personnel de dépannage qualifié... - Page 20 SW#1: Pour la sélection d'une fréquence radio adaptée à l'emplacement ON: Appliquer la fréquence US au casque d'écoute. OFF: Appliquer la fréquence canadienne. SW#2: OFF SW#3: OFF SW#4: OFF SW#5: OFF SW#6: Ce commutateur sélectionne le mode de la méthode de silencieux à commande par tonalités. ON: Le son est délivré...
-
Page 21: G Configuration Du Mode De Fonctionnement
G Configuration du mode de fonctionnement Tout en pressant et immobilisant simultanément les touches T et page P, presser et immobiliser le bouton d'alimentation pen- dant deux secondes pour mettre le preneur de commande en marche. Le preneur de commande passe en mode de configuration quand les indicateurs et les touches ont des fonctions différentes de celles du fonctionnement normal. - Page 22 1. Appuyer sur le bouton d'alimentation pour couper l'ali- Maintenir le bouton d'alimentation enfoncé pendant deux secondes. mentation du preneur de commande. 2. Tout en pressant et immobilisant simultanément les Mise sous tension. touches T et page P, presser et immobiliser le bouton d'alimentation pendant deux secondes pour mettre le preneur de commande en marche.
-
Page 23: Procédures D'utilisation
G Communication avec d'autres membres PROCÉDURES D’UTILISATION du personnel du magasin (PAGE) G Communications avec les clients Tous les membres du personnel portant un casque d'écoute peuvent communiquer entre eux sans être des (TALK) clients. Tout membre du personnel portant un casque d'écoute peut communiquer en mode bidirectionnel avec n'importe <Lorsque le mode de verrouillage page est préréglé>... -
Page 24: Dépannage
DÉPANNAGE Phénomène Cause probable Que faire ? Le témoin d'alimentation clignote en Le mauvais canal est sélectionné. Choisir n'importe lequel des canaux de 1 rouge. (Le sélecteur de canal n'est pas réglé à 8. sur la bonne position. Se référer à la S'il n'existe aucun moyen de rectifier, page 19.) consulter le distributeur pour qu'il... -
Page 25: Caractéristiques Techniques
CARACTÉRISTIQUES TECHNIQUES Fréquence d'utilisation: UHF/FM Type d'onde radio: Alimentation requise: Batterie rechargeable Ni-MH, 3,6 V à courant continu Fonction de commande: Alimentation (marche-arrêt) Volume (accroissement / réduction) Parler Page Sélection de canal (A/B) Sélection de groupe de canal (1-8) Configuration d'interrupteur DIP (8 bits) Dimensions: 139 mm (L) x 63 mm (H) x 26 mm (P) {5-1/2 po. - Page 28 For customer support, call 1.877.733.3689 Panasonic Sales Company Executive Office: Three Panasonic Way 2H-2, Secaucus, New Jersey 07094 Division of Panasonic Puerto Rico Inc. Zone Office San Gabriel Industrial Park 65th Infantry Ave. KM. 9.5 Carolina Eastern: Three Panasonic Way, Secaucus, New Jersey 07094 P.R.