Roland Jupiter-Xm Reference Manual
Hide thumbs
Also See for Jupiter-Xm:
- Reference manual (58 pages) ,
- Owner's manual (28 pages) ,
- Supplementary manual (4 pages)
Table of Contents
Advertisement
Quick Links
Advertisement
Table of Contents

Related Manuals for Roland Jupiter-Xm


Summary of Contents for Roland Jupiter-Xm
- Page 1 Reference Manual © 2019 Roland Corporation...
-
Page 2: Table Of Contents
. . . . . . . . . . . . . . . . . . . . . . . . . . . . . . . 36 : An Overview of the JUPITER-Xm . -
Page 3: Panel Descriptions
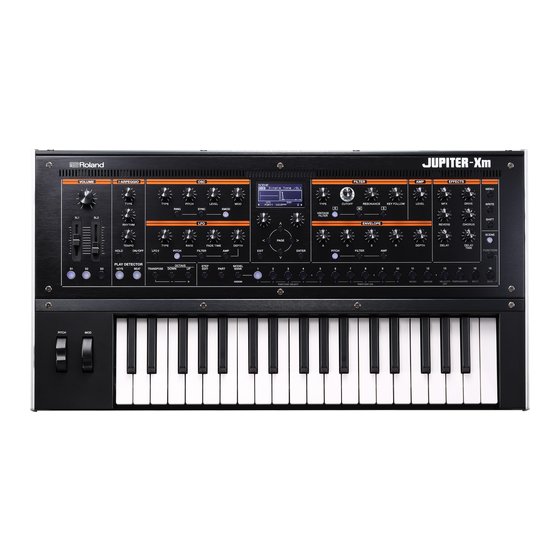
Panel Descriptions Top Panel * Some controllers are not operable in some modes. For details, refer to “Correspondence Between Controllers and Parameters” (p. 16). VOLUME [VOLUME] knob [TYPE] knob Adjusts the overall volume. Selects the oscillator waveform. [SL1] [SL2] slider [PITCH] knob Control the parameters that are assigned to the sliders. - Page 4 Chooses sound select mode, allowing you to select sounds of the If a vintage type model is selected, these buttons change the type of various models. filter. models a Roland filter, and model the filters of vintage synthesizers made by other manufacturers.
- Page 5 Panel Descriptions MODEL buttons PHONES jack Connect stereo mini-type headphones here. [1]–[16] button These buttons have various functions depending on the mode. Sound select mode ([MODEL BANK] button) The buttons select tones of the models that are assigned to the buttons. * By holding down the [MODEL BANK] button and pressing one of...
-
Page 6: Rear Panel (Connecting Your Equipment)
You can connect a USB flash drive here. * Use only the specified expression pedal. By connecting any other expression Connect or disconnect the USB flash drive while the JUPITER-Xm is pedals, you risk causing malfunction and/or damage to the unit. -
Page 7: Bottom Panel
Power-on the equipment in the order of JUPITER-Xm 0 connected devices . * In order to protect its circuitry, the JUPITER-Xm waits for a while after being powered-on before it begins operating. Switch on power to the connected equipment, and raise the volume to an appropriate level . -
Page 8: Introduction
This means that you can use a single JUPITER-Xm unit as if you owned a variety of units. It is convenient to save your settings beforehand as scenes, and then switch between these scenes while you perform. -
Page 9: An Overview Of The Jupiter-Xm
Introduction An Overview of the JUPITER-Xm On the JUPITER-Xm, you play or edit the “scene” that you’ve selected. First select a “scene,” and then specify its sound or arpeggio settings. Each scene contains settings such as I-Arpeggio, tones, and MFX. - Page 10 Introduction [10] on/off to remove or bring back just the drum sound as a performance [14 (PORTAMENTO)] button effect. If this is on, portamento is applied to that sound. (SCENE PART EDIT> Porta Sw) [11]–[16] buttons Portamento is a function that smoothly varies the pitch between the first- played note and the next-played note.
-
Page 11: Assigning The Desired Model Or Category To The [1]-[16] Buttons
Introduction Selecting or Turning On/Off an Oscillator or [16 (DUAL)] button This lets you layer two sounds. Partial (SCENE ZONE EDIT> Key Rng Low/Key Rng Upp) ([FUNCTION] Button) If this is on, the KEYBOARD SW of PART1 and PART2 is on, letting you You can use the [1]–[4] [6]–[9] buttons... -
Page 12: Write Screen
Introduction INFORMATION SCENE INITIALIZE View the software version. Here’s how to initialize the scene settings. The first preset tone will be the tone selected for each part. WRITE Screen Press the [WRITE] button . SCENE The WRITE MENU screen appears. Use the [1] knob [2] knob... -
Page 13: Editing Each Step Of The Arpeggio Performance
Introduction Editing Each Step of the Arpeggio Performance (STEP EDIT) Based on an analysis of your keyboard performance, this plays an optimal arpeggio pattern using multiple parts (I-Arpeggio). Simply by selecting a TYPE and RHYTHM, you can use I-ARPEGGIO with a wide variety of settings. I-ARPEGGIO Type Arpeggio pattern... -
Page 14: Performing With A Connected Mic (Vocoder)
Specifies the level at which the mic NOTE -60–0 [dB] CompThreshold compressor starts applying compression. The JUPITER-Xm supports dynamic microphones and electret 1: 1, 2: 1, …4: 1, Specifies the compression ratio for the 8: 1, 16: 1, 32: 1, CompRatio condenser microphone (plug-in power system). -
Page 15: Editing The Sound (Tone Edit)
The sound you create will change if you move a knob or select a different tone, and will be lost when you switch off the JUPITER-Xm’s power. When you’ve created a sound you like, you should save it as a user tone. -
Page 16: Correspondence Between Controllers And Parameters
Correspondence Between Controllers and Parameters JUPITER-8 32 33 34 35 Area Controller Parameter Area Controller Parameter TYPE LFO WAVEFORM ENV1/2-ATTACK RATE LFO RATE ENV1/2-DECAY FADE TIME LFO DELAY TIME ENV1/2-SUSTAIN OSC1 MOD/FILTER ENV1/2-RELEASE DEPTH MOD/AMP MOD2 PIT ENV DEPTH / FLT Pitch Select OSC1 MOD ENV DEPTH... -
Page 17: Operations When Combined With The [Shift] Button
Correspondence Between Controllers and Parameters Operations When Combined with the [SHIFT] Button Area Controller Condition 1 Condition 2 Jump destination “TONE EDIT” “OSC 1” is selected “JP8: OSC1 WAVEFORM” parameter [TYPE] knob “TONE EDIT” “OSC 2” is selected “JP8: OSC2 WAVEFORM” parameter “TONE EDIT”... - Page 18 Correspondence Between Controllers and Parameters Area Controller Condition 1 Condition 2 Jump destination “TONE EDIT” “ENV PITCH” is selected “JP8: ENV1 ATTACK” parameter “FLT ENV MODE” “TONE EDIT” parameter is “ENV1” “JP8: ENV1 ATTACK” parameter “ENV FILTER” is selected [A] knob “FLT ENV MODE”...
-
Page 19: Juno-106
Correspondence Between Controllers and Parameters JUNO-106 10 11 12 27 28 29 30 31 32 Controller Parameter Controller Parameter RATE LFO RATE ENV-ATTACK FADE TIME LFO DELAY TIME ENV-DECAY OSC LFO MOD / ENV-SUSTAIN DEPTH FILTER MOD ENV-RELEASE Pitch Select OSC1 MOD DEPTH FLT ENV DEPTH FILTER... -
Page 20: Operations When Combined With The [Shift] Button
Correspondence Between Controllers and Parameters Operations When Combined with the [SHIFT] Button Area Controller Condition Jump destination [TYPE] knob “TONE EDIT” [PITCH] knob “JU: OSC1 RANGE” parameter “TONE EDIT” “OSC 1” is selected “JU: PW SWITCH” parameter “TONE EDIT” “OSC 2” is selected “JU: SAW SWITCH”... -
Page 21: Jx-8P
Correspondence Between Controllers and Parameters JX-8P 30 31 32 33 34 35 Area Controller Parameter Area Controller Parameter TYPE LFO WAVEFORM ENV1/2-ATTACK RATE LFO RATE ENV1/2-DECAY FADE TIME LFO DELAY TIME ENV1/2-SUSTAIN OSC1 LFO MOD/ ENV1/2-RELEASE DEPTH OSC2 LFO MOD/ FILTER MOD OSC1/2 PIT ENV/FLT ENV DEPTH... -
Page 22: Operations When Combined With The [Shift] Button
Correspondence Between Controllers and Parameters Operations When Combined with the [SHIFT] Button Area Controller Condition 1 Condition 2 Jump destination “TONE EDIT” “OSC 1” is selected “JX8P: OSC1 WAVEFORM” parameter [TYPE] knob “TONE EDIT” “OSC 2” is selected “JX8P: OSC2 WAVEFORM” parameter “TONE EDIT”... - Page 23 Correspondence Between Controllers and Parameters Area Controller Condition 1 Condition 2 Jump destination “OSC WNV MODE” parameter is “TONE EDIT” “ENV1” “JX8P: ENV1 ATTACK” parameter “ENV PITCH” is selected and “OSC WNV MODE” parameter is “TONE EDIT” “ENV2” “JX8P: ENV2 ATTACK” parameter “FLT ENV MODE”...
-
Page 24: Sh-101
Correspondence Between Controllers and Parameters SH-101 10 11 12 27 28 29 30 31 32 Area Controller Parameter Area Controller Parameter TYPE LFO WAVEFORM ENV-ATTACK ENV-DECAY RATE LFO RATE OSC LFO MOD/FILTER ENV-SUSTAIN DEPTH ENV-RELEASE Pitch Select OSC1 MOD DEPTH FLT ENV DEPTH FILTER Select FILTER MOD... -
Page 25: Operations When Combined With The [Shift] Button
Correspondence Between Controllers and Parameters Operations When Combined with the [SHIFT] Button Area Controller Condition Jump destination “TONE EDIT” [PITCH] knob “SH: OSC RANGE” parameter “TONE EDIT” “OSC 1” is selected “SH: PW LEVEL” parameter “TONE EDIT” “OSC 2” is selected “SH: SAW LEVEL”... -
Page 26: Xv-5080, Rd-Piano, And Other Tones
Correspondence Between Controllers and Parameters XV-5080, RD-PIANO, and Other Tones (Scene Edit) 9 10 18 19 20 21 22 23 Area Controller Parameter SCENE PART EDIT > RATE Vib Rate SCENE PART EDIT > FADE TIME Vib Delay SCENE PART EDIT > DEPTH Vib Depth PITCH... -
Page 27: Xv-5080, Rd-Piano, And Other Tones
Correspondence Between Controllers and Parameters XV-5080, RD-PIANO, and Other Tones (Tone Edit) 17 18 19 36 37 38 39 40 41 Area Controller Parameter Area Controller Parameter Area Controller Parameter TONE EDIT > L1 (/L2) SCENE PART EDIT > TYPE TYPE FilterType (*2) MONO... -
Page 28: Effects (Common To All Models)
Correspondence Between Controllers and Parameters EFFECTS (Common to All Models) MFX Type Condition Assign Parameter Area Controller Parameter Inf Phaser Speed MFX (*1) Ring Mod Frequency Depth Tremolo DRIVE SCENE EFFECT: OD > Drive Rate Sync=OFF Rate Auto Pan SCENE PART EDIT > Output = THRU: SCENE PART Rate Sync=ON Rate Note... - Page 29 Correspondence Between Controllers and Parameters MFX Type Condition Assign Parameter AWah Sync=OFF AWRate OD/DS>A.Wah AWah Sync=ON AWRate Nt C.Rate Gt->Chorus F.Rate Gt->Flanger P.Rate Gt->Phaser Gt->Delay Dly Bal Tremolo Sync=OFF T.Speed EP->Tremolo Tremolo Sync=ON T.Spd Nt EP->Chorus Cho Depth EP->Flanger Flg Depth Phs Depth EP->Phaser Dly Bal...
-
Page 30: List Of Shift Operations (Shortcuts)
List of SHIFT Operations (Shortcuts) The SHIFT functions (shortcuts) for each model are listed below. & JUPITER-8 “Operations When Combined with the [SHIFT] Button” (p. 17) & JUNO-106 “Operations When Combined with the [SHIFT] Button” (p. 20) & JX-8P “Operations When Combined with the [SHIFT] Button” (p. -
Page 31: Rd-Piano, Xv-5080, Pr-A, Pr-B, Pd-C, Pr-D, Common, Jp-X Int (Tone Edit)
List of SHIFT Operations (Shortcuts) Area Controller Condition Jump destination “SCENE PART EDIT” [RATE] knob “Vib Rate” parameter “SCENE PART EDIT” [SHIFT] button+ [FADE TIME] knob “Vib Delay” parameter “SCENE PART EDIT” [DEPTH] knob “Vib Depth” parameter “SCENE PART EDIT” [CUTOFF] knob “Cutoff”... - Page 32 List of SHIFT Operations (Shortcuts) Area Controller Condition 1 Condition 2 Jump destination [TYPE] knob Change the value in units of 10. “TONE EDIT” [CUTOFF] knob Access the screen. [SHIFT] button+ “TONE EDIT” [RESONANCE] knob Access the screen. “TONE EDIT” [KEY FOLLOW] knob Access the screen.
-
Page 33: Settings For The Entire Unit
(Factory Reset) 415.3–466.2 [Hz] MasterTune The displayed value is the frequency of the A4 key (middle A). Here’s how the settings that you edited and saved on the JUPITER-Xm can Shifts the JUPITER-Xm’s overall pitch range in -24–24 MasKeyShift semitone steps. - Page 34 LED On Bright Tx PC OFF, ON will be transmitted (ON) or not be transmitted When the JUPITER-Xm is operating with the AC (OFF). adaptor, you can make the LEDs remain dimly Specifies whether bank select messages will be lit when off instead of going completely dark.
- Page 35 Settings for the Entire Unit List of functions that can be assigned to the Parameter Value Explanation [1] knob [2] knob controllers Specifies the amount of delay that is applied to Dly Send Lev 0–127 the mic input. S1 Func If you want the mic to be cut when the vocoder Mic Thru ON/OFF...
-
Page 36: Utility Screen
RESTORE FACTORY RESET Here’s how user data that you backed-up on a USB flash drive can be Here’s how the settings that you edited and saved on the JUPITER-Xm can returned to the JUPITER-Xm. be returned to their factory-set condition. -
Page 37: Formatting A Usb Flash Drive (Format Usb Memory)
UTILITY Screen Formatting a USB Flash Drive (FORMAT USB MEMORY) Here's how to format a USB flash drive. Connect the USB flash drive . USB Flash Drive NOTE If the USB flash drive contains important data, be aware that this operation erases all data from the drive. -
Page 38: Sound Engine Routing Details
Sound Engine Routing Details The RD and VOCODER models can be selected only for PART 1. DRUM KIT can be selected only for PART 5. The MFX of PART 5 can be specified if the SCENE setting Follow Tone MFX is OFF. -
Page 39: Error Messages
Error Messages Display Explanation Messages that disappear after a timeout When you press a model bank button, there is no tone to No TONEs. recall. Battery Low! The remaining battery capacity is low. Battery Very Low! The remaining battery capacity is extremely low. MIDI Offline! The MIDI connection is broken. -
Page 40: Q&A
Q&A Overall / System Can I specify a MIDI channel for each part? Is this unit equipped with Bluetooth functionality? Yes. Yes, it is. You can specify a desired channel as the Basic CH (part 1), and part 2 and You can use its Bluetooth functionality in the following ways. - Page 41 Q&A How many hours can I continue to use the unit Do the internal speakers produce enough on battery power? volume for a live performance? Approximately 3.5 hours (when using nickel-metal hydride batteries with They are not suitable for this purpose. 1,900 mAh capacity).
-
Page 42: The Vocoder
Q&A Sound Engine What is the meaning of “MODEL” in a model Can I input audio playback from my computer bank? instead of audio from the mic input, and apply the vocoder? A model is a sound engine that reproduces the sounds and parameter changes of famous vintage analog synthesizers and other historical Yes, you can. - Page 43 “TONE INITIALIZE . ” Press the [ENTER] button . [R]: This is the filter of the original Roland model, and is selected by default. The message “INITIALIZE TONE Are you sure?” appears. [S]: These model the filters of vintage synthesizers made by other companies.
- Page 44 Q&A Can I mute a part while the arpeggio is playing? Can the I-Arpeggio synchronize with the tempo of an external sequencer? Yes. Yes. Both master and slave synchronization are supported. In SYSTEM settings, With the [PART] button lit, hold down the [SHIFT] button set the SYNC/TEMPO parameters as appropriate for your situation.
- Page 45 Q&A Is it possible to initialize only the scene? Yes. Initialize the scene as follows. Press the [WRITE] button . The WRITE MENU screen appears. Use the [2] knob to select “SCENE INITIALIZE . ” Press the [ENTER] button . “INITIALIZE TONE Are you sure?”...