Table of Contents
Advertisement
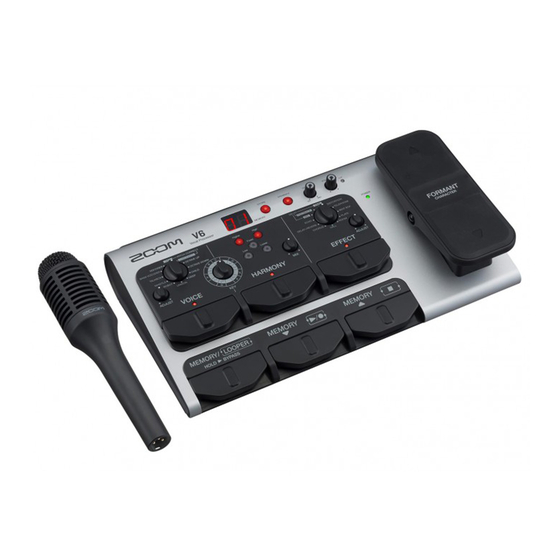
Vocal Processor
Operation Manual
You must read the Usage and Safety Precautions before use.
© 2019 ZOOM CORPORATION
Copying or reprinting this manual in part or in whole without permission is prohibited.
Product names, registered trademarks and company names in this document are the property of their respective companies. All trademarks and regis-
tered trademarks in this document are for identification purposes only and are not intended to infringe on the copyrights of their respective owners.
Proper display is not possible on grayscale devices.
Advertisement
Table of Contents

Related Manuals for Zoom V6


Summary of Contents for Zoom V6
-
Page 1: Zoom Corporation
Operation Manual You must read the Usage and Safety Precautions before use. © 2019 ZOOM CORPORATION Copying or reprinting this manual in part or in whole without permission is prohibited. Product names, registered trademarks and company names in this document are the property of their respective companies. All trademarks and regis- tered trademarks in this document are for identification purposes only and are not intended to infringe on the copyrights of their respective owners. - Page 2 ■ Operation Manual overview You might need this manual in the future. Always keep it in a place where you can access it easily. The contents of this document and the specifications of the product could be changed without notice. • Windows is a trademark or registered trademark of Microsoft Corporation.
-
Page 3: Introduction
With other features that include a unique formant pedal that can be used to change vocal characteristics, a looper that can record overdubs for up to 3.5 minutes and a super-directional ZOOM SGV-6 mic, this vocal pro- cessor is perfect for live performances. -
Page 4: Terms Used In This Manual
Terms used in this manual Patch memory Records of voice, harmony and effect settings are called “patch memories” and can be used to easily re- call settings. Up to 100 patch memories can be stored. Looper Vocal loops can be recorded for up to 3.5 minutes and played back. Loops can be layered for a variety of live performance techniques, including a cappella choruses and vo- cal percussion. -
Page 5: Table Of Contents
Using audio interface functions ������� 33 Making connections ������������ 10 Installing the driver ����������� 33 Connecting to a computer �������� 34 ZOOM SGV-6 mic overview ��������� 11 Updating the firmware ����������� 35 Turning the power on ����������� 12 Using batteries ������������� 13 Troubleshooting ��������������... -
Page 6: Structure
structure ■ Signal flow Settings saved in patch memories Clip LED PA system Compressor Volume Voice Formant Harmony Effect Enhance Looper INPUT OUTPUT Headphones Bypass USB Audio Computer The volume and tone of the input from the mic can be adjusted. “Adjusting the volume and tone”... -
Page 7: Names And Functions Of Parts
Names and functions of parts ■ Front panel ❶ ❷ ❸ ❹ ❺ ❻ ❼ ❽ ❾ VOICE section Alter vocals with pitch correction, pitch shifting, vocoder and other options. VOICE ADJUST knob Use to adjust the voice. VOICE selection knob Select the voice type. - Page 8 Display This shows the selected patch memory number and looper status. STORE button Press to save the current settings to a patch memory. Input control section Adjust the volume and tone of the input from the mic. ENHANCE button Turn the ENHANCE function on/off. COMP knob Adjust the amount of compression.
- Page 9 3: COLD PHANTOM switch Turn +48V phantom power ON/OFF . Turn this ON when connecting a ZOOM SGV-6 mic or a condenser mic that requires phantom power, for example. EFFECT CONTROL connector An expression pedal (ZOOM FP02M) can be connected here to control the effect.
-
Page 10: Making Connections
Connect a cable with an XLR connector (female) to the OUTPUT jack. Use a cable with a connector that suits the PA system or recorder input jack. Mic (ZOOM SGV-6 or output is line level. Use a mic cable to commercially-avail-... -
Page 11: Zoom Sgv-6 Mic Overview
ZOOM SGV-6 mic overview The SGV-6 is a mic with focused directionality based on the technologies of shotgun mics, which are de- signed to capture sound in the direction they are pointed. By capturing only the vocal, sounds from other instruments on stage are suppressed, enabling accurate pitch correction and harmonization. -
Page 12: Turning The Power On
Turning the power on Minimize the volume of output devices. to ON. This turns the on, and lights green. Raise the volume of output devices. HINT • 4 AA batteries can also be used. Use only one type of battery (alkaline, NiMH or lithium) at a time. ( “Using batteries”... -
Page 13: Using Batteries
Using batteries Open the battery compartment cover on the bottom of the product and insert 4 AA batteries. NOTE • Set the type of battery used correctly so that the amount of remaining battery charge can be shown accurately. ( “Setting the type of batteries used” on page •... -
Page 14: Adjusting The Volume And Tone
Adjusting the volume and tone Adjusting the mic input volume Turn While singing, adjust it so lights green. Quieter Louder NOTE Adjust the mic input volume to a level that enables the VOICE and HARMONY sections to function prop- erly. •... -
Page 15: Bringing Out Vocal Character (Enhance Function)
Bringing out vocal character (enhance function) enhance function has two effects. • Bringing out vocal character By emphasizing high frequencies, this can make singing clearer, so that it is not lost in the sound of a band. • Suppressing “s” sounds and other sibilant sounds Sibilant sounds are produced by air pushed through gaps between teeth and include hissing “s”... -
Page 16: Selecting Patch Memories
Selecting patch memories comes with patch memories that allow a variety of vocal sounds to be tried right away. Patch memories store all VOICE, HARMONY and EFFECT section settings. Up to 100 patch memories can be stored. Press Use these to select patch memories. The selected patch memory number is shown on the display. -
Page 17: Using The Voice Section
Using the VOICE section Use this section to alter the sound of the voice. For example, use it to correct pitch according to the key or give the voice a childlike, synthesized or vocoder sound. Press The VOICE section is activated, and lights. - Page 18 This transforms the sound into a robotic voice out- put at the root note of the set key.* ROBOT** Robot voice octave Using this during intros and interludes can en- hance the performance of a song. This has the effect of sounding like whistling even when just singing.
-
Page 19: Using The Harmony Section
Using the HARMONY section In the HARMONY section, two of the five options can be selected to generate harmonies automatically based on the KEY setting. Press The HARMONY section is activated, and lights. Turn Set the key of the song being sung. When using sheet music, the key can be determined from the key signature. - Page 20 Harmony Explanation Higher harmony Higher +5 or +6 degrees High harmony High +3 or +4 degrees Sung pitch Fixed The note of the key selected in step 2 (fixed) Low harmony –3 or –4 degrees Lower harmony Lower –5 or –6 degrees Each harmony is generated automatically according to the key selected in step 2.
-
Page 21: Using The Effect Section
Using the EFFECT section This section adds reverb, distortion or another effect to the original sound to change its tone. Press The EFFECT section is activated, and lights. Turn This selects the effect. Turn This adjusts the effect. Effect Explanation ADJUST function DISTORTION Distorts the voice heavily... - Page 22 • If an expression pedal (ZOOM FP02M) is connected, it can be used to adjust the effect (same as turning ). Adjustments made with a pedal are not saved in the patch memory.
-
Page 23: Saving Settings In Patch Memories
Saving settings in patch memories VOICE, HARMONY, and EFFECT settings can be saved as patch memories. Press The display blinks. Press Select the destination patch memory. The selected patch memory number is shown on the display. Press The current settings are saved. HINT Press to cancel saving. -
Page 24: Using The Formant Pedal
Using the FORMANT pedal Formants are vocal characteristics created by differences in mouth and throat shapes. By using the FORMANT pedal to change the formant, vocal characteristics can be changed without chang- ing the pitch. Operate the FORMANT pedal. This changes the character of the voice. Press forward (toe) This makes the voice higher and cuter. -
Page 25: Using The Looper
Using the looper Vocals can be recorded and loops created for up to 3.5 minutes. Loops can be layered for a variety of live performance techniques, including a cappella choruses and vo- cal percussion. Activating the looper When in memory mode, press appears on the display. -
Page 26: Overdubbing Loops
Overdubbing loops Additional performances can be added to the recorded loop. Press during loop playback. Overdubbing starts, and appears on the display. When the end of the loop is reached, loop playback will continue from the beginning, and overdub- bing can be repeated. Press during overdubbing. -
Page 27: Clearing The Loop
Clearing the loop When loop playback is stopped, press and hold The recorded loop is cleared, and appears on the display. Display indicators Indicator Explanation LOOPER: No loop recorded REC: Loop being recorded PLAY: Loop being played back (blinks when stopped) UNDO: Last overdubbed loop being removed REDO: Loop removed using UNDO being restored... -
Page 28: Bypassing The Effect Of The
Bypassing the effect of the Press and hold The effect of the is bypassed, and the display appears as follows. In memory mode The patch memory number and ”bP” appear alternately. In looper mode The looper status and ”bP” appear alternately. Press to stop bypassing. -
Page 29: Making Other Settings
Making other settings Setting the standard pitch for voices and harmonies This adjusts the standard pitch used for correcting vocal pitch and adding harmony. While pressing and holding , set to ON. After appears on the display, the current setting value appears. Press Set the standard pitch in 1Hz intervals (the default is 440 Hz). -
Page 30: Setting The Type Of Batteries Used
Setting the type of batteries used Set the type of battery used correctly so that the amount of remaining battery charge can be shown accu- rately. While pressing and holding , set to ON. After appears on the display, the current setting value appears. Press Set the type of batteries used. -
Page 31: Setting Eco Mode To Turn The Power Off Automatically When Not Used
Setting ECO mode to turn the power off automatically when not used This function can be used to turn the power off automatically if unused for 10 hours. While pressing and holding , set to ON. After appears on the display, the current setting value appears. Press Select the setting. -
Page 32: Restoring Factory Default Settings
Restoring factory default settings While pressing and holding , set to ON. blinks on the display. Press The display blinks rapidly, initialization occurs, restoring settings to their factory defaults, and the starts normal operation. NOTE Initialization will overwrite all settings, including patch memories, to their factory defaults. Be certain before using this function. -
Page 33: Using Audio Interface Functions
• You can download the latest “ZOOM V6 Driver” from the above website. • Download the driver for the operating system that you are using. Launch the installer and follow the instructions to install the ZOOM V6 Driver. NOTE • See the Installation Guide included in the driver package for detailed installation procedures. -
Page 34: Connecting To A Computer
Connecting to a computer Use a USB cable to connect the with the computer or iOS device. NOTE When connecting to an iOS device, use a Lightning to USB camera adapter (or Lightning to USB 3 cam- era adapter). to ON. After the turns on, it will connect to an iOS device. -
Page 35: Updating The Firmware
Updating the firmware Check the ZOOM website (www.zoom.co.jp), and download firmware for the Use a USB cable to connect the and the computer. While pressing both a n d , set to ON. This turns the on, and lights orange. -
Page 36: Troubleshooting
“Adjusting headphone volume” on page There is a lot of noise • Confirm that a shielded cable is not the cause. • Use a genuine ZOOM AC adapter. ( “Making connections” on page • Check the GROUND LIFT switch setting. ( “Making connections” on page The sound distorts strangely or has an odd timbre • Adjust the input volume to a suitable level. - Page 37 Batteries lose their charge quickly • Confirm that you are not using manganese batteries. Alkaline batteries should provide about 3.5 hours of continuous operation. • Confirm the battery setting. The setting must match the batteries being used in order to show the remaining battery charge accurate- ly.
-
Page 38: Specifications
Control input FP02 input Power AC adapter (9 V DC 500 mA, center negative) (ZOOM AD-16) 4 AA batteries (about 3.5 hours continuous operation time when using alkaline batteries) Connector: Micro USB Audio interface operation: 2-in/2-out USB2.0 Full Speed, 44.1 kHz, 16/24/32-bit • Power can also be supplied through the USB port. - Page 39 ZOOM CORPORATION 4-4-3 Kanda-surugadai, Chiyoda-ku, Tokyo 101-0062 Japan www.zoom.co.jp Z2I-3647-02...