Table of Contents
Advertisement
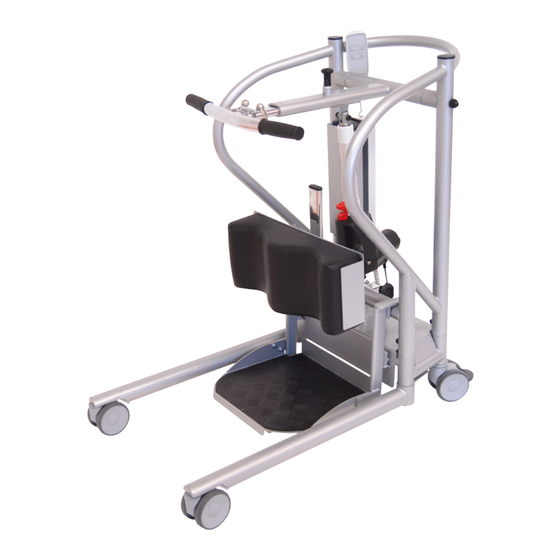
MiniLift200
Service manual - English
SystemRoMedic
TM
Valid from serial number:
200005000
SWL: 200 kg/441 lbs
Safety information
Visual inspection
Inspect lift unit functions regularly. Check to ensure that material is free from damage.
Before use
Ensure that the product is correctly assembled.
Check slingbar connection and safety latch function.
Check lift and base-width movement.
Check to ensure that the actuator is correctly installed.
Always read the user manual
Always read the user manuals for all assistive devices used during a transfer.
Keep the user manual where it is accessible to users of the product.
The lift unit may only be used by persons who have received instruction in the operation of the lift unit.
Manual nr: 883-En Ver. 7 151210
Advertisement
Table of Contents

Related Manuals for Handicare SystemRoMedic MiniLift200


Summary of Contents for Handicare SystemRoMedic MiniLift200
- Page 1 MiniLift200 Service manual - English SystemRoMedic Valid from serial number: 200005000 SWL: 200 kg/441 lbs Safety information Visual inspection Inspect lift unit functions regularly. Check to ensure that material is free from damage. Before use Ensure that the product is correctly assembled. Check slingbar connection and safety latch function.
-
Page 2: Table Of Contents
Table of contents Assembly -Final inspection ..................Using the product - Important information ................- Trouble-shooting ................... Exploded view and components .......... Spare part list ................10-11 Changing of spare parts ............12-13 Periodic inspection - protocol ............14 - Description for periodic inspection ............15 - Periodic inspection - instruction ............ -
Page 3: Assembly
Assembly Final inspection Check to ensure that no parts have been left in the packaging. Inspect the lift for signs of wear and damage. Check all four castor wheels and castor wheel locks. Check all connections and fixtures including screws and bolts. Check the emergency stop function by activating the emergency stop, and then pressing either the up or down button. -
Page 4: Using The Product
• To ensure optimal function, the lift must be inspected regularly. See section on Maintenance. • Warranty applies only if repairs or alterations are done by an authorized technician. • Using lifting accessories other than those approved by Handicare can entail a risk. Trouble-shooting If the lift or base-width adjustment cannot be activated, check the following: - That the emergency stop button is not pressed in. -
Page 5: Exploded View And Components
Exploded view and components SystemRoMedic... - Page 6 Exploded view - Base EM SystemRoMedic...
- Page 7 Threaded This drawing and any information or descriptive matter set out hereon are the confidential and copyright property of Handicare and must not be disclosed, loaned, copied or used for manufacturing, tendering or any other purpose without their written permission.
- Page 8 SHEET 1 OF 1 This drawing and any information or descriptive matter set out hereon are the confidential and copyright property of Handicare and must not be disclosed, loaned, copied or used for manufacturing, tendering or any other purpose without their written permission.
- Page 9 5.16 g SHEET 1 OF 1 This drawing and any information or descriptive matter set out hereon are the confidential and copyright property of Handicare This drawing and any information and must not be disclosed, loaned, copied or used for manufacturing, tendering or any other purpose without their written permission.
-
Page 10: Spare Part List
Spare part list Art no. Product Unit Components Parts 80100045 Cable for charger US 1 pce 1 x Charger cable 80100048 80100046 Cable for charger Uk 1 pce 1 x Charger cable 80100047 Cable for charger AUS 1 pce 1 x Charger cable 80100048 Cable for charger EU 1 pce... - Page 11 Art no. Product Unit Components Parts 80100156 Hand control HB32-4 1 pce 1 x Hand control 4-buttons 80100130 Hand control Tester Linak 1 pce 80100156 80100079 Footplate complete 200 1 pce 1 x Footplate holder mounted 80100079 80100080 Knee pad complete 200 1 pce 1 x Knee pad 80100080...
-
Page 12: Changing Of Spare Parts
Changing of spare parts 80100045, -46, -47, -48, Connect the charger cable to the control box, and then plug it into a wall socket. 80100049/ 80100050 Front/Rear castor kit 80mm Using an Allen key, remove the screw. Replace the castor, apply Loctite 2701 or similar, and then secure the castor with the screw. - Page 13 80100161 Battery box CBJ Grey BAJ1 Remove the battery by lifting it straight up and out of the holder in the control box. Install the new battery in the holder. Note! The battery must be charged for at least four hours before it is used for the first time. 80100057 Battery CBJ Remove the lift battery box and remove the screws.
-
Page 14: Periodic Inspection - Protocol
Periodic inspection - protocol Lift type: Contract no: s/n: Name: Version: Address: Prod. year: Sling bar id.: Situation of use: Home Institution Other Comments: 1. Attention 2. Correct 3. Do not use! Base: Check for visible damage Check: Castor Brakes Screws Upper part: Inspect the mast... -
Page 15: Description For Periodic Inspection
Description for periodic inspection SystemRoMedic... -
Page 16: Periodic Inspection - Instruction
Periodic inspection - instruction Base -Check the base for visible damage to the surfaces, finish, etc. Castors - Roll the lift unit unloaded on the floor, check that the castors roll and turn freely. - Check that the castor fasteners are tight. - Check that the lift runs straight. - Page 17 Emergency stop -Verify that the lift unit does not operate when emergency stop is pressed in. Electric emergency lowering -Verify the function of emergency lowering. Use a narrow object such as a pen. Charging -Verify that charging is operating. Yellow lamp on the controllbox should light up when charging. Product label - Check the serial number so that the label is there and readable.
-
Page 18: Maintenance
The air pressure should be between 700 and 1060 hPa. Let the hoist reach room temperature before the batteries are charged or the hoist is used. 1060 hPa +50 °C -10 °C 700 hPa Service agreements Handicare offers the possibility of service agreements for maintenance and regular testing of your mobile lift. Contact your local Handicare representative. SystemRoMedic... -
Page 19: Symbols
Symbols Read user manual May not be discarded in domestic waste The product complies with the requirements of the Medical Devices Directive 93/42/EEC. Type B, according to the degree of protection against electric shock. The device is intended for indoor use. Class lI equipment This product is tested and approved in regards to safety in the workplace according to the requirements of the US Occupational Safety &... -
Page 20: Dimensions
Dimensions All measurement are in mm/inch Tolerance +/- 5 mm/ 0.2” 860/ 33.8 410/ 16.1 425/ 16.7 295/ 11.6* 132/ 5.1 75/ 2.9 50/ 1.9 90/ 3.5 960/ 37.7 * Maximum reach at 600 mm (referens height) SystemRoMedic... - Page 21 570/ 22.4* 980/ 38.8 * Reach from base with legs spread to 700 mm (referens) SystemRoMedic...
- Page 22 SystemRoMedic...
- Page 23 SystemRoMedic...
- Page 24 Please contact your local Handicare and SystemRoMedic™ representative. A complete list of all our partners with their contact details can be found on our website; www.handicare.com. Handicare offers solutions and support to increase the independence of disabled or elderly people as well as to improve the convenience of those who are caring for them.