Table of Contents
Advertisement
Advertisement
Table of Contents
Troubleshooting

Related Manuals for Philips LX3600D/BK


Summary of Contents for Philips LX3600D/BK
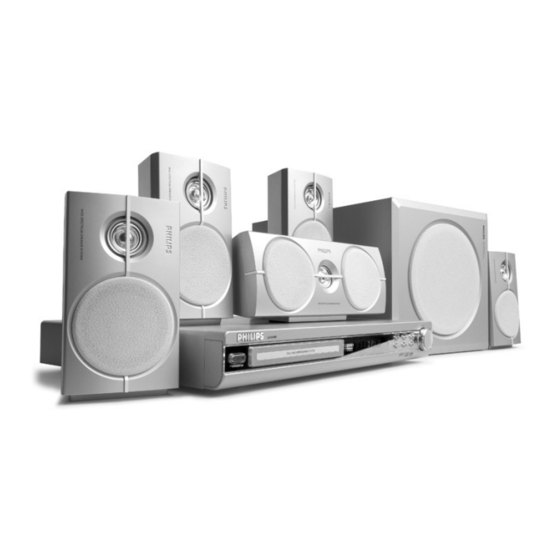
- Page 1 3600D 3600D DVD VIDEO DIGITAL SURROUND SYSTEM...
- Page 2 General Information Environmental information All unnecessary packaging has been omitted. We have tried to make the packaging easy to separate into three materials: cardboard (box), polystyrene foam (buffer) and polyethylene (bags, protective foam sheet). Your system consists of materials which can be recycled and reused if disassembled by a specialized company.
- Page 3 English ----------------------------------------- 5 ---------------------------------- 42 ---------------------------------- 80 Bahasa Melayu ---------------------------- 118 Index...
-
Page 4: Table Of Contents
Contents General Information Supplied accessories ... 6 Care and safety information ... 6 Connections Step 1: Set up the speakers ... 7 Step 2: Connecting speakers and subwoofer ... 7 Step 3: Placing the speakers and subwoofer ... 8 Step 4: Connecting TV ... 9-10 Using Composite Video jack (CVBS) ... - Page 5 Switching to active mode ... 37 Switching to Eco Power standby mode ... 37 Recording to an external device ... 37 Using the remote to operate your ‘Philips’ television ... 37 Troubleshooting ... 38–39 Specifications ... 40 Glossary ... 41...
-
Page 6: General Information
Do not use a solution containing alcohol, spirits, ammonia or abrasives. Finding a suitable location – Place the player on a flat, hard, stable surface. 10 cm (4 inches) PHILIPS 10 cm (4 inches) DVD Home Cinema System... -
Page 7: Connections
Step 1: Set up the speakers You can choose to mount the speakers on the wall. Attach the supplied bracket firmly to the rear of speakers using the supplied screws. Then mount a screw (not supplied) on the wall where the speaker is to be hung and hook the speaker securely onto the mounted screw. -
Page 8: Step 3: Placing The Speakers And Subwoofer
Connections Step 3: Placing the speakers and subwoofer Centre speaker and DVD System Rear speaker (Left) For best possible surround sound, all the speakers (except subwoofer) should be placed at the same distance from the listening position. Place the front left and right speakers at equal distances from the TV and at an angle of approximately 45 degrees from the listening position. -
Page 9: Step 4: Connecting Tv
Step 4: Connecting TV COMPONENT VIDEO IN S-VIDEO Pr/Cr AUDIO Pb/Cb VIDEO IN VIDEO OUT AUDIO REAR SUB- LEFT TV IN AUX-IN LINE-OUT IMPORTANT! – You only need to make one video connection from the following options, depending on the capabilities of your TV system. -
Page 10: Using S-Video Jack
RF In,) you will need an RF modulator in order to view the DVD playback on the TV. See your electronics retailer or contact Philips for details on RF modulator availability and operations. Using an accessory RF modulator Use the composite video cable (yellow) to connect the DVD system’s CVBS jack... -
Page 11: Step 5: Connecting Fm/Mw Antennas
Step 5: Connecting FM/MW antennas antenna fix the claw into the slot VIDEO OUT CVBS S-VIDEO Connect the supplied MW loop antenna to the MW jack. Place the MW loop antenna on a shelf or attach it to a stand or wall. -
Page 12: Connections (Optional)
Connections (Optional) Connecting a VCR FRONT MAINS RIGHT Viewing and listening to the playback Connect the VCR to the TV as shown. Connect the DVD system’s AUX IN (R/L) jacks to the AUDIO OUT jacks on the VCR. Before starting operation, press AUX on the remote to select “AUX”... -
Page 13: Functional Overview
– Selects the relevant active source mode: DISC, TV, TUNER or AUX. – DISC: to switch to DISC source mode. – TV: to switch to TV source mode and/or *to turn on the Philips TV (remote control only) – TUNER: toggles between FM and MW band. -
Page 14: Control Buttons Available On The Remote Only
– Confirms a selection. • Numeric Keypad (0-9) – Enters a track/title number of the disc. – Enters a number of a preset radio station. ª – Switches to Eco Power standby mode. – *Switches Philips TV to on/off (in TV mode). -
Page 15: Getting Started
DISC on the remote). Turn on the TV and set to the correct video-in channel. You should see the blue Philips DVD background screen on the Usually this channel is between the lowest and highest channels and may be called FRONT, A/V IN, or VIDEO. See your TV manual for more details. -
Page 16: Selecting The Colour System That Corresponds To Your Tv
Getting Started Selecting the colour system that corresponds to your TV This DVD system is compatible with both NTSC and PAL. In order for a DVD to play on this DVD system, the colour system of the DVD, the TV and the DVD system should match. -
Page 17: Step 4: Setting Language Preference
Step 4: Setting language preference You can select your preferred language settings so that this DVD system will automatically switch to the language for you whenever you load a disc. If the language selected is not available on the disc, the disc’s default setting language will be used instead. -
Page 18: Language Code
Getting Started Language Code Abkhazian 6566 Afar 6565 Afrikaans 6570 Albanian 8381 Amharic 6577 Arabic 6582 Armenian 7289 Assamese 6583 Avestan 6569 Aymara 6589 Azerhaijani 6590 Bashkir 6665 Basque 6985 Belarusian 6669 Bengali 6678 Bihari 6672 Bislama 6673 Bokmål, Norwegian 7866 Bosnian 6683... -
Page 19: Disc Operations
Turn on the TV power and set to the correct Video In channel. (See page 15 “Setting the TV”). You should see the blue Philips DVD background screen on the TV. Press OPEN•CLOSE open the disc tray and load a disc, then press the same button again to close the disc tray. -
Page 20: Auto Eco Power Standby Mode
Disc Operations Auto Eco Power standby mode This is a power-saving feature, the system will automatically switch to Eco Power standby mode if you do not press any button within 30 minutes after a disc has stopped playing. Using the Disc Menu Depending on the disc, a menu may appear on the TV screen once you load in the disc. -
Page 21: Repeat Play Mode
Repeat play mode While playing a disc, press REPEAT to select : REPEAT CHAPTER (DVD) – to repeat playback of the current chapter. REPEAT TRACK/TITLE (CD/VCD/DVD) – to repeat playback of the current track (CD/VCD)/title (DVD). REPEAT ALL (CD/VCD/SVCD) – to repeat playback of all the disc and all the programmed tracks. -
Page 22: Time Search
Disc Operations Time Search The Time Search function allows you to start playing at any chosen time on the disc. Press OSD. Press 3 4 to highlight time search box. The on-screen display shows the total playing time of the title/chapter. Press OK keys to select an option. -
Page 23: Special Vcd & Svcd Features
Special VCD & SVCD Features Playback Control (PBC) For VCD with Playback Control (PBC) feature (version 2.0 only) In stop mode, press DISC MENU to toggle between ‘PBC ON’ and ‘PBC OFF’. If you select ‘PBC ON’, the disc menu (if available) will appear on the TV. -
Page 24: Playing Mp3/Picture Cd (Kodak, Jpeg)
Disc Operations Playing MP3/Picture disc (Kodak, JPEG) IMPORTANT! You have to turn on your TV and set to the correct Video In channel. (See page 15 “Setting the TV”). General Operation Load an MP3/Picture (Kodak Picture CD, JPEG) disc. The MP3/Picture CD menu appears on the TV screen. -
Page 25: Special Mp3/Jpeg Features
Special MP3/JPEG features IMPORTANT! You have to turn on your TV and set to the correct Video In channel. (See page 15 “Setting the TV”). Preview Function (JPEG) This function shows the content of the current folder or the whole disc. Press Ç... -
Page 26: Dvd Menu Options
DVD Menu Options Basic Operations Press SETUP in the STOP mode to enter the Setup Menu. Press OK to enter the next level submenu or confirm your selection. Press 1 2 to enter the submenu or return to the previous menu. Press 34 to highlight the desired menu. -
Page 27: Screen Saver
Program - cont’d Playback tracks After complete programming, press 1 234 to move the cursor to the START button. Press OK. Playback will start with the selected tracks under the programmed sequence. Quit the program playback In the ‘Program’ menu, use 1 234 to move the cursor to the EXIT button. -
Page 28: Audio Setup Menu
DVD Menu Options Audio Setup Menu The options included in Audio Setup menu are: Speaker Setup and Analog Output. Press SETUP. Press 1 2 to select the Audio Setup icon. Press OK to confirm. Speaker Setup This menu contains setup options for your audio output which makes the speaker setup system reproduce high quality surround sound. -
Page 29: Video Setup Menu
Video Setup Menu The options included in Video Setup menu are: TV Type, TV Display, Closed Caption, Progressive and Picture Setting. Press SETUP. Press 1 2 to select the Video Setup icon. Press OK to confirm. TV Display Set the aspect ratio of the DVD Player according to the TV you have connected. -
Page 30: Closed Caption
DVD Menu Options Closed Caption Closed captions are data that are hidden in the video signal on specific discs, invisible without a special decoder. The difference between subtitles and captions is that subtitles are intended for hearing persons and captions are for the hearing impaired. -
Page 31: Picture Setting
Picture Setting You can personalise your picture colour by adjusting brightness,contrast, tint and colour (saturation). Press 34 to highlight ‘Picture Setting’. Enter its submenu by pressing 2. Move the cursor by pressing 34 to highlight the selected item. Brightness Press 34 to highlight ‘Brightness’. Press 2 to open the level bar. -
Page 32: Preference Setup Menu
DVD Menu Options Preference Setup Menu The options included in Preference Setup menu are: Audio, Subtitle, Disc Menu, Parental, Default, MP3/JPEG Nav and PBC. Press STOP twice. Press SETUP to enter the setup menu. Press 1 2 to select the Preference Setup icon. -
Page 33: Default Setup
Default Setup Setting the DEFAULT function will reset all options and your personal settings to the factory defaults except for your Parental Control password. Press 34 to highlight ‘Default’. Highlight RESET by pressing 2. Press OK, then press 1 to return to Preference Setup Page. -
Page 34: Tuner Operations
Tuner Operations IMPORTANT! – Make sure the FM and MW antennas are connected. Tuning to radio stations Press TUNER on the remote (or press SOURCE control on front panel) to select “FM” or “MW”. Press 3 / 4 briefly on the remote. "SEARCH"... -
Page 35: Manual Presetting
Press TUNER on the remote (or press SOURCE control on front panel) to select “FM” or “MW”. Press 1 2 or use the numeric keypad (0-9) to select a preset number to begin. Press and hold PROG until "AUTO" appears. If a radio station is stored in one of the earlier presets, the same radio station will not store under another preset number. -
Page 36: Sound And Volume Controls
Sound and Volume Controls Sound Control IMPORTANT! For proper surround sound, make sure the speakers and subwoofer are connected (see page 8). Selecting surround sound Press SURR to select : MULTI-channel or STEREO. The availability of the various surround sound modes depends on the number of speakers used and the sound available on the disc. -
Page 37: Other Functions
Helpful Hint: – Refer to the owner’s manual of the connected equipment for details. Using the remote to operate your ‘Philips’ television Press and hold TV to turn on your TV. Press or use the numeric S / T keypad (0-9) to select the TV’s channel. -
Page 38: Troubleshooting
Do not open the system as there is a risk of electric shock. If a fault occurs, first check the points listed below before taking the system for repair. If you are unable to remedy a problem by following these hints, consult your dealer or Philips for help. Problem No power. -
Page 39: Troubleshooting
Problem The DVD player does not start playback. Cannot activate some features, such as Angles, Subtitles, or multi-language Audio. There is no sound from the center and surround speakers. Radio reception is poor. The remote control does not function properly. Low hum or buzz sound. -
Page 40: Specifications
Specifications AMPLIFIER SECTION Output power - Stereo mode (DIN) 50 W + 50 W RMS - Surround mode (1 kHz) 50 W RMS/channel Frequency Response 100 Hz – 20 kHz / –3 dB Signal-to-Noise Ratio > 65 dB (CCIR) Input Sensitivity - AUX In 900 mV - TV In... -
Page 41: Glossary
Analogue: Sound that has not been turned into numbers. Analogue sound varies, while digital sound has specific numerical values. These jacks send audio through two channels, the left and right. Aspect ratio: The ratio of vertical and horizontal sizes of a displayed image. The horizontal vs.