Table of Contents
Advertisement
Advertisement
Table of Contents

Related Manuals for Varytec Colors StarBar 12


Summary of Contents for Varytec Colors StarBar 12
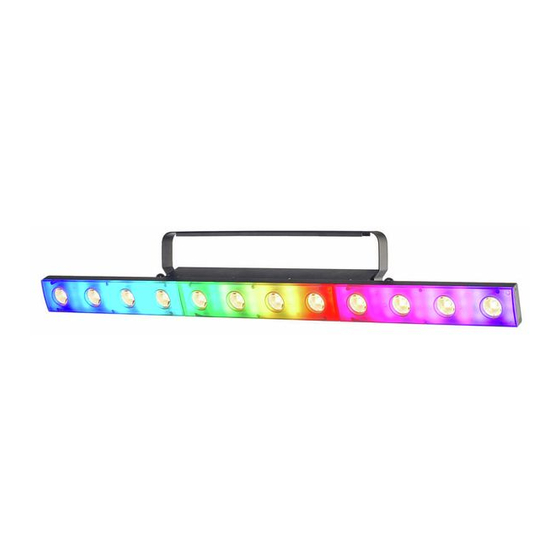
- Page 1 Colors StarBar 12 LED bar...
- Page 2 Musikhaus Thomann Thomann GmbH Hans-Thomann-Straße 1 96138 Burgebrach Germany Telephone: +49 (0) 9546 9223-0 E-mail: info@thomann.de Internet: www.thomann.de 18.10.2019, ID: 472657...
-
Page 3: Table Of Contents
Starting up..............................21 Connections and controls........................24 Operating..............................27 7.1 Starting the device........................... 27 7.2 Main menu............................27 7.3 Menu overview..........................33 7.4 Functions in 6-channel DMX mode................... 34 7.5 Functions in 8-channel DMX mode................... 36 Colors StarBar 12 LED bar... - Page 4 Table of contents 7.6 Functions in 12-channel DMX mode..................38 7.7 Functions in 52-channel DMX mode..................40 Technical specifications........................43 Plug and connection assignments....................46 Troubleshooting............................47 Cleaning............................... 49 Protecting the environment......................50 Colors StarBar 12 LED bar...
-
Page 5: General Information
Our products and user manuals are subject to a process of continuous development. We there‐ fore reserve the right to make changes without notice. Please refer to the latest version of the user manual which is ready for download under www.thomann.de. Colors StarBar 12 LED bar... -
Page 6: Further Information
Our online guides provide detailed information on technical basics Online guides and terms. Personal consultation For personal consultation please contact our technical hotline. If you have any problems with the device the customer service will Service gladly assist you. Colors StarBar 12 LED bar... -
Page 7: Notational Conventions
Texts and values displayed on the device are marked by quotation marks and italics. Examples: ‘24ch’ , ‘OFF’ . 1.3 Symbols and signal words In this section you will find an overview of the meaning of symbols and signal words that are used in this manual. Colors StarBar 12 LED bar... - Page 8 This combination of symbol and signal word indicates a pos‐ sible dangerous situation that can result in material and environmental damage if it is not avoided. Warning signs Type of danger Warning – high-voltage. Warning – hot surface. Colors StarBar 12 LED bar...
- Page 9 General information Warning signs Type of danger Warning – dangerous optical radiation. Warning – suspended load. Warning – danger zone. Colors StarBar 12 LED bar...
-
Page 10: Safety
Extend the life of the device by regular breaks in operation and avoid switching it on and off frequently. This device is not suitable for continuous use. Colors StarBar 12 LED bar... - Page 11 DANGER! Electric shock caused by short-circuit Do not modify the mains cable or the plug. Failure to do so could result in electric shock/death or fire. If in doubt, seek advice from a registered electrician. Colors StarBar 12 LED bar...
- Page 12 There are no user-serviceable parts inside. Do not use the device if covers, protectors or optical components are missing or damaged. WARNING! Eye damage caused by high light intensity Never look directly into the light source. Colors StarBar 12 LED bar...
- Page 13 Do not touch the device with bare hands during operation, and after switching off wait for at least 15 minutes. NOTICE! Risk of fire Do not block areas of ventilation. Do not install the device near any direct heat source. Keep the device away from naked flames. Colors StarBar 12 LED bar...
- Page 14 Failure to do so could result in damage to the device and possibly injure the user. Unplug the device before electrical storms occur and when it is unused for long periods of time to reduce the risk of electric shock or fire. Colors StarBar 12 LED bar...
- Page 15 Dust and dirt inside can damage the unit. When operated in harmful ambient conditions (dust, smoke, nicotine, fog, etc.), the unit should be maintained by qualified service personnel at regular intervals to prevent overheating and other malfunction. Colors StarBar 12 LED bar...
- Page 16 NOTICE! Possible damage due to installation of a wrong fuse The use of different types of fuses can cause serious damage to the unit. Fire hazard! Only fuses of the same type may be used. Colors StarBar 12 LED bar...
-
Page 17: Features
For technological reasons, the light output of LEDs decreases over their lifetime. This effect increases with higher operating temperature. You can extend the service life of the illuminants by providing adequate ventilation and operating the LEDs with the lowest possible brightness. Colors StarBar 12 LED bar... -
Page 18: Installation
Risk of injury caused by falling objects Make sure that the installation complies with the standards and rules that apply in your country. Always secure the device with a secondary safety attachment, such as a safety cable or a safety chain. Colors StarBar 12 LED bar... - Page 19 Possible data transmission errors For error-free operation make use of dedicated DMX cables and do not use ordi‐ nary microphone cables. Never connect the DMX input or output to audio devices such as mixers or ampli‐ fiers. Colors StarBar 12 LED bar...
- Page 20 Always work from a stable platform whenever installing, moving or servicing the unit. In doing so, the area underneath the unit must be cordoned off. The safety cable must be attached to the bracket. Please note that this device must not be connected to a dimmer. Colors StarBar 12 LED bar...
-
Page 21: Starting Up
Starting up Starting up Create all connections while the device is off. Use the shortest possible high-quality cables for all connections. Take care when running the cables to prevent tripping hazards. Colors StarBar 12 LED bar... - Page 22 Connect the output of the first DMX device to the input of the second one, and so on to form a daisy chain. Always ensure that the output of the last DMX device in the daisy chain is terminated with a resistor (110 Ω, ¼ W). Colors StarBar 12 LED bar...
- Page 23 Connect the DMX output of the master device to the DMX input of the first slave device. Then connect the DMX output of the first slave device to the DMX input of the second slave device and so on. Colors StarBar 12 LED bar...
-
Page 24: Connections And Controls
Connections and controls Connections and controls Colors StarBar 12 LED bar... - Page 25 5 Display 6 Operating buttons [MENU] Activates the main menu and toggles between menu items. Closes an opened submenu Toggles between the menu items of a menu level, increases or decreases the displayed value by one Colors StarBar 12 LED bar...
- Page 26 Connections and controls [ENTER] Selects an option of the respective operating mode, confirms the set value 7 [DMX IN] DMX input 8 [DMX OUT] DMX output Colors StarBar 12 LED bar...
-
Page 27: Operating
After 5 seconds, the active operating mode is displayed. If you do not press any key for about 20 seconds, the display turns off. The set values are retained even when the device is disconnected from the mains power supply. Colors StarBar 12 LED bar... - Page 28 Press [MENU] repeatedly until the display shows ‘ChNd’ . to select a DMX mode ( ‘6Ch’ , ‘8Ch’ , ‘12Ch’ or ‘52Ch’ ) and confirm with [ENTER]. DMX mode Highest possible DMX address 6-channel 8-channel 12-channel 52-channel Colors StarBar 12 LED bar...
- Page 29 ‘SeXX’ option (the currently set sensitivity is displayed) and press [ENTER]. Now use to select a value between 0 (low sensitivity) and 99 (high sensitivity), the display shows ‘Se00’ … ‘Se99’ . Confirm with [ENTER]. Colors StarBar 12 LED bar...
- Page 30 ‘Au 0’ … ‘Au59’ ). Press [ENTER]. To set the speed of the selected automatic show, use to select a value between 1 (slow) and 9 (fast) (display shows ‘SP 1’ … ‘SP 9’ ). Confirm with [ENTER]. Colors StarBar 12 LED bar...
- Page 31 / slave combination. This setting is only relevant if the device is not controlled via DMX. Press [MENU] repeatedly until the display shows ‘CoLo’ . Press [ENTER]. to choose from the following options: Display Meaning ‘red’ ‘Gree’ Green ‘bLue’ Blue ‘UhIt’ White Colors StarBar 12 LED bar...
- Page 32 ‘dSIP’ option to rotate the display by 180°. Confirm with [ENTER]. Software version Use ‘ver’ to display the software version. Press [MENU] repeatedly until the display shows ‘ver’ . Press [ENTER]. The software version appears in the display, e.g. ‘v10’ . Colors StarBar 12 LED bar...
-
Page 33: Menu Overview
Operating 7.3 Menu overview Colors StarBar 12 LED bar... -
Page 34: Functions In 6-Channel Dmx Mode
Intensity Blue (0 % to 100 %) 0…255 Intensity white (0 % to 100 %) 0…7 No function 8…12 Colour change 1 13…16 Colour change 2 17…20 Colour change 3 21…24 Colour change 4 … … 227…247 Colour change 59 Colors StarBar 12 LED bar... - Page 35 Operating Channel Value Function 248…255 Sound-controlled run 0…255 Speed increasing, only if channel 5 = 8…247 Colors StarBar 12 LED bar...
-
Page 36: Functions In 8-Channel Dmx Mode
0…255 Intensity Blue (0 % to 100 %) 0…255 Intensity white (0 % to 100 %) 0…7 No function 8…12 Colour change 1 13…16 Colour change 2 17…20 Colour change 3 21…24 Colour change 4 Colors StarBar 12 LED bar... - Page 37 Operating Channel Value Function … … 227…247 Colour change 59 248…255 Sound-controlled run 0…255 Speed increasing, only if channel 7 = 8…247 Colors StarBar 12 LED bar...
-
Page 38: Functions In 12-Channel Dmx Mode
Intensity red (0 % to 100 %), segment 2 0…255 Intensity green (0 % to 100 %), segment 2 0…255 Intensity blue (0 % to 100 %), segment 2 0…255 Intensity white (0 % to 100 %), segment 2 0…7 No function Colors StarBar 12 LED bar... - Page 39 Function 8…12 Colour change 1 13…16 Colour change 2 17…20 Colour change 3 21…24 Colour change 4 … … 227…247 Colour change 59 248…255 Sound-controlled run 0…255 Speed increasing, only if channel 7 = 8…247 Colors StarBar 12 LED bar...
-
Page 40: Functions In 52-Channel Dmx Mode
Intensity green (0 % to 100 %), segment 2 0…255 Intensity blue (0 % to 100 %), segment 2 0…255 Intensity white (0 % to 100 %), segment 2 0…255 Intensity red (0 % to 100 %), segment 3 Colors StarBar 12 LED bar... - Page 41 Intensity red (0 % to 100 %), segment 12 0…255 Intensity green (0 % to 100 %), segment 12 0…255 Intensity blue (0 % to 100 %), segment 12 0…255 Intensity white (0 % to 100 %), segment 12 0…7 No function Colors StarBar 12 LED bar...
- Page 42 Function 8…12 Colour change 1 13…16 Colour change 2 17…20 Colour change 3 21…24 Colour change 4 … … 227…247 Colour change 59 248…255 Sound-controlled run 0…255 Speed increasing, only if channel 51 = 8…247 Colors StarBar 12 LED bar...
-
Page 43: Technical Specifications
Buttons and display on the unit Number of DMX channels 6, 8, 12, 52 Input connections Voltage supply Lockable input socket (Power Twist) DMX control XLR chassis plug, 3-pin Output connections Voltage supply Lockable output socket (Power Twist) Colors StarBar 12 LED bar... - Page 44 Mounting options hanging, standing Dimensions (W × H × D), 1000 mm × 71 mm × 165 mm with bracket Weight 3.3 kg Ambient conditions Temperature range 0 °C…40 °C Relative humidity 50 %, non-condensing Colors StarBar 12 LED bar...
- Page 45 Technical specifications Further information Outdoor-ready Colour mixture WW / RGB LED type x-in-1 and uni-coloured LEDs Fanless Remote control Not possible Wireless DMX LEDs individually controllable Housing Metal, black Colors StarBar 12 LED bar...
-
Page 46: Plug And Connection Assignments
The unit offers a 3-pin XLR socket for DMX output and a 3-pin XLR plug for DMX input. Please refer to the drawing and table below for the pin assignment of a suitable XLR plug. Configuration Ground, shielding Signal inverted (DMX–, ‘cold signal’) Signal (DMX+, ‘hot signal’) Colors StarBar 12 LED bar... -
Page 47: Troubleshooting
Troubleshooting Troubleshooting In the following we list a few common problems that may occur during operation. We give you some suggestions for easy troubleshooting: Colors StarBar 12 LED bar... - Page 48 DMX interface circuit. If the procedures recommended above do not succeed, please contact our Service Center. You can find the contact information at www.thomann.de. Colors StarBar 12 LED bar...
-
Page 49: Cleaning
The frequency of cleaning depends on the operating environment: wet, smoky or particularly dirty surroundings can cause more accumulation of dirt on the optics of the device. Clean with a soft cloth using our lamp and lens cleaner (item no. 280122). Always dry the parts carefully. Colors StarBar 12 LED bar... -
Page 50: Protecting The Environment
Dispose of this device through an approved waste disposal firm or through your local waste facility. When discarding the device, comply with the rules and regulations that apply in your country. If in doubt, consult your local waste disposal facility. Colors StarBar 12 LED bar... - Page 52 Musikhaus Thomann · Hans-Thomann-Straße 1 · 96138 Burgebrach · Germany · www.thomann.de...