Toshiba RAS-10JAVP-E Owner's Manual
Toshiba air conditioner owner's manual
Hide thumbs
Also See for RAS-10JAVP-E:
- Installation manual (20 pages) ,
- Service manual (13 pages) ,
- Service manual (87 pages)
Table of Contents
Advertisement
AIR CONDITIONER
CLIMATISEUR (TYPE SEPARE)
KLIMAGERÄT (GETEILTE AUSFÜHRUNG)
CONDIZIONATORE D'ARIA (TIPO SPLIT)
ACONDICIONADOR DE AIRE (TIPO SEPARADO)
(
SISTEMA DE AR CONDICIONADO (TIPO SPLIT)
nchasing this TOSHIBA Air Conditioner. Please read this owner's manual carefully before using your Air Conr.
Thank you for purchasing this TOSHIBA Air Conditioner. Please read this owner's manual
carefully before using your Air Conditioner.
Avant tout, merci d'avoir porté votre choix sur un climatiseur TOSHIBA. Veuillez lire
attentivement ce mode d'emploi avant de mettre en service le climatiseur.
Wir danken Ihnen für den Kauf dieses TOSHIBA-Klimageräts. Lesen Sie die
Bedienungsanleitung sorgfältig durch, bevor Sie das Gerät in Betrieb nehmen.
Grazie per aver acquistato questo Condizionatore d'Aria TOSHIBA. Prima di usare il
Condizionatore d'Aria, si consiglia di leggere con attenzione il presente manuale.
Gracias por adquirir este acondicionador de aire TOSHIBA. Lea este manual del propietario
detenidamente antes de utilizar su acondicionador de aire.
µ
Obrigado por ter adquirido este sistema de ar condicionado da TOSHIBA. Leia atentamente
este manual do utilizador antes de utilizar o sistema de ar condicionado.
OWNER'S MANUAL
MODE D'EMPLOI
BEDIENUNGSANLEITUNG
MANUALE DI ISTRUZIONI
MANUAL DEL PROPIETARIO
MANUAL DO UTILIZADOR
)
Indoor Unit
Unité intérieure
Innenraumgerät
Unità interna
Unidad interior
µ
Unidade interior
RAS-10JKVP-E / RAS-10JAVP-E
RAS-13JKVP-E / RAS-13JAVP-E
µ
(SPLIT TYPE)
For general public use
Pour utilisation grand public
Für allgemeine Verwendung
Per l'uso in generale
Para el uso público general
µ
Para utilização geral
Outdoor Unit
Unité extérieure
Außengerät
Unità esterna
Unidad exterior
Unidade exterior
.
µ
µ
µ
.
Advertisement
Table of Contents
Troubleshooting

Related Manuals for Toshiba RAS-10JAVP-E


Summary of Contents for Toshiba RAS-10JAVP-E
-
Page 1: Air Conditioner
ACONDICIONADOR DE AIRE (TIPO SEPARADO) SISTEMA DE AR CONDICIONADO (TIPO SPLIT) nchasing this TOSHIBA Air Conditioner. Please read this owner’s manual carefully before using your Air Conr. Thank you for purchasing this TOSHIBA Air Conditioner. Please read this owner’s manual carefully before using your Air Conditioner. -
Page 2: Safety Precautions
ACCESSORIES Remote control Remote control holder SAFETY PRECAUTIONS DANGER • DO NOT ATTEMPT TO INSTALL THIS UNIT BY YOURSELF. THIS UNIT REQUIRES A QUALIFIED INSTALLER. • DO NOT ATTEMPT TO REPAIR THE UNIT BY YOURSELF. THIS UNIT HAS NO COMPONENTS WHICH YOU CAN REPAIR. - Page 3 CAUTION INSTALLATION CAUTIONS • Securely lay the drain hose for the best draining results. • Incorrect drainage can cause flooding in the house and furniture to get wet. • Be sure to connect the air conditioner to a dedicated power supply having the rated voltage. Otherwise, the unit can break down or cause a fire.
-
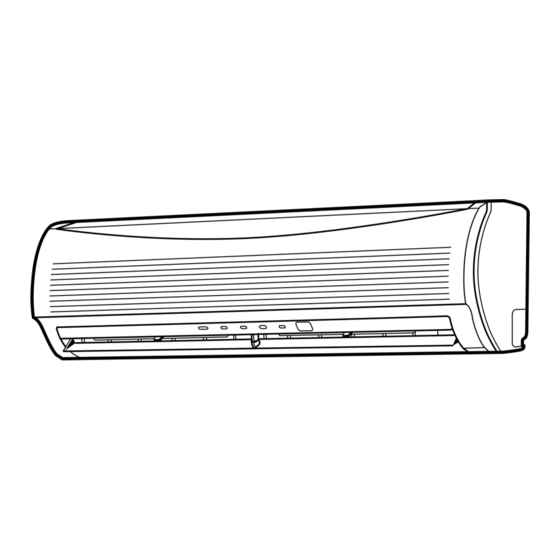
Page 4: Names Of Parts
NAMES OF PARTS Outdoor unit a Drain hose, refrigerant connecting pipe and electric wires b Air inlet (Side and rear) c Air outlet Indoor unit d Room temperature sensor e Front panel f Air inlet grille g Air filter h Air outlet i Horizontal air flow louver j Vertical air flow louver k Display panel... -
Page 5: Remote Control And Its Functions
REMOTE CONTROL AND ITS FUNCTIONS a Infrared signal transmitter Transmits signals to the indoor unit. button Press the button to start operation. (A receiving beep is heard.) Press the button again to stop operation. (A receiving beep is heard.) If no receiving sound is heard from the indoor unit, press the button twice. -
Page 6: Names And Functions Of Indicators On Remote Control
NAMES AND FUNCTIONS OF INDICATORS ON REMOTE CONTROL Display All indicators, except for the clock time indicator, are displayed by pressing the a Transmission mark This transmission mark ( ) indicates when the remote control transmits signals to the indoor unit. b Mode indicator Indicates the current operation mode. - Page 7 Setting the clock Before you start operating the air conditioner, set the clock of the remote control using the procedures given in this section. The clock panel on the remote control will indicate the time regardless of whether the air conditioner is in use or not. Initial setting When batteries are inserted in the remote control, the clock panel displays AM 0:00 and flashes.
-
Page 8: Using The Remote Control
USING THE REMOTE CONTROL CAUTION • The air conditioner will not operate if curtains, doors or other objects block the signals from the remote control to the indoor unit. • Be careful that liquids do not spill onto the remote control. Do not expose the remote control to direct sunlight or heat. -
Page 9: Automatic Operation (Auto Changeover)
AUTOMATIC OPERATION When you set the air conditioner to AUTO mode, it automatically selects cooling, heating, or fan only operation depending on the room temperature. ( see page 16.) The fan speed and louver are also automatically controlled. Start button Press this button to start the air conditioner. -
Page 10: Cooling/Heating Operation
COOLING/HEATING OPERATION Start button Press this button to start the air conditioner. b Mode select button (MODE) Select Cool or Heat c Temperature button ( TEMP Set the desired temperature. d Fan speed button (FAN) Select one of “AUTO” LOW , LOW+ HIGH •... -
Page 11: Air Purifying Operation
AIR PURIFYING OPERATION During air conditioner operation a PAP button Pressing this button starts Plasma Air Purifying (PAP) operation. • The PLASMA indicator (blue) on the display panel of the indoor unit turns on. • Plasma pure filter and air ionizer are activated. To stop only PAP operation PAP button Pressing this button stops PAP operation. -
Page 12: Hi Power Operation
Hi POWER OPERATION High power (Hi POWER) • The Hi POWER (high power operation) mode automatically controls room temperature, air flow and the operation mode so that the room is quickly cooled in summer and warmed in winter. ( see page 16.) Setting Hi POWER mode a Hi POWER button Press the Hi POWER button. - Page 13 Combined timer (Setting the ON and OFF timers simultaneously) OFF timer —> ON timer (Operation —> Stop —> Operation) This feature is useful when you want to stop the air conditioner after you go to sleep, and start it again in the morning when you wake up or you return home.
-
Page 14: Memory/Preset Operation
MEMORY/PRESET OPERATION Use the MEMO button to store a frequently used operation setting for convenience. Start the air conditioner in the operation mode that you want the remote control to store. Press the button as shown below while the air conditioner is operating. a MEMO button Press this button briefly to ready for storing the setting. -
Page 15: Adjusting Air Flow Direction
ADJUSTING AIR FLOW DIRECTION • Adjust the air flow direction properly. Failure to do so could cause discomfort and make an uneven room temperature distribution. • Adjust the vertical air flow using the remote control. • Adjust the horizontal air flow manually. Adjusting the vertical air flow The air conditioner automatically adjusts the vertical air flow direction according to the operating conditions when AUTO or A mode is selected. -
Page 16: Auto Restart Operation
AUTO RESTART OPERATION This air conditioner is equipped with an automatic restarting function which allows the air conditioner to resume without the use of the remote control under the operating settings in the event of a power shutdown. Operation resumes without warning three minutes after power is restored. -
Page 17: How The Air Conditioner Works
HOW THE AIR CONDITIONER WORKS Automatic Operation As shown in Figure 1, Automatic Operation mode selects the operation based on the room temperature data (Ta) when operation begins. The operation mode is selected again after the compressor has remained stopped for 15 minutes. Hi POWER operation When you press the Hi POWER button during cooling, heating or A operation, the air conditioner starts the following operation. -
Page 18: Temporary Operation
DRY operation ( The dry mode automatically selects the cooling dry operation based on the difference between the temperature setting and the actual room temperature. The fan speed indicator shows AUTO, and low speed is used. HINTS FOR ECONOMICAL OPERATION Chilly Maintain room temperature at a comfortable level Control... -
Page 19: Usual Maintenance
USUAL MAINTENANCE WARNING Before you clean the air conditioner, be sure to turn off the circuit breaker or main power switch. Cleaning of indoor unit and remote control CAUTION • Use a dry cloth to wipe the indoor unit and remote control. •... - Page 20 Insert the top section of the air filter so that its right and left edges fit on the indoor unit and it is firmly set. Close the air inlet grille. * If the FILTER indicator on the indoor unit is shown, press the FILTER button on the remote control or the RESET button on the indoor unit to turn off the indicator.
-
Page 21: Special Maintenance
SPECIAL MAINTENANCE Attaching the Zeolite-plus filter and Zeolite-3G filter • After installing the air conditioner, attach the supplied Zeolite-plus filter and Zeolite-3G filter. Preparation: Turn off the air conditioner using the remote control. Open the air inlet grille. Lift up the air inlet grille until it clicks into place. Take off the air filter from the left side. - Page 22 Cleaning the air ionizer • Clean the air ionizer when you clean the dust collecting unit. (Clean approximately once every six months.) Preparation: Turn off the air conditioner using the remote control. Turn off the power supply. WARNING Touching the ends of the metal pins inside the air ionizer (dark blue) can result in an electrical shock.
- Page 23 Wash and then dry. Soak in hot water at 40 to 50°C for about 10 to 15 minutes. If the staining is particularly severe, use a washing detergent compound (weak basic or neutral) at 10 to 15 times the standard concentration. Rub up and down, and rub left and right.
-
Page 24: Air Conditioner Operation And Performance
AIR CONDITIONER OPERATION AND PERFORMANCE Three-minute protection feature A protection feature is provided that prevents the air conditioner from being activated for approximately 3 minutes when it is restarted immediately after operation or when the power supply switch is set to on. This is used to protect the machine. Heating characteristics Preheating operation The air conditioner does not deliver warm air immediately after it is started. -
Page 25: Troubleshooting
TROUBLESHOOTING CAUTION If any of the following conditions occur, stop the air conditioner immediately, turn off the main power switch and contact the dealer. • The indicators flash at short intervals (5 Hz). Reset the circuit breaker 2 to 3 minutes after the power main switch is turned off. Despite the resetting operation, the indicators still continue turning on and off. - Page 26 Before asking for servicing or repairs, check the following points. Condensation forms on the back of the indoor unit. • Condensation on the back of the indoor unit is automatically collected and drained out. Indoor unit or outdoor unit makes a strange noise. •...
- Page 27 Before asking for servicing or repairs, check the following points. The FILTER indicator turns on. • This indicator turns on after PAP operation has been performed for approximately 1000 hours. • The indicator may turn on if the front panel is not firmly closed. •...
-
Page 28: Specifications
Outdoor coil assembly Dry bulb Wet bulb Dry bulb Reverse cycle, Split type Indoor Unit Outdoor Unit RAS-10JKVP-E RAS-10JAVP-E 220 – 240 V~, 50 Hz 220 V~, 60 Hz 0.15 2.58 – 2.35 0.15 3.44 – 3.14 For heating Indoor coil assembly... -
Page 29: Troubleshooting (Remote Control)
TROUBLESHOOTING (Remote Control) Before asking for servicing or repairs, check the following points. Symptoms The fan speed cannot be changed. Symptoms The indicators on the display are not shown after a short time. The TIMER display turns off after a certain period of time. Symptoms No receiving tone is made from the indoor unit even when the... -
Page 30: Declaration Of Conformity
DECLARATION OF CONFORMITY We, TOSHIBA CARRIER CORPORATION, 336 Tadewara, Fuji-shi, Shizuoka-ken, 416-8521, Japan, declare under our responsibility that the product, Household split type Room Air Conditioner, to which this declaration relates is in conformity with the provisions of Council Directive 89/336/EEC Electromagnetic Compatibility and 73/23/EEC Low Voltage Directive.