Advertisement
Quick Links
DMC-CPU3
DigitalMedia™ CPU3 Card for DM
Installation Guide
Description
The DMC-CPU3 card is available as an upgrade to the DMC-CPU card, which is included
with the DM-MD8X8, DM-MD16X16, DM-MD32X32, and related redundant power supply
models (DM-MD8X8-RPS, DM-MD16X16-RPS, and DM-MD32X32-RPS).
This guide provides information about the following:
• Replacing the DMC-CPU with a DMC-CPU3
• Making connections to the DMC-CPU3
• Upgrading the rmware
• Con guring the DigitalMedia™ switcher
Additional Resources
Visit the product page on the Crestron
information.
Replacing the DMC-CPU with a DMC-CPU3
To replace the DMC-CPU with a DMC-CPU3, perform the following steps and refer to the
illustration below.
CAUTION: The DMC-CPU3 is susceptible to damage from electrostatic discharge
(ESD). Standard ESD precautions must be followed when handling the card.
Always wear an ESD wrist strap that is connected to ground and place the card on
grounded surfaces only.
NOTE: The DMC-CPU3 is not hot swappable. Always shut down the DigitalMedia
switcher before installing the card.
1. Remove the DMC-CPU card:
a. Disconnect the LAN cable from the card.
b. Using a #2 Phillips screwdriver (not included), loosen the two 6-32 x 3/4-inch
Phillips pan head screws that secure the card to the card assembly, and then
slide the card out of the slot.
2. Install the DMC-CPU3 card:
a. Carefully insert the card into the left and right guides of the CPU slot until the card
is 1/4 inch from the fully seated position.
b. Align the two included 6-32 x 3/4-inch Phillips pan head screws with the
corresponding holes in the card assembly, and then push the card inward until it
engages the chassis backplane.
c. Tighten the two Phillips screws to secure the card—do not overtighten
the screws.
DMC-CPU3 Card Installation (DM-MD8X8 Shown)
Switchers
®
website (www.crestron.com) for additional
®
6-32 x 3/4-inch
Phillips pan head screws
Making Connections to the DMC-CPU3
Make connections to the DMC-CPU3 as required for the application.
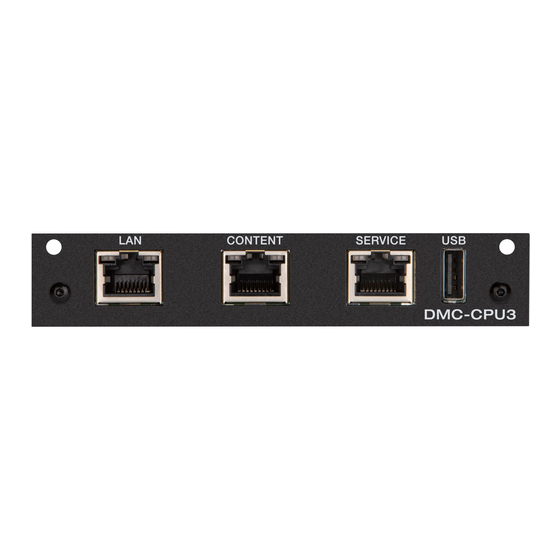
DMC-CPU3 Connections
LAN:
10BASE-T/100BASE-TX/
1000BASE-T Ethernet
to LAN
CONTENT:
10BASE-T/100BASE-TX/
1000BASE-T Ethernet
to LAN
(for streaming only)
Upgrading the Firmware
Upgrade the firmware of all DMC cards in the switcher and the firmware of all
DM
endpoints. The latest firmware file can be downloaded from the Crestron website.
®
Con guring the DigitalMedia Switcher
Con gure the DigitalMedia™ switcher by using the web interface and DMTool.
To access the web interface, open a web browser and enter either of the following:
hostname/setup (hostname is the hostname of the switcher)
or
xxx.xxx.xxx.xxx/setup (xxx.xxx.xxx.xxx is the IP address of the switcher)
For more information, refer to OLH ID 1000200 in the Online Help section of the Crestron
website (www.crestron.com/onlinehelp).
SERVICE:
USB:
For factory
For rmware
use only
loading
Advertisement

Related Manuals for Crestron DigitalMedia DMC-CPU3


Summary of Contents for Crestron DigitalMedia DMC-CPU3
- Page 1 (xxx.xxx.xxx.xxx is the IP address of the switcher) 2. Install the DMC-CPU3 card: For more information, refer to OLH ID 1000200 in the Online Help section of the Crestron website (www.crestron.com/onlinehelp). a. Carefully insert the card into the left and right guides of the CPU slot until the card is 1/4 inch from the fully seated position.
- Page 2 15 of the FCC Rules. These limits are designed to provide reasonable protection Crestron Electronics, Inc. in the United States and/or other countries. UL and the UL logo are either against harmful interference in a residential installation. This equipment generates, uses and can radiate trademarks or registered trademarks of Underwriters Laboratories, Inc.