Table of Contents
Advertisement
For replacement parts visit
WENPRODUCTS.COM
Your new tool has been engineered and manufactured to WEN's highest standards for dependability, ease
of operation, and operator safety. When properly cared for, this product will supply you years of rugged,
trouble-free performance. Pay close attention to the rules for safe operation, warnings, and cautions.
If you use your tool properly and for its intended purpose, you will enjoy years of safe, reliable service.
NOTICE: Please refer to wenproducts.com for the most up-to-date instruction manual.
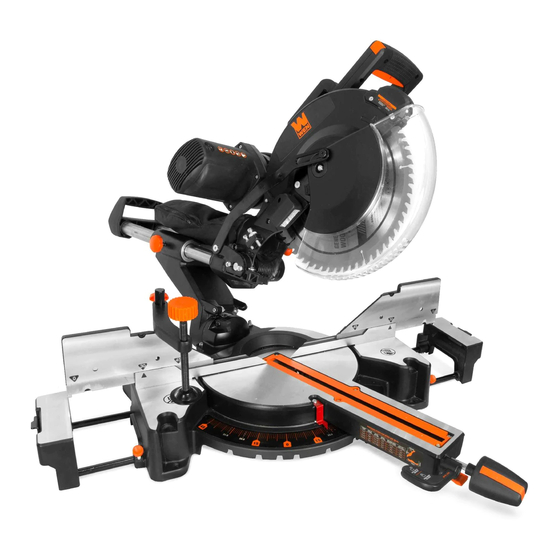
12" DUAL-BEVEL SLIDING
COMPOUND MITER SAW
IMPORTANT:
NEED HELP? CONTACT US!
Have product questions? Need technical support?
Please feel free to contact us at:
800-232-1195
techsupport@wenproducts.com
WENPRODUCTS.COM
MODEL MM1214
(M-F 8am-5pm CST)
Advertisement
Table of Contents

Related Manuals for Wen MM1214


Summary of Contents for Wen MM1214
- Page 1 WENPRODUCTS.COM IMPORTANT: Your new tool has been engineered and manufactured to WEN’s highest standards for dependability, ease of operation, and operator safety. When properly cared for, this product will supply you years of rugged, trouble-free performance. Pay close attention to the rules for safe operation, warnings, and cautions.
-
Page 2: Table Of Contents
0° Miter, 45° Bevel 2-1/8" x 13-3/8" 45° Miter, 45° Bevel 2-1/8" x 9-1/2" Weight 61 lbs Product Dimensions 27" x 35" x 20" Replacement blades (Part MM1214B), carbon brushes (Part MM1214-114), and additional blades can be purchased from wenproducts.com. -
Page 3: Introduction
INTRODUCTION Thanks for purchasing the WEN Miter Saw. We know you are excited to put your tool to work, but first, please take a moment to read through the manual. Safe operation of this tool requires that you read and understand this operator’s manual and all the labels affixed to the tool. -
Page 4: General Safety Rules
GENERAL SAFETY RULES Safety is a combination of common sense, staying alert and knowing how your item works. SAVE THESE SAFETY INSTRUCTIONS. WARNING: Read and understand all warnings, cautions and operating instructions before using this tool. Failure to follow all instructions listed below may result in personal injury, electric shock, fire and/or tool damage. - Page 5 GENERAL SAFETY RULES POWER TOOL USE AND CARE CALIFORNIA PROPOSITION 65 WARNING 1. DO NOT FORCE THE POWER TOOL. Use the correct Some dust created by power sanding, sawing, grinding, power tool for your application. The correct power tool drilling, and other construction activities may contain will do the job better and safer at the rate for which it chemicals, including lead, known to the State of Califor- was designed.
-
Page 6: Specific Safety Rules For Your Miter Saw
SPECIFIC RULES FOR YOUR MITER SAW WARNING: Do not operate the miter saw until you have read and understood the following instruc- tions and the warning labels. SAW BLADE SAFETY 3. People with pacemakers should consult their 1. Always wear protective gloves when handling saw physician(s) before use. - Page 7 SPECIFIC RULES FOR YOUR MITER SAW WARNING: Do not operate the miter saw until you have read and understood the following instruc- tions and the warning labels. 3. Examine the miter saw for any damaged or missing 5. Turn on the miter saw and let it reach full speed, then parts.
-
Page 8: Electrical Information
ELECTRICAL INFORMATION GROUNDING INSTRUCTIONS IN THE EVENT OF A MALFUNCTION OR BREAKDOWN, grounding provides the path of least resistance for an elec- tric current and reduces the risk of electric shock. This tool is equipped with an electric cord that has an equipment grounding conductor and a grounding plug. -
Page 9: Unpacking & Transportation
UNPACKING & TRANSPORTATION UNPACKING With the help of a friend or trustworthy foe, carefully remove the miter saw from the packaging. Make sure to take out all contents and accessories. Do not discard the packaging until everything is removed. Check the packing list below to make sure you have all of the parts and accessories. -
Page 10: Know Your Miter Saw
KNOW YOUR MITER SAW TOOL PURPOSE Miter Saws allow you to easily make cuts at a variety of angles. Refer to the following diagrams to become famil- iarized with all the parts and controls of your miter saw. The components will be referred to later in the manual for assembly and operation instructions. - Page 11 KNOW YOUR MITER SAW Q. Spindle Lock U. Laser ON/OFF Y. Bevel Scale R. Operating Handle V. Work Light ON/OFF Z. Stop Plate S. Carrying Handle W. Rear Carrying Handle T. Power Trigger X. Support Stand...
-
Page 12: Assembly & Adjustments
ASSEMBLY & ADJUSTMENTS WARNING: Do not plug in or turn on the tool until it is fully assembled according to the instructions. Read through and become familiarized with the following procedures of handling and adjusting your miter saw. Failure to follow the safety instructions may result in serious personal injury. GUARD OPERATION Fig. - Page 13 ASSEMBLY & ADJUSTMENTS Fig. 4 Fig. 5 Clamp Assembly ADJUSTING THE MITER ANGLE USING THE TABLE EXTENSIONS The miter table can be adjusted from 0° to 45° to both The table extensions (Fig. 4 - 1) come pre-installed on left and right to create miter cuts. either side of your miter saw and serve as extra support for your workpiece.
- Page 14 (Fig. 7 - arrows). Mount and fix the saw to a level, horizontal bench, worktable, or miter saw stand (compatible with WEN Models MSA330 and MSA750) using four bolts and nuts (not included). 2. If desired, you can mount the saw to a piece of 1/2"...
- Page 15 ASSEMBLY & ADJUSTMENTS WARNING: Do not plug in or turn on the tool until it is fully assembled according to the instructions. Read through and become familiarized with the following procedures of handling and adjusting your miter saw. Failure to follow the safety instructions may result in serious personal injury. Fig.
- Page 16 ASSEMBLY & ADJUSTMENTS WARNING: Do not plug in or turn on the tool until it is fully assembled according to the instructions. Read through and become familiarized with the following procedures of handling and adjusting your miter saw. Failure to follow the safety instructions may result in serious personal injury. 5.
- Page 17 ASSEMBLY & ADJUSTMENTS WARNING: Do not plug in or turn on the tool until it is fully assembled according to the instructions. Read through and become familiarized with the following procedures of handling and adjusting your miter saw. Failure to follow the safety instructions may result in serious personal injury. Wear gloves while changing the blade. CHANGING THE SAW BLADE Fig.
- Page 18 ASSEMBLY & ADJUSTMENTS WARNING: Do not plug in or turn on the tool until it is fully assembled according to the instructions. Read through and become familiarized with the following procedures of handling and adjusting your miter saw. Failure to follow the safety instructions may result in serious personal injury. ADJUSTING THE DRIVE BELT Fig.
-
Page 19: Operation
OPERATION WARNING: Do not plug in or turn on the tool until it is fully assembled according to the instructions. Read through and become familiarized with the following procedures of handling and adjusting your miter saw. Failure to follow the safety instructions may result in serious personal injury. 1. - Page 20 OPERATION WARNING: Before operating the miter saw, make sure to equip yourself with a dust mask, ear protection, and safety glasses for protection from possible injuries. Tie back long hair and do not wear loose clothing or jewelry. DO NOT look into the laser beam, this can cause serious eye damage or blindness. Do not wear gloves while operating the saw.
-
Page 21: Maintenance
Any attempt to repair or replace electrical parts on this tool may be hazardous. Servicing of the tool must be performed by a qualified technician. When servicing, use only identical WEN replacement parts. Use of other parts may be hazardous or induce product failure. -
Page 22: Troubleshooting Guide
Inspect and replace carbon brushes as needed (see page Carbon brushes are worn 21) Replacement brushes (Model MM1214-114) can be ordered from wenproducts.com. Stop using the tool and contact customer service at (800) Defective motor or other internal problem 232-1195, M-F 8-5 CST for assistance. -
Page 23: Exploded View & Parts List
EXPLODED VIEW & PARTS LIST 201 202 203 204... - Page 24 EXPLODED VIEW & PARTS LIST Part. No. Description Qty. Part. No. Description Qty. MM1214-001 Base Table Extension Block MM1214-035 (Right) MM1214-002 Foot Right Table Extension M4 x 12 Self-Tapping MM1214-036 MM1214-003 Stop Plate Screw MM1214-037 Miter Lock Knob MM1214-004 Ø2 x 4 Rivet...
- Page 25 EXPLODED VIEW & PARTS LIST Part. No. Description Qty. Part. No. Description Qty. MM1214-068 M6 Spring Washer MM1214-105 Roller Bearing HK1010 MM1214-069 M6 x 10 Cross Bolt MM1214-106 Guard Label MM1214-070 Connecting Bar Support MM1214-107 M6 x 10 Set Screw...
- Page 26 MM1214-154 M6 Spring Washer MM1214-191 Double Switch MM1214-155 M6 Thick Flat Washer MM1214-192 Transformer PCB MM1214-156 Large Pulley Clamp Assembly MM1214-197ASM MM1214-157 Ø28 Retaining Ring MM1214-193 M5 x 12 Cross Screw MM1214-158 Spindle Lock Bracket MM1214-194 M5 Spring Washer MM1214-159...
-
Page 27: Warranty Statement
(2) years from date of purchase or 500 hours of use; whichever comes first. Ninety days for all WEN products if the tool is used for professional or commercial use. Purchaser has 30 days from the date of purchase to report missing or damaged parts. - Page 28 THANKS FOR REMEMBERING...