Table of Contents
Advertisement
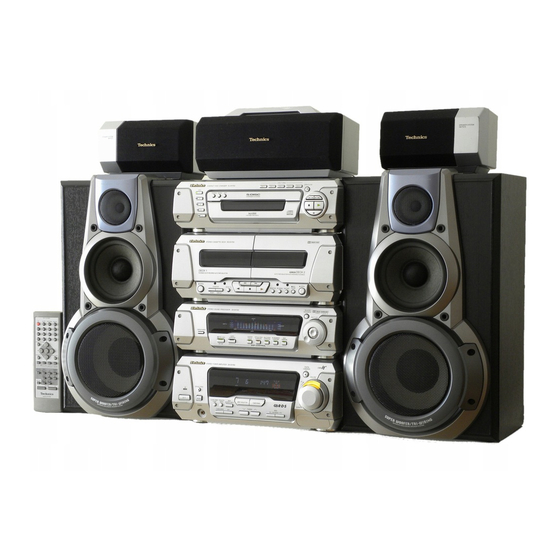
System Component
Operating Instructions
SC-EH760
Model No.
SC-EH560
The illustrations show SC-EH760 for areas except Australia and N.Z.
EB EP GN
Note
The "EB" indication shown on the outside packing
case indicates United Kingdom.
Before connecting, operating or adjusting this prod-
uct, please read these instructions completely.
Please keep this manual for future reference.
RQT5355-B
Advertisement
Table of Contents

Related Manuals for Technics SC-EH560


Summary of Contents for Technics SC-EH560
-
Page 1: Operating Instructions
System Component Operating Instructions SC-EH760 Model No. SC-EH560 The illustrations show SC-EH760 for areas except Australia and N.Z. EB EP GN Note The “EB” indication shown on the outside packing case indicates United Kingdom. Before connecting, operating or adjusting this prod- uct, please read these instructions completely. -
Page 2: Supplied Accessories
These operating instructions are applicable to the following systems. These operating instructions, however, fundamentally explain the operation of system SC-EH760. [SC-EH760]: indicates a function which can be enjoyed with SC-EH760 only. [SC-EH560]: indicates a function which can be enjoyed with SC-EH560 only. System SC-EH760 Sound processor... -
Page 3: Table Of Contents
3D ENHANCED SURROUND [SC-EH760] ....27 CENTER EFFECT [SC-EH560] ......28 SURROUND EFFECT [SC-EH560] . -
Page 4: Caution For Ac Mains Lead
Caution for AC Mains Lead (For United Kingdom) (“EB” area code model only) For your safety, please read the following text carefully. This appliance is supplied with a moulded three pin mains plug for your safety and convenience. A 5-ampere fuse is fitted in this plug. Should the fuse need to be replaced please ensure that the replacement fuse has a rating of 5-ampere and that it is approved by ASTA or BSI to BS1362. -
Page 5: Placement Of Center/Surround Speakers
Front view Place the surround speakers ( , tion, or slightly to the rear, about 1 meter higher than ear level. Place the speakers with the Technics logo facing toward the listening position. Surround However the position should be adjusted to your personal prefer-... -
Page 6: Basic Connections
Basic connections (Right) The illustrations show SC-EH760 for areas except Australia and N.Z. To connect cables To unplug cables Hold the connector from both ends Connector and pull it out. White line (For Australia and N.Z.) FM ANT 75∞ (For others) 75∞... -
Page 7: Optional Antenna Connections
Before connection Do not connect the AC mains lead until all other connections are complete. To prepare the AM loop antenna and speaker cables (and FM antenna for Australia and N.Z.), twist the vinyl tip and pull off ([A]). Flat cables. Keep the cables as flat as possible against the back of the unit. -
Page 8: Front Panel Controls
5 67 8 9 œPLAY/œREC MODE INPUT SELECTOR CLOCK/TIMER FM AUTO/ DEMO MONO DISCRETE INPUT TUNING PHONES TUNING MODE < = > SC-EH560 œPLAY/œREC MODE INPUT SELECTOR CLOCK/TIMER FM AUTO/ DEMO MONO TUNING PHONES TUNING MODE < = > SC-EH760... - Page 9 SUPER CENTER VIRTUAL REAR MULTI REAR 3D ENHANCED PRO LOGIC SURROUND FOCUS SURROUND SURROUND SURROUND OFF/ON DSP CONTROL _ ` a b SC-EH560 DISPLAY MODE -UV DEMO VIRTUAL SIMULATED CENTER SURROUND SEAT DOLBY SURROUND STEREO EFFECT EFFECT POSITION DSP CONTROL...
-
Page 10: The Remote Control
[SC-EH760] Input select button (VCR/AUX/6CH INPUT) ..24, 39 [SC-EH560] AV EFFECT VCR button (VCR) ....... . . 39 TAPE select, deck 1/deck 2 select button (TAPE/DECK 1/2) . -
Page 11: Setting The Time
CLOCK/TIMER DEMO TUNING CLOCK/TIMER DEMO MODE MODE Setting the time This is a 24-hour clock. The example shows how to set the clock for 16:25 (4:25 p.m.). Press [ /I] to turn the unit on. Press [CLOCK/TIMER, –DEMO] to display “CLOCK”. Each time you press the button: CLOCK PLAY... -
Page 12: Adjust The Volume
SC-EH760 DISC 1–5 SC-EH560 SC-EH760 DIRECT OPEN DISC 1 DISC 2 DISC 3 DISC 4 DISC 5 Label must face upward OPEN/CLOSE SC-EH760 SC-EH560 VOLUME DOWN RQT5355 Preparation: [SC-EH760] 1 2 3 Note You can not change CDs while a disc is playing. - Page 13 Press and hold [ “NO DISC” is displayed When the unit is in CD mode but a disc isn’t in the playing position (SC-EH760) or in the player (SC-EH560). Note Skipping is done in the selected order in program play ( page 14).
- Page 14 After the playing time appears on the display, press [CANCEL]. “CANCEL” goes out. To add to the end of the program Repeat steps 2 through 4 (SC-EH760) or step 4 (SC-EH560). CANCEL CANCEL DISC [A] To cancel tracks...
- Page 15 ¤ » ¤ SC-EH760 DISC DISC SC-EH760 DISC DISC j/-/-- INPUT SELECTOR SC-EH760 RANDOM REPEAT RANDOM REPEAT SC-EH560 SC-EH760 SC-EH560 RANDOM DISC RANDOM SC-EH760 SC-EH560 DISC REPEAT REPEAT Other modes of play Preparation: Direct access play [SC-EH760] Starts normal play from a selected track on a selected disc to the last...
-
Page 16: The Radio: Manual Tuning
“ST” is displayed when a stereo FM broadcast is being re- ceived. Adjust the volume. )] for a moment until the frequency )] once again. If noise is excessive in FM RDS broadcasting [SC-EH760\for\areas\except\Australia\and\N.Z.] [SC-EH560\for\areas\except\United\Kingdom] PS or PTY display MODE 2 PRESET... -
Page 17: Automatic Presetting
TUNING MODE TUNING SLEEP PROGRAM CANCEL DISC j/-/-- 3D AI EQ/M.EQ BAND CH SELECT AV EFFECT TEST UPRO LOGIC SUPER DIGITAL SURROUND S.WOOFER VCR/AUX/ TAPE/ TUNER/ 6CH INPUT DECK 1/2 BAND ⁄/g ¤ » ¤ MUTING ∂ VOLUME µ TUNER/ BAND Preset channel j/-/--... -
Page 18: Cassette Tapes
DECK 1/2 EOPEN DOLBY NR REV MODE VOLUME DOWN DECK 1/2 RQT5355 Preparation: To stop the tape Press [ ]. [A] To change the deck to be used Press [DECK 1/2] to select the deck you want to play. Forward side Tape facing down To listen to 2 tapes consecutively Insert a tape into each deck and select “... - Page 19 F, G DECK 1/2 Cassette tapes Fast-forwarding and rewinding Press [ ] or [ ] while the tape is stopped. Tape direction rewind For your reference: Each deck’s play direction is stored in the system’s memory. You can fast forward or rewind the tape while you are playing or recording a tape in another deck.
-
Page 20: Changing Sound Field And Quality
The original display is restored on the display panel in about 5 seconds. HALL AI-EQ M.EQ To cancel Turn [MULTI JOG] (SC-EH760) or press [EQ] (SC-EH560) to select HIGH “FLAT”. Note HALL AI-EQ The changes you make are stored and automatically recalled the M.EQ... -
Page 21: Using The Acoustic Image Equalizer (3D Ai Eq)
Adjust heaviness and lightness with [ , The original display is restored on the display panel in about 5 seconds. To cancel Turn [MULTI JOG] (SC-EH760) or press [EQ] (SC-EH560) to select “FLAT”. Note The changes you make are stored and automatically recalled the next time you select “AI-EQ”. -
Page 22: Enjoying Surround Sound
Surround system [SC-EH760] 6CH DISCRETE INPUT page 24) [SC-EH760] DOLBY PRO LOGIC page 25) [SC-EH560] VIRTUAL DOLBY SURROUND page 26) [SC-EH760] MOVIE SUPER SURROUND page 26) MUSIC... - Page 23 Multi rear surround page 27) This mode makes it seem like there are multiple surround speakers in your room, increasing the cinema-like atmosphere. Virtual speakers [SC-EH560] Center effect page 28) Surround effect page 28) When you are using Virtual Dolby...
-
Page 24: 6Ch Discrete Input [Sc-Eh760]
INPUT SELECTOR DISCRETE INPUT VOLUME DOWN SLEEP PROGRAM 3D AI EQ/M.EQ BAND CH SELECT TEST UPRO LOGIC SUPER SURROUND VCR/AUX/ TAPE/ 6CH INPUT DECK 1/2 ⁄/g ¤ » MUTING ∂ VOLUME CH SELECT RQT5355 Preparation: Connect a DVD player with a built in Dolby Digital or DTS decoder page 38). -
Page 25: Dolby Pro Logic [Sc-Eh760]
PRO LOGIC OFF/ON SLEEP PROGRAM CANCEL DISC j/-/-- 3D AI EQ/M.EQ BAND CH SELECT AV EFFECT TEST UPRO LOGIC SUPER DIGITAL SURROUND S.WOOFER VCR/AUX/ TAPE/ TUNER/ 6CH INPUT DECK 1/2 BAND ⁄/g ¤ » ¤ MUTING ∂ VOLUME µ TEST ∂... -
Page 26: Virtual Dolby Surround [Sc-Eh560]
SUPER SC-EH760 SURROUND SC-EH560 VIRTUAL DOLBY SURROUND DISPLAY MODE SIMULATED - UV DEMO STEREO (On the tuner amplifier) VIRTUAL DOLBY SURROUND (On the sound processor) FLAT HEAVY CLEAR HALL AI-EQ M.EQ SUPER (On the tuner amplifier) SURROUND SLEEP 3D AI EQ/M.EQ BAND... -
Page 27: Surround Effects
CENTER MULTI REAR FOCUS SURROUND VIRTUAL REAR SURROUND SLEEP PROGRAM CANCEL DISC j/-/-- 3D AI EQ/M.EQ BAND CH SELECT AV EFFECT UPRO LOGIC TEST SUPER DIGITAL SURROUND S.WOOFER (On the tuner amplifier) CENTER FOCUS (On the sound processor) FLAT HEAVY CLEAR (On the tuner amplifier) VIRTUAL REAR... -
Page 28: Center Effect [Sc-Eh560]
Press [ ] or [ ] so the “SURROUND EFFECT” indicator flashes. Press [ ] (to turn on or increase level) or [ ] (to decrease level). To turn it off, after steps orange. Surround effects [SC-EH560] CENTER EFFECT Press [CENTER EFFECT]. The indicator flashes green. -
Page 29: Seat Position
SC-EH760 SC-EH560 SLEEP PROGRAM CANCEL DISC j/-/-- 3D AI EQ/M.EQ BAND CH SELECT AV EFFECT UPRO LOGIC TEST SUPER DIGITAL SURROUND S.WOOFER VCR/AUX/ TAPE/ TUNER/ 6CH INPUT DECK 1/2 BAND ⁄/g ¤ » ¤ MUTING ∂ VOLUME µ (On the tuner amplifier) -
Page 30: Before Recording (Deck 2 Only)
COUNTER RESET DISPLAY DECK 1/2 COUNTER DISPLAY COUNTER RESET Side A Tab for side “A” Tab for side “B” To re-record Normal tape High-position tape Discrimination hole RQT5355 Note [SC-EH760] You cannot record when [6CH DISCRETE INPUT] is selected. (“ERROR” appears.) The unit automatically identifies the type of tape. - Page 31 EOPEN DOLBY NR Î REV MODE Before recording (Deck 2 only) Preparatory steps Do these steps before each recording. Wind up the leader tape in deck 2 so recording can begin imme- diately. Press [ the cassette. Insert the cassettes on both decks for tape-to-tape recording page 33).
-
Page 32: Recording Cds
SC-EH760 EDIT DISC1–5 SC-EH560 PAUSE SC-EH760 SC-EH560 EDIT EDIT RQT5355 Preparation: Do the preparatory steps ( Insert the CD(s) you want to record ( [SC-EH760] Press [DISC 1]–[DISC 5] on the CD changer to select the disc where you want to start recording, then press [ ] to stop the disc. -
Page 33: Recording The Radio
PAUSE Î DECK 1/2 TAPE EDIT Recording the radio Preparation: Tune to the required station. page 16 or 17) Press [ The deck goes into the recording standby mode and the play indicator “ ” or “ ” starts flashing. Press [ ] start recording. -
Page 34: Using The Timers
1 2–5 œPLAY/œREC CLOCK/TIMER DEMO 2–5 TUNING RQT5355 Using the timers The play timer This timer starts play of the selected source at the selected time. The example shows settings for preset radio channel 8 to play between 6:30 and 7:40 at Preparation: 2–5 FPLAY... - Page 35 1 2–4 œPLAY/œREC CLOCK/TIMER DEMO 2–4 TUNING Using the timers The record timer This timer records the radio at the set time. The example shows settings for recording preset channel 8 from 18:30 to 19:30. Preparation: Turn the unit on, set the time ( radio stations ( Press [CLOCK/TIMER, –DEMO] to select “...
- Page 36 œPLAY/œREC CLOCK/TIMER DEMO SLEEP SLEEP 3D AI EQ/M.EQ BAND CH SELECT UPRO LOGIC TEST VCR/AUX/ TAPE/ 6CH INPUT DECK 1/2 ⁄/g MUTING ∂ VOLUME SLEEP RQT5355 Checking the timers Press [CLOCK/TIMER, –DEMO] to select “ PLAY” (or “ REC”). The timer conditions are shown in the following order: Play timer: Start time Record timer:...
-
Page 37: Changing The Sound Range Display
SC-EH760 SC-EH560 DISPLAY MODE DISPLAY MODE – UV DEMO SC-EH760 SC-EH560 DISPLAY MODE - UV DEMO DISPLAY MODE (On the sound processor) FLAT HEAVY CLEAR FLAT HEAVY CLEAR FLAT HEAVY CLEAR TEST UPRO LOGIC SUPER DIGITAL SURROUND S.WOOFER VCR/AUX/ TAPE/... -
Page 38: External Unit Connections
By connecting the video connection cable as shown in the illus- tration, it is possible to switch both audio and video input with [INPUT SELECTOR] of this unit. Connections to SC-EH560 You can enjoy the sound from your DVD player/Laser disc player etc. -
Page 39: Using Other Equipment
Listening to an external source Press [INPUT SELECTOR] to select the external source. Each time you press the button: [SC-EH760] TUNER [SC-EH560] TUNER On the remote control Press [VCR/AUX/6CH INPUT] (SC-EH760) or [VCR] (SC-EH560). Operate the unit. See the unit’s manual for details on operation and connection. -
Page 40: Enjoy Karaoke With Cds And Cassettes (For Australia And N.z. Only)
MIC VOL KARAOKE VOLUME DOWN ECHO RQT5355 Lower the volume with [MIC VOL] and connect the microphone. Plug type: 6.3 mm monaural Press [KARAOKE] to select a voice mode. Each time you press the button: MONO L Use this chart to select the appropriate mode. : appropriate ECHO Voice... -
Page 41: Technical Specifications
SEAT POSITION [SC-EH760] CENTER FOCUS (1, 2), [SC-EH760] VIRTUAL REAR SURROUND, [SC-EH760] MULTI REAR SURROUND, [SC-EH760] 3D ENHANCED SURROUND [SC-EH560] CENTER EFFECT (1, 2, 3), [SC-EH560] SURROUND EFFECT (1, 2, 3) Spectrum analyzer section Display mode NORMAL, PEAKHOLD, AURORA General... -
Page 42: Troubleshooting Guide
Troubleshooting guide Before requesting service, make the below checks. If you can’t fix the system as described below, or if something not listed here occurs, refer to the enclosed directory to locate an Authorized Service Center convenient to you or contact your dealer. Reference pages are shown as black circled numbers Common Problems No sound. -
Page 43: Maintenance
The CD changer or CD player The display is wrong or play won’t The disc may be upside down. start. Wipe the disc. Replace the disc if it is scratched, warped, or nonstandard. Condensation may have formed in the changer or player due to a sudden change in temperature. Wait about an hour for it to clear and try again. - Page 44 Matsushita Electric Industrial Co., Ltd. Osaka 542-8588, Japan RQT5355-B F0100MF1020...
Need help?
Do you have a question about the SC-EH560 and is the answer not in the manual?
Questions and answers
No se oyen los cd
There may be no sound from CDs on the Technics SC-EH560 if:
1. The input source is not set to CD. Ensure the CD input is selected using the input selector.
2. The volume is muted. Check and disable the muting function.
3. The speakers are not properly connected or powered on.
4. The CD is not correctly loaded or the disc is unreadable.
5. A different input like “6CH DISCRETE INPUT” is active, which may disable normal CD playback.
Check these settings and connections to restore sound.
This answer is automatically generated