
Related Manuals for Curtis Alpha FreshTrac G3 Series


Summary of Contents for Curtis Alpha FreshTrac G3 Series
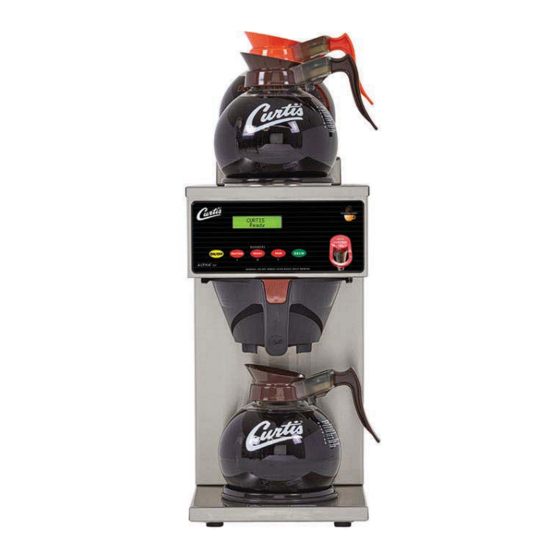
- Page 1 USER GUIDE G3 Series Alpha FreshTrac ® Decanter Coffee Brewing System READ AND SAVE THESE INSTRUCTIONS NOTICE TO INSTALLER: Please leave this booklet with the machine.
-
Page 2: Table Of Contents
........................ES61 ..........................ES62 ............................................................................................................................................................Contact Information Wilbur Curtis Co., Inc. 6913 Acco Street | Montebello, CA 90640 US Phone: 323-837-2300 | Toll Free: 800-421-6150 Email: csrassistance@wilburcurtis.com | Web: www.wilburcurtis.com . - 4:00 . PT Email: techsupport@wilburcurtis.com... -
Page 3: Fs32
KEY FEATURES/SPECIFICATIONS/SYSTEM REQUIREMENTS FS32 Key Features ® • Gold Cup Series – Digital Control Module provides precise control over all aspects of brewing: time, temperature, volume pre-infusion, pulse-brewing and water bypass. • Visual Monitoring – Red LED indicator light provides a simple method for at-a-glance coffee freshness monitoring. -
Page 4: Is2
INSTRUCTIONS could result in personal injury or void the warranty. • This appliance is designed for commercial use. Any service other than cleaning and preventive maintenance should be performed by an authorized Wilbur Curtis service technician. • serviceable parts inside. - Page 5 IMPORTANT SAFEGUARDS CE Requirements • This appliance must be installed in locations where it can be overseen by trained personnel. • • • • This appliance must not be cleaned by water jet. • instruction concerning use of the appliance in a safe way and if they understand the hazards involved. •...
-
Page 6: Ii2
INSTALLATION INSTRUCTIONS WARNING: WARNING: properly grounded. NOTICE: SPECIFICATIONS section. IMPORTANT: Installation Instructions Installation Requirements • A secure surface capable of supporting the weight of the appliance. • For units without an attached cord set: Appropriately sized, UL listed, grounding type power cable to meet enough •... -
Page 7: Ii17
INSTALLATION INSTRUCTIONS II17 Installation Leveling WARNING: Use the leveling legs to level the brewer only. Do not use them to adjust brewer height. Do not extend them higher than necessary. Position the brewer on the counter top. Level it left to right and front to back by turning the bottom of the legs. - Page 8 INSTALLATION INSTRUCTIONS II17 Connecting the Water Supply Flush the water supply line prior to installation to purge the back of the brewer. Leave the water supply valve closed until the power is connected. Powering Up the Brewer Brewers With A Cord Set Attached 11 On brewers with a cord set attached, connect the power cord to the appropriate electrical outlet.
- Page 9 OPERATING INSTRUCTIONS OI25 Brewing Instructions WARNING - TO AVOID SCALDING, AVOID SPLASHING. The G3 brewer is factory preset for optimal performance. Center an empty decanter under the brew basket. the brew basket. PROGRAMMING GUIDE...
-
Page 10: Oi25
OI25 Easy Access Features Brew Volume Adjustment: Vol. Adj.<-0> Oz. Select , press Button labeling varies Warmer Temperature Control (Factory setting = 90%): Power <-90% > Rear Select Button labeling varies Tank Temperature Check CURTIS Water Temp.201°F Button labeling varies... -
Page 11: Oi26
The FreshTrac decanter and receiver are dishwasher safe. • The expected receiver battery life is two years. The integral receiver battery is not replaceable, however the receiver itself can be removed from the decanter and replaced. Order Curtis part number WC-10003. FreshTrac Decanter Placement... - Page 12 The FreshTrac receiver attaches to the left side of the decanter. It is held in place on the decanter by a pin and Curtis decanter is FreshTrac compatible (has a hole in the handle). Position the receiver into the recessed area of the FreshTrac handle as shown.
-
Page 13: Ci1
CLEANING INSTRUCTIONS WARNING: HOT SURFACES - To avoid injury, allow the brewer and dispenser(s) to cool before cleaning. NOTICE - Do not use cleaning liquids, compounds or powders containing chlorine (bleach) or corrosives. USE OF THESE PRODUCTS WILL VOID THE WARRANTY. Cleaning The Brewer - Daily WARNING: DO NOT immerse the brewer in water or any other liquid. -
Page 14: Ci11
CI11 Glass Decanters Avoid injury or damage when cleaning glass decanters: Do not clean with materials that scratch. Curtis glass decanters are dishwasher safe, or may be hand washed. To clean, prepare a mild solution of detergent and warm water or urn cleaning solution intended for coffee decanters. - Page 15 PROGRAMMING GUIDE Curtis To enter programming mode: With unit OFF, press and hold Entering bottom right BREW button (4). Programming mode Then press and release ON/OFF button. Continue to hold down BREW button until Enter Code appears. Enter 4 digit code.
- Page 16 PROGRAMMING GUIDE Programming Options Some menus save and exit automatically when a parameter is updated. Other menus exit to the previous menu when a parameter is saved. To exit, press until EXIT appears on the display, then press Brew by Volume - button again to stop the brew cycle and set the volume.
- Page 17 Banner Name - changes the banner name that appears on the display (the factory default is Curtis to choose the letter to change. Then press to change the letter value.
- Page 18 PROGRAMMING GUIDE Programming Options (cont.) Display Brew Time - Once accessed, press to choose the desired setting, then press to exit. FreshTrac-Glass - to exit. Drip-out Mode - accessed, press to choose desired setting, then, press to exit. Display Messages - to choose the desired setting, then press to exit.
- Page 19 ROUGH-IN DRAWINGS RD38 ALPHA1/2/3 Coffee Brewers 17.13 in [43.5 cm] ALP1GT 20.25 in [51.4 cm] 17.63 in [44.8 cm] ALP2GT 9.13 in [23.2 cm] 19.13 in [48.6 cm] 17.63 in [44.8 cm] 13.13 in 7.00 in [33.3 cm] 8.75 in [17.8 cm] [22.2 cm] 16.50 in...
- Page 20 ILLUSTRATED PARTS LIST IP60 ALPHA FRESHTRAC - Main Chassis - Exploded View Water tank assemblies: - Dual Voltage, see section IP58 - 220 Volt, see section IP59 ALPHA FRESHTRAC, ILLUSTRATED PARTS/RECOMMENDED PARTS 110118B...
-
Page 21: Ip60
KIT, HOT WATER FAUCET REPLACEMENT WC-37252 CONTROL MODULE, UCM 120V ALPGT/D500GT/ ALPGT/D60GT/D500GT WC-774 D60GT WC-972 WARMER, ASSY COMPLETE 100W 120V LABEL, UCM OVERLAY ALPHA-3GT L/R CURTIS TRANSMITTER ASSEMBLY, D-STYLE FRESH- WC-39345 LOGO WC-10002D TRAC WC-29025 SPRAYHEAD, PURPLE ADVANCE FLOW RECEIVER ASSEMBLY 1 LED FRESH TRAC... - Page 22 ILLUSTRATED PARTS/RECOMMENDED PARTS IP58 WC-6285 - Tank Assembly Water Level Probe Detail (Older Units) WC-6285 - Tank Assembly - Parts List ITEM # PART # DESCRIPTION ITEM # PART # DESCRIPTION WC-6285 TANK, COMPLETE ALPHA-GT DV 120/220V GUARD, SHOCK/HEATING ELEMENT FOR SINGLE WC-4394* HEATING ELEMENT WC-5853-102...
- Page 23 ILLUSTRATED PARTS/RECOMMENDED PARTS IP59 WC-6267 - Tank Assembly Water Level Probe Detail (Older Units) WC-6267 - Tank Assembly - Parts List ITEM # PART # DESCRIPTION ITEM # PART # DESCRIPTION WC-6267 TANK, COMPLETE ALP-DS/GT 220V GUARD, SHOCK/HEATING ELEMENT FOR SINGLE WC-4394* HEATING ELEMENT WC-5853-102...
-
Page 24: Es61
ELECTRICAL SCHEMATICS ES61 ALPHA FRESHTRAC - DUAL VOLTAGE... -
Page 25: Es62
ELECTRICAL SCHEMATICS ES62 ALPHA FRESHTRAC - 220 VOLT... - Page 26 TROUBLESHOOTING GUIDE WARNING: Electric Shock Hazard - Scald and Burn Hazard - IMPORTANT: always Valve Test Procedure ELECTRICAL SCHEMATIC Troubleshooting Guidelines ERROR CODES • • • Use this troubleshooting guide along with the appropriate ELECTRICAL SCHEMATIC. • Valve Test Procedure in either direction Water Not Hot Enough replace the temperature sensor...
- Page 27 TROUBLESHOOTING GUIDE During Brewing ELECTRICAL SCHEMATIC No Power - Display Not Lit Water Tank Does Not Fill Brewer Does Not Start When Brew Button is Pressed Brewing Brewing Sensor Error Message...
- Page 28 TROUBLESHOOTING GUIDE Water Tank Does Not Fill IMPORTANT: Coffee/Tea Too Strong Dispenser Not Filled To Normal Level During Brewing Dispenser Not Filled To Normal Level During Brewing SPECIFICATIONS sure that the spray head is correctly aligned and that the tubing is routed properly to allow for maximum water ELECTRICAL SCHEMATIC...
- Page 29 TROUBLESHOOTING GUIDE All Of The Time ELECTRICAL SCHEMATIC No Water/Tea Flows From Brewer During Brewing Water Tank Does Not Fill ELECTRICAL SCHEMATIC Low Water Flow Warning Water Level Error Message Water Level Error Message ERROR CODES SPECIFICATIONS...
- Page 30 TROUBLESHOOTING GUIDE TG39 Water Does Not Heat At All Check to see if the water level in the tank is in contact with the water level probe. If not, see Tank Does Not Fill. • The water will not heat unless it is in contact with the probe. If the water heats, but is not hot enough, see Water Not Hot Enough.
- Page 31 TROUBLESHOOTING GUIDE TG14 Warmer Does Not Heat NOTE coffee. First, check to make sure that the warmer function is not set to off in brewer program (warmers default). See the PROGRAMMING GUIDE section. Turn on power to the warmer that is not working. See the OPERATING INSTRUCTIONS to determine how the warmer operates for your model.
- Page 32 TROUBLESHOOTING GUIDE TG17 ® FreshTrac Receiver does not work OPERATING INSTRUCTIONS...
- Page 33 ERROR CODES System Fault Messages An error message will appear on the screen in the event of a malfunction under the following conditions: ERROR MESSAGE WARNING DESCRIPTION CAUSE Water Level Error G3 BREWER, ERROR CODES 042017A...
- Page 34 Return Merchandise Authorization (RMA): All returned equipment must be properly re-packaged in the original carton and received by Curtis within 45 days following the issuance of a RMA. NO UNITS OR PARTS WILL BE ACCEPTED WITHOUT A RETURN MERCHANDISE AUTHORIZATION (RMA).